Continuing where we left off in the previous post, we’ve created a menu that is right in front of us that we can interact with.
Now at this point, we have multiple buttons that appear on our screen. Everything looks great, except one problem. The buttons don’t do anything.
That’s the next thing we’re going to do. Being able to interact with the menu button isn’t too hard to do.
Let’s fix that, we’re going to set up our menu so that we can interact with the screen.
Writing Code to Interact with the Menu
We’ll be using the same Event Trigger system that we’ve been using for our Daydream pointer to trigger the buttons, which means we need to create a class that can create functions for each button.
- Create a new script for our Menu Container. Let’s call it
MenuController. This script will control everything that happens with our Menu.
We’re going to build up our MenuController script to do some other neat things, but the first thing we should try and do is to be able to respond when we click on something in the menu.
Here’s what MenuController looks like:
using UnityEngine;
using UnityEngine.UI;
public class MenuController : MonoBehaviour
{
public void MenuButtonClick(int index)
{
switch (index)
{
case 0:
print("Clicked button " + index);
break;
case 1:
print("Clicked button " + index);
break;
case 2:
print("Clicked button " + index);
break;
case 3:
print("Clicked button " + index);
break;
case 4:
print("Clicked button " + index);
break;
case 5:
print("Clicked button " + index);
break;
case 6:
print("Clicked button " + index);
break;
default:
break;
}
}
}
Walking Through the Code
There’s not much that we’re going to have to walk through.
We use MenuButtonClick as the function our button is going to call when they’re clicked.
For each button, we’re going to manually provide an index to this function so we can do something. In this case, we don’t have any goal in mind so I’m just going to print the index that we clicked on.
Connecting the Script With the Environment
Now that we have our MenuController, it’s time to set it up for our scene.
In each of our button item in the game object, we’re going to create a new Event Trigger component and connect them to our MenuController script.
- In
Ball on the game hierarchy, create an Event Trigger - In the
Event Trigger, create a Pointer Click - For the event, select the
Menu Container object from our game hierarchy and select MenuController > MenuButtonClick, give it index 0 as the value.
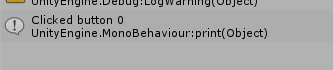
At this point, if we were to play our game and use our pointer to select button 1, in our console, you’ll see:
Clicked button 0.
Here’s what our Event Trigger looks like:

At this point, we need to do the same thing for our other 4 buttons. This could be a long and painful process, but we can speed it up a bit by copying the component.
Specifically:
- Select the cog in the top right corner for our Event Trigger component and select Copy Component.
- In our next Ball game object
Ball (1), select the cog button of any other components and select Paste Component As New. - Set the appropriate index value and repeat for the remaining
game objects.
Conclusion
Now with this done, we have a simple menu that we can interact with.
At this point, we have a relatively simple menu, but in the next post, we’re going to make it better! How? Let’s implement scrolling with the touchpad of the Daydream Controller!
With the controller, we want to be able to easily scroll through each of the menu items in Unity. There’s no support for this in Unity, so we’re going to have to implement this feature ourselves.
Tomorrow, we’ll see how we will go about implementing this and it’s going to be a long one!


