Introduction
There are some situations when Android Application Developers need to customize a listview. To customize a ListView, you need to customize Adapter of the ListView. Without an Adapter, you cannot implement a dynamic ListView. The Adapter will inherit BaseAdapter class of Android, you can manage everything inside the Adapter class. Those who have basic knowledge of Android can easily understand this tip.
Background
I faced a lot of situations where I had to implement dynamic ListView which changes according to user's input.
Using the Code
Here, I am going to show how a ListView of some Members can be generated. The YourAdapter class extends BaseAdapter and Override some methods of it. The getView method returns a View, so be very careful about that. The YourAdapter constructor receives the context of the Activity, the data as a ArrayList. You may use List rather than ArrayList but I have used this for a purpose. And the third parameter is the size of the listview. After that, inside getView() method, here are some checkings which change the ListView dynamically. You can change the background of the items of list. You can change the textView or ImageView or EditText or anything of the ListItem. For this, I put the ListItem as a Linear Layout.
I have set proper comments beside the code snippets, so you can have an idea about what is going on here.
class YourAdapter extends BaseAdapter {
Context context;
ArrayList aL;
int count = 0;
int limit;
private LayoutInflater inflater = null;
public YourAdapter(Context context, ArrayList aL, int size) {
this.context = context;
this.aL = aL;
this.limit = size;
inflater = (LayoutInflater) context
.getSystemService(Context.LAYOUT_INFLATER_SERVICE);
}
@Override
public int getCount() {
return limit;
}
@Override
public Object getItem(int position) {
return this.aL.get(position);
}
@Override
public long getItemId(int position) {
return position;
}
@Override
public int getViewTypeCount() {
return getCount();
}
@Override
public int getItemViewType(int position) {
return position;
}
@Override
public View getView(int position, View convertView, ViewGroup parent) {
View vi = convertView;
LinearLayout lL = null;
if (vi == null) {
vi = inflater.inflate(R.layout.list_item,
null);
}
lL= (LinearLayout) vi.findViewById(R.id.linearLayoutList);
TextView data = (TextView) lL.findViewById
(R.id.textListItem);
ImageView memberIcon =
(ImageView) lL.findViewById(R.id.maleOrFemale);
ArrayList savedPositions = db.getTempData();
List<Integer> loanDepositAmount =
db.getLoanInfoOfMembers();
List<String> genderList =
db.getAllGenderOfMembers();
for (int i = 0; i < genderList.size(); i++) {
if (position == i) {
String maleOrFemale = "";
try {
maleOrFemale = genderList.get(position).toString();
} catch (Exception e) {
e.toString();
}
if (maleOrFemale.equals("Female")) {
memberIcon.setBackgroundResource(R.drawable.female);
} else {
memberIcon.setBackgroundResource(R.drawable.male);
}
if (newMembers.get(position).toString().contains("New")) {
data.setTextColor(Color.parseColor
("#086A87"));
}
if (position == loanDepositAmount.get(i)) {
data.setTextColor(Color.parseColor
("#FE2E2E"));
}
}
}
for (int i = 0; i < savedPositions.size(); i++) {
if (position == Integer.parseInt(savedPositions.get(i)
.toString())) {
rL.setBackgroundDrawable(new ColorDrawable(Color
.parseColor("#31B404")));
}
}
data.setText(newMembers.get(position).toString());
return vi;
}
}
After creating the customized adapter class, you need to set this in a ListView. Suppose there's a ListView named listMembers, then:
ArrayList memberData;
ListView listMembers;
DatabaseHelper db;
@Override
protected void onCreate(Bundle savedInstanceState) {
super.onCreate(savedInstanceState);
setContentView(R.layout.your_activity_layout);
memberData= new ArrayList<String>();
listMembers = (ListView)
findViewById(R.id.listViewMembers);
db = new DatabaseHelper(getApplicationContext());
memberData = db.getAllMembers();
listMembers.setAdapter(new YourAdapter
(YourClass.this, memberData, memberData.size()));
}
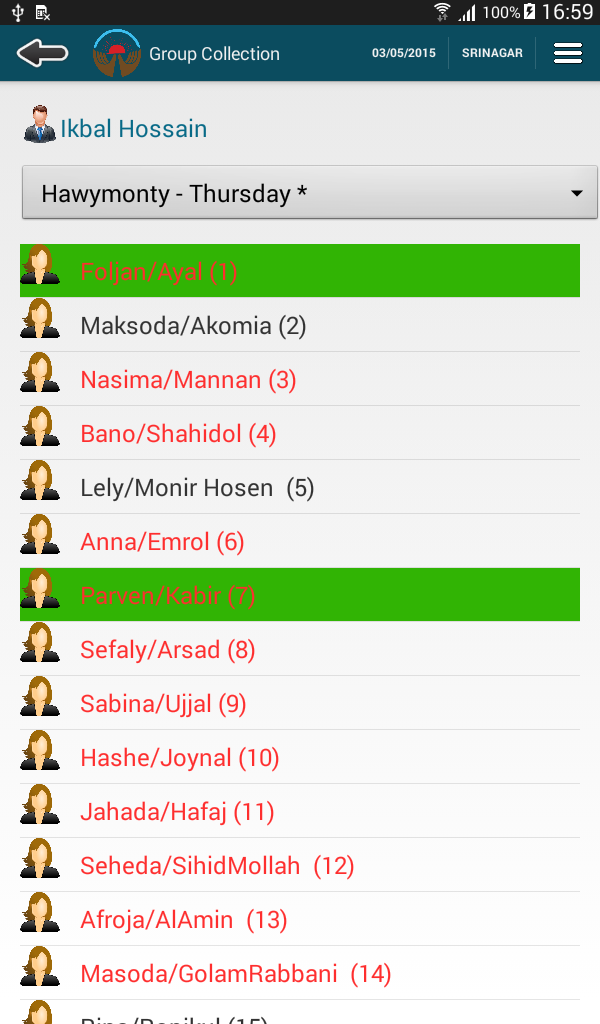
You can change the size according to user's input also, suppose you select Male from a ComboBox, then only Male Member's data will be shown. The output is like this image for this scenario:
Points of Interest
There are a lot of things, I had so much fun while implementing these. I removed other data validations and threading from the code for clear understanding. There, you can set a lot of checkings and change items of the ListView as per your desire.
I am well determined and self motivated to work in multiple platforms. I don't want to isolate me in a single platform, want to be an expert in multiple technologies. And i have managerial ability and organizer experience, so in future i can be a good project manager also. I open a lot of ways to lead my life, if i fail in a certain path then other options make me confident enough to go ahead. Another thing everyone says about me and i really feel it, i am always positive minded having a very positive attitude to accomplish a job whether it is possible or not. I learn all possible ways of solving a problem then find out the optimal solution. This strategy is a little bit time consuming, but finding the best solution requires time.


