In this blog, we will create data access layer using Entity Framework Code First Approach. We will be using the same data access layer in our coming blogs.
Introduction
We have many ORM frameworks available, Entity Framework is one of the available frameworks.
So what is ORM (Object Relational Mapping)? ORM is a programming technique to convert data between incompatible systems. What is incompatible systems? In this case, SQL server and C#, both don’t understand each others' language, to make them understand each other, we use ORM.
Entity Framework helps .NET developer write code in C# language, which can be converted to SQL. Entity Framework can be downloaded using NuGet Package Manager. The current version available is EF 7.0, which is part of .NET Core. In this blog, we will be using EF 6.0.
Prerequisite
We will be using the below given IDE and Frameworks in this blog.
- VS 2015
- Entity Framework 6.0
- Web API 2.0
- Class Library Project
We will create a WebApi project and consume the DAL layer directly in our API controllers to see it working. So, let’s get started and create our project.
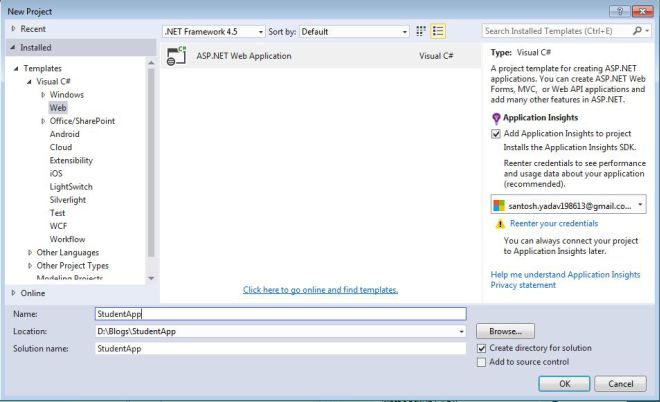
- Create a project Go to File->New->Project name it as
StudentApp and click OK. Choose ASP.NET Web Application.
- On Next page, create MVC from templates, and select Web API from “Add folders and core references for”, MVC will be select by default, click OK to wait for some time, your project will be loaded.

- Now once our project is loaded, let’s see what are the things we need to make it work, as informed we will create a different project to create our
DataAccessLayer. - Leave your project as it is and a new project , right click on solution and Add->New Project and choose Class Library, name it as StudentApp.DAL and click ok.
- Let’s add Entity Framework as reference to our project, we will use NuGet so right click on this recently created project and click Manage NuGet Packages and go to Browse tab and search for
EntityFramework and install, it will ask to accept, click accept and references will be added. - In Entity Framework, we create context classes which connect to your database, there are 2 options, we can use a single context class and all Models or we can create a each context for every Models available.
- For database, we will be using
localDb, if you open your web.config file from studentApp, we will find a DefaultConnection as connectionString, we will change the database name and change it to StudentDataBase. - Now, we need one more project for our Models, let’s add a new
ClassLibrary project and name it as StudentApp.Model.
- Project will be loaded with Class1.cs, let’s rename the class and change it to
Student, it will ask whether you want to rename all references, say yes. - Now add few properties to our class, we will see the advantages of entity framework as well.
namespace StudentApp.Model
{
    public class Student
    {
        public int StudentID { get; set; }
        public string FristName { get; set; }
        public string LastName { get; set; }
        public DateTime DateOfBirth { get; set; }
        public DateTime CreatedDate { get; set; }
        public DateTime? ModeifiedDate { get; set; }
    }
}
- Done with our model class, now build our model project and add reference of this project to our DAL. To add, just right click on our DAL project Add-> reference, a box will open from left side, choose Project. It will show us 2 options, choose
StudentApp.Model and click ok.
- In our DAL project, rename the class1.cs file to StudentContext.cs. So if you are thinking what context class does, it is the model which will talk to our database and help us retrieve the data from DB, let DB know which are the tables DB needs to create, with which properties and which database to target.
- To create our
StudentContext, we need to inherit DbContext class, our default constructor will have parameter which will be connectionString Name from our config class. Let’s see the code below.
namespace StudentApp.DAL
{
    public class StudentContext : DbContext
    {
        public StudentContext() : base("DefaultConnection")
        {

        }

        public DbSet<Student> Student { get; set; }

        protected override void OnModelCreating(DbModelBuilder modelBuilder)
        {
            base.OnModelCreating(modelBuilder);
        }
    }
}
- Line number 5 has the default constructor which will initialize our database, the parameter passed is the same as our
connectionString Name. - Line number 10 has the property as
Student, DbSet<> tell the database that we need to create a table with name as Student in our database, and onModelCreting() method, let us modify properties to table before table is created in DB. - Our context is ready, but to perform operations over our database, we need to write our methods, so let’s create a
DataStore, this is nothing but a class which will use our StudentContext to perform operation on our DB. - Add a new class in our DAL project and name it as
StudentDataStore, we will write 3 methods to GetStudentList(), AddStudent() and UpdateStudent(). - Let’s do it one by one, this will be simple implementation, below is the code:
using System;
using System.Collections.Generic;
using System.Linq;
using System.Text;
using System.Threading.Tasks;
using StudentApp.Model;
using System.Data.Entity;

namespace StudentApp.DAL
{
    public class StudentDataStore
    {
        private StudentContext _context = new StudentContext();

        public async Task<List<Student>> GetStudentList()
        {
            return await _context.Student.ToListAsync();
        }

        public async Task<bool> AddStudent(Student student)
        {
            student.CreatedDate = DateTime.Now;
            _context.Student.Add(student);
            int x = await _context.SaveChangesAsync();
            return x == 0 ? false : true;
        }

        public async Task<bool> UpdateStudent(Student student)
        {
            _context.Entry(student).State = EntityState.Modified;
            student.ModeifiedDate = DateTime.Now;
            int x = await _context.SaveChangesAsync();
            return x == 0 ? false : true;
        }
    }
}
. - We have all 3 methods as
async, if you notice Add and Update methods, both are using SaveChangesAsync(), this is similar to our commit is SQL, the changes will be saved to database post this command is fired. - Build the project to check if it is working. Great, our build is successful, let’s expose our DAL layer using API.
- Add reference of
Student.Model and StudentApp.DAL to StudentApp. To add reference, right click on Student solution and Add->Reference and select solutions, select both StudentApp.Model and DAL project and click OK. - Now let’s add an API, to right click on Controller Folder and click Add->Controller, from next screen, select Web API 2 Controller – Empty.
- Name the controller as
student, we will be calling the same 3 methods in this API.
using System;
using System.Collections.Generic;
using System.Linq;
using System.Net;
using System.Net.Http;
using System.Threading.Tasks;
using System.Web.Http;
using StudentApp.Model;
using StudentApp.DAL;

namespace StudentApp.Controllers
{
    public class StudentController : ApiController
    {
        private StudentDataStore _store = new StudentDataStore();
        public async Task<List<Student>> Get()
        {
            return await _store.GetStudentList();
        }

        public async Task<bool> Post(Student student)
        {
            return await _store.AddStudent(student);
        }

        public async Task<bool> Put(Student student)
        {
            return await _store.UpdateStudent(student);
        }

    }
}
- Now build the
Student project and press F5. once project is built and page is loaded append /Api/Student/Get. We will get the below screen:
- Now we will add a new student using Advanced Rest Client, you can use chrome store to add this App.
- In host, enter http://localhost:7565/Api/Student/Post and in payload provide {FristName: “Santosh”,LastName: “Yadav”,DateOfBirth: “11/13/1986”}. Below is the request and response.
- Now you can call get again and check.
- You can do the same for
Put method and see the result.
Conclusion
So we have knowledge of how we can create a simple DAL layer using Entity Framework Code First. Unlike old approach, we have not created any database manually, no tables and no scripts, it simplifies the whole process.
Also, we used N-Tier architecture in creating this application. In the next blog, we will see how entity framework can be used with Repository Pattern.
Keep reading my blog for more topics, you can write to me on santosh.yadav198613@gmail.com in case you need any assistance.
You can download the code from https://github.com/santoshyadav198613/EntityFramework
This member has not yet provided a Biography. Assume it's interesting and varied, and probably something to do with programming.


 General
  News
News  Suggestion
  Question
  Bug
Bug  Answer
  Joke
Joke  Praise
  Rant
Rant  Admin
Admin 


