
Repository Pattern
4.86/5 (6 votes)
This blog post discusses the Repository Pattern
Prerequisites: Data Mapper Pattern
If you look at the above patterns, you will always need to do the below tasks:
- Find the connection string from some sort of configuration
- Open a new connection to the database
- Create a command object or a
recordsetobject - Execute the SQL statement or stored procedure
- Close the connection to release the database resources
- And put some adequate error handling around the data access code
I bet most of you would have started writing programs in the same fashion.
Also, in the earlier patterns like Data Mapper and Active record, most of the problems still exist. That is where the Repository pattern comes to the rescue.
The Repository pattern adds a separation layer between the data and domain layers of an application. It also makes the data access parts of an application better testable.
I have created a sample Repository pattern, which can be used for creation of ORMs. This is a widely used and accepted pattern. First, we will see the database structure which I have used. It's the normal Customer, Order, Order Items and Products as shown below:

For this application, I have used LINQ to SQL. You can create a new LINQ to SQL project and using the server explorer, drag and drop the tables after connecting to the desired database. The Relationships between 2 entities can also be added/edited.
Once we have the Database structure and its dbml ready, we can then move on to create the Repositories. First, we will create a Repository interface which will contain the CRUD functionality along with Queryable search.
using System;
using System.Collections.Generic;
using System.Linq;
using System.Linq.Expressions;
using System.Text;
using System.Threading.Tasks;

namespace Xamlized.Repositories
{
    public interface IRepository<T>
    {
        void Insert(T entity);
        void Delete(T entity);
        IQueryable<T> SearchFor(Expression<Func<T, bool>> predicate);
        IQueryable<T> GetAll();
    }
}
Then, we will implement this as below:
using System;
using System.Collections.Generic;
using System.Linq;
using System.Text;
using System.Threading.Tasks;
using System.Data.Linq;
using System.Linq.Expressions;

namespace Xamlized.Repositories
{
    public class Repository<T> : IRepository<T> where T : class
    {
        internal Table<T> DataTable;

        public Repository(DataContext dataContext)
        {
            DataTable = dataContext.GetTable<T>();
        }

        public void Insert(T entity)
        {
            DataTable.InsertOnSubmit(entity);
        }

        public void Delete(T entity)
        {
            DataTable.DeleteOnSubmit(entity);
        }

        public System.Linq.IQueryable<T> SearchFor
              (System.Linq.Expressions.Expression<Func<T, bool>> predicate)
        {
            return DataTable.Where(predicate);
        }

        public System.Linq.IQueryable<T> GetAll()
        {
            return DataTable;
        }
    }
}
Now we have our basic repository created. We will now create an individual repository for each entity; which can be used to query each entity separately.
namespace Xamlized.Repositories
{
    public interface ICustomerRepository
    {
        IQueryable<Product> FindProductsByCustomer(Customer customer);
    }
}
And the implementation as below:
 public class CustomerRepository : Repository<Product>,ICustomerRepository
    {
        public CustomerRepository(DataContext datacontext) : base(datacontext)
        {

        }

        public IQueryable<Product> FindProductsByCustomer(Customer customer)
        {
            // you can write your logic here
            return null;
        }
    }
Similarly, for Order, we can implement Repository as below:
 public interface IOrderRepository
    {
        IQueryable<Order> FindOrdersByCustomer(Customer customer);
    }
Now, we will implement this as shown below:
public class OrderRepository : Repository<Order>,IOrderRepository
    {
        public OrderRepository(DataContext datacontext) : base(datacontext)
        {

        }

        public IQueryable<Order> FindOrdersByCustomer(Customer customer)
        {
            return DataTable.Where(x => x.Customer.Equals(customer));
        }
    }
Similarly OrderItem, this can be used to retrieve items depending on a order.
public interface IOrderItemRepository
    {
        IQueryable<OrderItem> FindItemsByOrder(Order order);
    }
Its implementation:
public class OrderItemRepository : Repository<OrderItem>, IOrderItemRepository
    {
        public OrderItemRepository(DataContext datacontext)
            : base(datacontext)
        {

        }

        public IQueryable<OrderItem> FindItemsByOrder(Order order)
        {
            return DataTable.Where(x => x.Order.Equals(order));
        }
    }
The last bit, the Product Repository:
public interface IProductRepository
    {
        IEnumerable<Product> FindProductByOrderItems(List<OrderItem> orderitems);
    }
If you see here, you can see a different implementation here. Similar to this, you can create custom logic.
namespace Xamlized.Repositories
{
    public class ProductRepository : Repository<Product>, IProductRepository
    {
        public ProductRepository(DataContext datacontext)
            : base(datacontext)
        {

        }

        public IEnumerable<Product> FindProductByOrderItems(List<OrderItem> orderitems)
        {
            var SE = DataTable.Where(s => orderitems
                            .Select(so => so.ProductID)
                            .Contains(s.ProductID))
            .ToList();
            return SE;
        }
    }
}
We have all the Repositories ready.
Now, we will create our Main console application as below:
class Program
{
static void Main(string[] args)
{
using (var dataContext = new CustomerDataContext())
{
var orderRepository = new Repository<Order>(dataContext);
Order order = orderRepository.SearchFor(o => o.CustomerID == 38).Single();
var orderItemsRepository = new Repository<OrderItem>(dataContext);
var orderitems = orderItemsRepository.SearchFor(ot => ot.Order.Equals(order));
var productrep = new ProductRepository(dataContext);
var products = productrep.FindProductByOrderItems(orderitems.ToList());
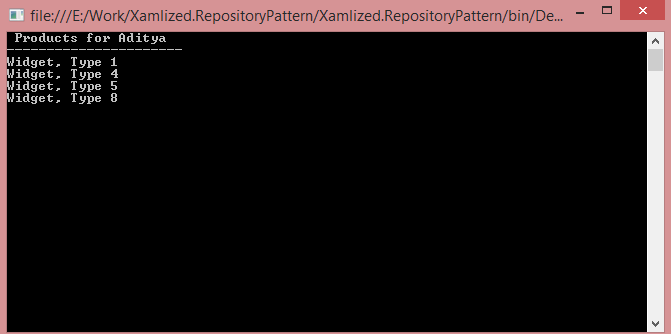
Console.WriteLine(" Products for {0} "+Environment.NewLine
+"----------------------", order.Customer.Name);
foreach (var product in products)
{
Console.WriteLine(product.Name);
}
Console.ReadKey();
}
}
}
You will get output as:
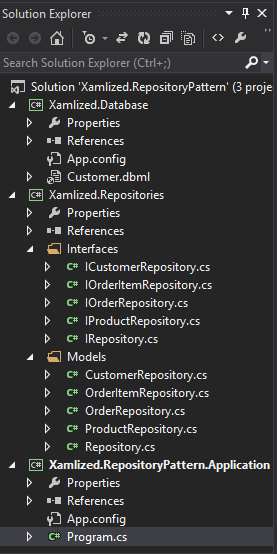
The project structure will be like:
Using this above pattern, one can easily segregate the entities with independent wrappers around it. You avoid duplicate code and structure each of your classes better.
But still, we are left with a problem of tracking the changes, i.e., how many enties have changed, etc. You cannot see whether an entity has really changed and keep a track of the dirty, deleted entities for faster interaction and persistence. For this, we need Unit of work Pattern, which will be studied in the coming articles.
The entire solution can be found in GIT: Xamlized Repository Pattern


![]()