
Running Automation Tests at Scale Using JavaScript
4.80/5 (3 votes)
This tutorial will discuss using Selenium with JavaScript for automated testing of websites and web applications.
The digital landscape has revolutionized the way of using web and mobile platforms, significantly influencing the users on how these platforms help make better decisions in several ways. As a result, many software products are trying to provide their users with top-notch digital experiences.
When it comes to delivering high-quality applications, testing plays a vital role in ensuring that the application meets the development requirements. That means establishing high internal QA standards and investing in automation testing for faster release cycles and quick developer feedback.
There are a lot of frameworks to choose from while performing automation testing of your web application. However, Selenium is a popular test automation framework that automates web browsers and supports a wide range of programming languages, including JavaScript.
As per the Stack Overflow Developer Survey, JavaScript is a widely used programming language. As JavaScript is extensively used for web development, developers can also leverage it to write test scripts while performing Selenium automation testing. Furthermore, JavaScript has a rich ecosystem of libraries and frameworks like TestCafe, Mocha, and Chai, which are well-suited for automation testing.

This tutorial will discuss using Selenium with JavaScript for automated testing of websites and web applications. Next, we will use a JavaScript-based testing framework like TestCafe with Selenium and perform parallel test execution at scale on the cloud.
Table of Contents
- What is Selenium?
- How to Setup Selenium with JavaScript?
- Writing First Automation Test Script with Selenium
- How to Setup Selenium with JavaScript Testing Framework?
- Using the TestCafe Framework for Parallel Test Execution
- Challenges of Testing on the Local Grid
- Running Test Case on LambdaTest
- Running Test Case on LambdaTest with Parallel Test Execution
- Conclusion
What is Selenium?
Selenium is a popular automated testing framework for web application browser automation. In a recent survey on test automation, 64.2% of the participants said they utilized Selenium to automate testing.

It allows website or web application testing across numerous operating systems and browsers. It also supports many programming languages, such as JavaScript (Node.js), C#, Java, Python, Ruby, and more, allowing testers to automate their website testing in the most familiar language.
The Selenium framework has three components, as shown in the image below.

Selenium IDE
Selenium IDE (Integrated Development Environment) provides a record and playback tool that will generate scripts based on actions performed on a browser. It provides a user-friendly interface that allows testers and developers to easily export automated test scripts in programming languages like Python, Java, JavaScript, Ruby, C#, and many more. It is an ideal tool for beginners, requiring almost no prior programming knowledge. However, it is unable to create more complex test cases. For that, Selenium WebDriver and Selenium Grid can be used.
Selenium WebDriver
Selenium WebDriver offers a reliable and object-oriented method of automating browsers. Writing automation scripts in programming languages like Java, C#, Python, Ruby, and JavaScript is possible with Selenium WebDriver. Numerous browsers, including Chrome, Firefox, Safari, Microsoft Edge, and others, are supported by WebDriver.
Selenium Grid
Selenium Grid is also classified as a Local Grid that enables parallel test execution by allowing you to split test execution across several physical or virtual machines. You can simultaneously run tests on several browsers, operating systems, and devices, thanks to its integration with Selenium WebDriver. Several nodes and a hub make up the Selenium Grid. Tests are distributed to the available nodes for execution on the Hub, which serves as a central location for test registration.
How to Setup Selenium with JavaScript?
Setting up Selenium with JavaScript is relatively easy. You can set it up without any hassle by following the steps provided in this section.
Prerequisites
- The latest version of Node.js.
- Web browser on which you wish to run your test.
Using the JavaScript package manager npm, you may install Selenium by entering the following command on a command line or terminal:
npm install selenium-webdriver
Console Output

To verify the installation of Selenium, look at the package.json file:
{
  "dependencies": {
    "selenium-webdriver": "^4.12.0"
  }
}
Writing First Automation Test Script with Selenium
Most of us have used the login authentication functionality of the website to access its features, so why not test login functionality?
In this section, we will create two simple yet practical test scenarios, one of which is to get the website's title, and the other is to add data to the field and click the button. To run these tests, we will use a simple form demo, a demo webpage maintained and managed by LambdaTest.

Getting Website Title
In this test, we will print the title, which we will retrieve from the website. We will use Firefox browser to execute our test.
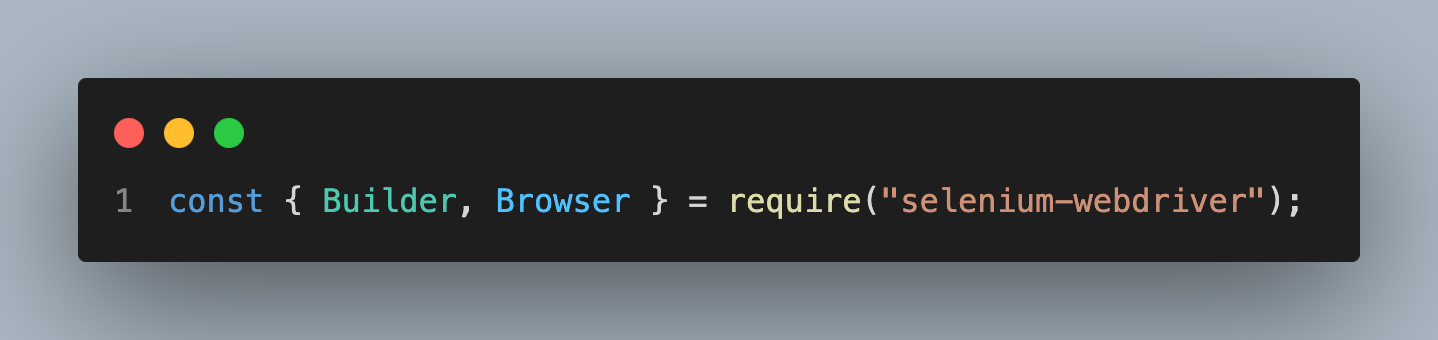
const { Builder, Browser } = require("selenium-webdriver");

async function example() {
  // To wait for the browser to build and launch properly
  let driver = await new Builder().forBrowser(Browser.FIREFOX).build();

  // To fetch http://google.com from the browser with our code.
  await driver.get("https://www.lambdatest.com/selenium-playground/simple-form-demo");

  // Verify the page title and print it
  var title = await driver.getTitle();
  console.log("\nTitle is:", title);

  // It is always a safe practice to quit the browser after execution
  await driver.quit();
}

example();
Console Output

Code Walkthrough
The const statement acts as an import statement to our code. The import statements help you load all the libraries belonging to the Selenium package. In the below code, we are loading WebDriver from the Selenium package.
In this line of code, we assign the new instance of WebDriver to Firefox as the browser.

get(): This is a method provided by the WebDriver object, which is used to navigate to a specific URL. It instructs the web browser to open the specified URL.

title: The title method is used to retrieve the title of the webpage the user is currently working on.

quit(): This method quits the entire browser session with all its tabs and windows.

In automation, interacting with input fields and buttons is a regular task. Right-click anywhere on the webpage and choose "inspect element" to view the element’s details. Hover over the element you want to access.
Using the find_element() method, we can address the input elements you found during the inspect element, and with send_keys(), you can send the value to the browser input field.
You can simulate user input by filling the input field with the desired data by giving the selected text or value as an argument. To use the button, you need to use the find_element() method to find the button and click() method to press it. With the help of the below test, we will see how to use these methods.
Add data to the Field and click the Button
In this test, we will add Hello to the input field and submit it by pressing the button. We will use the Firefox browser to execute our test.
const { Builder, Browser, By } = require("selenium-webdriver");

async function example() {
  let driver = await new Builder().forBrowser(Browser.FIREFOX).build();

  await driver.get(
    "https://www.lambdatest.com/selenium-playground/simple-form-demo"
  );

  // Find the element with the id "user-message" and send the text "HELLO" to it
  await driver.findElement(By.id("user-message")).sendKeys("HELLO");

  // Find the element with the id "showInput" and click on it
  await driver.findElement(By.id("showInput")).click();

  await driver.quit();
}

example();
Output

Code Walkthrough
To use By, the following import statement needs to be imported:

Get the element using the findElement() function.

sendKeys(): It is used to send text to any field, such as the input field of a form.

click(): This method will click the button.

How to Setup Selenium with JavaScript Testing Framework?
The testing frameworks offer an organized and effective method of testing. It provides a methodical technique to arrange, automate, and manage tests, making finding and addressing coding errors simpler.
JavaScript provides testing frameworks like TestCafe, Jest, Jasmine, Mocha, QUnit, Cypress, Playwright, Nightwatch.js, and Puppeteer, which are readily used. To start with, we are going to rewrite our previous test in TestCafe.
First, we need to install TestCafe using the following command.
npm install -g testcafe
Console Output

We need to convert our test into a function like the one below.
import { Selector } from "testcafe";

fixture("Simple Form Demo Test").page(
  "https://www.lambdatest.com/selenium-playground/simple-form-demo"
);

// Test 1
test("Test 1 - Getting title of the website", async (t) => {
  const websiteTitle = Selector("title").textContent;

  // Assert that the website title is "Selenium Grid Online | Run Selenium Test On Cloud"
  await t
    .expect(websiteTitle)
    .eql("Selenium Grid Online | Run Selenium Test On Cloud");
});

// Test 2
test("Should display the entered text when the button is clicked", async (t) => {
  const userMessageInput = Selector("#user-message");
  const showInputButton = Selector("#showInput");

  // Type the text "HELLO" into the user message input field
  await t.typeText(userMessageInput, "HELLO");

  // Click the show input button
  await t.click(showInputButton);
});
Output

TestCafe will find the tests and run them, giving you thorough output that includes a pass/fail status. You can use TestCafe's testing features while automating Selenium's web testing chores by combining Selenium with TestCafe.
Using the TestCafe Framework for Parallel Test Execution
When you have a big suite of tests, parallel testing can drastically shorten the time it takes to run each test. You can utilize TestCafe's built-in parallel test execution functionality to run the specified code in parallel.
Consider an example where we need to execute 2 test cases, which will take 7-8 seconds. In stark contrast, if we do it using Parallel Test Execution, the time will be 5-6 seconds.
Here is how to do it:
Now, run the script using the following command.
testcafe chrome --parallel 2 test_example.js
It states you wish to use two parallel processes to conduct the tests. This indicates that TestCafe will divide the tests and run them concurrently on two CPU cores, which can speed up the execution of your test suite.
Without Parallel Test Execution
With Parallel Test Execution

As you can see, the whole test script executed in 6s, 2 seconds less compared to the above-executed test, which took 8s.
Challenges of Testing on the Local Grid
Many challenges can arise while testing on a local grid. More readily available physical devices and browsers are one of the significant problems. A local grid makes testing challenging across various device and browser configurations, which could negatively affect test coverage.
It also needs a lot of resources, including infrastructure setup, software, and hardware, to maintain and manage. It can take time and money to scale the grid to handle rising test demand.
Cloud-based testing grids address the problems with local grids. They provide various devices and browsers, enabling scalable and flexible testing. Testers can use different configurations, run tests concurrently for faster execution, and increase coverage. Grids that are based in the cloud do not require managing local infrastructure.
AI-powered test orchestration and execution platforms like LambdaTest provide a cloud grid where you can run tests with automated testing frameworks like Selenium with JavaScript. They make it simple to write and execute automation scripts with well-known test frameworks like TestCafe and Unittest, supporting numerous latest and legacy browsers and different operating systems.
Running Test Case on LambdaTest
In this section, we will perform Selenium automation testing on LambdaTest using TestCafe as the framework. We will test on the Windows 10 operating system with Chrome version 118.0.
Before running a JavaScript test on LambdaTest, follow the simple steps.
- Create a LambdaTest account and complete all the required processes.
- Go to the LambdaTest Dashboard. To get your credentials, navigate to your Profile avatar in the top right corner.
- Get your credentials from the profile icon in the top right corner, and then select Account Settings; it will redirect to the profile screen.

- Then go to Password & Security. You can find your Username and Access Key under the Password & security tab.

Understanding the Code Step by Step
Shown below is the test script of a sample application.
const { Builder, Browser, By } = require("selenium-webdriver");

// Define your LambdaTest authentication credentials
const USERNAME = "USERNAME";
const ACCESS_KEY = "ACCESS_KEY";

// Define the LambdaTest Grid host URL
const GRID_HOST = "hub.lambdatest.com/wd/hub";

// Define the capabilities for the test
const capability = {
  browserName: "Chrome",
  browserVersion: "118.0",
  "LT:Options": {
    username: USERNAME,
    accessKey: ACCESS_KEY,
    platformName: "Windows 10",
    build: "JavaScript build",
    project: "JavaScript Test",
    name: "Test 1",
    w3c: true,
    plugin: "node_js-node_js",
  },
};

async function example() {
  // Construct the LambdaTest Grid URL with authentication
  const gridUrl = "https://" + USERNAME + ":" + ACCESS_KEY + "@" + GRID_HOST;

  const driver = new Builder()
    .forBrowser(Browser.FIREFOX) // Specify the browser you want to use (Firefox in this case)
    .usingServer(gridUrl) // Set the LambdaTest Grid URL
    .withCapabilities(capability) // Assign the capabilities defined earlier
    .build();

  await driver.get(
    "https://www.lambdatest.com/selenium-playground/simple-form-demo"
  );

  await driver.findElement(By.id("user-message")).sendKeys("HELLO"); // Enter text in an input field
  await driver.findElement(By.id("showInput")).click(); // Click on a button

  await driver.quit();
}

example();
In the above script, add your LambdaTest credentials (Username and Access Key) or set them in your Environment Variables.

Get your desired capabilities generated from the LambdaTest Desired Capabilities Generator.

Run your first JavaScript test
Find details of your test case under Automation > Web Automation.

You can also explore other available options to get a better idea of the LambdaTest platform.

As you can see, the working of LambdaTest functionality helped you solve the local grid issue. Similarly, we can use LambdaTest parallel testing functionality to run our test script.
Running Test Case on LambdaTest with Parallel Test Execution
We need to follow some simple steps to execute the test in parallel on the cloud grid.
- Run the following command to install the npm TestCafe plugin provided by LambdaTest.
npm install testcafe-browser-provider-lambdatest
Console Output

- Add the credentials
For Linux/Mac:
$ export LT_USERNAME=YOUR_LAMBDATEST_USERNAME
$ export LT_ACCESS_KEY=YOUR_LAMBDATEST_ACCESS_KEY
For Windows:
$ set LT_USERNAME=YOUR_LAMBDATEST_USERNAME
$ set LT_ACCESS_KEY=YOUR_LAMBDATEST_ACCESS_KEY
- Create a config.json file in the folder where the test file is available.
- Get your desired capabilities generated from the LambdaTest Capabilities Generator.

It will look similar to this.
{
  "Chrome@118.0:Windows 10": {
    "browserVersion": "118.0",
    "LT:Options": {
      "platformName": "Windows 10",
      "build": "JavaScript Build on Cloud",
      "project": "TestCafe on Cloud",
      "name": "test 1",
      "w3c": true,
      "plugin": "node_js-testCafe"
    }
  }
}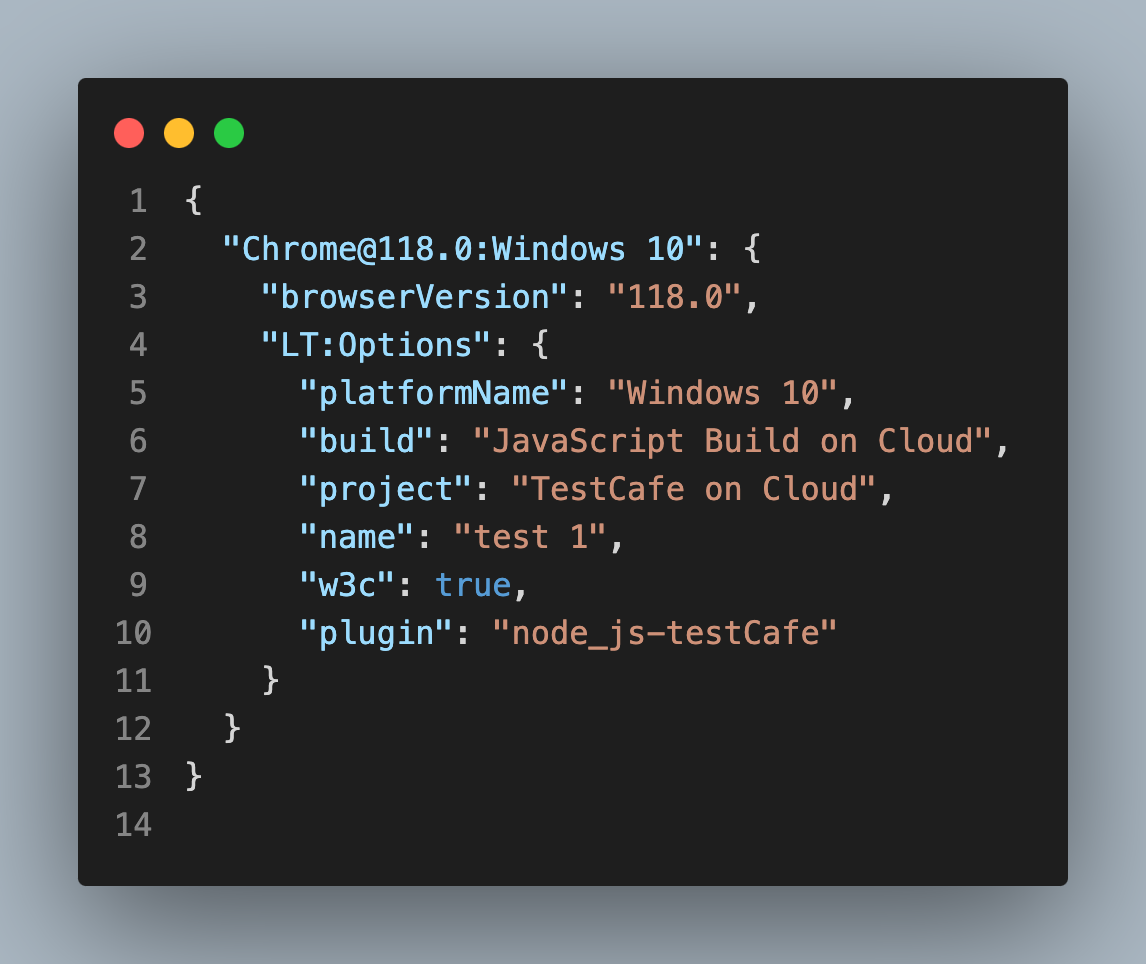
- Now run the following command.
testcafe "lambdatest:Chrome@118.0:Windows 10" 'test_example.js'
Console Output

- To view your test results, visit the LambdaTest Automation Dashboard.

As you can see, both tests run simultaneously on LambdaTest.
Conclusion
Selenium is a robust set of technologies for automating online browser interactions. We discovered how to combine JavaScript and Selenium and put our first test into practice. We also discussed the benefits of using testing frameworks like TestCafe and running tests concurrently to increase efficiency.
We also highlighted the difficulties of using a local grid for testing and the advantages of using a cloud-based automation testing platform, like LambdaTest, which offers a scalable and resource-effective option. Testers may accelerate test execution and increase test coverage with Selenium, cloud-based grids, and parallel execution.
In conclusion, Selenium offers a thorough and effective online automation and testing method combined with JavaScript, contemporary testing frameworks, cloud-based grids, and parallel execution. It gives testers the tools to handle problems and produce high-quality software.