Here we create a viewing screen so that the manufacturer can receive a notification in their Teams Channel, open the app, view the orders, make comments, and send the order to the processing team.
This is the third article in a three-part series on Power Apps development in Teams.
Introduction
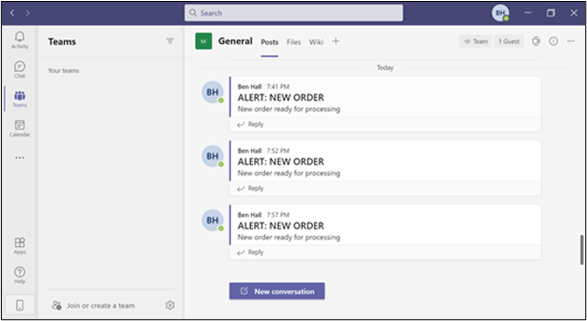
This series's first two articles created our server data control center using Dataverse within Teams. We created a customer user interface (UI) with a built-in approval system, again within Teams. Our app even posts messages on a Teams channel to inform the manufacturer that there is an order ready for processing. Our alerts look great!
Our manufacturing team needs a UI so they can forward the orders for processing. We'll keep ours simple but feel free to experiment.
Create the Manufacturer UI
We have already restricted this manufacturer UI screen to the manufacturing team members. We don't want anyone to view these orders. When finished, it will look something like this:

The View Orders screen should have the same heading as the rest of the app. Copy and adapt it from one of your other screens.
Orders Panel
We start on the left with the gallery of orders.
We need:
- A label with the Text property set to "Orders"
- A rectangle to provide the background for our gallery
- A gallery
| Name | galProcessingOrders |
| Layout | Title |
| Data source | HVAC_Orders |
| Fields | ThisItem.OrderID |
| Items | Filter(HVAC_Orders, OrderStatus = 'OrderStatus (HVAC_Orders)'.'Ready for Processing') |
| Template Fill | If(ThisItem.IsSelected, RGBA(224,224,237,1)) |
Little extras can make a big difference to your app. Features like Template Fill and highlighting the gallery item on selection improve user experience with little effort. Adding this highlights the selected order in the RGB color we provide.
Order Details Panel
Once the manufacturer selects an order for review, the middle panel provides extra order details.
The manufacturer can then send the order to the processing team, adding notes to the order message.
We've demonstrated how to post a message to a Teams channel. Now, let's look at how to send an email to our processing department.
To do this, we use the connector Office 365 Outlook, which we added in the first part of this series.
Let's look in detail at the email section of this OnSelect function:
```
Office365Outlook.SendEmailV2(
    "Example_Processing_Email@Example_HVAC_Company.com",
    "Ready for Processing: Order " & galProcessingOrders.Selected.OrderID,
    Order_Header.Text & ": " & Concat(
        galOrderDetailsforProcessing.AllItems,
        ProductName & ", Quantity: " & Quantity,
        ", "
    ) & ". Additional Notes: " & txtNotes.Value
);
```
Here the Concat function converts the information in our gallery to text to fill the email body. We also add a text input box, txtNotes, with a label with the Text property set to "Notes:".
We append this note box to our email so our manufacturer can add a custom message for the processor. We do this by adding & txtNotes.Value.
Although we hard code the processing department's email address, this can easily be a lookup from a table, from SharePoint, or from another connector like Office365Users. There are many possibilities.
Once we click Send for Processing, the app sends an email from the email account affiliated with the current user.
We need:
- A large rectangle to provide the background for this middle section, with a border
- A smaller rectangle with a label with the Text property set to
"Order Details for " & galProcessingOrders.Selected.CustomerName - A gallery
| Name | galOrderDetailsforProcessing |
| Layout | Title and subtitle |
| Data source | HVAC_Ordered_Items |
| Fields | ProductName and Quantity |
| Items | Filter(HVAC_Ordered_Items, OrderID=galProcessingOrders.Selected.OrderID) |
- A label with the Text property set to
Notes: - A text input box
| Name | txtNotes |
| Tooltip | "Write additional notes to processing team here" |
- A button to send for processing
| Text | "Send For Processing" |
| OnSelect |
Patch(
    HVAC_Orders,
    galProcessingOrders.Selected,
    {OrderStatus: 'OrderStatus (HVAC_Orders)'.Processing}
);
Office365Outlook.SendEmailV2(
    "Example_Processing_Email@Example_HVAC_Company.com",
    "Ready for Processing: Order " & galProcessingOrders.Selected.OrderID,
    Order_Header.Text & ": " & Concat(
        galOrderDetailsforProcessing.AllItems,
        ProductName & ", Quantity: " & Quantity,
        ", "
	) & ". Additional Notes: " & txtNotes.Value
);
Reset(txtNotes);
Notify(
    "Order sent for processing",
    Success,
	1000
)
|
This button marks the order in our Dataverse table as Processing, emails the processing team, and sends a success notification to our user for one second.
You should now group this middle section together and set Visible to !IsBlank(galProcessingOrders).
Our app is ready for publishing! Click Publish to Teams on the top right of your screen.
App in Action
Let's take a look at some screen captures of our app in action.
From the dashboard or Home screen, we can navigate to Create New Order.
After we add items to our order and send it for approval, the app returns us to the Home screen with a message containing our order number.
At every stage, our Dataverse tables update correctly:
Members of the management team can view orders, then batch them to the panel on the right, ready for submission to the manufacturer. Or they can reject orders.
Having received a notification in their Teams Channel, the manufacturer can now open the app, view the orders, make comments, and send the order to the processing team.
Next Steps
In conclusion, we'd like to draw your attention to a few features and final tips that are great for making your Power Apps in Teams experience a great one.
First, there are sample apps, like Employee Ideas, which are excellent for exploring, getting an idea of what is possible, and having a good look at general app design.
Also at your disposal is the app checker, which highlights any issues with your app.
When writing logic or coding of a substantial size, we'd recommend completing your code in the top formula bar and clicking format text: it formats everything nicely for you. Select an object, and it color codes it in the app and formula bar.
Microsoft provides Teams, Dataverse, and Power Apps support. There are comprehensive online materials on various platforms, and our dedicated developer base is itching to help anyone in need in the online forums.
Hopefully, you enjoyed your first experience with Power Apps in Teams. You can quickly create a powerful app with the same ease as creating a PowerPoint. Organizations can easily add functions to Teams to help with their everyday workflow.
The HVAC manufacturer order app we have built should provide a springboard for you to go and experiment. There are so many possibilities for extending this tutorial. You can create a view orders screen for customers to review and amend their orders or create an order from the Supplier screen for the processing team to restock their supplies.
The possibilities are endless — and they can all be implemented with ease and speed in Power Apps, without ever having to leave Teams. To get started creating your unique Power App for Teams, explore Power Apps and Microsoft Teams integration.
Check out our 7-Step Guide to Low-Code App Development to get starting using Power Apps today.
Ben is the Principal Developer at a gov.uk and .NET Foundation foundation member. He previously worked for over 9 years as a school teacher, teaching programming and Computer Science. He enjoys making complex topics accessible and practical for busy developers.


