Author's Note
This piece is directed at the XNA\Monogame engine. However, it will relate to any game engine that incorporates similar concepts and API's.
When researching how to scroll a tiled map, I have come across many postings on the Internet by other developers with the same questions. For the most part (and I was also), most are interested in how to use standardized scroll-bars for such a process. This seems like a logical interest since most developers embarking on game development have already developed applications where scroll-bars are just part of the implementation of the controls they are using for their applications. However, developers new to game development, are often finding that such luxuries that are common in general and business applications are not so in game development environments. This is because game development is at a somewhat lower level than most other applications leaving game developers without many easy options to implement scroll-bars.
For game development, research has shown that one must create the scroll-bars on their own or get a user-interface toolkit that supports them. So far, for the Monogame engine, I haven't found many such toolkits that would support implementing scroll-bars with the possible exception of EmptyKeys.
EmptyKeys is probably the most advanced toolkit of its type available for game developers as it provides a near complete UI implementation for game interfaces that rivals similar implementations in the major software vendor IDEs such as Visual Studio and NetBeans. However, due to the nature of its lower level implementation, it can be rather complex to learn and work with.
For my own purposes, I have currently settled on the use of the Myra UI, which is appears to be rapidly gaining a following in the Monogame Community due to its easier implementation and highly responsive author. Unfortunately, at this time, the Myra UI does not provide a scroll-bar implementation. However, I imagine if enough developers request it, the developer may decide to add it to the library.
Using the Keyboard for Screen Directional Movement
The Monogame Engine comes with built in support for standard movement keys, which allows a player to move forwards, backwards, left and right. Many developers will be familiar with these input keys as up-arrow, down-arrow , left-arrow, and right-arrow or the W, S, A, D keys.
These input keys can then be tested in the "Update" event for a Monogame application as the following C# code demonstrates through the use of the arrow keys.
protected override void Update(GameTime gameTime)
{
if (GamePad.GetState(PlayerIndex.One).Buttons.Back == ButtonState.Pressed ||
Keyboard.GetState().IsKeyDown(Keys.Escape))
{
Exit();
}
coKeyboardState = Keyboard.GetState();
if (coKeyboardState.IsKeyDown(Keys.Left))
{
}
if (coKeyboardState.IsKeyDown(Keys.Right))
{
}
if (coKeyboardState.IsKeyDown(Keys.Up))
{
}
if (coKeyboardState.IsKeyDown(Keys.Down))
{
}
base.Update(gameTime);
}
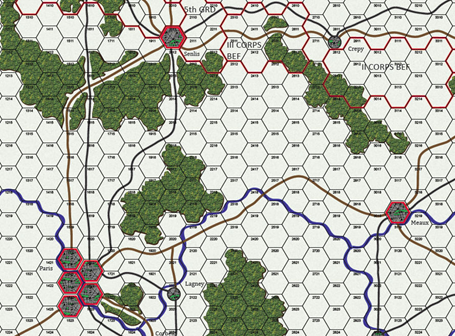
When moving a tiled map in any direction, you must remember to account for the type of tiles you are using; whether they are square, hexagonal, or orthographic. In the code above, no movement calculations are shown since you will have to implement your own calculations. If you read my last article on working with hexagonal tiled maps, "Part I - Creating a Digital Hexagonal Tile Map", which can be found here, you will remember that I implemented a hexagonal map with a tile size of 72×72 pixels. You are free to do the same and I will provide you with the project code if you contact me at blackfalconsoftware@outlook.com.
However, if you use anything other than what I designed, then your movement calculations (via the redrawing of your tiles) will obviously be different.
Implementing the Mouse for Screen Directional Movement
Many game developers are perfectly satisfied with the use of keyboard-based screen movement and for certain types of games such as an FPS or first-person-shooter, this has certainly been the default technique for many such games since in many of these games, there can be a lot of keyboard handling.
However, for strategy style games, there tends to instead be a lot of mouse-handling requirements since there is often so much in-game detail that must be handled and the use of a mouse over a keyboard has been found to be far more comfortable for most such functionality.
In this case, the first thing you want to do is ensure that your mouse pointer is made visible within your game's screen.
This is easily accomplished by implementing the following code in your game's main module's constructor:
this.IsMouseVisible = true;
The next step is to also capture your initial mouse state if you intend on doing anything immediately with the mouse as soon as your game screen is displayed. This can be done with the following line of code, also in your game's main module's constructor.
private Microsoft.Xna.Framework.Input.MouseState coMouseState;
The next consideration you may want to implement is to set your mouse pointer to the center of the screen upon initialization. Thus in the main game module's "Initialize" event, you may want to add the following line of code:
Mouse.SetPosition(GraphicsDevice.Viewport.Width / 2, GraphicsDevice.Viewport.Height / 2);
Once you have set up your initializations of your mouse, you can now consider implementing the code that will replace the above noted, default key handling code with the following for the mouse.
protected override void Update(GameTime gameTime)
{
if (GamePad.GetState(PlayerIndex.One).Buttons.Back == ButtonState.Pressed ||
Keyboard.GetState().IsKeyDown(Keys.Escape))
{
Exit();
}
coMouseState = Microsoft.Xna.Framework.Input.Mouse.GetState();
if (coMouseState.X < 1) {
{
}
if (coMouseState.Y < 1) {
{
}
base.Update(gameTime);
}
Please note that the same scrolling code that has been developed for the original keyboard handling of the scrolling of the map board can now be implemented in the corresponding section of the above mouse handling "if" sections of the code.
Once implemented, when you now move your mouse outside of the bounds of the map board, you will see your board scroll in the corresponding direction.
As an added sense of finesse, you may want to add boundaries to where your mouse can be positioned beyond any side of the map board so that if you move the mouse outside such boundaries, the scrolling will be halted. This will allow you some control over the scrolling if you decide to work with a different application at the same time. Otherwise, your scrolling will continue until the corresponding edge of the board is reached on the side of the map board you have moved your mouse beyond.
As I am currently in the middle of developing the appropriate algorithms for hex tile selection, my next piece will cover this subject along with access to my working source code.
If you have any comments or suggestions regarding this piece, please contact me at my email address below…
Steve Naidamast
Sr. Software Engineer
blackfalconsoftware@outlook.com

This member has not yet provided a Biography. Assume it's interesting and varied, and probably something to do with programming.


