
GDI Drawing and Printing
4.74/5 (26 votes)
Learn the basics of how to draw with GDI on screen and to printer. We will look closer at the different GDI map modes, and how to do proper adjustments when you need to send the output to a printer. We will also create a metafile and load it back in again.
Introduction
The Graphics Device Interface (GDI) is a device independent library for drawing in Windows. It can be used to output on screens, printers, faxes, etc. GDI is an old workhorse that gets the job done. Although the GDI library consists of many simple routines for drawing, it becomes more complex when you need to output to something other than a printer. In that case, you might need to deal with scaling and a reversed coordinate system. This article guides you through three different mapping modes. We will also see how we can save the GDI operations into enhanced metafiles, and replay them again.
Simple Drawing in GDI
First of all, GDI draws on DevicesContexts.
It is sort of a virtual region in memory.
Below, you can see how to draw a rectangle.
Let's pretend that we need to respond to a paint event and need to repaint the window.
case WM_PAINT:
{
    PAINTSTRUCT ps;
    HDC hdc = BeginPaint(hwnd, &ps);

    // Drawing code begin
    //
    RECT rc;
    rc.top = 100;
    rc.left = 100;
    rc.bottom = 300;
    rc.right = 300;

    HBRUSH greenBrush=CreateSolidBrush(RGB(0,255,0));
    FillRect(hdc, &rc, greenBrush);
    DeleteObject(greenBrush);
    //
    // Drawing code end

    EndPaint(hwnd, &ps);
}
This code paints on the screen a 200x200 filled green rectangle with its upper left corner at position (100,100).
Outputting to a Printer
What happens if we try to do the output on a printer instead?
void GDIDraw::Print(HWND hWnd)
{
   PRINTDLG pd = {0};
   pd.lStructSize = sizeof( pd );
   pd.hwndOwner = hWnd;
   pd.Flags = PD_RETURNDC;

   // Retrieves the printer DC
   if (PrintDlg(&pd))
   {
      HDC hdc = pd.hDC;
      StartDoc (hdc, &di);
      StartPage (hdc);

      // Drawing code begin
      //
      RECT rc;
      rc.top = 100;
      rc.left = 100;
      rc.bottom = 300;
      rc.right = 300;

      HBRUSH greenBrush=CreateSolidBrush(RGB(0,255,0));
      FillRect(hdc, &rc, greenBrush);
      DeleteObject(greenBrush);
      //
      // Drawing code end

      EndPage (hdc);
      EndDoc(hdc);
      DeleteObject(hdc);
   }
}

Doing this makes a tiny rectangle appear, but it will be so tiny that it is hardly visible.
The reason for the image being tiny is that the paper
has a very high resolution compared to the screen.
A printer may very well use 600 dpi when printing our rectangle,
making it fit in 1/3 of an inch on the paper.
In other words, we must scale up the rectangle to make it bigger on the paper.
But then we have the issue of size to consider. How much measures 100 pixels?
This depends on the dpi of both the screen and the printer.
Normally, a screen outputs at 72 dpi.
100 pixels is about 100 pixels / 72 dpi = 1.39 inch on the screen.
To make it the same size on the printer, you must multiply it by the dpi of the printer.
1.39 inch x 600 dpi = 833 device units.
Implying a scaling factor of 600/72 = 8.33.
GetDeviceCaps(hdc, LOGPIXELSX) and GetDeviceCaps(hdc, LOGPIXELSY)
return the printing DPI 600 for my XPS printer.
double scaleX = GetDeviceCaps(hdc, LOGPIXELSY) / 72;
double scaleY = GetDeviceCaps(hdc, LOGPIXELSX) / 72;

// Scale for printing
rc.top *= scaleY;
rc.bottom *= scaleY;
rc.left *= scaleX;
rc.right = *= scaleX;

Window Too Large for the Printer
What if the window is larger in inches than the paper you print on? In that case, you must still scale up the rectangle, but the scaling must be within the bounds of the paper.
Let's consider the A4 paper size which is 210 mm wide in portrait layout, and a screen of 1200x800 pixels. 1200 pixels / 72 dpi/ 25.4mm = 423 mm wide. In other words, my screen is twice the width of a A4 paper. If we would like to fill the width, we would have to do a reverse calculation. The maximum width on the screen would still be 1200, but on the printer it would be 210mm / 25.4mm/inch * 600 dpi = 4961 device units. How do we map 1200 pixels to 4961 device units? The answer is to use a Mapping Mode.
Mapping Mode
The translation between logical view and the device view is handled by the GDI map mode.
-
MM_TEXT MM_ISOTROPICMM_HIMETRIC
There are more modes, but this article only handles these three.
You can set the mapping mode by calling SetMapMode(HDC hdc, int mode).
MM_TEXT
MM_TEXT maps 1 logical pixel to 1 device pixel.
For screens, this is the most appropriate mapping,
since no scaling is necessary in this case. This is the default mode.
MM_HIMETRIC
MM_HIMETRIC does reverse mapping, maps 1 device pixel to 1 logical pixel.
1 device pixel corresponds to 0.01 mm on the paper
Notice that the logical view does not correspond
to the screen anymore, even if it is the screen you want to print.
Neither in size or shape.
An A4 paper is 210 mm wide. The number of logical units is 210 mm / 0.01 mm/unit = 21000 units. The y axis is negative and measures 297 mm = -29700 units. Let's say your window measures 1200x800. The scaling factor for the X axis is 21000 units / 1200. The scaling factor for the Y axis is the same but negative. (There are printers that output a different dpi on x and y axis, in that case one has to compensate for that ratio as well.)
double scaleX = 21000.0/1200.0
double scaleY = -scaleX;

RECT rc;
rc.top = 100;
rc.left = 100;
rc.bottom = 300;
rc.right = 300;

// Scale for printing
rc.top *= scaleY;
rc.bottom *= scaleY;
rc.left *= scaleX;
rc.right = *= scaleX;
MM_ISOTROPIC
MM_ISOTROPIC is sort of like a mix between MM_TEXT and HIMETRIC.
This mode supports automatic scaling, between logical view and device view.
These two views don't need to have the same resolution, but should have the same proportions.
Otherwise the scaling will be skewed.
SetWindowExt(hdc, 120, 80);
SetViewPortExt(hdc, 1200, 800);
If you draw a 120 units wide line, it will fill up 1200 device units.
There is a catch if you output on a printer.
The proportions of the x and y are fixed.
It is decided by the paper size and if it is printed in portrait or landscape.
So in order for the scaling to work, we must expand the logical view,
so that has the same proportions as the paper we are outputting to.
For a 1200 x 800 screen to print on a A4 paper in portrait layout,
we can do the following calculations to get the size of the virtual region.
int printerXUnits = GetDeviceCaps (hdc, HORZRES);
int printerYUnits = GetDeviceCaps (hdc, VERTRES);
double windowX = 1200.0;
double windowY = 800.0;
double scaleX = printerXUnits/x;
double scaleY = printerYUnits/y;
double Y = printerYUnits/printerXUnits*windowX = 1697.14
Our logical view should measure (1200 x 1697) in order to take the proportional size of the paper in portrait layout.
SetWindowExt(hdc, 1200, 1697);
SetViewPortExt(hdc, 1200, -1697);
Now the width of the window will occupy the whole X axis. The scaling is automatic.
RECT rc;
rc.top = 100;
rc.left = 100;
rc.bottom = 300;
rc.right = 300;
Saving a Metafile
GDI is almost like vector graphics. We can save the GDI operations instead of saving an image. We can load the metafile back in, and replay it, at a different resolution.
Saving it in a resolution fitting a printer makes sense. The A4 format measures 210x297 mm. Which corresponds to 21000x29700 units. One way to get the measures of your printer Letter or A4, is to open an XPS printer, and read the measurements from the driver.
HDC printerDC = CreateDC(TEXT("Microsoft XPS Document Writer"),
              TEXT("Microsoft XPS Document Writer"),NULL, NULL);
int paperWidthInMillimeter = GetDeviceCaps(printerDC, HORZSIZE);
int paperHeightInMillimeter = GetDeviceCaps(printerDC, VERTSIZE);
int paperWidth = paperWidthInMillimeter * 100;
int paperHeight = paperHeightInMillimeter * 100;
RECT rect;
rect.top = 0;
rect.left = 0;
rect.bottom = paperHeight;
rect.right = paperWidth;
After this, we can create a new device context that is linked to a metafile.
HDC metaHdc = CreateEnhMetaFile(printerDC, filename.c_str(), &rect, "GDIApp");
if (metaHdc)
  {
    gdiDraw->Paint(metaHdc, hWnd, TRUE);
    CloseEnhMetaFile(metaHdc);
}
DeleteDC(printerDC);
Loading and Replaying a Metafile
Replaying a metafile is almost as simple as saving it.
One easy way to display a metafile on screen is to first replay it over a bitmap, which has the desired dimensions you want. If the metafile is smaller or bigger in size than your screen, you will find this very convenient if you need to rescale it. The first thing one has to do is to find out the dimensions of the metafile.
HENHMETAFILE m_metafile = GetEnhMetaFile(filename);

BOOL GetFrameRectFromMetafile(HENHMETAFILE hemf, RECT* rect)
{
   ENHMETAHEADER emh = { 0 };
   emh.nSize = sizeof(ENHMETAHEADER);
   if( GetEnhMetaFileHeader( hemf,  sizeof( ENHMETAHEADER ), &emh ) == 0)
      return FALSE;

   if (rect == NULL)
      return FALSE;

   rect->top = emh.rclFrame.top;
   rect->bottom = emh.rclFrame.bottom;
   rect->left = emh.rclFrame.left;
   rect->right = emh.rclFrame.right;
   return TRUE;
}
If we have saved the metafile as a printed document in A4 size, the full height of the document will not fit on the screen, at least not if we intend to make the document occupy the full width of the screen. In this case, we need to create a bitmap that has a height that would fit the totality of the document. We know the desired width, that is the width of the screen. Now we need to calculate the height.
RECT metaFrameRect = {0};
GetFrameRectFromMetafile(m_metafile, &metaFrameRect);
long lWidth = (long)(abs(metaFrameRect.left - metaFrameRect.right));
long lHeight =(long)(abs(metaFrameRect.top - metaFrameRect.bottom));
int adjustedX = windowX;
int adjustedY = lHeight * windowX / lWidth;
Now, we need to replay the file into the bitmap.
RECT adjustedRect = {0};
adjustedRect.right = adjustedX - 1;
adjustedRect.bottom = adjustedY - 1;

// Paint the metafile into a bitmap
HDC memDC = ::CreateCompatibleDC(hdc);
HBITMAP bitmap = ::CreateCompatibleBitmap(hdc, adjustedX, adjustedY);
::SelectObject(memDC,bitmap);

// The metafile may lack background color
// Set it, otherwise the background color will be black
HBRUSH whiteBrush=CreateSolidBrush(RGB(255,255,255));
FillRect(memDC, &adjustedRect, whiteBrush);
DeleteObject(whiteBrush);

// Play metafile
PlayEnhMetaFile(memDC,m_metafile,&adjustedRect);
DWORD dwRet = GetLastError();
The final step is to copy it over to the screen.
// Now we can copy the bitmap to screen
// AdjustedY can be bigger than the screen
BitBlt(hdc,0, 0,adjustedX, min(windowY, adjustedY), memDC, 0, 0, SRCCOPY);
DeleteObject(bitmap);
DeleteDC(memDC);
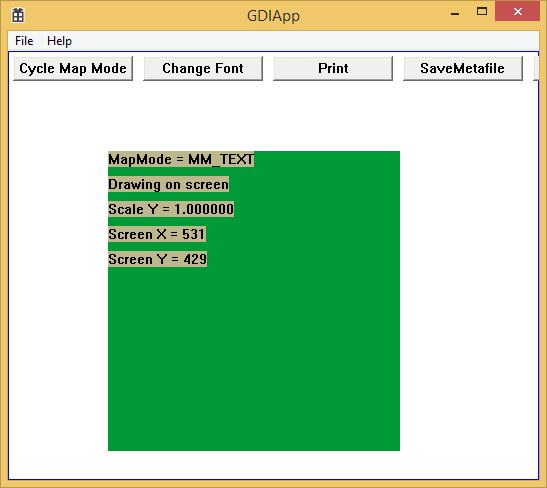
Demo Application
I have made a demo application that outputs a rectangle and some text.
Clicking on the button it cycles through the three mapping modes MM_TEXT, MM_HIMETRIC, and MM_ISOTROPIC.
All in all, there are 6 different paths through the program,
2 for each of the 3 mapping modes. When outputting to the printer,
we need to do a lot more calculations to handle the scaling correctly.
The font is also scaled in the DemoApp, which can be a bit trickier than scaling lines and boxes.
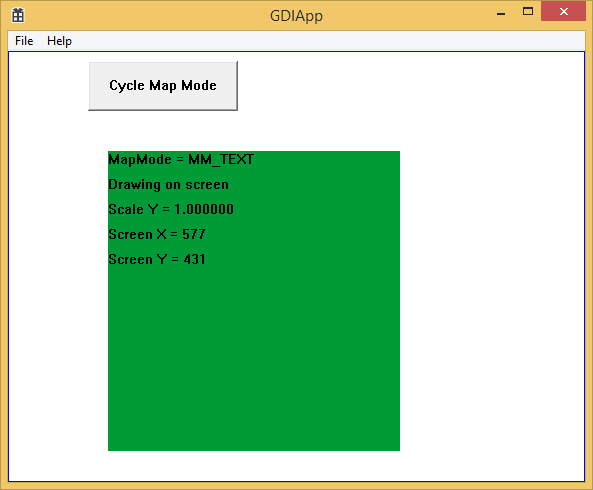
Click the button to cycle between the mapping modes, and use the Print option in the File menu to print the page (Output to an XPS printer to save ink and paper).
The background color when loading a metafile is not white. The metafile actually lacks a background color if not explicitly set. I changed the color so that it will be easier to see a difference from when it is painted normally. Change it to white yourself, if that is the desired color.
The Code
I used the Win32 GDI functions where the first parameter is the hdc.
The alternative is using MFC classes,
but I am using the VS2012 Express version at home where MFC is not available.
But the MFC classes are just wrappers around the GDI functions,
so the same principles and rules apply to the classes.
I have just tested the code and the conversions using millimeters and mapping mode MM_HIMETRIC.
There is a mapping mode called MM_HIENGLISH too that uses inches. But it shouldn't be too much effort to make it work looking at the code for MM_HIMETRIC.
Points of Interest
Some functions like LPtoDP and DPtoLP which are used for translating values between logical coordinates and device coordinates return a long datatype.
These are rounded values. Consider converting 100 units or more to get more decimals.
After that, do all scaling with floatal point arithmetic.
GDI was considerable more complex than I initially thought. Things appeared skewed, the wrong size, or even not at all. I found various sources on the internet in my quest for answers regarding GDI. But I would recommend a good GDI book instead. Charles Petzold (one of my favourite authors) wrote one back in 1998. Programming Windows (5th edition). It is an old book but GDI is also an old technology.
History
- 24th April, 2014 - V1.0 First version
- 27th April, 2014 - V1.1 Added support for enhanced metafiles