Introduction
Being electronics engineering students, we are taught programming but not as properly as CS guys learn it. This App implements many of the simple features which are taken as granted in Windows GUI Apps. The primary goal was to make something similar to this app: LED Matrix Studio http://freshney.org/electronics/builder.htm - but with time constraints and finding it is not as easy as it seems we settled with an app which is somewhat useful.
We call our app, MATPaint, which is short for MATrix Paint - the app currently allows for designing and saving of Dot-Matrix patterns for up to 32x32 size matrix.
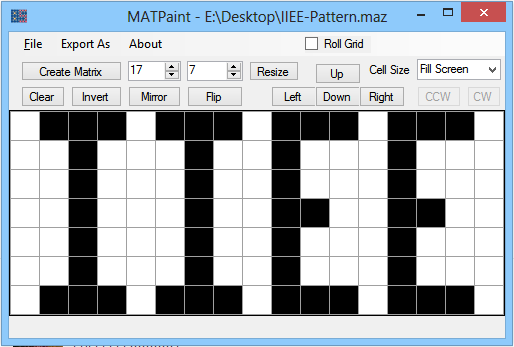
MATPaint - Application screenshot
Background
This article is written as it is a requirement of our C# project - our programming teacher Engr. Sajid Hussain (IIEE-PCSIR, Karachi) asked us to make an application as part of our C# Course and put on CodeProject.com and this application and article are the result of that.
I had worked on LED Dot-Matrix displays as a side project a few months back using AVR and 8x8 LED Displays and had made a quick and dirty app for generation of the hex-code for the display pattern.
http://zaidpirwani.com/1054/8x8-led-matrix-dot-matrix-font-demo/
https://github.com/zaidpirwani/Hex-Code-Generator-for-LED-Dot-Matrix-Display
So for this C# Project, I along with my group-mate (Maaz Ahmed) decided to make an app which can generate codes for various sizes of dot-matrix displays and also has other features available in regular apps that we use. We did find a similar app [mentioned in the Intro] which did all that during our search for similar work on the Internet but that was written in Delphi and not C#, so we basically have written this app from scratch.
How this Article is Written
From here on, this article has been divided into
two parts, the first part describes the application working, features and how it was made plus explanation of some of the tasks (File save/Open etc) the other part details the working of the Matrix/Grid and the relevant functions (Invert/Flip/Roll etc). The first part mainly done and written by me [Zaid Pirwani] and the second part by Maaz Ahmed.
Making of MATPaint
We started with a Visual Studio 2010 C# project but half way through we moved over to VS2012 and the files uploaded along this article were last saved/built with VS2012 - (the solutions files can still be opened in VS2010 if it has SP1 update installed). The App does
not use any external libraries other than those provided by Windows and should run on any Windows PC without any additional installation (well maybe .Net Framework).
MATPaint in its current form has the following features:
Application Features
- File New/Open/Save properly implemented as in regular apps
- Remembers its last state when closed and opens in same state
- Saving the pattern as a PNG Image
- Generation of HEX Code for Micro-controller
- Print preview and Printing of the Pattern
- Install Shield Setup Wizard
- FileType Association [.maz file extension ]
Task Specific Features- Pattern sizes can be from 1x1 to 32x32 cell Matrix
- Patterns can be re-sized
- Mirror / Flip / Rotate 90deg (CW and CCW) / Invert / Clear for complete Matrix
- Pattern movement buttons (Up/Down/Left/Right) with Roll/Rotate across edges
- 4 different sizes for display of Matrix cells
For the Matrix paint
area we used DataGridView; as Maaz Ahmed puts it:
We used the DataGridView control for the purpose of pattern generation because this control provides flexibility and customization to the user for creating any types of cells. We exploited its properties to design the grid with the desired functionality. With the extensive support to design and adjust the appearance of the cells we find it suitable for our needs.
Now, feature by feature code explanation and snippets are provided, the code below is not verbatim as used in the app. For the sake of explanation we have omitted
some repetitions etc in the code.
Feature/Code Explanation
Application Features
File New/Open/Save
The first thing we wanted in the app was to be able to save patterns and open them later on. For the file type and format we decided to simply save the files as text files having row and column data comma separated and divided by lines changes. The files are saved with an extension .maz to differentiate them from other text files.
We used the OpenFileDialog and SaveFileDialog objects available in VS2012 - however simply putting in the Open/Save dialogs was not enough as we wanted proper notepad-like functionality for opening/saving files so that the user is prompted when opening a file when already a file was being edited and so on. This was implemented by putting in 2 flag variables; isChanged (boolean) and currentFile (enum with Opened and New as values), the values of these 2 flag variables is checked whenever a file is opened / closed / new file etc.
The methods used are NewMatrix();, SaveMatrix();, SaveOpenMatrix();, OpenMatrix(); along with click events for New, Open, Save and Save menu items.
Menu Item (New, Open, Save, ) Click Events
private void newToolStripMenuItem1_Click(object sender, EventArgs e)
{
if (isChanged == true && currentFile == FileStatus.New)
{
DialogResult z = MessageBox.Show("Do you want to SAVE the current Pattern",
"Save Pattern", MessageBoxButtons.YesNoCancel);
if (z == DialogResult.Yes)
{
SaveMatrix();
NewMatrix();
}
else if (z == DialogResult.No)
NewMatrix();
}
else if (isChanged == true && currentFile == FileStatus.Open)
{
DialogResult z = MessageBox.Show("Do you want to SAVE the current Pattern",
"Save Pattern", MessageBoxButtons.YesNoCancel);
if (z == DialogResult.Yes)
{
SaveOpenMatrix();
NewMatrix();
}
else if (z == DialogResult.No)
NewMatrix();
}
else if (isChanged == false)
NewMatrix();
}
private void saveToolStripMenuItem1_Click(object sender, EventArgs e)
{
if (currentFile == FileStatus.New)
SaveMatrix();
else if (currentFile == FileStatus.Open)
SaveOpenMatrix();
}
private void saveAsToolStripMenuItem_Click(object sender, EventArgs e)
{
SaveMatrix();
}
private void openToolStripMenuItem1_Click(object sender, EventArgs e)
{
}
NewMatrix() method
private void NewMatrix()
{
UpdateMatrixCellSize();
currentFile = FileStatus.New;
isChanged = false;
this.Text = "MATPaint - ";
}
SaveMatrix() Method
private void SaveMatrix()
{
if (saveFileDialog1.ShowDialog() == DialogResult.OK)
{
string matrixCode = "";
matrixCode = dataGridView1.ColumnCount.ToString() + "," + dataGridView1.RowCount.ToString() + "\r\n";
int row = 0, col = 0, page = 0, z = 0;
for (page = 0; page <= dataGridView1.RowCount / 8; page++)
{
for (col = 0; col < dataGridView1.ColumnCount; col++)
{
for (row = 0; row < 8; row++)
{
if (dataGridView1.RowCount > (page * 8) + row)
if (dataGridView1.Rows[(page * 8) + row].Cells[col].Style.BackColor == Color.Black)
z = z + Convert.ToInt16(Math.Pow(2.0, row));
z += 0;
}
matrixCode = matrixCode + z.ToString() + ",";
z = 0;
}
matrixCode = matrixCode + "\r\n";
}
TextWriter tw = new StreamWriter(saveFileDialog1.FileName);
tw.Write(matrixCode);
tw.Close();
matrixFileName = saveFileDialog1.FileName;
isChanged = false;
currentFile = FileStatus.Open;
this.Text = "MATPaint - " + matrixFileName;
saveFileDialog1.FileName = "";
}
}
private void SaveOpenMatrix()
{
}
OpenMatrix() Method
private void OpenMatrix(string matrixFileNameToOpen = null)
{
bool readFile = false;
openFileDialog1.FileName = matrixFileNameToOpen;
if(matrixFileNameToOpen != null)
readFile = true;
else if (openFileDialog1.ShowDialog() == DialogResult.OK)
readFile = true;
if (readFile == true)
{
try
{
TextReader tr = new StreamReader(openFileDialog1.FileName);
string matrixCode = tr.ReadToEnd();
tr.Close();
string[] cellDataS = matrixCode.Split(new char[] { ',', '\r', '\n' }, StringSplitOptions.RemoveEmptyEntries);
int[] cellData = new int[cellDataS.Length];
int count = 0;
foreach (string s in cellDataS)
cellData[count++] = Convert.ToInt16(s);
int row = cellData[1], col = cellData[0], page = 0, z = 0;
count = 1;
dataGridView1.ColumnCount = col;
dataGridView1.RowCount = row;
bt_Clear_Click(this, EventArgs.Empty);
try
{
for (page = 0; page <= row / 8; page++)
for (col = 0; col < dataGridView1.ColumnCount; col++)
{
z = cellData[++count];
for (row = 0; row < 8; row++)
if (dataGridView1.RowCount > (page * 8) + row)
if ((z & Convert.ToInt16(Math.Pow(2.0, row))) > 0)
dataGridView1.Rows[(page * 8) + row].Cells[col].Style.BackColor = Color.Black;
}
}
catch { }
dataGridView1.ClearSelection();
matrixFileName = openFileDialog1.FileName;
isChanged = false;
currentFile = FileStatus.Open;
num_Col.Value = dataGridView1.ColumnCount;
num_Row.Value = dataGridView1.RowCount;
this.Text = "MATPaint - " + matrixFileName;
}
catch { MessageBox.Show("Cannot Read File", "File Read Error", MessageBoxButtons.OK, MessageBoxIcon.Error); }
}
}
Remembering Last State of Application: Another good feature which is seen in many commercial apps is the saving of status on close
and the app opens as it was closed. We used the built-in App Settings option in VS2012 (also in VS2010) to store and retrieve app settings like App Size,
Location, State, Matrix Size etc. The settings are retried during the Form_Load event and are saved in the Form_Closing event.
private void Form1_Load(object sender, EventArgs e)
{
this.Location = Properties.Settings.Default.appLocation;
this.WindowState = Properties.Settings.Default.appState;
this.Size = Properties.Settings.Default.appSize;
num_Col.Value = Properties.Settings.Default.MatCols;
num_Row.Value = Properties.Settings.Default.MatRows;
recent1toolStripMenuItem.Text = Properties.Settings.Default.Recent1;
recent2toolStripMenuItem.Text = Properties.Settings.Default.Recent2;
recent3toolStripMenuItem.Text = Properties.Settings.Default.Recent3;
}
private void Form1_FormClosing(object sender, FormClosingEventArgs e)
{
Properties.Settings.Default.appLocation = this.Location;
Properties.Settings.Default.appState = this.WindowState;
Properties.Settings.Default.appSize = this.Size;
Properties.Settings.Default.MatCols = Convert.ToInt16(num_Col.Value);
Properties.Settings.Default.MatRows = Convert.ToInt16(num_Row.Value);
Properties.Settings.Default.Recent1 = recent1toolStripMenuItem.Text;
Properties.Settings.Default.Recent2 = recent2toolStripMenuItem.Text;
Properties.Settings.Default.Recent3 = recent3toolStripMenuItem.Text;
Properties.Settings.Default.Save();
}
Saving the pattern as a PNG Image: Almost all controls in VS provide a method DrawToBitmap(), we used this method to generate a screenshot
of the Matrix Grid and then saved it using the SaveFileDialog.
private void imagePNGToolStripMenuItem_Click(object sender, EventArgs e)
{
Bitmap matrixPNG = new Bitmap(dataGridView1.Width, dataGridView1.Height);
dataGridView1.DrawToBitmap(matrixPNG, dataGridView1.ClientRectangle);
saveFileDialog1.Filter = "PNG Image File|*.png";
saveFileDialog1.Title = "Save PNG Screenshot";
if (saveFileDialog1.ShowDialog() == DialogResult.OK)
matrixPNG.Save(saveFileDialog1.FileName, System.Drawing.Imaging.ImageFormat.Png);
saveFileDialog1.Filter = "Matrix Pattern Files|*.maz";
saveFileDialog1.Title = "Save Pattern File";
saveFileDialog1.FileName = "";
}
Exporting the pattern as a HEX File (Binary Code): What good is a Dot-Matrix Pattern generator when it cannot produce hex code for micro-controllers
so we added a very simple hex generator which saves the Row/Column codes as Binary data rather than text.
private void binaryCodeHEXToolStripMenuItem_Click(object sender, EventArgs e)
{
    saveFileDialog1.Filter = "Binary Code File |*.hex";
    saveFileDialog1.Title = "Save Pattern Hex Code";
    if (saveFileDialog1.ShowDialog() == DialogResult.OK)
        using (FileStream hex = new FileStream(saveFileDialog1.FileName, FileMode.Create))
        {
            using (BinaryWriter writer = new BinaryWriter(hex))
            {
                int row = 0, col = 0, page = 0;
                byte z=0;
                for (page = 0; page <= dataGridView1.RowCount / 8; page++)
                    for (col = 0; col < dataGridView1.ColumnCount; col++)
                    {
                        for (row = 0; row < 8; row++)
                        {
                            if (dataGridView1.RowCount > (page * 8) + row)
                                if (dataGridView1.Rows[(page * 8) + row].Cells[col].Style.BackColor == Color.Black)
                                    z = Convert.ToByte(z + Math.Pow(2.0, row));
                            z += 0;
                        }
                        writer.Write(z);
                        z = 0;
                    }
                writer.Close();
            }
        }
    saveFileDialog1.Filter = "Matrix Pattern Files|*.maz";
    saveFileDialog1.Title = "Save Pattern File";
    saveFileDialog1.FileName = "";
}
Print preview and Printing of the Pattern: In the end, we just added the PrintDocument, PrintDialog and PrintPreview for one more feature, the print option is very crudely implemented and prints the screenshot capture of the Matrix control but for now, it seems to be working.
private void printPreviewToolStripMenuItem_Click(object sender, EventArgs e)
{
    printPreviewDialog1.Document = printDocument1;
    printPreviewDialog1.ShowDialog();
}
private void printToolStripMenuItem_Click(object sender, EventArgs e)
{
    if (printDialog1.ShowDialog() == DialogResult.OK)
        printDocument1.Print();
}
private void printDocument1_PrintPage(object sender, System.Drawing.Printing.PrintPageEventArgs e)
{
    Bitmap matrixPNG = new Bitmap(dataGridView1.Width, dataGridView1.Height);
    dataGridView1.DrawToBitmap(matrixPNG, dataGridView1.ClientRectangle);
    e.Graphics.DrawImage(matrixPNG, new Point(0,0));
}
Install Shield Setup Wizard and FileType Association: Last but not the least, to make an installer for the app, we opted to use a InstallShield Setup Project to our app and with some simple steps in a wizard the whole thing was ready, as a bonus we added FileType Association as well for .maz extension and added support for command line arguments so that our app opens the appropriate pattern when a .maz file is double clicked.
Task Specific Features
Matrix (Grid) Size: A matrix of any specified order between 1x1 and 32x32 can be generated by
NewMatrix() method, we kept it maximum at 32 cause after that the form repaint on screen was taking quite a lot of time making the app slow.
private void NewMatrix()
{
    dataGridView1.ColumnCount = Convert.ToInt16(num_Col.Value);
    dataGridView1.ColumnCount = Convert.ToInt16(num_Col.Value);
    dataGridView1.RowCount = Convert.ToInt16(num_Row.Value);
    for (int z = 0; z < dataGridView1.RowCount; z++)
        for (int y = 0; y < dataGridView1.ColumnCount; y++)
            dataGridView1.Rows[z].Cells[y].Style.BackColor = Color.White;
}
Matrix Cell Size: UpdateMatrixCellSize() method is used to set the size of grid cells. There are
four different sizes available for designing in addition to the Fill screen mode, where the cells are expanded to the corners of the window. This method is called whenever the user selects a different size type from the list or if Fill Screen is selected whenever the application form size is changed (checked by the
Form_Resize Event).
private void UpdateMatrixCellSize()
{
int RowHeight = 10, ColumnWidth = 10;
switch (cmbx_Grid.SelectedIndex)
{
case 0:
if (dataGridView1.RowCount > 0)
RowHeight = dataGridView1.Height / dataGridView1.RowCount;
if (dataGridView1.ColumnCount > 0)
ColumnWidth = dataGridView1.Width / dataGridView1.ColumnCount;
break;
case 1:
RowHeight = 12;
ColumnWidth = 12;
break;
default:
break;
}
for (int z = 0; z < dataGridView1.RowCount; z++)
dataGridView1.Rows[z].Height = RowHeight;
for (int z = 0; z < dataGridView1.ColumnCount; z++)
dataGridView1.Columns[z].Width = ColumnWidth;
}
Pattern Resize (change dimensions): Changing of the dimension of the matrix/grid is done by the following code. This also alerts the user when there
is a chance of loosing any data while reducing the size of the matrix.
int tmpCol = Convert.ToInt16(num_Col.Value);
int tmpRow = Convert.ToInt16(num_Row.Value);
if ((tmpCol < dataGridView1.ColumnCount) || (tmpRow < dataGridView1.RowCount))
{
    if (MessageBox.Show("The New Size is Smaller than current Size, some Clipping may occur, \nContinue ?",
          "Resize Warning", MessageBoxButtons.YesNo, MessageBoxIcon.Exclamation) == DialogResult.Yes)
    {
        dataGridView1.ColumnCount = tmpCol;
        dataGridView1.RowCount = tmpRow;
        UpdateMatrixCellSize();
        isChanged = true;
    }
}
Mirror / Flip / Rotate 90deg (CW and CCW) / Invert / Clear for complete Matrix:
Using simple algorithms features such as mirroring, flipping, clearing, inverting and rotating the pattern on the grid were implemented.
The rotate is only done when the matrix is square, i.e. Rows == Cols
Invert
for (int z = 0; z < dataGridView1.RowCount; z++)
    for (int y = 0; y < dataGridView1.ColumnCount; y++)
        if (dataGridView1.Rows[z].Cells[y].InheritedStyle.BackColor != Color.Black)
            dataGridView1.Rows[z].Cells[y].Style.BackColor = Color.Black;
        else
            dataGridView1.Rows[z].Cells[y].Style.BackColor = Color.White;
Clear
for (int z = 0; z < dataGridView1.RowCount; z++)
    for (int y = 0; y < dataGridView1.ColumnCount; y++)
        dataGridView1.Rows[z].Cells[y].Style.BackColor = Color.White;
Mirror
int x = dataGridView1.ColumnCount - 1;
for (int z = 0; z < dataGridView1.RowCount; z++)
    for (int y = 0; y < dataGridView1.ColumnCount / 2; y++)
    {
        Color temp = dataGridView1.Rows[z].Cells[y].Style.BackColor;
        dataGridView1.Rows[z].Cells[y].Style.BackColor = dataGridView1.Rows[z].Cells[x - y].Style.BackColor;
        dataGridView1.Rows[z].Cells[x - y].Style.BackColor = temp;
    }
Flip
int x = dataGridView1.RowCount - 1;
    for (int z = 0; z < dataGridView1.RowCount / 2; z++)
        for (int y = 0; y < dataGridView1.ColumnCount; y++)
        {
            Color temp = dataGridView1.Rows[z].Cells[y].Style.BackColor;
            dataGridView1.Rows[z].Cells[y].Style.BackColor = dataGridView1.Rows[x - z].Cells[y].Style.BackColor;
            dataGridView1.Rows[x - z].Cells[y].Style.BackColor = temp;
        }
Rotate 90 deg ( CW and CCW )
int x = dataGridView1.ColumnCount - 1;
Color[,] GridArray = new Color[dataGridView1.RowCount, dataGridView1.ColumnCount];
for (int z = 0; z < dataGridView1.RowCount; z++)
for (int y = 0; y < dataGridView1.ColumnCount; y++)
GridArray[z,y] = dataGridView1.Rows[z].Cells[y].Style.BackColor;
for (int z = 0; z < dataGridView1.RowCount; z++)
for (int y = 0; y < dataGridView1.ColumnCount; y++)
dataGridView1.Rows[z].Cells[y].Style.BackColor = GridArray[y, x - z];
for (int z = 0; z < dataGridView1.RowCount; z++)
for (int y = 0; y < dataGridView1.ColumnCount; y++)
dataGridView1.Rows[z].Cells[y].Style.BackColor = GridArray[x - y, z];
Pattern movement (Up/Down/Left/Right) with Roll across Edges
Pattern movement allow us either to shift the data on the grid or to rotate it across its edges in the Up/Down/Left/Right directions if the Roll Grid checkbox is checked.
This is done by this code, only code for UP and Right shifting is provided here as the Down and Left are quite similar to these.
UP SHIFT/ROLL
Color[] temp = new Color[dataGridView1.ColumnCount];
for (int y = 0; y < dataGridView1.ColumnCount; y++)
temp[y] = dataGridView1.Rows[0].Cells[y].Style.BackColor;
for (int z = 0; z < dataGridView1.RowCount - 1; z++)
for (int y = 0; y < dataGridView1.ColumnCount; y++)
dataGridView1.Rows[z].Cells[y].Style.BackColor = dataGridView1.Rows[z + 1].Cells[y].Style.BackColor;
if (cbx_GridRoll.Checked == true)
for (int y = 0; y < dataGridView1.ColumnCount; y++)
dataGridView1.Rows[dataGridView1.RowCount - 1].Cells[y].Style.BackColor = temp[y];
else
for (int y = 0; y < dataGridView1.ColumnCount; y++)
dataGridView1.Rows[dataGridView1.RowCount - 1].Cells[y].Style.BackColor = Color.White;
RIGHT SHIFT/ROLL
Color[] temp = new Color[dataGridView1.RowCount];
for (int x = 0; x < dataGridView1.RowCount; x++)
temp[x] = dataGridView1.Rows[x].Cells[dataGridView1.ColumnCount - 1].Style.BackColor;
for (int y = dataGridView1.ColumnCount - 1; y > 0; y--)
for (int x = 0; x < dataGridView1.RowCount; x++)
dataGridView1.Rows[x].Cells[y].Style.BackColor = dataGridView1.Rows[x].Cells[y - 1].Style.BackColor;
if (cbx_GridRoll.Checked == true)
for (int x = 0; x < dataGridView1.RowCount; x++)
dataGridView1.Rows[x].Cells[0].Style.BackColor = temp[x];
else
for (int x = 0; x < dataGridView1.RowCount; x++)
dataGridView1.Rows[x].Cells[0].Style.BackColor = Color.White;
Points of Interest
- Using Controls for things they are NOT designed for: We used the
DataGridView control as the base grid for our Matrix paint area and it worked out quite great, though usually DataGridViews are not used for painting purposes and are for data output to user in grid form. - Simple Features are sometimes NOT very simple: Though we are saying this cause we are beginners but the most time on the app was spent on the simple features we usually take for granted like Open/Save, File Association, etc.
- Goal of this Project was Learning C#: I think working on this app gave us a good practice of making a simple GUI Application and though the app may not seem to do much, much effort was put into it and the main goal was to add regular-app-features not make a complete pattern generator.
- Probably NOT the Best Practices: The code in this project may not be the BEST-PRACTICE code, but this is what gets the work done and doesn't go into the complexities which a beginner usually runs from as this is made by us who are very new to C# and GUI and VS.
GitHub Repository
The complete source code is available at GitHub as well and while it is unlikely that I will be updating the app in the coming months but I wish to add a few more things to this app and if time allows will keep on updating it there.
https://github.com/zaidpirwani/MatPaint
More Features to Add
A few more features/improvements that come to mind are
- Undo / Redo [Google searches show it is NOT going to be an easy task]
- Selection and Cut/Copy/Paste of Pattern
- Selection Movement
- Rectangle, Circle, Line etc Controls for drawing on pattern
- Font for writing Text
- Better Handling of Larger Matrix
- Sending Live Matrix Data via Serial to Hardware Matrix
- Animation Frames
- More Windows integration
- Making a completely-custom-control for Matrix-Grid
- ..... [the list can go on and on and on....]
Article Update
- Updated the project to .NET Framework 2.0.
Founded Ejaad, a Technology and Engineering consultancy Startup, based in Karachi, Pakistan.
Student at Industrial Electronics Engineering Student at IIEE-PCSIR, Karachi, Pakistan.
Freelance Web Developer and General Tech Support provider at Guru.com and Local Businesses
This member has not yet provided a Biography. Assume it's interesting and varied, and probably something to do with programming.


 General
  News
News  Suggestion
  Question
  Bug
Bug  Answer
  Joke
Joke  Praise
  Rant
Rant  Admin
Admin 


