
Day 42 of 100 Days of VR: Using the Daydream Controller with our FPS
5.00/5 (4 votes)
How to use the Daydream controller with our FPS
Here, we are on day 42! Yesterday, we officially finished incorporating VR into our simple FPS.
What’s next? There are 2 things that I have in my mind that we should do:
- Incorporate the Daydream control functionality
- Use Google’s Spatial Audio system that adjusts the sound from the game based off of the location of the player.
I’ve finally received my new S8 and Daydream Viewer so it’s time to learn how we can use it.
Note: It’s okay if you don’t have a Daydream compatible device or a controller, Google allows us to use our Android device like a Daydream Controller. However, make sure to read through everything before making changes or you might have trouble getting back the Google Cardboard controls.
I’ll be referencing Google’s official Daydream Controller support documentation which talks a lot about setting up the work environment along with the Daydream Controller API and this Stack Overflow thread on running the Daydream Controller on Unity.
Our objectives today are to:
- Learn how to use the Daydream Controller on Unity
- Learn how to use the prefabs associated with the Daydream controls
- Integrate Daydream Controller into our existing game
Today is going to be drawn out so let’s get started right away!
Step 1: Setting Up the Daydream Controller on Unity
The first thing we’re going to have to do is set up our Unity work environment to use the Daydream Controller.
Step 1.1: Setting Up the Unity Editor
The first thing we need to do is to add 2 more prefabs from Google into our hierarchy to support our controller.
- Add
GvrControllerMain, located in Assets/GoogleVR/Prefabs/Controller anywhere into our hierarchy - Add
GvrControllerPointeralso located in Assets/GoogleVR/Prefabs/ as a sibling to our Main Camera. Specifically, we would make it a child of ourPlayergame object
The GvrControllerMain prefab is used to capture the player’s inputs from the controller. The GvrControllerPointer prefab is the remote/arm/gun that the player will control that receives inputs from the GvrControllerMain.
Once we’re done, we should have something like this:
According to our documentation:

Now that we have our scene set up, we can move on to using our controller.
Step 1.2: Setting Up Our Controller
Now that we have everything set up in our game environment, we have a couple of ways to use our controller.
- We use our mouse to imitate our camera
- We use Google Instant Preview Controller Only Mode to allow us to stream data from our phone to Unity, this includes both the headset and the Daydream Controller.
For option 2, if you don’t have a Daydream phone handy, but have a spare, we can use Google’s mobile emulator to make our spare phone act as a controller.
To help make this more accessible to people, I’m going to use the first method, but if you’re following along and want to use one of the other methods, that would work just as well if not better!
The instructions on how to use the GvrControllerPointer (the remote) is all in GvrControllerMain. The only commands that we care about for our game are:
- Shift + Move Mouse = Move our controller
- Shift + Mouse Click = Button click
That’s it!
Important Point: Regarding moving our mouse. If we were to spin around, normally, our controller would follow us, however, in the Unity Editor, we can’t move our head and our controller at the same time. As a result, in our game, our controller might end up in weird positions that shouldn’t happen on the actual device. /End
Now if we were to try playing the game and use these commands, we would see that nothing happened. Why?
If we were to use our controller to look down, we’ll see that our controller does exist, it’s just further down than we thought.
We can fix this by going down and looking at the Gvr Arm Model component script that is attached to the GvrControllerPointer.

There are 2 things that I wanted to change:
- Disabled,
isDeactivatedWhenDisconnectedin the Gvr Tracked Controller Script so that we can see our controller even when we’re not holding shift down - Changed our Elbow Rest Position values to be the one above so that we can move the controllers to a different location, specifically in front of our player, the values being (0.2, -0.2, 0.4)
Once we’re done, we’ll have something like this:
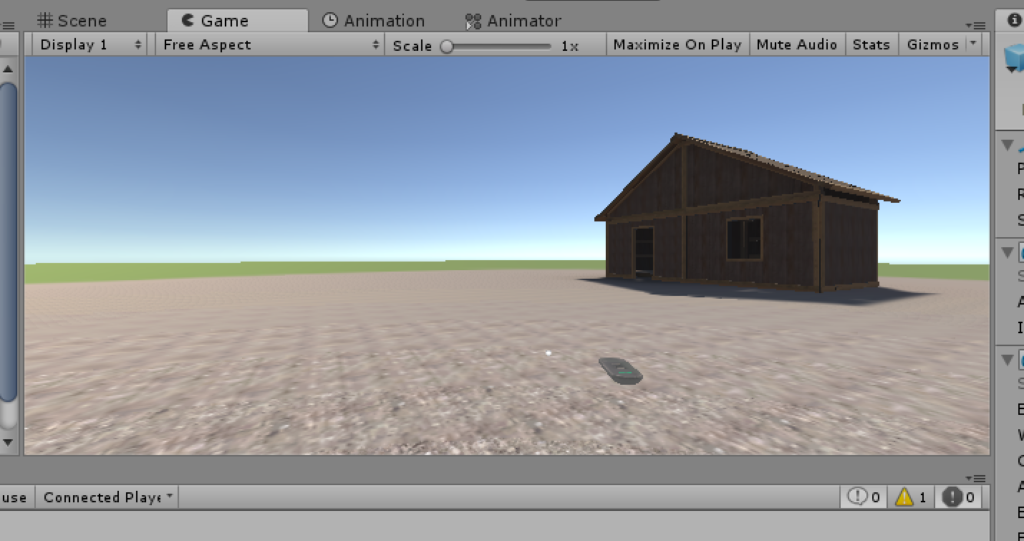
Now with the controller in and fully controllable, it’s time to start looking at how we can write code to interact with the controller.
Step 2: Exploring the Daydream Controller API
Now that our environment is setup correctly, it’s time for us to look at how to interact with the controllers. Here’s Google Controller API Basics documentation that we’ll be referencing.
Looking at the code, our main point of contact with our controller is a static class called GvrController, which we can see in their example:
void Update() {

  // Example: get controller's current orientation:
  Quaternion ori = GvrController.Orientation;

  // If you want a vector that points in the direction of the controller
  // you can just multiply this quat by Vector3.forward:
  Vector3 vector = ori * Vector3.forward;

  // ...or you can just change the rotation of some entity on your scene
  // (e.g. the player's arm) to match the controller's orientation
  playerArmObject.transform.localRotation = ori;

  // Example: check if touchpad was just touched
  if (GvrController.TouchDown) {
    // Do something.
    // TouchDown is true for 1 frame after touchpad is touched.
  }

  // Example: check if app button was just released.
  if (GvrController.AppButtonUp) {
    // Do something.
    // AppButtonUp is true for 1 frame after touchpad is touched.
  }

  // Example: check the position of the user's finger on the touchpad
  if (GvrController.IsTouching) {
    Vector2 touchPos = GvrController.TouchPos;
    // Do something.
  }
}
Looking at the GvrController class itself, we’ll see that:

We’ll see that GvrController has been obsoleted by GvrControllerInput.
Looking at the documentation, its usage is still the same. It’s a singleton object that we should only use once in our scene.
Everything I want to say is the same, but without going through the whole documentation, I think the most important thing we should look at is:
ClickButton– Returns aboolthat tells us if we’re currently holding down our daydream controller button or not.
There are some other nifty functions, but in terms of our gameplay, I don’t think they’re needed, however, if you’re serious in developing for the Daydream, it wouldn’t hurt to look at the controller APIs and familiarize yourself with what’s available.
Step 3: Changing the FPS to Use the Daydream Controller
Now that we’ve taken a quick peek at what’s needed to work with the Daydream Controller, it’s time to add it to our game.
Luckily for us, many things have already been handled for us. I want to say the 2 biggest things we must change are:
- Replace the
ControllerVisualgame object with our machine gun. - See how we would integrate the
ControllerAPI with our game.
Step 3.1: Changing the Remote Controller Prefab with our Gun
Looking at the ControllerVisual game object, notice something?
The game object is just a mesh with the exception of the GvrControllerVisual script which only provides visual feedback for the daydream controller.
If we recall, its parent: GvrControllerPointer and the GvrArmModel script is what helps move our hand.
By taking advantage of the parent moving, the child would also move with it.
What this means is that we can make our machine a child game object of our GvrControllerPointer and we should be able to do the same thing with our remote controller.
- Hit Ctrl + D on
MachineGun_00located in Player > Main Camera in our game hierarchy. - Move the duplicated copy to be a child of
- Disable our original
MachineGun_00game object so we won’t have 2 guns floating around. - Disable the
ControllerVisualgame object, we don’t want to have both controller and gun. - I assume we have already, but if not, disable the
GvrReticlePointerwhich is a child of our Main Camera this would be our dot in the middle of the screen, but now that we’re using the Daydream Controller, we don’t need to use our gaze reticle anymore
When we’re done, we should have something like this in our game hierarchy:
Now we have the gun on our screen, but when we try to play it, we’ll see that the gun is too close to the player like our remote controller previously was.
I had to play around with the Position of the GvrControllerPointer and I was finally able to get a good location that looks like where our gun is normally.
Here’s what I used:
- At
GvrControllerPointer, go to the Gvr Arm Model (Script) component and keep everything the same, except change ourZposition to be2.
Unfortunately, I was not able to get an image of my gun model following the reticle as I move it, but you’re going to have to take my word for it.
With this change in, we have everything that’s needed to play the game.
In fact, if we play it, most of the game will already work! The only part is our game over and victory UI.
That was easy!
It was this easy because we have a lot of our existing Cardboard setup!
I refer us back to what’s needed for our controller support and here’s what prefab we need:
GvrControllerMain– Controls our controller’s states (button press, orientation, etc.) and allows us to read it. Added today.GvrControllerPointer– Our controller that we use in the game. Added today.GvrEventSystem– A replacement to allow the user to use the daydream and gaze controller with Unity’s event system, that fires events (click, hover) from those two control sources. Already had.
Scripts we need to add:
GvrPointerPhysicsRaycaster– Needed to account for raycasting for VR. Attached to the Main CameraGvrPointerGraphicRaycaster– Needed for us to interact with canvas elements. Will be added.
Not to mention the changes we applied to our game itself to get everything working.
I believe the best way to summarize how everything fits together is that: GvrControllerMain feeds information about our Daydream controller to our GvrControllerPointer, which via Google’s GvrPointerPhysicsRaycaster or GvrPointerGraphicsRaycaster override, our GvrEventSystem would emit events to whatever we’re interacting with so that we can use Unity’s event system with our VR toolkit.
Step 3.2: Making Raycasting Work on our UI
Before, I mentioned that everything worked except for our game over panels that we worked on. That’s okay, we can fix this quite easily!
The reason why we weren’t able to click on the buttons with our UI is for 2 reasons:
- Our Canvas Group component was set to not block raycasts.
- We need to add
GvrPointerGraphicRaycasterto the UI element, so we can interact with it.
These will be a relatively simple fix.
In Assets/Prefabs, we want to update both our Victory and GameOver prefabs.
In both prefabs, we want to pretty much do what I described above:
- Go to the Canvas Group component and check Blocks Raycast. This will allow us to interact with the UI
- Click Add Component and look for the
GvrPointerGraphicRaycasterto add to the prefab. Make sure you don’t accidentally chooseGvrPointerPhysicsRaycaster! - Disable the no longer needed Graphic Raycaster (Script)
Technically, I don’t know why this worked in the Google Cardboard, because it shouldn’t, maybe I did put it in, forgot to mention it, and then disappeared…
Anyways, the important part is that it’s in now!
When we’re done, we should have something like this:
Once you did this to both prefabs, our game will be ready to go!
Step 3.3: Setting Up to Play
Now we’re in the final part, we want to deploy our app to our phone.
Everything is the same as we had been doing before, the only change we need to do is to change our Player Settings to run our settings.
One important to mention: I’ve previously updated my Unity to the latest version. As a result, in our Player Settings, our VR settings are now all in XR Settings.
The only thing we must do is:
- In XR Settings (or previously in Other Settings), we would select our Virtual Reality SDK to be Daydream.
- Move Daydream to the top to have it take priority or just remove the Cardboard SDK.
- In Other Settings, change the Minimum API Level to be 24 for Daydream support.
When we’re done, here’s what we’ll have:
Conclusion
It’s been awhile since I wrote such a long post! I bet you’re surprised that we finished using the Daydream controller all in one day!
There was a lot of playing around and exploring with the Daydream Controller and all the other nifty features that are available to it.
We went through quite a bit today. We:
- Set up our game to use the Daydream Controller
- Investigated the
GvrControllerInputAPI for us to read information of our controller - Re-integrate the controller into the rest of our game
However, there is one thing we forgot about! Setting the UI on our gun! Because we made a duplicate of our gun, we haven’t changed some of our other scripts to use the duplicated UI instead of the old one!
Tomorrow, we’re going to fix this. I also want to look at the final major feature that we haven’t touched yet: Spatial Audio!
I don’t know how this will play out, but it’s going to be useful in building a good VR experience!
Day 41 | 100 Days of VR | Day 43
The post Day 42 of 100 Days of VR: Using the Daydream Controller with our FPS appeared first on Coding Chronicles.