Contents
Introduction
The main idea of writing this series of article is to discover more features about Angular2 and .NET CORE Framework such as:
- Create a RestFul Server using WebApi v2
- Using Entity Framework for .NET Core to reverse engineering an existing database
- Manipulate Angular2 Material Design to build HTML templates
- Create Single Page web application using Angular2
- Create components, services and classes in Angular2
- Using rooting system in Angular2
- Using cookies in Angular2
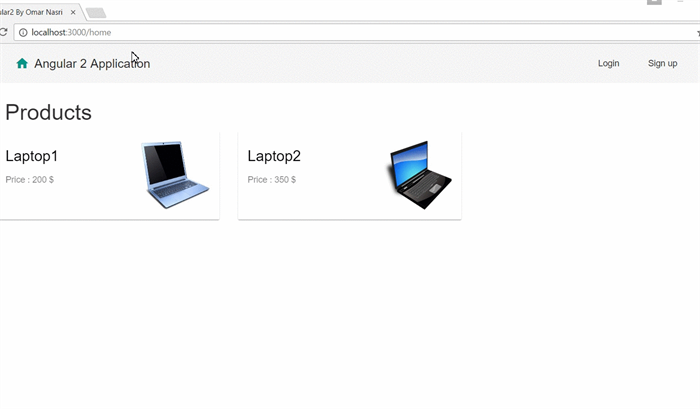
At the end of this article, you will have a web application for management product, it will be composed by a back-office interface (in which you can manage product) and front-office (used to : present available products, login and Signup), you can see the final demo below:
This application can be improved in future releases by:
- adding a search filter
- adding pagination system
- improving input-validation
- adding a cart system
and more features.
In this article, I relied on the following links:
Background
To better understand this article, it is recommended to have good knowledge about:
- programming in C#
- SQL language
- Entity Framework
- Visual Studio Code
Prerequisites
Using the Code
A) Setup ASP.NETCore MVC Project
You can find more about how you can set up ASP.NET Core application through this link:
B) Setup DataBase
1) Create Database
I used SQL Server 2014 to locally host my database.
Our database will contain the following entities:
- p_users: used to preserve information about registered users such as:
email: to store email addresspwd: to store password
Only email field is used as primary key.
- p_product:
id (auto-increment, used as primary key): unique identifier of productprice (number)title (text): name of productfulldescription (text): a complete description of productpicture (text): image is stored into Base64 format
The following steps will help you to prepare your database:
- Create a database named ‘
ProductsDataBase’ - Execute the following SQL Script:
create table p_users(
email varchar(250) primary key,
pwd varchar(250),
);
create table p_product(
id int identity(1,1) primary key,
price int,
title varchar(250),
fulldescription varchar(max),
picture varchar(max),
)

set IDENTITY_INSERT p_product on
2) Using Entity Framework Database Approach
In this section, you need to do reverse engineering to import model of your existing database. To ensure that, you should follow the steps below:
- Navigate to the root folder of your application,
- Import required dependencies and tools: to do that, you should configure the project.json by:
- Adding the following dependencies:
"Microsoft.EntityFrameworkCore":"1.0.0",
  "Microsoft.EntityFrameworkCore.SqlServer": "1.0.0",
  "Microsoft.EntityFrameworkCore.SqlServer.Design": "1.0.0",
  "Microsoft.EntityFrameworkCore.Tools": {
    "version": "1.0.0-preview2-final",
    "type": "build"
  },
- Adding tools:
"Microsoft.EntityFrameworkCore.Tools": {
     "version": "1.0.0-preview2-final",
     "imports": [
       "portable-net45+win8+dnxcore50",
       "portable-net45+win8"
     ]
   }
- Using cmd.exe, navigate to project root and:
dotnet -restore
- Start the reverse engineering, to load the model for your existing database:
dotnet ef dbcontext scaffold  "Data Source=LFRUL-013;
Initial Catalog=ProductsDataBase;Integrated Security=True"
Microsoft.EntityFrameworkCore.SqlServer -o Models/DataBase
C) Setup Restful WebApi
Create a controller inside controller folder named ‘ServicesController’ that will contain the following endpoints:
api/Services/Login:
- verify if user is registered or not.
api/Services/Subscription:
- create a new user into
p_users entity.
api/Services/GetProducts:
- return list of available products from
p_product entity.
api/Services/AddProduct:
- add a new product into
p_product entity
Among the operations done by the current service, we have the transformation image process, that transforms a given image data into base64 format which will be stored into database.
api/Services/DeleteProduct:
Delete an existing product from database using url parameter (id).
[EnableCors("AllowOrigin")]
[Route("api/Services/")]
public class ServiceController : Controller
{
private ProductsDataBaseContext _context;
public ServiceController(ProductsDataBaseContext context)
{
UserModel userModel = new UserModel();
_context = context;
}
[HttpGet]
[Route("Hello")]
public string Hello(){
return "Hello";
}
[HttpPost]
[Route("Login")]
public HttpResponseMessage Login([FromBody]UserModel model){
var elem = _context.PUsers.Where(p=> p.Email == model.login &&
p.Pwd == model.pwd).FirstOrDefault();
if((elem != null)){
return new HttpResponseMessage(HttpStatusCode.OK);
}else{
return new HttpResponseMessage(HttpStatusCode.InternalServerError);
}
}
[HttpGet]
[Route("LogOut")]
public HttpResponseMessage LogOut(){
return new HttpResponseMessage(HttpStatusCode.OK);
}
[HttpPost]
[Route("Subscription")]
public HttpResponseMessage Subscription([FromBody]UserModel model){
var newUser = new PUsers(){Email = model.login, Pwd = model.pwd };
_context.PUsers.Add(newUser);
_context.SaveChanges();
return new HttpResponseMessage(HttpStatusCode.OK);
}
[HttpGet]
[Route("GetProduct")]
public IEnumerable<ProductModel> GetProduct(){
return _context.PProduct.Select(p=> new ProductModel(){
id = p.Id,
title = p.Title,
fullDescription = p.Fulldescription,
price = p.Price,
picture = p.Picture
}).ToList();
}
[HttpPost]
[Route("AddProduct")]
public HttpResponseMessage AddProduct(){
string pictureInBase64 = "";
if (Request.Form.Files.Count > 0)
{
var formFile = Request.Form.Files[0];
var stream = formFile.OpenReadStream();
byte[] oFileBytes = new byte[stream.Length];
stream.Read(oFileBytes, 0, oFileBytes.Length);
string result = Convert.ToBase64String(oFileBytes);
pictureInBase64 = "data:image/jpg;base64,"+ result;
}
var newProduct = new PProduct(){
Title = Request.Form["title"],
Fulldescription = Request.Form["fullDescription"],
Price = Convert.ToInt32(Request.Form["price"]),
Picture = pictureInBase64,
};
_context.PProduct.Add(newProduct);
_context.SaveChanges();
return new HttpResponseMessage(HttpStatusCode.OK);
}
[HttpDelete]
[Route("DeleteProduct")]
public void DeleteProduct(int id){
var product = new PProduct(){Id = id};
_context.Attach(product);
_context.Entry(product).State = EntityState.Deleted;
_context.SaveChanges();
}
}
To run server, you should write the following command into CMD console:

If the compilation is successfully done, you can try to reach any endpoint to check if the server is running well:
In the next article, you will learn how to build a full Angular 2 application from scratch.
References
History
- v1 29th January, 2017: Initial version
Microsoft certified professional in C# ,HTML 5 & CSS3 and JavaScript, Asp.net, and Microsoft Azure.


 General
  News
News  Suggestion
  Question
  Bug
Bug  Answer
  Joke
Joke  Praise
  Rant
Rant  Admin
Admin 


 ,
,