
A Little Bit of Fun with Face Detection in Windows Phone 8
This is a fun and short tutorial to try face detection on Windows Phone using FaceDetectionWP8 library.
To Start Off
If anybody is actually looking for Face Detection Libraries for Windows Phone and haven't tried this one, this is for them. It's a neat library popping off facedetecionwp7 library by Julia Schwarz. And you can do pretty cool stuff with it with pretty less hassle.
Let's Have A Little Fun
Let's go ahead and get ourselves started with a Windows Phone 8 Project. Our job would be to try this library and detect faces in a picture and have some fun with it, say overlay the face with the classic troll face with the laugh. :P

Now, no matter what that sounds like, let's give it a shot. I've jotted down a very simple GUI to do this one. And it's as follows:

If you want to have a closer look at the XAML, it will look like the following:
<Grid x:Name="LayoutRoot" Background="Transparent">
        <Grid.RowDefinitions>
            <RowDefinition Height="Auto"/>
            <RowDefinition Height="*"/>
        </Grid.RowDefinitions>


        <!--TitlePanel contains the name of the application and page title-->
        <StackPanel x:Name="TitlePanel" Grid.Row="0" Margin="12,17,0,28">
            <TextBlock Text="Face Detection in Windows Phone"
            Style="{StaticResource PhoneTextNormalStyle}" Margin="12,0"/>

        </StackPanel>

        <!--ContentPanel - place additional content here-->
        <Grid x:Name="ContentPanel" Grid.Row="1" Margin="12,0,12,0">
            <Button x:Name="CaptureImageButton" Content="Capture Image"
            HorizontalAlignment="Center" Margin="0" VerticalAlignment="Top"
            Width="267" Click="CaptureImageButton_Click"/>
            <Image Name="facesPic" HorizontalAlignment="Center"
            Height="388" Margin="0,170,0,0"
            VerticalAlignment="Top" Width="427"/>
        </Grid>

    </Grid>
Now, you can definitely see that this is a very basic UI. We have a Button with a click event CaptureImageButton_Click and a Image named facesPic.
Now, before we get our hands dirty, let's go ahead and add a reference to a library we will need. We will need WritableBitmapEx from here. This lib is already available on Nuget too, so you can get it from there too.
After you added that in your project reference, you will need a bunch of libraries from FaceDetectionWP8 to make these things work. You can get the classes there from the following link too.
After you download the .zip, unzip it and include all the classes inside in your project. I added them under a separate folder named FaceDetector.
Let's move to our MainPage.xaml.cs.
Now, the first thing to do is to pick a picture and the best thing to use for that is PhotoChooserTask . Let's hook up the following snippet in CaptureImageButton_Click event.
private void CaptureImageButton_Click(object sender, RoutedEventArgs e)
{
    PhotoChooserTask photo = new PhotoChooserTask();
    photo.Completed += new EventHandler<PhotoResult>(photoChooserTask_Completed);
    photo.ShowCamera = true;
    photo.Show();
}
Now, the next thing to write is definitely photoChooserTask_Completed event handler. Let's go ahead and write it. First thing to do would be to get the chosen photo into a WritableBitmap as we are going to make some changes on it.
if(e.TaskResult==TaskResult.OK)
{
    BitmapImage SourceBitmap = new BitmapImage();
    SourceBitmap.SetSource(e.ChosenPhoto);
    WriteableBitmap SourceWritableBitmap = new WriteableBitmap(SourceBitmap);
}
Now, the next thing we need to do is downsample the image a bit as most of the Windows Phone devices pack a pretty powerful camera and often the pictures are oversampled. I personally suggest you downsize the image a bit too. I didn't do it in this demo but if you want a faster performance, you really should try that too. I added the following code segment inside the if block.
byte[] downsampledImage = new byte[SourceWritableBitmap.PixelWidth /
_downsampleFactor * SourceWritableBitmap.PixelHeight / _downsampleFactor];

Utils.DownSample(SourceWritableBitmap.ToByteArray(), SourceWritableBitmap.PixelWidth, SourceWritableBitmap.PixelHeight, ref downsampledImage, _downsampleFactor);

SourceWritableBitmap = SourceWritableBitmap.FromByteArray(downsampledImage);
The code segment is pretty straight forward here now. The Utils class here is from the FaceDetectionWP8 library. The first argument for Utils.DownSample used here is a Byte Array of the SourceWritableBitmap and it used the WritableBitmapEx we added here before. The second one is the width of the source bitmap and the third one is the height. The last argument passed here is the downsample factor. This was defined as the following in the MainPage class.
int _downsampleFactor = 2;
And then the SourceWritableBitmap is reinitialized with a downsampled version of its own.
The next thing to do would be getting the faces detected of course. :D So, why wait? I added the following sinppet for that.
List<FaceDetector.Rectangle> faces = new List<FaceDetector.Rectangle>();
faces = _detector.getFaces(SourceWritableBitmap, 2f, 1.25f, 0.1f, 1, false, true);
I used the defaults here except the last argument that determines whether it should detect multiple faces and I kept it true. You can have fun with the other params if you want to tweak your haar cascade detection parameters here.
Here comes the fun part, now we are going to replace the face/faces in the picture with the troll laugh picture. :P. We can see it returns the faces as a List<FaceDetector.Rectangle>. All we have to do now is paint the Troll laugh in the rectangles returned by the method. Fun, huh?
Now, before replacing the Source Image with the Troll Laugh, we need to load it in another WritableBitmap so we can blend both of them.
StreamResourceInfo MaskImageSri = Application.GetResourceStream
(new Uri("Images/Troll.png", UriKind.Relative));
BitmapImage MaskImageBitmap = new BitmapImage();
MaskImageBitmap.SetSource(MaskImageSri.Stream);

WriteableBitmap MaskWritableBitmap = new WriteableBitmap(MaskImageBitmap);
As we got our Troll.png, why don't we paste it on the source bitmap?
foreach (var r in faces)
{
   int x = Convert.ToInt32(r.X);
   int y = Convert.ToInt32(r.Y);
   int width = Convert.ToInt32(r.Width);
   int height = Convert.ToInt32(r.Height);

   System.Windows.Rect destRect = new Rect(x, y, width, height);
   System.Windows.Rect srcRect = new Rect(0, 0, MaskWritableBitmap.PixelWidth, MaskWritableBitmap.PixelHeight);

   SourceWritableBitmap.Blit(destRect, MaskWritableBitmap, srcRect);

}
   SourceWritableBitmap.Invalidate();
   facesPic.Source = SourceWritableBitmap;
Now, this is pretty straight forward too. All we need is we iterated over the faces and we created two separate rect structs. One is from the MaskWritableBitmap so we can get the rect of the portion of the image we are pasting, in this case, the full one and the destination rect is the face rectangle on the source image we are pasting this troll laugh on.
The next thing to do is invoke Blit() method as this one is responsible to blend these two WritableBitmaps. It comes with the WritableBitmapEx library we added before. The first parameter is the destination rectangle where the source rectangle will be pasted. In this case, the face rectangle that will be replaced by the troll laughter image. The second parameter would be the WritableBitmap where the rect that would be posted in the source is found. Here this one is the Troll Image and the last one is the rect in the Troll Image that would be transferred to the main bitmap.
We called it on SourceWritableBitmap as we want to paste the troll Laugh on it. And when all is said and done, we set facesPic source to the SourceWritableBitmap.
Now, all we have to do is build and test the app. And the result is as follows:
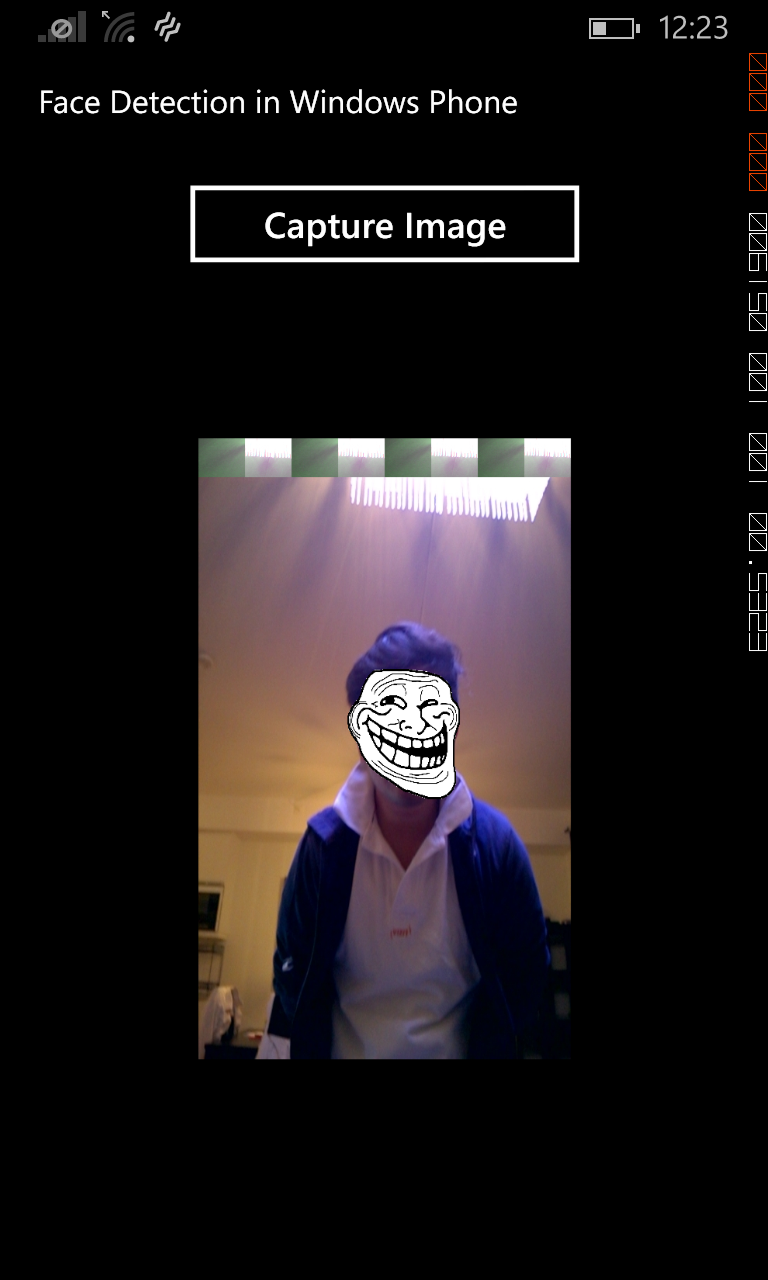
So, what are you waiting for? Test the demo project above the article and have fun!