
Flexibly use vector icons in WPF without other class library
4.93/5 (6 votes)
This article gives you a choice on using the vector icons (such as the icons from icomoon.io,etc) in WPF without other class library
Introduction
This article gives you a choice on using the vector icons (such as the icons from icomoon.io,etc) in WPF without other class library.You can control the icon's color and size flexibly without distortion.
Feel free to download the code and see what it is in detail.
Background
SVG icons contain a path element which will be used in this tutorial.Although some other articles also mention this way,we want to flexibly control the size and color the icon presents in control just like we do in HTML.
Using the code
First of all,we should have some icons to be dealed with.
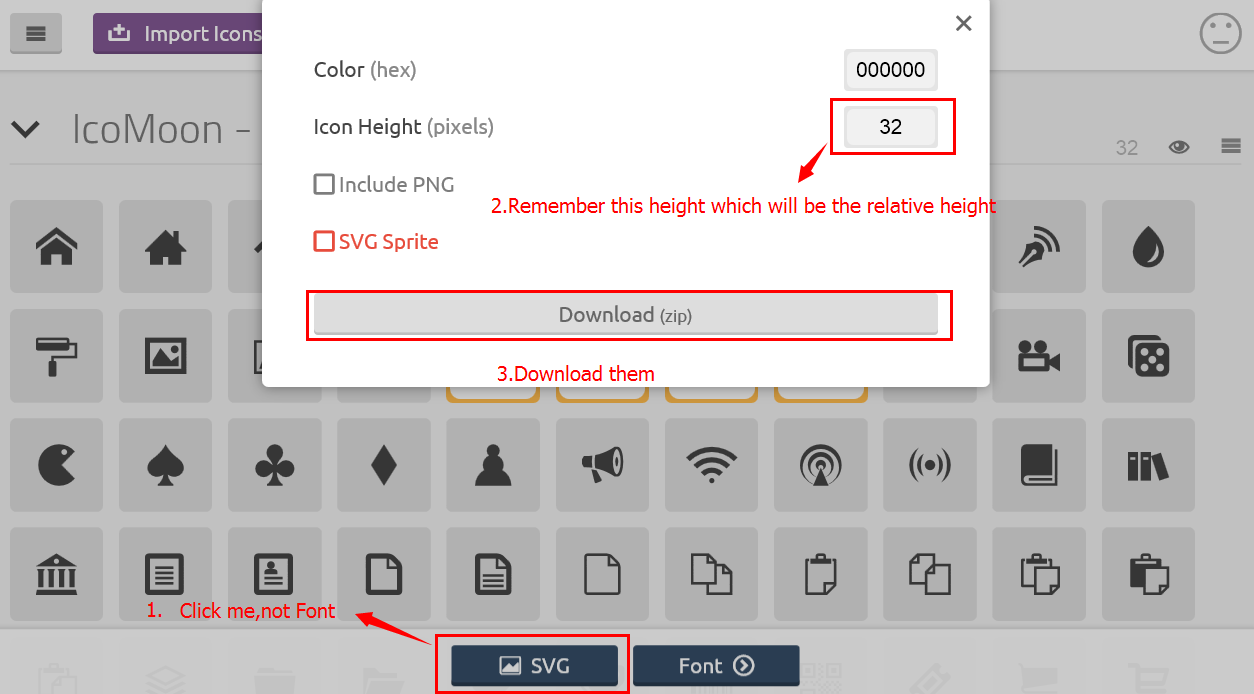
Go to Icomoon.io or other sites and select the icons you want.(Remember not to download them in a whole font,they should be seperated svg files downloaded in a package.
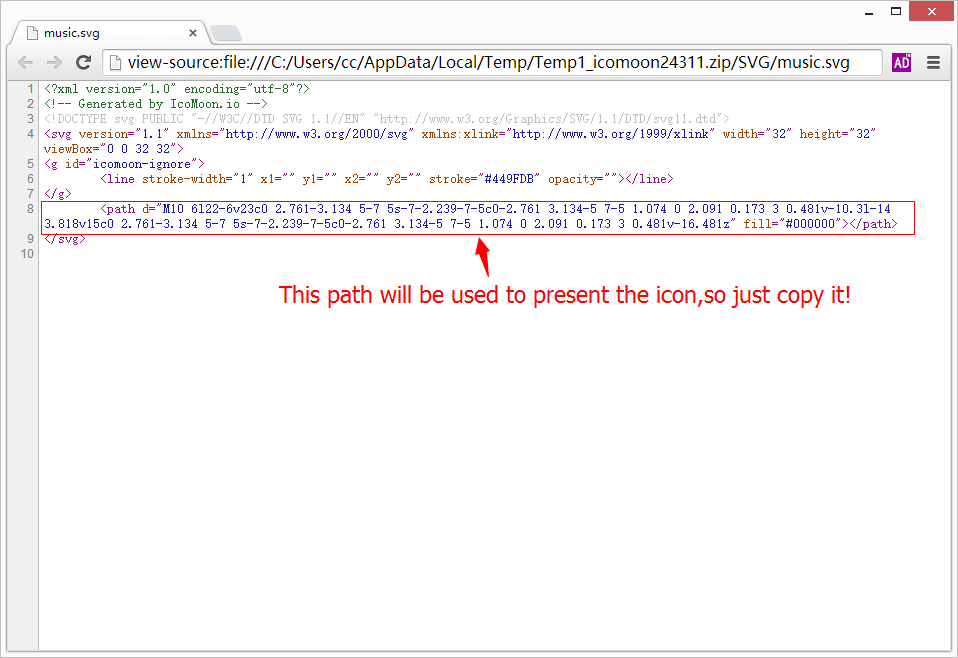
Now we can open the svg icon file in our browser.Right click and open the source of the web page.
Then what we are going to do is in Visual Studio.
Say we are gonna make a Button based on this vector icon,we need to add a new template for Button.
Here is my template
     <ControlTemplate TargetType="Button" x:Key="VectorIconButton">
            <Border Height="32" Width="32">
                <Border.LayoutTransform>
                    <ScaleTransform ScaleX="{Binding RelativeSource={RelativeSource TemplatedParent}, Path=Width, Converter={StaticResource Size2ScaleConverter }}" ScaleY="{Binding RelativeSource={RelativeSource TemplatedParent}, Path=Height,Converter={StaticResource Size2ScaleConverter }}"/>
                </Border.LayoutTransform>
                <Path x:Name="refreshPath" Fill="{Binding RelativeSource={RelativeSource TemplatedParent},Path=Foreground}" Data="M36.627 28.787l15.373-11.453c1.773-1.773 1.773-3.56 0-5.333l-15.373-11.453c-0.481-0.347-1.080-0.547-1.72-0.547-1.613 0-2.907 1.252-2.907 2.801v5.199c-15.467 0.040-28 12.56-28 28 0 15.468 12.573 28 28.067 28 14.387 0 26.241-10.787 27.88-24.68 0.013-0.040 0.053-0.467 0.053-0.653 0-1.467-1.2-2.667-2.68-2.667h-6.72c-2.2 0-3.867 1.52-4.093 2.787-1.293 6.773-7.267 11.88-14.44 11.88-8.12 0-14.695-6.56-14.695-14.667 0-8.081 6.533-14.627 14.628-14.667v5.2c0 1.547 1.293 2.8 2.907 2.8 0.64 0 1.239-0.199 1.72-0.547z" HorizontalAlignment="Center" VerticalAlignment="Center" />
           </Border>
        </ControlTemplate>
Remember that we write down the icon height in first picture? We set the Border element's width and height to this.My icon height is 32.
Inside the Border element is that path we copy the data from the browser source code.(In source ,it's 'd:' and in WPF its name is 'data:' that store the path data.) We fill it with the binding Foreground color of the TemplatedParent ,which allows us to change this icon(Icon Button)'s color.
Now let's introduce the magic part of dynamicaly sizing this icon(Icon Button).
I add a LayoutTransform element to change the <Border>to the actual width and height by using ScaleTransform.
Let's have a look:
- Our icon's width and height are both 32 pix.
- The border element's width and height are also set to 32 pix.
So if we set the ScaleTransform's ScaleX and ScaleY to 1,then the actual height and width properties are 32pix.
If we set the ScaleTransform's ScaleX and ScaleY to 2,then the actual height and width properties are 64pix.
We should assign Width an Height properties in design time,you can see that ScaleTransform element can receive these properties from bindings.Then we can make some calculation to convert the DesignTime width and height to bind ScaleX and ScaleY.
For example,If we set the Button's Width and Height to 100pix in DesignTime,then we should let ScaleX and ScaleY be 100/32 to resize the <Border> element to fit the size. We need a converter to do this.
Here is my Converter:
  public class Size2ScaleConverter : IValueConverter
    {
       public object Convert(object value, Type targetType, object parameter, CultureInfo culture)
       {
           var newValue = (double)((double)value / 32);//this is converted for assigning the ScaleX and ScaleY

           return newValue;
       }
       public object ConvertBack(object value, Type targetType, object parameter, CultureInfo culture)
       {
           return value;
       }
   }
Just add a staticResource Converter before the Button Template(Code order is important because it maybe cause some loading problems)
<YourNameSpace:Size2ScaleConverter x:Key="Size2ScaleConverter "></YourNameSpace:Size2ScaleConverter >
Magic happens!
You can set any ForeGround and Width,Height to control this Vector Icon Button .
Enjoy it.