
How to Run Docker Container using AWS Elastic Container Service
5.00/5 (2 votes)
An overview of AWS Elastic Container Registry (ECR) and Elastic Container Service (ECS)
Introduction
If you're into programming, you've clearly heard of Docker. Docker is an open source containerization framework. It allows developers to package applications in containers - standardized executable components that combine application source code with the operating system (OS) libraries and dependencies needed to run that code in any environment. Amazon also has container launch and storage solutions are Elastic Container Registry(ECR) and Elastic Container Service (ECS). In this article, I will show you how to create your own container, upload it to the repository and run it.
Create an Image Container
First, let's create our own container. For demonstration, I'll be using an EC2 instance on Ubuntu. The instance must have Docker installed and run the command:
nano DockerFile
For our example, we use the approach httpd on Amazon Linux. Next, write code (Image 1):
FROM amazonlinux

RUN yum -y update

RUN yum -y install httpd

RUN echo 'Hello World from ECR! This is version 1' > /var/www/html/index.html

CMD ["/usr/sbin/httpd","-D","FOREGROUND"]

EXPOSE 80

Next, let's compile the image and run the command:
docker build -t hello-world-app .
Do not forget about write dot after -app.
Next, to check that it is present in our images, run the docker images command (Image 2) .

As we can see, you have two new images created. This completes the first step. Let's open to the AWS Management Console and then to the ECR service, then go to the Repositories tab and click Create repository (Image 3).

Here, we need to enter the name of the repository and create a private one. I want to note that Amazon has restrictions on private public repositories and be careful not to exceed the limit. Next, we will go to the repository and as we see that it is impossible to simply upload our image to the repository. Moreover, we do not have even a button. Next, click the View push commands button and see the commands that Amazon offers us (Image 4).
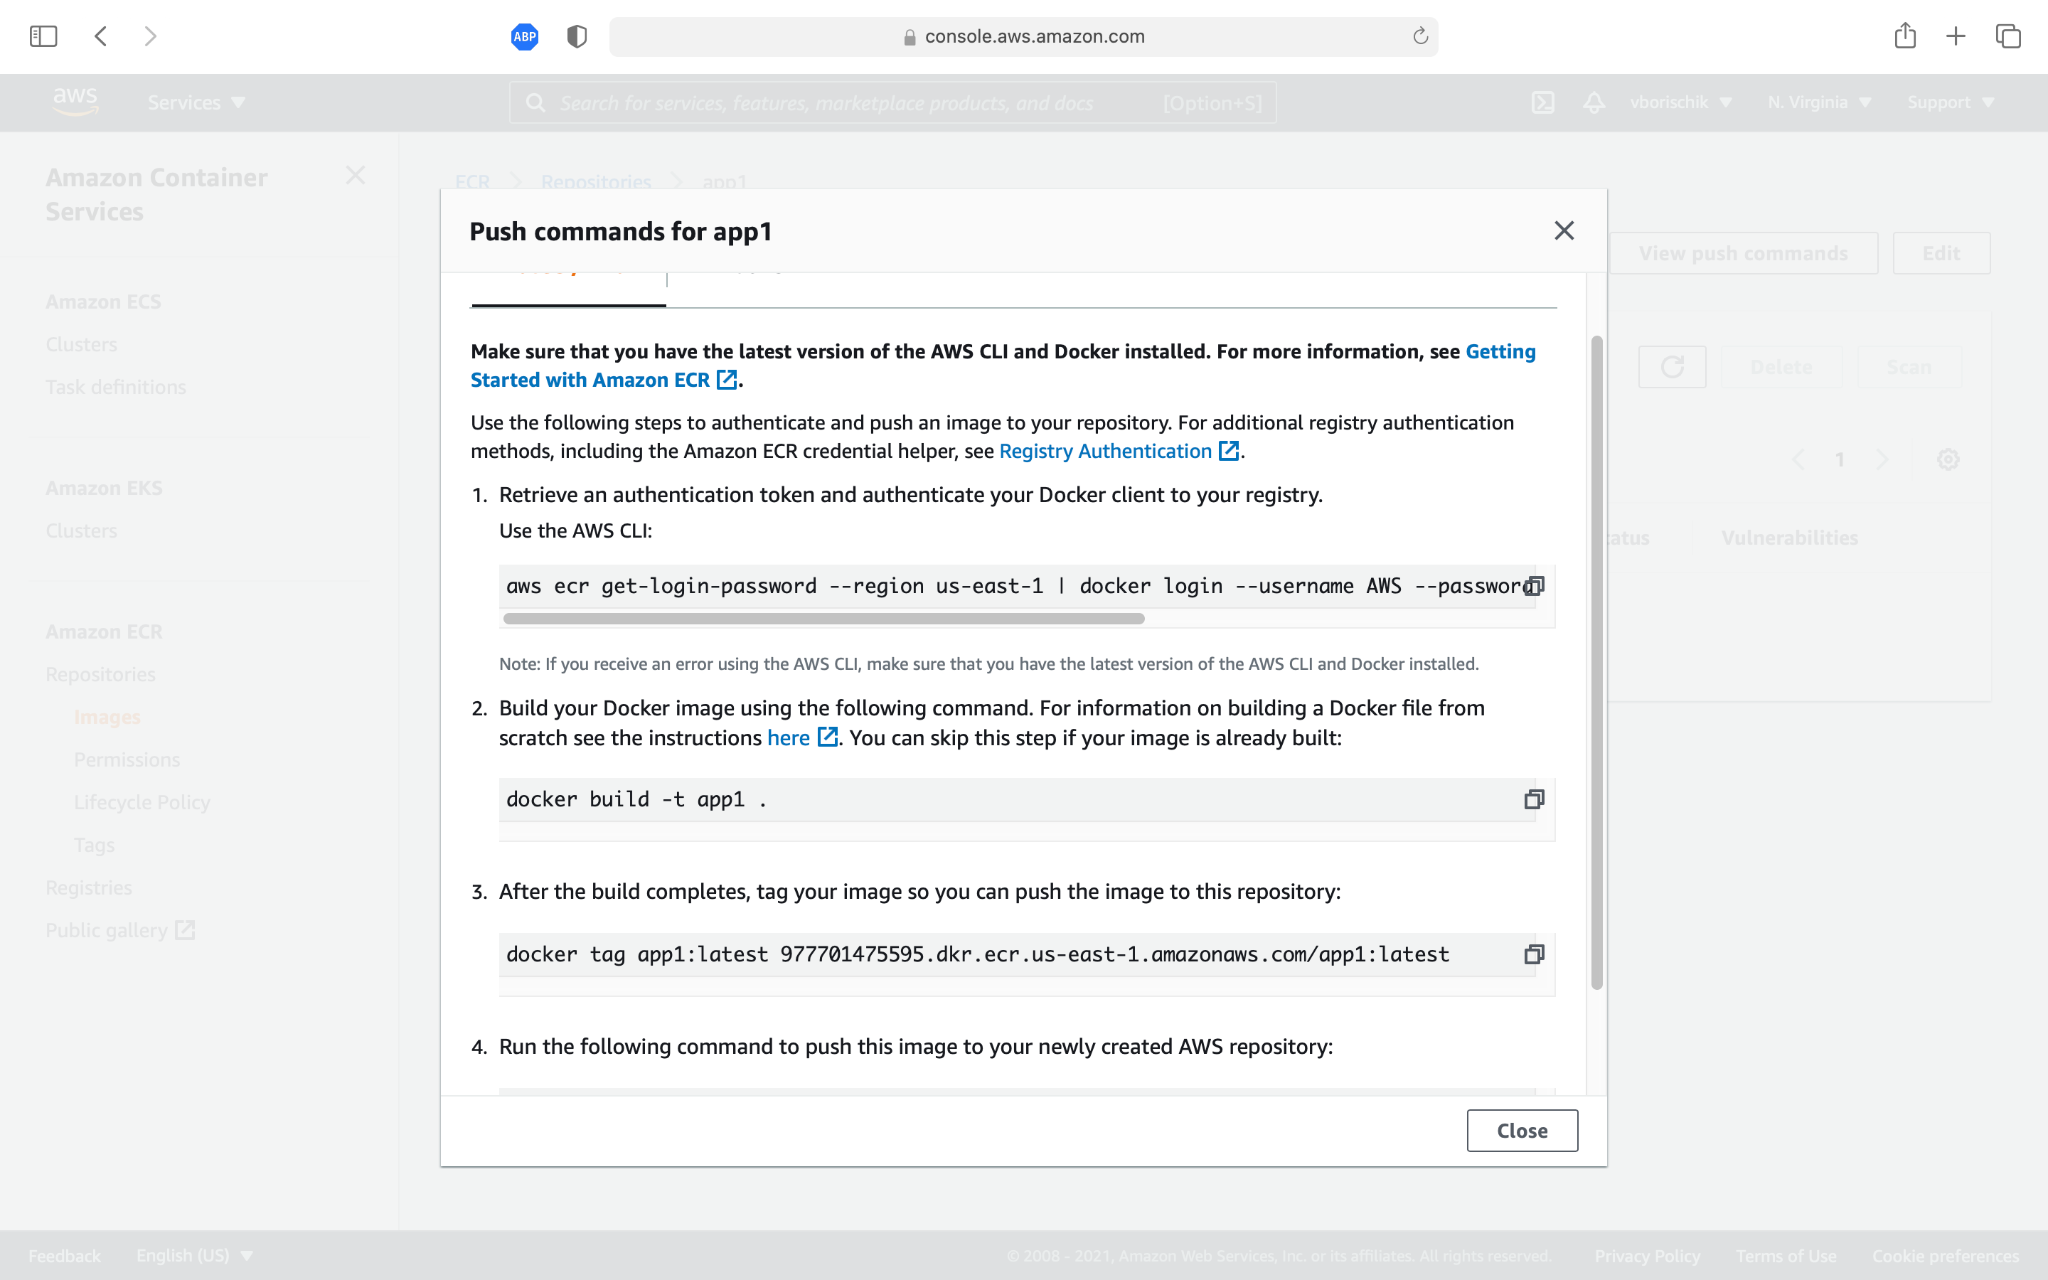
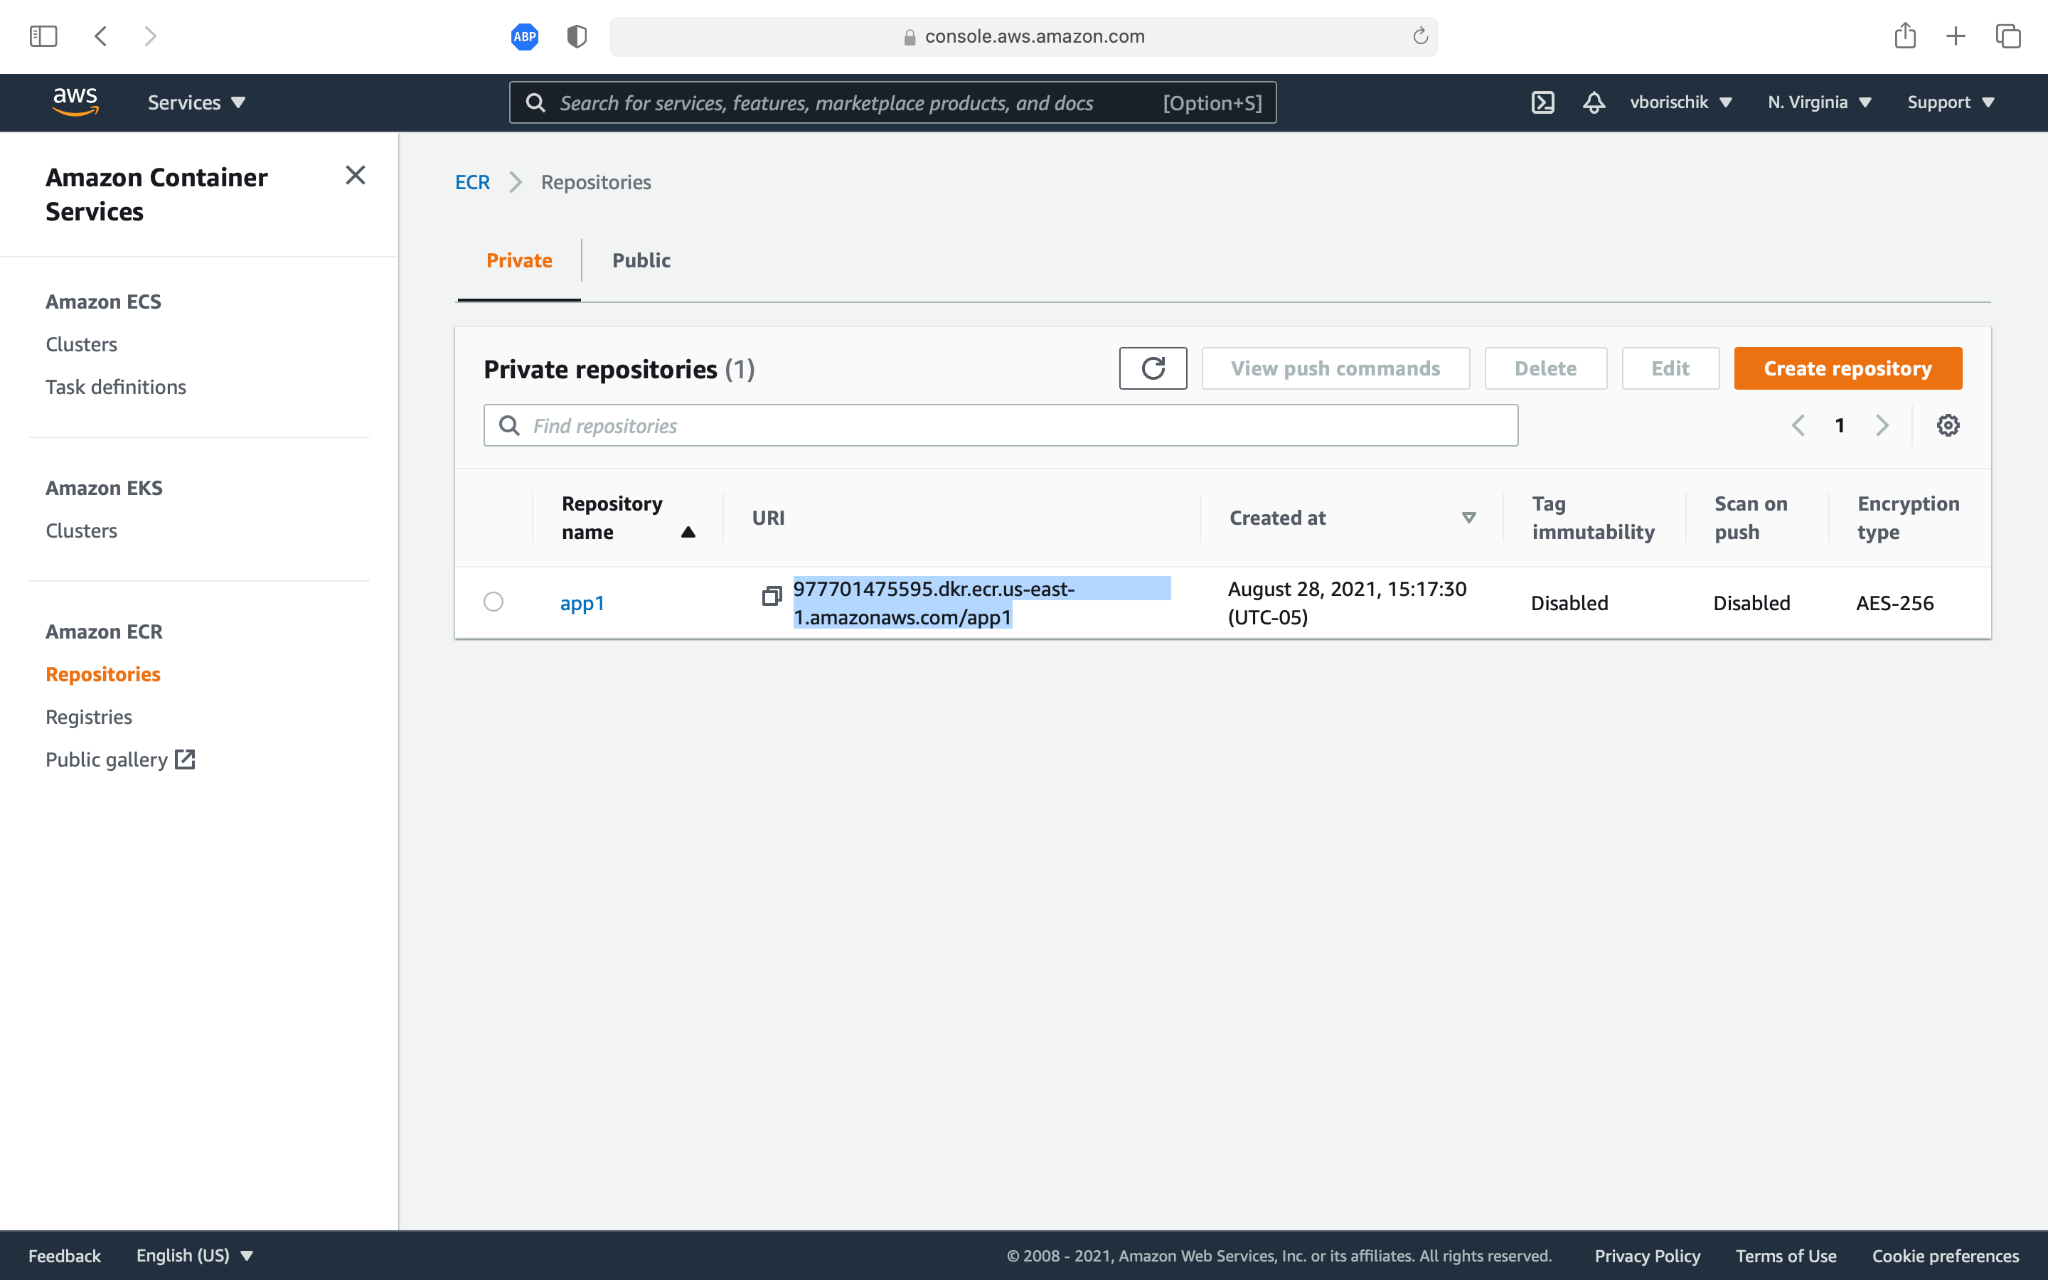
These commands are for the old version of the CLI, but I am going to show you how to use a much simpler command. Next, we need to rename our image to the name that AWS suggests to us. Let's copy this freak name (Image 5).
Next, go to our terminal and run the command:
docker tag hello-world-app:latest 977701475595.dkr.ecr.us-east-1.amazonaws.com/app1:v1
You can see it in image 6.

Next, as I described earlier, we will run a command that will send our image to the repository. To do this, run the aws configure command and enter the Access key id and Secret access key. Next, we will install the region in which you have deployed the repository (Image 7).

To do this, you need to log in by entering the command:
aws ecr get-login --no-include-email --region us-east-1
Then, we will receive an unusual answer (Image 8). Let's copy it and run it (Image 9).


Using the command from View push commands:
docker push 977701475595.dkr.ecr.us-east-1.amazonaws.com/app1:v1
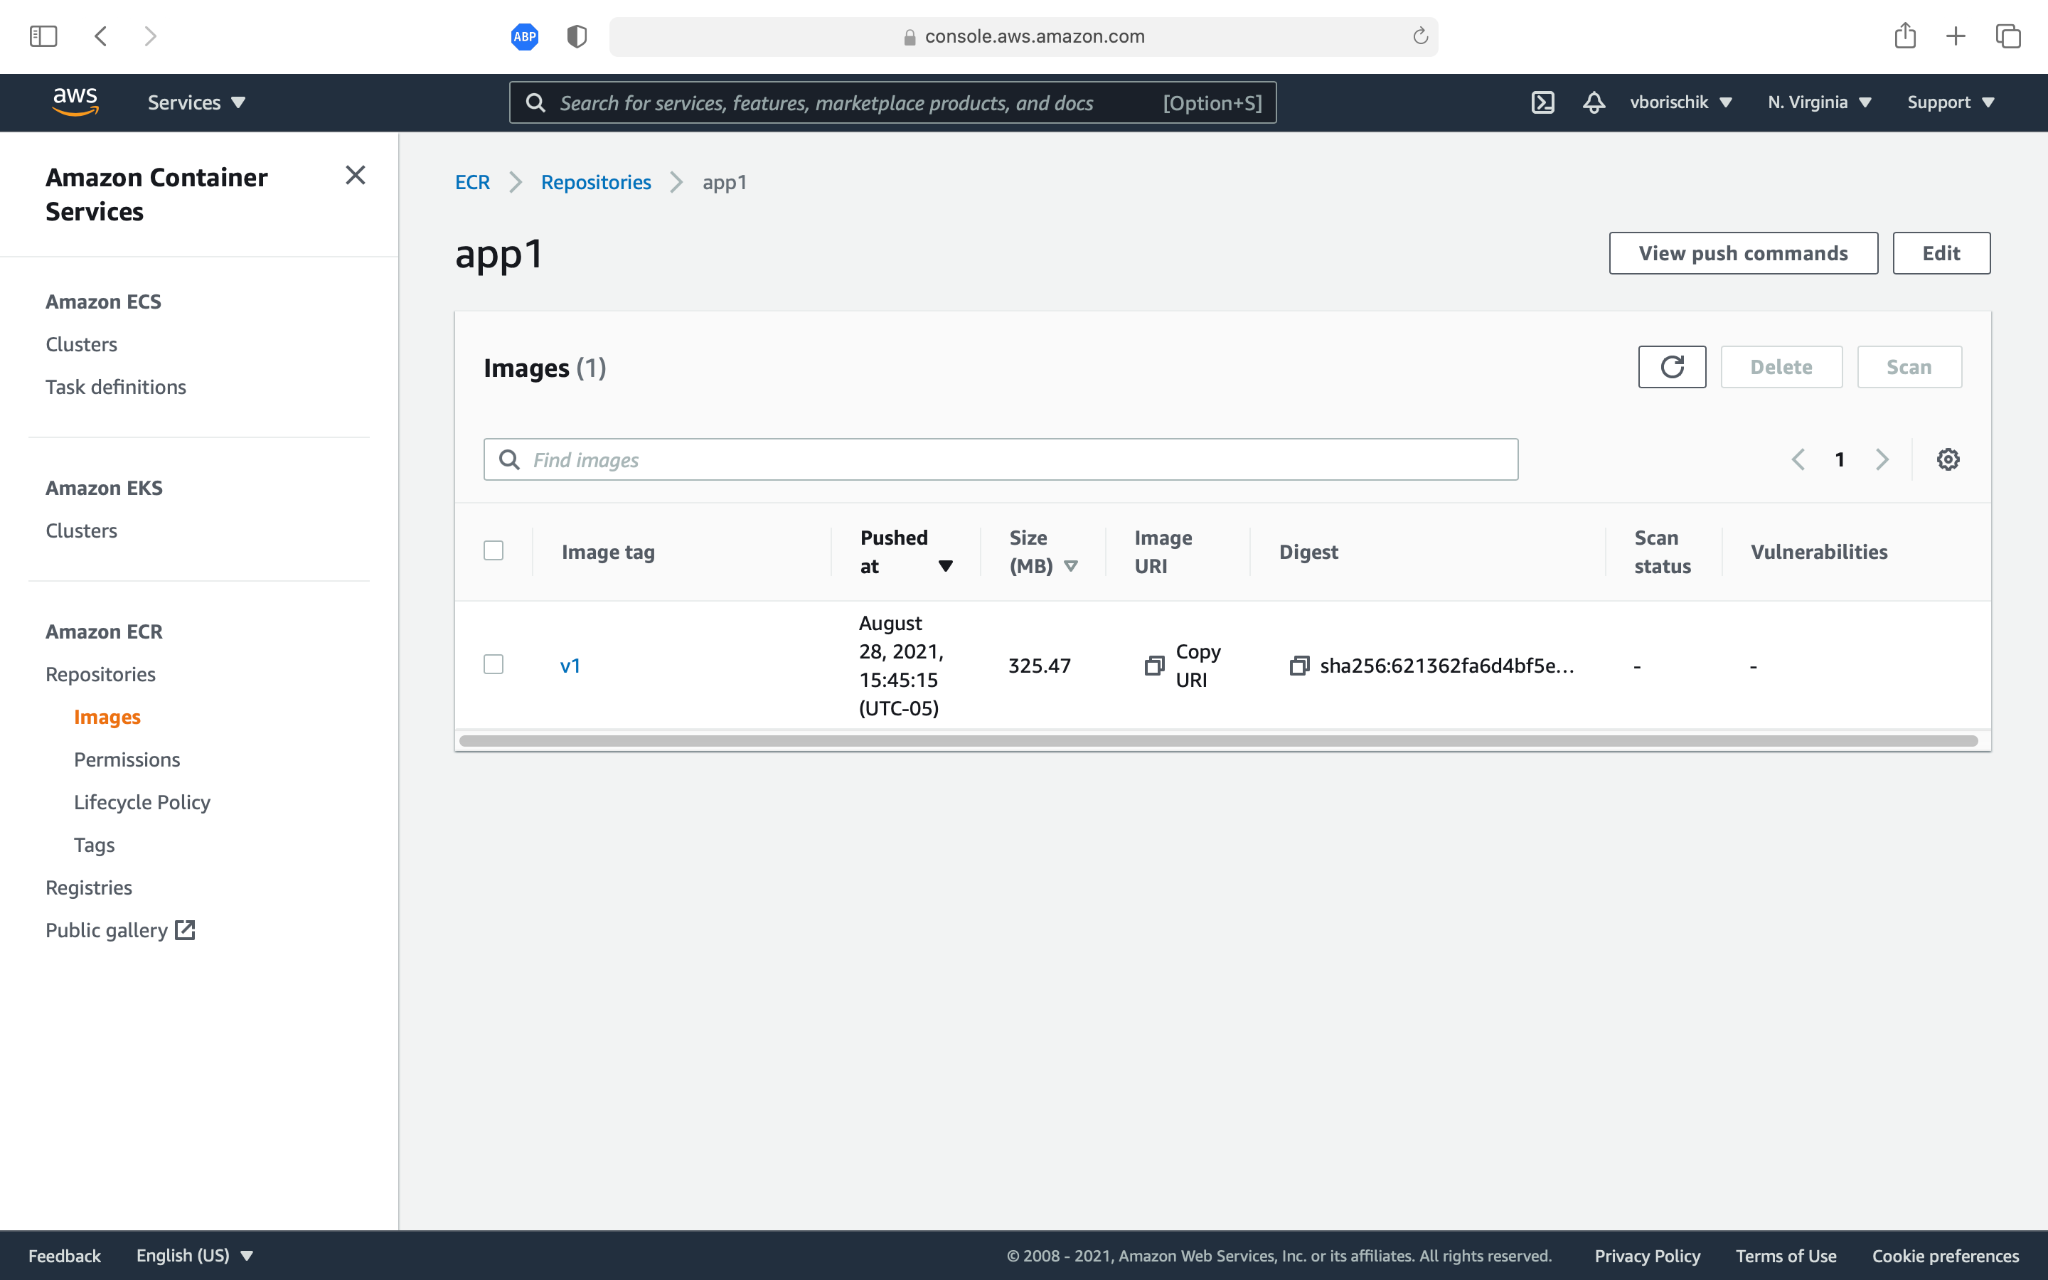
Let's send our image to the repository. After that, we can open AWS Management Console and see our container in ECR sevice (Image 10).
Create a Task Definition and Cluster
In order to deploy our repository, let's go to ECS and create a new Task Definition (Image 11).

Then choose EC2 type (Image 12).

Next, let's give a name and add a container. Next, give a name to the container and specify a repository. To do this, go to ECR and copy the URI, then leave everything as default and click Create (Image 13).

Next, to run the Task Definition, we need to create a new cluster. Choose a Cluster and then tap on Create Cluster button (Image 14).

Then, select the type of cluster EC2 linux+Networking (Image 15).

Next, enter a name for the container and select the number of instances (Image 16).

This action takes a certain amount of time. Let's wait until our resources are created.
Next, add the container to the cluster. To do this, go to the Tasks tab in the cluster, select Run new Task. Here, we select the name of our Task and select Revision (Image 17).

The new Task has been created. Next, we can check its work for this, go to the Task properties and find the Network bindings item, and there, we will find the External Link, by clicking on which we will receive the response from our container (Images 18,19).


As you can see, our container has started.
Conclusion
In conclusion, I showed how to create your own Docker container, then place your own container in the Elastic Container Registry , and then run it on Elastic Container Service. As you can see, this is not a very complicated process as it might seem at first glance, and now everyone, after reading this article, can do the same.
History
- 29th August, 2021: Initial version