
Building Angular Reusable Components using ng-template, ngTemplateOutlet & ngTemplateOutletContext
0/5 (0 vote)
Learn how to create reusable components
Introduction
Recently, I was working on an interesting but very common problem in my project that motivated me to write this article.
The problem was like that, I had a re-usable data-table dumb component that I wanted to share across my app and the requirement was to make it configurable from its parent component. That is, the parents can configure its rows’ template and decide what the HTML of each cell should look like. It turned out Angular being an awesome framework, already provides us the right tools using which we can easily solve such types of problems.
What were the tools? 😕

Well, ng-template, ngTemplateOutlet, and ngTemplateOutletContext were the tools that helped me in creating my reusable component. I will be using these to demo the component.
Goal
The goal is to make a reusable component that can be shared across the app and is highly configurable by the parent component.

Steps
Create DataTable Component
Firstly, create a shared component that will be shared in various components.
The DataTable component will take three inputs, one for binding headings, one for binding row data, and one that will take the template of each column. The one taking an array of TemplateRef is important. Because it is the one which will be used for configuring the style and template of each column by the parent.
Let’s have a look into the component class of DataTable.
import { Component, Input, TemplateRef } from '@angular/core';

@Component({
    selector: 'app-data-table',
    templateUrl: './data-table.component.html',
    styleUrls: ['./data-table.component.scss']
})
export class DataTableComponent{

    @Input() rowData : any[];
    @Input() colsTemplate: TemplateRef<any>[];
    @Input() headings: string[];
}
Nothing fancy here, just some dummy input properties.
Next, create a template to bind these properties.
<table class="table">
    <tr>
        <th *ngFor="let heading of headings">
            {{heading}}
        </th>
    </tr>
    <tr *ngFor="let row of rowData">
        <td *ngFor="let col of colsTemplate">
            <ng-template [ngTemplateOutlet]="col" [ngTemplateOutletContext]="{data:row}">
            </ng-template>
        </td>
    </tr>
</table>
This template is the place where the real magic happens. ngTemplateOutlet is used to bind the template as will be passed/configured by the parent component. ngTemplateOutletContext is used to bind the scope of row data to the template that will be specified by the parent.
😅That was all required to make a shared component. Next, let’s see how to use this component in a parent component.
Create Employee Component
Now, create a component that will supply all the required inputs to the DataTable component.
import { Component, OnInit, ViewChild, TemplateRef } from '@angular/core';

@Component({
    selector: 'app-employees',
    templateUrl: './employees.component.html',
    styleUrls: ['./employees.component.scss']
})
export class EmployeesComponent implements OnInit {

    employees = [
        {
            id: 1,
            name: 'Scott',
            designation: 'Dev',
            exp: 4
        },
        {
            id: 2,
            name: 'Billy',
            designation: 'QA',
            exp: 3
        },
        {
            id: 3,
            name: 'Frank',
            designation: 'Lead',
            exp: 8
        },
        {
            id: 4,
            name: 'Alan',
            designation: 'Manager',
            exp: 10
        },
    ];

    headings = [
        'Id',
        'Name',
        'Designation',
        'Experience'
    ];

    @ViewChild('id', { static: true }) id;
    @ViewChild('name', { static: true }) name;
    @ViewChild('des', { static: true }) des;
    @ViewChild('exp', { static: true }) exp;

    cols: TemplateRef<any>[] = [];

    ngOnInit(): void {
        this.cols.push(this.id, this.name, this.des, this.exp);
    }
}
For simplicity, the data to be shown is hard-coded. The important thing to notice here is, there is an array of TemplateRef and four different references of templates are being pushed to the array. The big picture will be cleared upon seeing the template HTML.
<h3 class="text-center text-secondary">Employees</h3>

<app-data-table [rowData]="employees"
[colsTemplate]="cols" [headings]="headings">
</app-data-table>

<ng-template #id let-data="data">
    <span class="badge badge-dark">{{data.id}}</span>
</ng-template>

<ng-template #name let-data="data">
    <span class="badge badge-success">{{data.name}}</span>
</ng-template>

<ng-template #des let-data="data">{{data.designation}}</ng-template>
<ng-template #exp let-data="data">
    <div class="progress">
        <div class="progress-bar bg-info" role="progressbar"
        [ngStyle]="{'width' : data.exp*10 + '%'}" aria-valuemin="0"
            aria-valuemax="10">{{data.exp}} years</div>
    </div>
</ng-template>
Well, there are four different ng-template that is used to define the template of different columns(‘Id’,’Name’,’Designation’, ‘Experience’). These templates are being referenced in the component class and stored in an array and are passed as an input to the colsTemplate property of DataTable. let-data is the context that will be passed by DataTable itself. So all the control to create the styling of each column is still possessed by the employee component and the DataTable component is doing the job of rendering columns in the data table.
Let’s see another component (address) that will also use the same DataTable component but this time address component will define the templates of columns as per its requirement.
Create Address Component
This time TemplateRef array is not required to be declared in the component, it will be directly passed from the HTML template to the input property of DataTable.
import { Component } from '@angular/core';

@Component({
    selector: 'app-address',
    templateUrl: './address.component.html',
    styleUrls: ['./address.component.scss']
})
export class AddressComponent {

    addresses = [
        {
            name: 'Scott',
            country: 'Germany'
        },
        {
            name: 'Billy',
            country: 'Mexico'
        },
        {
            name: 'Frank',
            country: 'Canada'
        },
        {
            name: 'Alan',
            country: 'Sweden'
        }
    ]

    headings = [
        'Name',
        'Country'
    ];
}
This component is merely containing anything except for the headings and the data.
<h3 class="text-center text-secondary">Address</h3>

<div class="d-flex justify-content-center">
    <div class="w-50 text-center">
        <app-data-table [rowData]="addresses" [colsTemplate]="[name,country]"
                        [headings]="headings">
        </app-data-table>
    </div>
</div>

<ng-template #name let-data="data">
    <div class="border-primary text-primary">{{data.name}}</div>
</ng-template>
<ng-template #country let-data="data">
    <span>🏠 {{data.country}}</span>
</ng-template>
How cool was that 😃? Declared two ng-template for two columns and are directly passed to the colsTemplate input property.
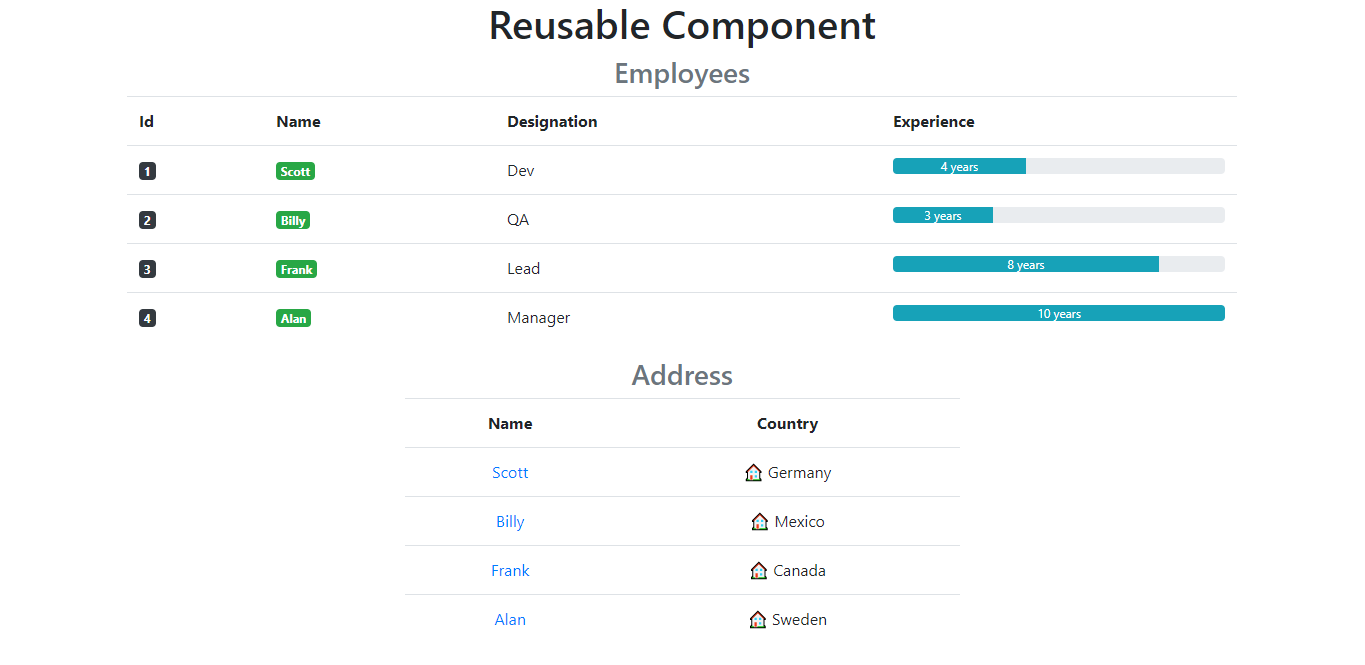
The App
Let’s see how the final product looks:
Source Code
If you like, you can browse the complete source code on GitHub.
Happy coding!! 😃
History
- 13th October, 2020: Initial version