
Setting up Windows 10 IoT Core on Raspberry Pi 2 B
4.83/5 (5 votes)
This tip describes configuration options on Windows 10 IoT Core on Raspberry Pi 2 B
Introduction
In this tip, I will describe what configuration options are provided by Windows 10 IoT Core.
Background
This post is one of a series of posts which I wrote about development applications for Windows 10 IoT Core. To see all my posts, please visit my introduction article: Introduction to Windows 10 IoT.
Config.txt Settings
To read more about config.txt values, you can read the official documentation.
First thing that you can set up is config.txt on SD card of your device. Initial config looks like this:
gpu_mem=32                  # set ARM to 480Mb DRAM, VC to 32Mb DRAM
framebuffer_ignore_alpha=1  # Ignore the alpha channel for Windows.
framebuffer_swap=1          # Set the frame buffer to be Windows BGR compatible.
disable_overscan=1          # Disable overscan
init_uart_clock=16000000    # Set UART clock to 16Mhz
hdmi_group=2                # Use VESA Display Mode Timing over CEA
arm_freq=900
arm_freq_min=900
force_turbo=1
This config will result in output video in format 1360 x 768 @60Hz.
block starting with "arm_freq" is simply disabling ARM power management and dynamic frequency changes on Raspberry pi, and setting default frequency to 900Mhz. (Without this, your raspberry will run on 600Mhz because dynamic frequency changes are not implemented in Windows yet.)
Setting Up Screen Resolution
I needed full HD resolution on my display, so I use this additional setting in config (you just add these lines to config and restart device)
hdmi_drive=2
hdmi_mode=82
by hdmi_drive=2 I set it to DMT (Display Monitor Timings; the standard typically used by monitors)
by hdmi_mode=82 I set resolution to 1920x1080 @60Hz (1080p)
If you want to read more about supported resolution, you can find a very useful article here.
I have tested more of different settings and I ended up for now with this setting, since I do not need sound it is OK for me.
You can of course play with these settings and find out which resolution best fits your requirements.
To set correct display resolution, you need to change these three settings:
| hdmi_group | result |
| 0 | Auto-detect from EDID |
| 1 | CEA |
| 2 | DMT |
Based on hdmi group, you can choose hdmi_mode (different modes are available for group 1 and group 2, you cannot choose hdmi_mode when hdmi_group is 0).
hdmi modes available for group 1
| hdmi_mode | resolution | frequency | notes |
| 1 | VGA (640x480) | ||
| 2 | 480p | 60Hz | |
| 3 | 480p | 60Hz | 16:9 aspect ratio |
| 4 | 720p | 60Hz | |
| 5 | 1080i | 60Hz | |
| 6 | 480i | 60Hz | |
| 7 | 480i | 60Hz | 16:9 aspect ratio |
| 8 | 240p | 60Hz | |
| 9 | 240p | 60Hz | 16:9 aspect ratio |
| 10 | 480i | 60Hz | pixel quadrupling |
| 11 | 480i | 60Hz | pixel quadrupling, 16:9 aspect ratio |
| 12 | 240p | 60Hz | pixel quadrupling |
| 13 | 240p | 60Hz | pixel quadrupling, 16:9 aspect ratio |
| 14 | 480p | 60Hz | pixel doubling |
| 15 | 480p | 60Hz | pixel doubling, 16:9 aspect ratio |
| 16 | 1080p | 60Hz | |
| 17 | 576p | 50Hz | |
| 18 | 576p | 50Hz | 16:9 aspect ratio |
| 19 | 720p | 50Hz | |
| 20 | 1080i | 50Hz | |
| 21 | 576i | 50Hz | |
| 22 | 576i | 50Hz | 16:9 aspect ratio |
| 23 | 288p | 50Hz | |
| 24 | 288p | 50Hz | 16:9 aspect ratio |
| 25 | 576i | 50Hz | pixel quadrupling |
| 26 | 576i | 50Hz | pixel quadrupling, 16:9 aspect ratio |
| 27 | 288p | 50Hz | pixel quadrupling |
| 28 | 288p | 50Hz | pixel quadrupling, 16:9 aspect ratio |
| 29 | 576p | 50Hz | pixel doubling |
| 30 | 576p | 50Hz | pixel doubling, 16:9 aspect ratio |
| 31 | 1080p | 50Hz | |
| 32 | 1080p | 24Hz | |
| 33 | 1080p | 25Hz | |
| 34 | 1080p | 30Hz | |
| 35 | 480p | 60Hz | pixel quadrupling |
| 36 | 480p | 60Hz | pixel quadrupling, 16:9 aspect ratio |
| 37 | 576p | 50Hz | pixel quadrupling |
| 38 | 576p | 50Hz | pixel quadrupling, 16:9 aspect ratio |
| 39 | 1080i | 50Hz | reduced blanking |
| 40 | 1080i | 100Hz | |
| 41 | 720p | 100Hz | |
| 42 | 576p | 100Hz | |
| 43 | 576p | 100Hz | 16:9 aspect ratio |
| 44 | 576i | 100Hz | |
| 45 | 576i | 100Hz | 16:9 aspect ratio |
| 46 | 1080i | 120Hz | |
| 47 | 720p | 120Hz | |
| 48 | 480p | 120Hz | |
| 49 | 480p | 120Hz | 16:9 aspect ratio |
| 50 | 480i | 120Hz | |
| 51 | 480i | 120Hz | 16:9 aspect ratio |
| 52 | 576p | 200Hz | |
| 53 | 576p | 200Hz | 16:9 aspect ratio |
| 54 | 576i | 200Hz | |
| 55 | 576i | 200Hz | 16:9 aspect ratio |
| 56 | 480p | 240Hz | |
| 57 | 480p | 240Hz | 16:9 aspect ratio |
| 58 | 480i | 240Hz | |
| 59 | 480i | 240Hz | 16:9 aspect ratio |
hdmi modes available for group 2
| hdmi_mode | resolution | frequency | notes |
| 1 | 640x350 | 85Hz | |
| 2 | 640x400 | 85Hz | |
| 3 | 720x400 | 85Hz | |
| 4 | 640x480 | 60Hz | |
| 5 | 640x480 | 72Hz | |
| 6 | 640x480 | 75Hz | |
| 7 | 640x480 | 85Hz | |
| 8 | 800x600 | 56Hz | |
| 9 | 800x600 | 60Hz | |
| 10 | 800x600 | 72Hz | |
| 11 | 800x600 | 75Hz | |
| 12 | 800x600 | 85Hz | |
| 13 | 800x600 | 120Hz | |
| 14 | 848x480 | 60Hz | |
| 15 | 1024x768 | 43Hz | incompatible with the Raspberry Pi |
| 16 | 1024x768 | 60Hz | |
| 17 | 1024x768 | 70Hz | |
| 18 | 1024x768 | 75Hz | |
| 19 | 1024x768 | 85Hz | |
| 20 | 1024x768 | 120Hz | |
| 21 | 1152x864 | 75Hz | |
| 22 | 1280x768 | reduced blanking | |
| 23 | 1280x768 | 60Hz | |
| 24 | 1280x768 | 75Hz | |
| 25 | 1280x768 | 85Hz | |
| 26 | 1280x768 | 120Hz | reduced blanking |
| 27 | 1280x800 | reduced blanking | |
| 28 | 1280x800 | 60Hz | |
| 29 | 1280x800 | 75Hz | |
| 30 | 1280x800 | 85Hz | |
| 31 | 1280x800 | 120Hz | reduced blanking |
| 32 | 1280x960 | 60Hz | |
| 33 | 1280x960 | 85Hz | |
| 34 | 1280x960 | 120Hz | reduced blanking |
| 35 | 1280x1024 | 60Hz | |
| 36 | 1280x1024 | 75Hz | |
| 37 | 1280x1024 | 85Hz | |
| 38 | 1280x1024 | 120Hz | reduced blanking |
| 39 | 1360x768 | 60Hz | |
| 40 | 1360x768 | 120Hz | reduced blanking |
| 41 | 1400x1050 | reduced blanking | |
| 42 | 1400x1050 | 60Hz | |
| 43 | 1400x1050 | 75Hz | |
| 44 | 1400x1050 | 85Hz | |
| 45 | 1400x1050 | 120Hz | reduced blanking |
| 46 | 1440x900 | reduced blanking | |
| 47 | 1440x900 | 60Hz | |
| 48 | 1440x900 | 75Hz | |
| 49 | 1440x900 | 85Hz | |
| 50 | 1440x900 | 120Hz | reduced blanking |
| 51 | 1600x1200 | 60Hz | |
| 52 | 1600x1200 | 65Hz | |
| 53 | 1600x1200 | 70Hz | |
| 54 | 1600x1200 | 75Hz | |
| 55 | 1600x1200 | 85Hz | |
| 56 | 1600x1200 | 120Hz | reduced blanking |
| 57 | 1680x1050 | reduced blanking | |
| 58 | 1680x1050 | 60Hz | |
| 59 | 1680x1050 | 75Hz | |
| 60 | 1680x1050 | 85Hz | |
| 61 | 1680x1050 | 120Hz | reduced blanking |
| 62 | 1792x1344 | 60Hz | |
| 63 | 1792x1344 | 75Hz | |
| 64 | 1792x1344 | 120Hz | reduced blanking |
| 65 | 1856x1392 | 60Hz | |
| 66 | 1856x1392 | 75Hz | |
| 67 | 1856x1392 | 120Hz | reduced blanking |
| 68 | 1920x1200 | reduced blanking | |
| 69 | 1920x1200 | 60Hz | |
| 70 | 1920x1200 | 75Hz | |
| 71 | 1920x1200 | 85Hz | |
| 72 | 1920x1200 | 120Hz | reduced blanking |
| 73 | 1920x1440 | 60Hz | |
| 74 | 1920x1440 | 75Hz | |
| 75 | 1920x1440 | 120Hz | reduced blanking |
| 76 | 2560x1600 | reduced blanking | |
| 77 | 2560x1600 | 60Hz | |
| 78 | 2560x1600 | 75Hz | |
| 79 | 2560x1600 | 85Hz | |
| 80 | 2560x1600 | 120Hz | reduced blanking |
| 81 | 1366x768 | 60Hz | |
| 82 | 1920x1080 | 60Hz | 1080p |
| 83 | 1600x900 | reduced blanking | |
| 84 | 2048x1152 | reduced blanking | |
| 85 | 1280x720 | 60Hz | 720p |
| 86 | 1366x768 | reduced blanking |
and last parameter, hdmi_drive:
| hdmi_drive | result |
| 1 | Normal DVI mode (No sound) |
| 2 | Normal HDMI mode (Sound will be sent if supported and enabled) |
Don't worry about testing these values - the worst thing that could happen is that you will not output from your raspberry correctly, device will still boot up and it will be working correctly, you can just change the config and reboot the device.
Setting Up Screen Rotation
Sometimes, you want to rotate raspberry screen by 90, 180, or 270 degrees. You can do this using config too.
To do this, you will use display_rotate. Here are available values:
| display_rotate | result |
| 0 | No rotation |
| 1 | Rotate 90 degrees clockwise |
| 2 | Rotate 180 degrees clockwise |
| 3 | Rotate 270 degrees clockwise |
| 0x10000 | Horizontal flip |
| 0x20000 | Vertical flip |
With this setting, you should be careful and test after every change, When I was using Windows on Raspberry pi, it did not boot up after I changed the rotation until I increased gpu_mem to some higher value like:
gpu_mem=128
Based on this and also based on my testing, it is best not to change display rotation of device because I think it consumes huge amount of processing power just to rotate the HDMI output. I have also experienced far worse performance when I was testing my app running in 90 degrees rotation.
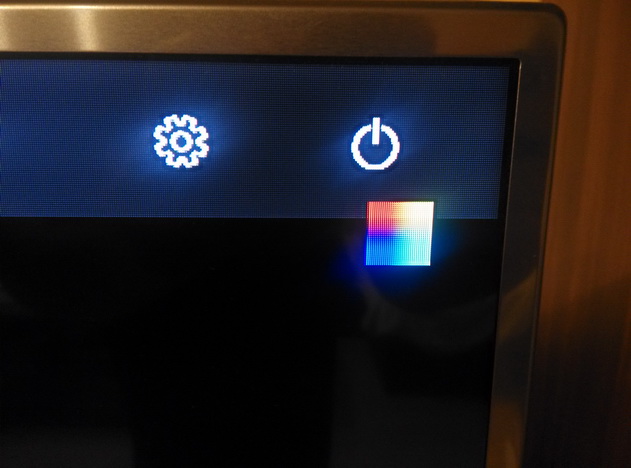
Low Voltage Warning
I usually take power for my Raspberry pi from some TV which have USB ports, and usually I get low current warning directly from Raspberry pi. So far, I did not notice some performance or reliability problem associated with this, it is just annoying. See it in the picture.
To disable it, just add this into config:
avoid_warnings=2
I know, this probably is not the best practice and this warning has a meaning there, but since it does not have any influence on my applications, I don't want to see it there. I would not like to add another power supply just to avoid this warning if it can be turned off simply and nothing will happen. In my case, I use TV USB port as power source. When I was testing it, I figured out that cause of this problem is usually a cable that you are using. So to fix it, I recommend to test several USB cables.
Connecting to filesystem on Raspberry Pi 2 B
There are several methods in which you can connect to filesystem on your Windows 10 IOT.
Accessing SD Card On Your Computer
This is the simplest method, but you have very limited set of settings that you can change. Basically, you can only modify config.txt.
I recommend first to shutdown Raspberry pi and then you can detach SD card and insert it into your computer. Then, you should see something like this:

What you see on Windows is only the first partition of SD card. When SD card was created, Windows split it into 4 partitions. On Windows systems, it is for user visible only first partition with normal settings.
Connecting to Device filesystem Directly
To see all partitions and modify almost everything on filesystem, you need to put SD card back to Raspberry pi, and turn it on. Then, you can use IOT Dashboard to find its IP address. (To read more about IOT dashboard, you can read my previous article: Installing Windows 10 IoT core on Raspberry Pi 2).
After you know the IP address, just open Windows explorer and navigate to Raspberry pi. In my case, I typed this:
\\192.168.0.233\c$
Please note c$ at the end of address, it must be there, otherwise this will not work.
After you enter address of device, you will be prompted for your credentials to device, These are default credentials:
Username : Administrator
Password : p@ssw0rd
Of course, if you changed your password, enter new password instead.
When you login successfully, you should see filesystem on device:

Here, you can see how filesystem is split on device, as root you see C:\ and also you can see links to Data, Crash dump and EFISP (this is partition you see when you insert SD card to your PC).
C:\ is installed main operating system, all Windows binaries are stored here, in Windows folder. You will not find here almost no user data, these are on Data partition.
Data\ you find working directories of apps that you have installed in \Data\Users\DefaultAccount.
CrashDump\ is probably used by system to store crashdumps, I have never seen anything interesting there.
EFISP\ is main boot partition, where config.txt is stored, you can modify it directly on device, but to see effects, you need to restart device.
Accessing Device Remotely
The third option is most powerful, you can access device's command line remotely from your computer. To do this, you can use Powershell or putty (putty is faster but has fewer options than Powershell). It does not matter from which operating system you connect to Raspberry pi.
Accessing Device Using powershell
1. Start powershell as Administrator on your PC.

After you start powershell, you should run the following commands:
net start WinRM
The next step is to add machine key into trusted hosts list, you will do it by this command:
Set-Item WSMan:\localhost\Client\TrustedHosts -Value 192.168.0.233
Then, you confirm by "Y".
After this, you can connect to your device:
Enter-PSSession -ComputerName 192.168.0.233 -Credential 192.168.0.233\Administrator
After this command, you will be prompted to input your password. Default is p@ssw0rd
Please be patient, because this process takes a while (can be 2-3 minutes) When the process is finished, you should see console on device.
The output will look like this:

It is very helpful to know console commands that you can use, I recommend you this site http://ss64.com/nt/.
Powershell is a very good option to connect to Raspberry pi, but in my opinion, it is a bit slow and some C++ console applications can run in an incorrect way in this. When you will have some problems with powershell, you still have at least one more option.
Accessing Device using Putty
Yes, you can connect to windows 10 IoT using putty or any other SSH client. And it is very simple, just download putty from: http://the.earth.li/~sgtatham/putty/latest/x86/putty.exe.
When you have it downloaded, just enter IP address of your device, as can be seen here.

You will be prompted to enter username, which is Administrator and then password. (p@ssw0rd) you will be on the same console as when connected using Powershell, just, putty is much faster.
This is it. I hope you will be able to set everything up. If you will have some questions, just write in the comments below and I will respond.