
Day 2 - Database Connectivity (Retrieve Value from Database and Bind to Gridview)
Retrieve value from database and bind to gridview
Introduction
This is my second post in the series of Database Connectivity. After this tip, we will be able to retrieve values from database and bind to gridview. This tip is intended for beginners only. Before starting, it will be good if you know how to connect to database. In case of any doubts, please go through my first post in this series.
In this tip, I will cover how we can retrieve values from database and how we can bind these values to gridview. For this, I am using Visual Studio 2013 and SQL Server 2014.
There can be several approaches for this, but I will try to explain this with a very basic approach. I will use stored procedure so knowledge of stored procedures will be good.
Background
In my first tip, we covered how we connect to database and how we inserted record in database. Today, we will use the same table which I created in my first post. I will continue with the same project which we created in my first tip. In my first tip, I created a table with the below script. If you don't already have it, then please create a database named DatabaseConnectivity (if you already have it, you don't need to create it again) and execute the below script which we will create a table as below:
CREATE TABLE [dbo].[tblUser](
	[ID] [int] IDENTITY(1,1) NOT NULL,
	[Name] [nvarchar](50) NULL,
	[Email] [nvarchar](50) NULL,
	[Password] [nvarchar](50) NULL,
	[Address] [nvarchar](50) NULL,
 CONSTRAINT [PK_tblUser] PRIMARY KEY CLUSTERED
(
	[ID] ASC
)WITH (PAD_INDEX = OFF, STATISTICS_NORECOMPUTE = OFF, _
IGNORE_DUP_KEY = OFF, ALLOW_ROW_LOCKS = ON, ALLOW_PAGE_LOCKS = ON) ON [PRIMARY]
) ON [PRIMARY]
In my previous tip, we inserted some records through the application so in the above table, there should be some records but if somebody is starting from this tip, then he/she can directly insert some records in the table with the below script:
INSERT [dbo].[tblUser] ([Name], [Email], [Password], _
[Address]) VALUES (N'Rahul', N'R@gmail.com', N'123', N'Delhi')
GO
INSERT [dbo].[tblUser] ([Name], [Email], [Password], _
[Address]) VALUES (N'Vijay', N'vijayrana1091@gmail.com', N'1234', N'Delhi')
GO
INSERT [dbo].[tblUser] ([Name], [Email], [Password], _
[Address]) VALUES (N'Ankur', N'A@gmail.com', N'1234', N'Delhi')
Using the Code
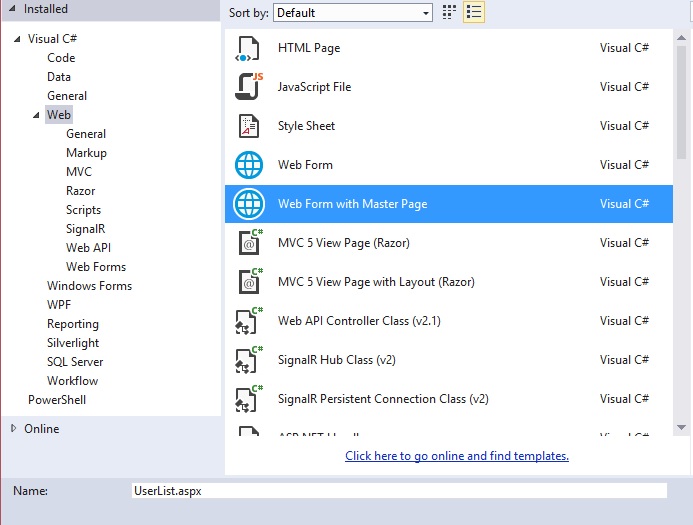
Till now, we have covered database connectivity and today, we will see how we can retrieve records and bind to Gridview. For this, I am adding a new page (UserList.aspx) in my project which we created in my first tip (those who are new to this tip, please go through my first tip, where we created a project and added a page in the project).
There are several data controls in ASP.NET, but here I will use Gridview. So, add a gridview on the page as below:
<asp:Content ID="Content3"
ContentPlaceHolderID="MainContent" runat="server">
    <asp:GridView ID="gdUser" runat="server" ></asp:GridView>
</asp:Content>
Before starting code, I will create a stored procedure in database which will fetch all the records from the tblUser Table. Script of Stored Procedure is:
create procedure spSelectUser
as
Select ID, Name, Email, Password, Address from tblUser
So now, we have gridview on page and stored procedure is ready so it's time for some code. Go to the code behind page (UserList.aspx.cs) of UserList.aspx and this time we will use the Page_Load event because we will display all the records when page will load in the browser. So this time, I will use Page_Load event and will use 4 simple steps which will be a little bit different from the previous steps which we followed in last article. I will create a function named BindGrid() and will call this function from Page_Load event as below (Make sure you have added already two required namespaces (System.Data.SqlClient and System.Data) on code behind page.
Step 1: Make a Connection
To make a connection with database, ADO.NET provides a class named SqlConnection. So, we will create an object of this class and will pass the connection string:
SqlConnection con = new SqlConnection
("Data Source=.;Initial Catalog = DatabaseConnectivity;Trusted_Connection=true;");
Step 2: Prepare Command
To prepare a command, ADO.NET gives us a class named SqlCommand which we will use as below:
SqlCommand com = new SqlCommand(); // Create a object of SqlCommand class
com.Connection = con; //Pass the connection object to Command
com.CommandType = CommandType.StoredProcedure; // We will use stored procedure.
com.CommandText = "spSelectUser"; //Stored Procedure Name
Step 3: Create object of Data Adapter and Data Set
To access data from database, I am creating an object of SqlDataAdapter and a object of DataSet (we can use Data Table also instead of Data Set) as below:
SqlDataAdapter da = new SqlDataAdapter(com);
DataSet ds = new DataSet();
da.Fill(ds);
Step 4: Bind Data to Data Control
Now, we have required data in Data Set. I will pass this data to Grid View for this we use DataSource property and DataBind method as below:
gdUser.DataSource = ds;
gdUser.DataBind();
Ohh! We are done! The complete code will be as given below:
private void BindGrid()
        {
SqlConnection con = new SqlConnection("Data Source=.;
Initial Catalog = DatabaseConnectivity;Trusted_Connection=true;");
SqlCommand com = new SqlCommand();
    try
      {
         com.Connection = con; //Pass the connection object to Command
         com.CommandType = CommandType.StoredProcedure; // We will use stored procedure.
         com.CommandText = "spSelectUser"; //Stored Procedure Name
         SqlDataAdapter da = new SqlDataAdapter(com);
         DataSet ds = new DataSet();
         da.Fill(ds);
         gdUser.DataSource = ds;
         gdUser.DataBind();
       }
    catch (Exception ex)
        {
        }
    finally
        {
          com.Dispose();
        }
   }
Now, we need to call this function from Page Load.
protected void Page_Load(object sender, EventArgs e)
   {

     BindGrid();

   }
Run the application and we will get the below result:

So, we have all the data in Gridview now. Time to add some styles to this Gridview. I will add bootstrap CSS to this Gridview. For this, either we can download bootstrap or directly we can give the CDN path. I will use CDN and will add CDN path to Master Page (There will be page in project named site.master). Open Site.Master and add below CDN in head section:
<link rel="stylesheet"
href="https://maxcdn.bootstrapcdn.com/bootstrap/3.3.5/css/bootstrap.min.css">
<link rel="stylesheet"
href="https://maxcdn.bootstrapcdn.com/bootstrap/3.3.5/css/bootstrap-theme.min.css">
<script src="https://maxcdn.bootstrapcdn.com/bootstrap/3.3.5/js/bootstrap.min.js">
</script>
Go to UserList.aspx and add a CSS on gridview as below:
<asp:GridView ID="gdUser" runat="server"
CssClass= "table table-striped table-bordered table-condensed"></asp:GridView>
Now run the application and we will get the below result:

Now suppose we want to give Edit and Delete functionality to user, then we need to add Edit and Delete button in our Gridview. For that, I downloaded two delete and edit image icons and copy them to my images folder. Now, I will add two Template Fields in Gridview as below:
<asp:GridView ID="gdUser" runat="server"
CssClass="table table-striped table-bordered table-condensed">
   <Columns>
   <asp:TemplateField ItemStyle-HorizontalAlign="Center" >
        <ItemTemplate >
           <asp:ImageButton ID="btnDelete" runat="server"
           ImageUrl="~/Images/Delete.png" Width="30px" />
        </ItemTemplate>
   </asp:TemplateField>
   <asp:TemplateField ItemStyle-HorizontalAlign="Center" >
        <ItemTemplate >
           <asp:ImageButton ID="btnEdit" runat="server"
           ImageUrl="~/Images/Edit.png"  Width="30px" />
         </ItemTemplate>
   </asp:TemplateField>
   </Columns>
</asp:GridView>
Now run the application and we will get two custom columns for edit and delete.

I am not adding any functionality on these buttons in this tip. I will cover edit and delete functionality in the next tip, but for now some questions for you.
Questions
Q1: Difference between DataSet and DataTable?
Q2: Difference between SqlDataAdapter and SqlDataReader()?