
Hosting WCF Service II
0/5 (0 vote)
Hosting WCF Service - Windows Hosting
Introduction
WCF service can be hosted in different ways.
I recommend you to read the previous post : Self Hosting
In this example, I will show, Windows-Hosting method to consume a WCF service.
Using the code
Our sample application performs the simple integer arithmetic operations.
- Create a WCF Service
- Create a Windows Service
- Install / Uninstall Windows Service
- Consume Windows Service
Part 1 : Create WCF service
To create a wcf service refer the Self Hosting post -> Part 1 : Create WEF service
In this example i have created a WCF application with the name of "WcfWindowsService" and service name is "Calculator"
Part 2 : Create a Windows Service
1. Right click on the solution -> Add ->New Project
2. Select Windows Desktop from left side then select Windows Service.

3. Add the previously created WCF Service application reference and add "System.ServiceModel" assembly.
4. Change the Service1 file name to CalculatorWindowsService.
5. Double-click on the CalculatorWindowsService file. It will look like the following.

- Right-click on that file then click View Code.

- When you click view code it will have the following code:
public partial class CalculatorWindowsService : ServiceBase
{
    public CalculatorWindowsService()
    {
        InitializeComponent();
    }
    protected override void OnStart(string[] args)
    {
    }
    protected override void OnStop()
    {
    }
}
- Change the code like the following to open the communication channel to consume the service for the client.
public partial class CalculatorWindowsService : ServiceBase
{
    ServiceHost host;
    public CalculatorWindowsService()
    {
        InitializeComponent();
    }
    private System.Threading.Thread _thread;
    protected override void OnStart(string[] args)
    {
        try
        {
            // Uncomment this line to debug...
            //System.Diagnostics.Debugger.Break();

            // Create the thread object that will do the service's work.
            _thread = new System.Threading.Thread(DoWork);

            // Start the thread.
            _thread.Start();

            // Log an event to indicate successful start.
            EventLog.WriteEntry("Successful start.", EventLogEntryType.Information);
        }
        catch (Exception ex)
        {
            // Log the exception.
            _thread.Abort();
            EventLog.WriteEntry(ex.Message, EventLogEntryType.Error);
        }
    }
    private void DoWork()
    {
        host = new ServiceHost(typeof(WcfWindowsService.Calculator));
        host.Open();
    }
    protected override void OnStop()
    {
        if (host != null)
        {
            host.Close();
            host = null;
        }
    }
}
- Open the CalculatorWindowsService file. Right-click on that file then select Add Installer

- When you click on Add Installer it will add the ProjectInstaller.cs file.

6. Open the ProjectInstaller.cs file, you can see on the left side there are two instances, one is ServiceProcessInstaller1 and the second is ServiceInstaller1.

- Right-click on ServiceInstaller1 then select Properties. The properties window will be opened in the right side, in the Service Name property, change the name Service1 to TestWcfWindowsService. Select Start Type. Manual, Automatic and Disabled options are available. If you select Automatic then it will start automatically when windows starts like other applications or if you select Manual then need to start it manually.

- Right-click on ServiceProcessInstaller1 then select Properties. The properties window will be opened in the right side, Now we need to select the Account properties. To allow the user to access this service select LocalSystem.

7. Right click the "App.config" file of console application, then select "Edit WCF Configuration".
8. It will show a pop up to configure the service.
9. Select the "Services" folder then click on the right side link "Create a New Service". Click on the Browse Button and open the bin folder of "WcfWindowsService" (WCF Service Application bin folder). Select "WcfWindowsService.dll" (WCF Service Application dll) and click "Open". In the next window, It will show our service. select the service and click "Open".


10. Click on the Next button, it will ask to provide the Service Contract

11. Click on the Next button, it will ask to select the binding. In our demo we are going to use "TCP".

12. Click on the next button, it will ask th endpoint address. Enter the relative address of "WcfWindowsService" service.

13. Click on the next button, it will show all the features we selected previously.

14. Click on finish button, it will show our service.

15. Here we need to expand our service and select "Host". Here we are going to add two base addresses, one for the service endpoint and another one to enable metadata exchange. Add base address by clicking "New" button.

16. We need to enable service behaviours to enable metadata exchange, clients can generate proxy classes using that. Expand the "Advanced" folder then select the "Service Behaviour" option the click "New Service Behavior Configuration". Change service behavior name to "mexBehavior". We need to add a new service behaviour for metadata exchange. Select "SelfHostingBehavior" then select the "Add" button then select from the list "ServiceMetadata".


17. Then click on "serviceMetatdata" to set "HttpGetEnable" to "True".

18. We need to set this new behavior to our service. For that click on our "WcfWindowsService.Calculator" service and set the "Behaviour Configuration" to "mexBehavior".

19. Click File menu and save, then close this window. Then it will ask for you to save the changes; click Yes.
20. Now check App.config file, all the previous setup details automatically provided in the App.config file.

21. Save the project and build it.
Part 3 : Install / Uninstall Windows Service
To install /Uninstall windows service, we are going to use installutil.exe
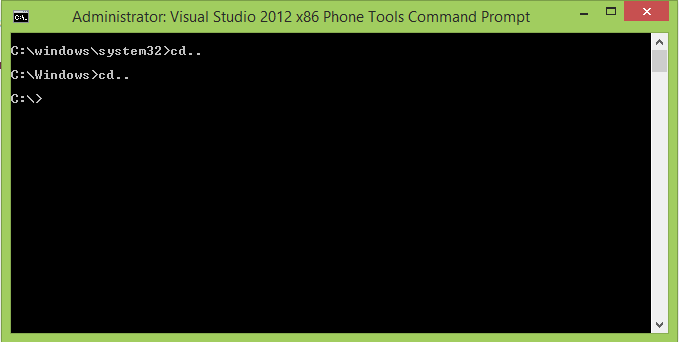
1. Open a Visual Studio Command Prompt in Administrator mode.
2. Navigate to the C:\ to install the service.
3. Use the following syntax to install and uninstall the Windows Service.
Install:
Installutil –i windows_service_path/projectname.exe + Enter
Uninstall:
Installutil –u windows_service_path/projectname.exe + Enter
4. Install windows service


5. Now open the installed service Start + R and type services.msc. In the servies window our TestWcfWindowsService is not started yet so just right-click the service and select Start

6. After successful service running, we can view the service in browser. Copy the base address from the Windows Service app.config file and view in a browser.

- Uninstall windows service (Reference)

Part 4 : Consume Windows Service
1. Right click on the solution -> Add ->New Project
2. Select Console Application and Create.
3. Add the previously created WCF Service application reference and add "System.ServiceModel" assembly.
4. Add a service reference to the console application. In this example service running in "http://localhost:8088"

5. Open Console Application Progarm.cs file and add the following codes.
- Include the following using statements.
using System.ServiceModel;
using WcfWindowsService;
using WindowsServiceConsume.ServiceReference1;
Replace the below code.
class Program
{
    static void Main(string[] args)
    {
        WCFServiceConsume();

    }

    public static void ConsoleClose()
    {
        Console.WriteLine("Are you sure to close the application? (1/0)\n");
        string close = Console.ReadLine();
        if (close == "1")
        {
            Console.Clear();
            WCFServiceConsume();
        }
    }
    public static void WCFServiceConsume()
    {
        try
        {
            Console.WriteLine("Self-Hosting a WCF Service in Console Application\n");
            Console.WriteLine("-------------------------------------------------\n");
            Console.WriteLine("Enter first integer number : ");
            int number1 = Convert.ToInt32(Console.ReadLine());
            Console.WriteLine("Enter second integer number : ");
            int number2 = Convert.ToInt32(Console.ReadLine());

            ServiceReference1.CalculatorClient cal = new ServiceReference1.CalculatorClient();

            try
            {
                int addition = cal.Addition(number1, number2);
                Console.WriteLine("Addition Result : " + addition);
            }
            catch (FaultException exceptionFromService)
            {
                Console.WriteLine("Addition Service Error : " + exceptionFromService.Detail.errorMessageOfAction);
            }

            try
            {
                int subtraction = cal.Subtraction(number1, number2);
                Console.WriteLine("Subtraction Result : " + subtraction);
            }
            catch (FaultException exceptionFromService)
            {
                Console.WriteLine("Subtraction Service Error : " + exceptionFromService.Detail.errorMessageOfAction);
            }

            try
            {
                int multiplication = cal.Multiplication(number1, number2);
                Console.WriteLine("Multiplication Result : " + multiplication);
            }
            catch (FaultException exceptionFromService)
            {
                Console.WriteLine("Multiplication Service Error : " + exceptionFromService.Detail.errorMessageOfAction);
            }

            try
            {
                int division = cal.Division(number1, number2);
                Console.WriteLine("Division Result : " + division);
            }
            catch (FaultException exceptionFromService)
            {
                Console.WriteLine("Division Service Error : " + exceptionFromService.Detail.errorMessageOfAction);
            }
            Console.WriteLine("*********************************\n");
        }
        catch (Exception exception)
        {
            Console.WriteLine(exception.Message);
            Console.ReadKey();
        }
        finally
        {
            ConsoleClose();
        }
    }
}
6. Set Console application as the Start up project.
7. Run the application.
Output

History
1st Version : 2015-08-05