
WCF RESTful on Windows Service Host
4.75/5 (4 votes)
Hosting WCF REST Service on Windows Service
Introduction
This article/code will give you a working example of how to host a WCF RESTful service on a Windows Service. The code/solution is on Visual Studio 2015 RC but should work on the earlier relevant versions as well. The service provides both JSON and XML/Text response.
Caution
Open Visual Studio and Command Prompt as Administrator only. You won't be able to install your service on Windows Services if you don't open 'VS2013 x64 Cross Tools Command Prompt' as admin.

Code
Below are the steps to develop the same demo...
Service
Create the WCF Service.
- Add a WCF Service Library to the solution and name it '
RestWCFServiceLibrary'.
- Add a new interface named '
IRestWCFServiceLibrary'.using System.ServiceModel; using System.ServiceModel.Web; namespace RestWCFServiceLibrary { [ServiceContract] public interface IRestWCFServiceLibrary { [OperationContract] [WebInvoke(Method = "GET", ResponseFormat = WebMessageFormat.Xml, BodyStyle = WebMessageBodyStyle.Wrapped, UriTemplate = "xml/{id}")] string XMLData(string id); [OperationContract] [WebInvoke(Method = "GET", ResponseFormat = WebMessageFormat.Json, BodyStyle = WebMessageBodyStyle.Wrapped, UriTemplate = "json/{id}")] string JSONData(string id); } } - Add a new class named '
RestWCFServiceLibrary' which implements 'IRestWCFServiceLibrary'.namespace RestWCFServiceLibrary { public class RestWCFServiceLibrary : IRestWCFServiceLibrary { public string XMLData(string id) { return Data(id); } public string JSONData(string id) { return Data(id); } private string Data(string id) { // logic return "Data: " + id; } } } - Add/modify the 'App.Config' as below...

Host
Now we need to host our WCF Service. So create a Windows Service project and name it as 'RestWCFWinService'.
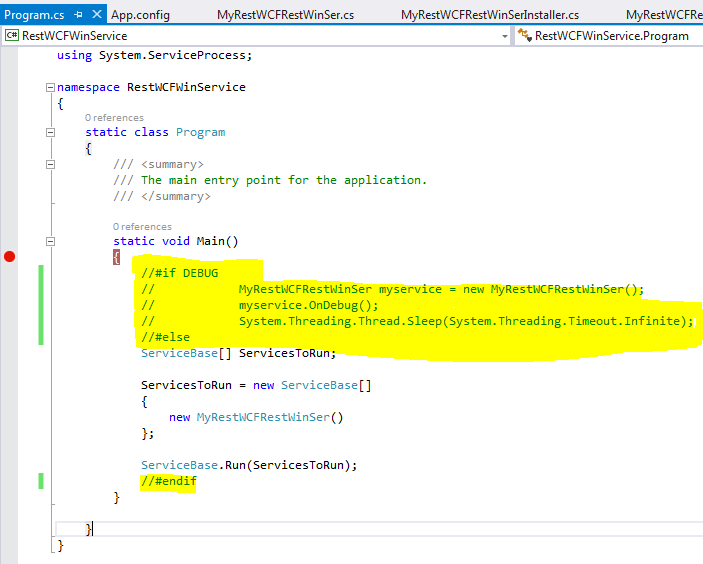
- Code in 'Program.cs' file...
Debugging facility: The highlighted code in yellow can be uncommented and the project debugged right away!
For this...- Uncommented the highlighted code.
- Set '
RestWCFWinService' as startup project. - Put a debugging stop-point.
- Add
OnDebug()as mentioned in #3... - This code needs to be commented while building for the deployment.
- Create the installer file named '
MyRestWCFRestWinSerInstaller'. This file enables the .exe to be installed on Windows Services.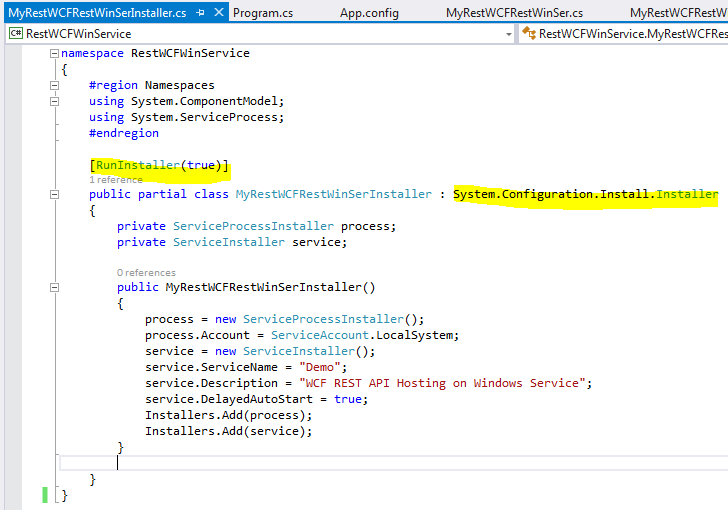
- Create a class file named '
MyRestWCFRestWinSer' with the below code. This class inherits 'ServiceBase'.Debugging facility:
OnDebug()is required for debugging as mentioned in #1...

For the '
RestWCFServiceLibrary', add the reference...Likewise, references to
System.ServiceModel, etc. would also be required.
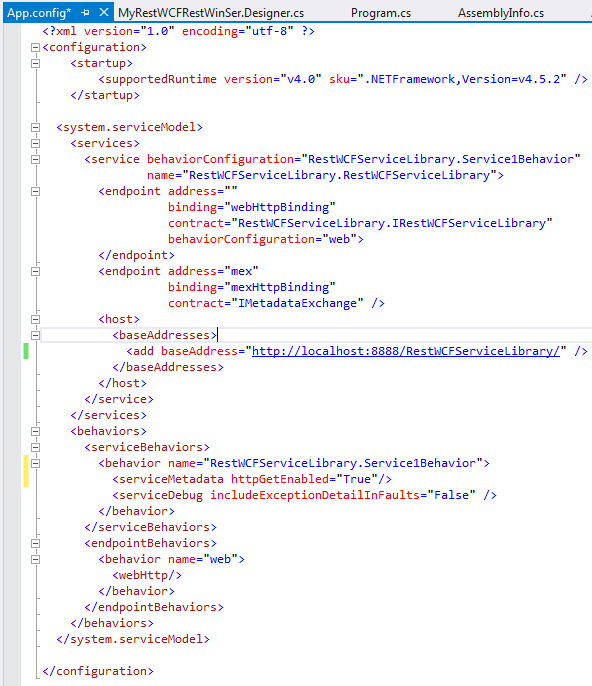
- Add the App.config with the end points...
Here, the service would be hosted on port 8888, you can change it with any not in use but valid port.
Installing the Host Application on Windows Services
- Build your solution and grab the path where "
RestWCFWinService" generates the .exe file. In my case, it is at... '..\WcfRestfulWithWindowsHostDemo\WindowsService1\bin\Debug\WindowsService1.exe' of "RestWCFWinService" project.Info:
WindowsService1is the folder name of 'RestWCFWinService' project in Solution Explorer. - Now open the Visual Studio Command Prompt in Administrator mode and install the application using 'installutil -i file_path', like this..

You can uninstall the same application using 'installutil -u file_path',
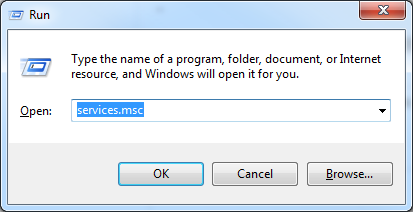
- Once the installation is successful, go to RUN --> services.msc.
- Start the '
Demo' service...
- Now test the service by browsing the below URLs...
- http://localhost:8888/RestWCFServiceLibrary/xml/1234567890
- http://localhost:8888/RestWCFServiceLibrary/json/1234567890

and you are done! :)