A Very Simple MVVM Demonstration
0/5 (0 vote)
This is a very simple MVVM demonstration.
When starting out with MVVM, it can take some time and research to really start to understand the concepts, and there is a wealth of information and opinion on the subject, to the point where it could become overwhelming.
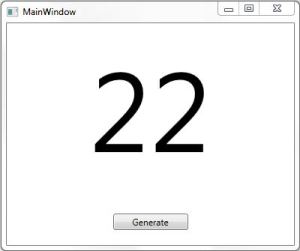
Here, I have decided to create a random number generator to demonstrate MVVM and data binding in a very simplistic way.
Firstly to the XAML. Here, I have simply created a form with a textblock and a button. The button binds to a command to generate a random number, and the textblock then binds to the number to display.
<DockPanel LastChildFill="True">
      <Button Content="Generate" Command="{Binding Generate}"
      DockPanel.Dock="Bottom" Width="100" Margin="20"/>
      <TextBlock Text="{Binding Number}" Margin="10" HorizontalAlignment="Center"
                 FontSize="150" />
</DockPanel>
Before we can create our view model, we also need to create a command to bind our button to, as by default this isn’t directly provided for in WPF. To do this, we can create a class that implements the ICommand interface, and accepts an Action() in the constructor. Set the CanExecute() to return true for this scenario as we don’t need to worry about disabling the button.
 public class ButtonCommand : ICommand
    {
        private Action action;

        public ButtonCommand(Action action)
        {
            this.action = action;
        }

        public void Execute(object parameter)
        {
            action();
        }

        public bool CanExecute(object parameter)
        {
            return true;
        }

        public event EventHandler CanExecuteChanged;
    }
Now that we have our command, we can create our view model class. This basically exposes 2 items, the string value of the number we want to display, and an implementation of the command we have just created.
public class MainWindowViewModel : INotifyPropertyChanged
    {
        private string number;

        private ICommand generate;

        public MainWindowViewModel()
        {

        }

        public string Number
        {
            get
            {
                if (this.number == null)
                {
                    return string.Empty;
                }
                return this.number;
            }

            private set
            {
                this.number = value;
                this.NotifyPropertyChanged("Number");
            }
        }

        public ICommand Generate
        {
            get
            {
                if (this.generate == null)
                {
                    this.generate = new ButtonCommand(() => this.GenerateNumber());
                }
                return this.generate;
            }
        }

        public event PropertyChangedEventHandler PropertyChanged;

        protected void NotifyPropertyChanged(string property)
        {
            if (this.PropertyChanged != null)
            {
                this.PropertyChanged(this, new PropertyChangedEventArgs(property));
            }
        }

        private void GenerateNumber()
        {
            Random rnd = new Random();
            this.Number = rnd.Next(1, 100).ToString();
        }
    }
There are a couple of things to notice here. Firstly, our view model implements the INotifyPropertyChanged interface. [Note: If we were making multiple view models, we'd want to abstract this out.] This interface allows us to notify our view when a value changes. Here, you can see that when we click our generate button, we fire the GenerateNumber() method which then updates our Number property. Not this is our ‘Number’ property, not the ‘number’ field. This way, via the ‘set’ accessor, we can then call the NotifyPropertyChanged() method, passing it the value “Number”. By doing this, any control on the view that is binding to ‘Number’ will be asked to update.
The last thing we need to do is set the data context of the view, so the view has something to bind to. We can do this in the views code behind constructor.
public MainWindow()
        {
            InitializeComponent();

            this.DataContext = new MainWindowViewModel();
        }
I hope this shows how easy it is start out with MVVM, and decouple the view from the view model. Through the use of views and view models, and taking advantage of data binding, we can build responsive user interfaces quickly and with minimal code. By decoupling the view from the view model, it should also be very easy to create unit tests for the view model, meaning we should be able to write better, bug-free code. In my next post, I shall demonstrate unit testing of the above application.
Filed under: C#, CodeProject, WPF
Tagged: C#, Demonstration, Introduction, Model, MVVM, Net, Simple, View, Viewmodel, WPF, XAML
![]()

