
Custom Windows InputBox
5.00/5 (5 votes)
A custom Windows InputDialog to capture user input
Introduction
C#, unlike Visual Basic, does not have an InputBox class. If your application requires an InputBox to capture user input, you can add a reference to Microsoft.VisualBasic.dll in your project and use the static InputBox method located in the following namespace Microsoft.VisualBasic.Interaction.InputBox(). If however, you want a custom solution, you can easily create your own by inheriting from the System.Windows.Forms.Form class. This article presents a simple InputDialog class, which you can use to capture user input. While the class isn't customizable programmatically, you can quite easily make the necessary changes in code to customize it to your needs.
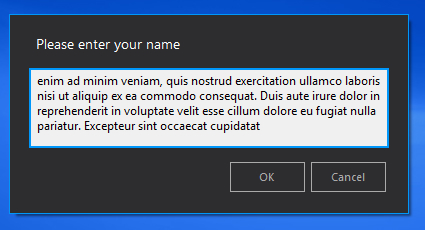
My primary reason for developing a custom InputDialog was because I wanted to expand the textbox when the user entered text that was longer than the width of the input textbox. This would allow the user to see more of the text they were entering. See images below.
Single Line Textbox

Multiline Textbox
The development of the InputDialog was relatively very easy. I created an InputDialog class and inherited from the System.Windows.Forms.Form class. The class constructor was made private so that instances of the class could not be created. However you can create instances of a class even when the constructor is private within the class itself. This meant that I could create all the controls needed to display on the InputDialog in the class constructor and then create an instance of the class in a public static Show() method. The instance of the InputDialog is shown as a dialog. This is important because showing a form as a dialog blocks the main UI. This is needed because the static Show() method returns a string (the users input) and since this is not done immediately, we need to block the main UI by showing the InputDialog as a dialog. Only when the user clicks either the OK or Cancel button, does the static Show() method return the user input. This is better explained with a code sample.
    public static string Show(string message)
    {
        InputDialog dialog = new InputDialog();
        dialog.lblMessage.Text = message;
        dialog.ShowDialog();

        return dialog._txtInput;
    }
The ShowDialog() method in the code sample above will prevent the return statement from executing. When the dialog instance is disposed, the execution of the code continues and the user data is returned to the calling method.
The expanding of the textbox is accomplished by adding a KeyDown event to the textbox. When the length of the user input is greater than a predetermined length, then the textbox expands in height to show more text. The rest of the code deals with the UI look, such as adding a form shadow and wrapping the textbox in a panel to give it a border.
The final code sample below shows how to use the class:
string input = InputDialog.Show("Please enter your name");
MessageBox.Show(input);
While the class isn't very detailed, it could be used as a template.
History
- 24th October, 2014: Initial version