
Setting Up Your Android Development Environment on Ubuntu
0/5 (0 vote)
Article 2 - Setting up Android Studio or Eclipse ADT on Ubuntu
Introduction
This article discusses some of the key differences between Android Studio and Eclipse with the Android Developer Tools (ADT) plugin, before showing how to get them set up on Ubuntu. This article also covers downloading appropriate Android SDK packages and setting up an virtual device to use for testing.
I've also created an alternative article for Windows users.
The extra section for this article covers installing alternative JDKs.
Android Studio and Eclipse ADT
Android Studio, which is based on IntelliJ IDEA, and Eclipse with the ADT plugin (often just called "ADT") are IDEs for developing Android applications and both offer broadly the same range of features. They both include:
- An Android build system for compiling your application code and other resources into the .apk file which can be loaded onto an Android phone, or other device.
- Virtual device emulation for testing your apps.
- Graphical tools for editing the XML layout files used by your apps activities and fragments.
- Extra, Android-specific, warnings and suggestions.
Current Status
Eclipse ADT is the older of the two, with Android Studio still being in beta. As of 1st August 2014, the Get the Android SDK page on developers.android.com says:
Quote:If you're a new Android developer, we recommend you download the ADT Bundle to quickly start developing apps.
So, for the moment at least, Eclipse with the ADT plugin is the official recommended option for new Android developers.
However, the Google tools team have said that development of new tools features is focussed on Android Studio and it seems likely that Android Studio will soon become the primary reccommended Android IDE, perhaps when they reach version 1.0.
New Features in Android Studio
- Uses Gradle as for its build system instead of Ant. Gradle uses Maven to keep track of your project's dependencies and allows you do build several variants of your application, for example trial and premium versions.
- More advanced Android code completion using the underlying IntelliJ IDE.
- Various new upcoming features to enable more efficient Android development, as shown here at Google I/O 2014.
One feature that Eclipse has and Android Studio lacks is Native Development Kit (NDK) support.
Summary
Eclipse with ADT is the older and more mature Android IDE and still the official reccommended option. However, current development effort at Google is focussed on Android Studio which will likely become the reccommended option in the near future.
Setting Up Android Studio
- Ensure you have a JDK installed:
sudo apt-get install default-jdk
- Go to http://developer.android.com/sdk/installing/studio.html and download the latest version of the Android Studio Bundle for Linux.
- Extract the the archive to somewhere sensible, your home directory should be fine.
- To run Android Studio: open a terminal and navigate to the
android-studio/bindirectory, then run:./studio.sh
- You can add Android Studio's bin directory to your
PATHenvironment variable, so you can runstudio.shfrom anywhere, by editting your ~/.bashrc file. For example, if you extracted the bundle into your home directory, open up ~/.bashrc and add:# Add the Android Studio /bin directory to PATH export PATH=$PATH:~/android-studio/bin
- Alternatively add an alias for
studio.shspecifically, for example:# Add an alias for Android Studio's 'studio.sh' alias astudio=~/android-studio/bin/studio.sh
and then your can start Android Studio from the terminal by runningastudio. - Run Android Studio and ensure you have the latest version by clicking the 'Check' link on the bottom bar:

Android Studio is now set up and ready! Now continue to the section on downloading Android SDK packages below
Note: Android Studio may display a warning about using OpenJDK (the default JDK for Ubnutu). I have been able to use Android Studio just fine using OpenJDK, but if you'd prefer to use the recommended Oracle JDK, see the extra section on installing alternative JDKs at the end of this article.
Setting Up Eclipse ADT
- Ensure you have a JDK installed:
sudo apt-get install default-jdk
- Go to http://developer.android.com/sdk/index.html and download the latest version of the ADT Bundle for Linux.
- Extract the the archive to somewhere sensible, your home directory should be fine.
- To run Eclipse ADT: open a terminal and navigate to the
adt-bundle-linux-.../eclipsedirectory, then run:./eclipse
You will be asked to select a "workspace", the default location should be fine. - You can add an alias for this Eclipse installation in your ~/.bashrc file. For example, if you extracted the bundle into your home directory, open ~/.bashrc and add:
# Add an alias for Android Studio's 'studio.sh'
alias adt=~/adt-bundle-linux-.../eclipse/eclipse
and then your can start Eclipse ADT from the terminal by runningadt. - Run Eclipse ADT and check you have the latest version by going to Help > Check for Updates:

Eclipse ADT is now set up and ready!
Tip: Adding Eclipse Global gitignore Rules
If you're already using, or planning to use Git for version control, you can easily prevent any of Eclipse's temporary/configuration files from being added to any of your repositories using a global .gitignore file.
- Create a new empty file in a convenient location e.g. ~/.global_gitignore.
- Copy and paste these rules into that file.
- In a terminal run the following command to register your global ignore file:
git config --global core.excludesfile ~/.global_gitignore
Downloading Android SDK Packages
So far you've set up your Android IDE, either Android Studio or Eclipse ADT, and installed the core SDK tools. But new SDK components are being released all the time via the Android SDK Manager. Before you can start developing, you need to download some extra packages.
Note: As new versions of Android are released, new packages will become available in the SDK Manager and you will have to download these to gain access to the new APIs and features.
You can open the SDK Manager from the Android Studio welcome screen by clicking on 'Configure' and then 'SDK Manager':

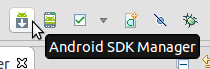
Or if you're using Eclipse ADT, just click the 'Android SDK Manager' icon in the top toolbar:
Installing the Packages
The typical set of packages to install are:
- The latest versions of 'Android SDK Tools', 'Android SDK Platform-tools' and Android SDK Build-tools' from the 'Tools' section.
- All of the packages for the latest Android version.
- The 'Android Support Library' package from the 'Extras' section.
The SDK Manager will often make a sensible suggestion of which packages to install for you.
Click the 'Install X packages...' button to continue and then accept the licenses.
Setting Up an Android Virtual Device
Virtual devices for testing are configured using the Android Virtual Device (AVD) Manager. This is only accessible from Android Studio after you've set up your first project, so for now you can launch it from the terminal by navigating to android-studio/sdk/tools and running:
./android avd
If you're using Eclipse ADT, just click the 'Android Virtual Device Manager' icon in the top toolbar:

Example Virtual Device
Once you've started the AVD Manager, click 'Create...' to add a new virtual device. Most of the options are self-explanatory and you can see a typical set up below (screenshot borrowed from Windows article). Note that you need to have downloaded the appropriate system image SDK packages, to have options for the 'CPU/ABI' field.

Extra: Installing Alternative JDKs
Installing and Using the Oracle JDK for Android Studio
Installing 'default-jdk' on Ubuntu will give you some version of OpenJDK and this will trigger the following warning when you open up Android Studio:

The Oracle JRE/JDK is a proprietary implementation of Java and it not available in any of the Ubuntu package repositories, but you can still download it from the Oracle website.
- Visit the Java SE Development Kit 8 Downloads page and download the appropriate version for your system. Ubuntu wont install .rpm packages by default, so just get the .tar.gz archive.
- Extract it somewhere sensible, for example /usr/lib/jvm, where OpenJDK gets installed. In the terminal:
sudo tar -xzf jdk-8u11-linux-x64.tar.gz -C /usr/lib/jvm
- Set the
STUDIO_JDKenvironment variable to the location where you extracted the Oracle JDK by adding the following line to ~/.bashrc:export STUDIO_JDK=/usr/lib/jvm
Note: STUDIO_JDK is an environment variable that's just used by Android Studio, but you could also change JAVA_HOME to achieve the same affect.
OpenJDK 7 on Older Versions of Ubuntu
The actual JDK which installing the 'default-jdk' meta-package give you depends on which version of Ubuntu you're using. Since 12.10 the default JDK package has been 'openjdk-7-jdk', but on 12.04 it's 'openjdk-6-jdk'. To get OpenJDK 7 on these older versions of Ubuntu:
-
sudo apt-get install openjdk-7-jre openjdk-7-jdk
-
sudo update-alternatives --config java
-
sudo update-alternatives --config javac
Note: If your STUDIO_JDK or JAVA_HOME environment variables are set you will need to point these to /usr/lib/jvm/java-7-openjdk-... for Android Studio to take notice of the newly installed JDK.