
Linking ASP.NET MVC with DB2 Table
How to link ASP.NET MVC with DB2 table
Overview
In this article, I will explain a simple example of linking a DB2 table (AS400) to an ADO.NET DataSet using ASP.NET MVC 4 in Visual Studio 2012. It will also feature Mvcscaffolding to cater for CRUD operations.
Objective
By the end of this topic, I will create an ASP.NET MVC 4 web application that allows the user to add, update and delete records from a DB2 table using customisable CRUD methods provided. The application will also create an audit trail of who updated the table and when.
In AS400
This example used is a product master file located in the AS400 database called Product. Here we have a physical file by the name of Product located in the library named RAYALS.

It is set up as follows according to the Data Description Specification (DDS) of a physical file in iSeries, where NAME is the name of the product (character of size 30), DESCRP (size 100) is the description, followed by PRICE (size 15) and QTY (quantity of size 10).

In Visual Studio 2012
We create a new project, selecting ASP.NET MVC 4 Web application in Visual Studio 2012.

Following that, we name it as SampleProductInterface in the location specified.

Then, we will select the ‘Internet Application’ as the template and accept the remaining default settings.

This will take a while when the solution is created for the first time.
When it is ready, you should see the following folders and files created in the Solution explorer.

Similar to previous MVC versions, MVC 4 has the usual Controllers, Models and Views folders as shown above. We can modify the layout of the initial page when the application starts.
We will select the _Layout.cshtml razor file located as follows.

From there, we can change the page title and action link title (highlighted) to whatever we want.
<title>@ViewBag.Title - Sample Product Interface </title>
<p class="site-title">@Html.ActionLink("Product Master Update", "Index", "Home")</p>
Creating the Dataset to Contain the AS400 table
We then create a DataSet in the Models folder. Right click the folder ‘Models’ and add item, select Data and choose DataSet.

Name it as ‘ProductDataSet.xsd’.

In the Server Explorer toolbox, we connect as follows:

Select the ![]() icon and the following window will appear. The name of the server will appear in the blue rectangle shown below.
icon and the following window will appear. The name of the server will appear in the blue rectangle shown below.

As shown above, the main thing is to get the correct Data source followed by the OLEDB provider. The other field to complete is the ‘Server or File name’.
Don’t forget to click on the ‘Test Connection’ button to confirm that the remote server is connectable. Following that, you can click ‘Ok’. The following connection will be shown below, under the Data Connections section as IBMDA400.BARBUDA.

By clicking on the Tables folder, you will see the following list of tables existing in that particular library (e.g. RAYALS). We will be focusing on the product table.
We click on the PRODUCT table on the left pane (server explorer) and drag it to the ProductDataSet.xsd file on the right. This will create an instance of the table in the .xsd.

Model Setup
In the Models folder, we then create a class of ProductsMaster that is responsible for entering data from the web UI to the AS400 table Product. Every time a new product is added to the AS400 table, we have an audit trail of who did it and when.
namespace SampleProductInterface.Models
{
    public class ProductMaster
    {
        [Key]
        [Required]
        public int ProdId { get; set; }
        public string ProductName { get; set; }
        public string Description {get;set;}
        public string Price {get;set;}
        public string Quantity {get;set;}
        public string Username { get; set; }
        public DateTime DateEntered { get; set; }
    }
}
CRUD Creation with Mvcscaffolding
We go to the package manager console and call the command Mvcscaffolding to create the relevant CRUD features for the ProductMaster class.
First, we install mvcscaffolding by typing install-package mvcscaffolding on the PM> prompt as shown below:
![]()
Once everything is installed for mvcscaffolding, the prompt will appear again as below with the trail of messages above it.

Call the following command in the Package Console Manager prompt to create the necessary CRUD views for the ProductMaster class in the Views/ProductMasters folder.
Scaffold Controller ProductMaster -Repository -Force.
Creating DAL Folder and Class
Create a DAL folder in the project as follows. This is where classes to access and modify the AS400 tables will be written.

Then, create a class in DAL folder called UnitOfWork.cs or whatever you may prefer.
using SampleProductInterface.Models;
using SampleProductInterface.Models.ProductDataSetTableAdapters;
using System;
using System.Collections.Generic;
using System.Data.OleDb;
using System.Linq;
using System.Web;
public class UnitOfWork
    {
        public string HostName, Library, UserName, Password, DBConnectionString;

        public static string GetConnectionString
        (string host, string library, string username, string password)
        {
            string _sqlConnectionString = string.Format
            ("Provider=IBMDA400.DataSource.1;Data Source={0};Persist Security Info=True;
            Password={3};User ID={2};Catalog Library List={1}", host, library, username, password);
            return _sqlConnectionString;
        }
        public UnitOfWork(string environment)
        {
            HostName = "BARBUDA";
            UserName = "MICKY";
            Password = "MOUSE";
            Library = "RAYALS";
            DBConnectionString = GetConnectionString(HostName, Library, UserName, Password);
        }

        public void WriteToProduct(ProductMaster prd)
        {
            using (var ta = new PRODUCTTableAdapter())
            {
                 ta.Connection = new OleDbConnection(DBConnectionString);
                 using (var ds = new ProductDataSet())
                 {
                     var productRow = ds.PRODUCT.NewPRODUCTRow();

                     productRow.NAME = prd.ProductName;
                     productRow.DESCRP = prd.Description;
                     productRow.PRICE = prd.Price;
                     productRow.QTY = prd.Quantity;
                     ds.PRODUCT.AddPRODUCTRow(productRow);
                     try
                     {
                         //insert into AS400 table
                         ta.Update(ds.PRODUCT);
                     }
                     catch (Exception ex)
                     {
                         throw new ApplicationException("Failed to insert Row into PRODUCT File", ex);
                     }
                 }
            }
        }
    }
In the above code, the WriteToProduct() method is the main process used to write to the AS400 file. The constructor sets the login credentials for the AS400 server, with Host, Library, Username and Password. The WriteToProduct() method will then connect to the AS400 using the connection string derived from the credentials initiated in the constructor and write to the dataset (ProductDataSet) from the product master file (ProductMaster). The table adapter (PRODUCTTableAdapter) will then execute an insert statement to get the dataset values and write to the PRODUCT table in AS400.
Modifying Controller Method
In the controller, the Create method should look like this:
[HttpPost]
        public ActionResult Create(ProductMaster productmaster)
        {
            UnitOfWork uow = new UnitOfWork();
            if (ModelState.IsValid) {
                //call uow to insert into AS400
                uow.WriteToProduct(productmaster);
                productmaster.Username = Environment.UserName;
                productmaster.DateEntered = DateTime.Now;
                productmasterRepository.InsertOrUpdate(productmaster);
                productmasterRepository.Save();
                return RedirectToAction("Index");
            } else {
                return View();
            }
        }
In the above code, we are calling the UnitOfWork method ‘WriteToProduct()’ which will write to the AS400 table. Then prior to updating the SQL server table ProductMaster, we ensure that the Username and DateEntered fields are populated by assigning the current Windows username and current time (DateTime.Now) to their respective values.
So in this instance, we will be populating 2 tables, one in the AS400 via the method WriteToProduct() and the other using the controller Edit method productmasterRepository.InsertOrUpdate (productmaster) and productmasterRepository.Save().
Modifying the cshtml Views
In the _Layout.cshtml file (located in Views/Shared), we will also add an extra line to enable access to the Index.cshtml page for updating the ProductMaster table. The extra line (third line) shown below is where the ActionLink for ProductMasters will point to the Index.cshtml page when the tab labelled ‘Products Update’ is selected.
     <ul id="menu">
         <li>@Html.ActionLink("Home", "Index", "Home")</li>
         <li>@Html.ActionLink("Products Update", "Index", "ProductMasters")</li>
         <li>@Html.ActionLink("About", "About", "Home")</li>
         <li>@Html.ActionLink("Contact", "Contact", "Home")</li>
     </ul>
Then in the _CreateOrEdit.cshtml file (located in Views/ProductMasters), delete the following rows:
<div class="editor-label">
    @Html.LabelFor(model => model.Username)
</div>
<div class="editor-field">
    @Html.EditorFor(model => model.Username)
    @Html.ValidationMessageFor(model => model.Username)
</div>

<div class="editor-label">
    @Html.LabelFor(model => model.DateEntered)
</div>
<div class="editor-field">
    @Html.EditorFor(model => model.DateEntered)
    @Html.ValidationMessageFor(model => model.DateEntered)
</div>
The program will automatically populate these fields in the ProgramMaster (SQL server table) at the point of creation, so we won’t need to touch them at all.
Running the Application
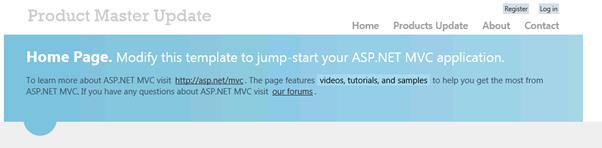
Press F5 to run the web application. You will see the following screen:
![]()
Click on the Products Update link to get to the following page:

The above field name display can be formatted to a more readable presentation, but for now our focus is on demonstrating how this application will update the AS400 table. At this moment, a database instance of ProductMaster would have been created on the App_Data folder of the project.
Click on the ‘Create New’ link and the following page will show. The filed values were typed in.

From there, click on the ‘Create’ button and the method ‘WriteToProduct()’ will be invoked to write to the AS400 table PRODUCT.
Looking at the query on the PRODUCT table, the row has indeed been added as shown below:

The next time we visit the Index.cshtml page, we will see a record detailing our entry into the AS400 table with the user profile and timestamp.
This ends our simple demonstration of populating an AS400 table via an ASP.NET MVC 4 web application.
Points of Interest
There is nothing particularly complex in deriving the above solution. The main thing is to get the correct DB2 (AS400) credential settings and things will be straight forward from there.