
Implementing One-To-Many Relationship in ASP.NET
4.82/5 (17 votes)
In this article we will create a project to see how one-to-many relationship can be implemented in ASP.NET
Introduction
As we know that there are three different types of Database Relationships:
- One-to-one relationships occur when each entry in the first table has one and only one counterpart in the second table. One-to-one relationships are rarely used because it is often more efficient to simply put all of the information in a single table.
- One-to-many relationships are the most common type of database relationship. They occur when each record in the first table corresponds to one or more records in the second table but each record in the second table corresponds to only one record in the first table. For example, the relationship between a Teachers table and a Students table in an elementary school database would likely be a one-to-many relationship, because each student has only one teacher, but each teacher may have multiple students.
- Many-to-many relationships occur when each record in the first table corresponds to one or more records in the second table and each record in the second table corresponds to one or more records in the first table. For example, the relationship between a Teachers and a Courses table would likely be many-to-many because each teacher may instruct more than one course and each course may have more than one instructor.
In this article, we will create a project to see how one-to-many relationship can be implemented in ASP.NET.
Background
We will take a simple example of Lecturer – Student relationship. For example, one Lecturer can be associated with one or more Student(s). We will complete this example in three steps:
-
Database changes
-
Data Access Layer changes
-
Presentation Layer changes
Database changes
Let’s execute the following SQL statements to create required tables and stored procedures:
CREATE TABLE [tblLecturer](
 [LecturerID] [int] NOT NULL,
 [Name] [varchar](50) NULL
 )
CREATE TABLE [tblStudent](
 [StudentID] [int] NOT NULL,
 [Name] [varchar](50) NULL
 )
CREATE TABLE [tblLecturerStudent](
 [LecturerID] [int] NOT NULL,
 [StudentID] [int] NOT NULL
 )

CREATE PROCEDURE [spDeleteLecturerStudentRelationByLecturerID]
 @LecturerID  int
AS
BEGIN
 SET NOCOUNT ON;
    DELETE FROM [tblLecturerStudent]
    WHERE [LecturerID] = @LecturerID
END

CREATE PROCEDURE [spInsertLecturerStudentRelation]
 @LecturerID  int,
 @StudentID int
AS
BEGIN
 SET NOCOUNT ON;
    INSERT INTO [tblLecturerStudent]
    VALUES(@LecturerID, @StudentID)
END

INSERT INTO [tblLecturer] VALUES(1, 'Lecturer-1')
INSERT INTO [tblLecturer] VALUES(2, 'Lecturer-2')
INSERT INTO [tblLecturer] VALUES(3, 'Lecturer-3')
INSERT INTO [tblLecturer] VALUES(4, 'Lecturer-4')
INSERT INTO [tblLecturer] VALUES(5, 'Lecturer-5')
INSERT INTO [tblLecturer] VALUES(6, 'Lecturer-6')
INSERT INTO [tblLecturer] VALUES(7, 'Lecturer-7')
INSERT INTO [tblLecturer] VALUES(8, 'Lecturer-8')

INSERT INTO [tblStudent] VALUES(1, 'Student-1')
INSERT INTO [tblStudent] VALUES(2, 'Student-2')
INSERT INTO [tblStudent] VALUES(3, 'Student-3')
INSERT INTO [tblStudent] VALUES(4, 'Student-4')
INSERT INTO [tblStudent] VALUES(5, 'Student-5')
INSERT INTO [tblStudent] VALUES(6, 'Student-6')
INSERT INTO [tblStudent] VALUES(7, 'Student-7')
INSERT INTO [tblStudent] VALUES(8, 'Student-8')
INSERT INTO [tblStudent] VALUES(9, 'Student-9')
INSERT INTO [tblStudent] VALUES(10, 'Student-10')
INSERT INTO [tblStudent] VALUES(11, 'Student-11')
INSERT INTO [tblStudent] VALUES(12, 'Student-12')
Data Access Layer changes
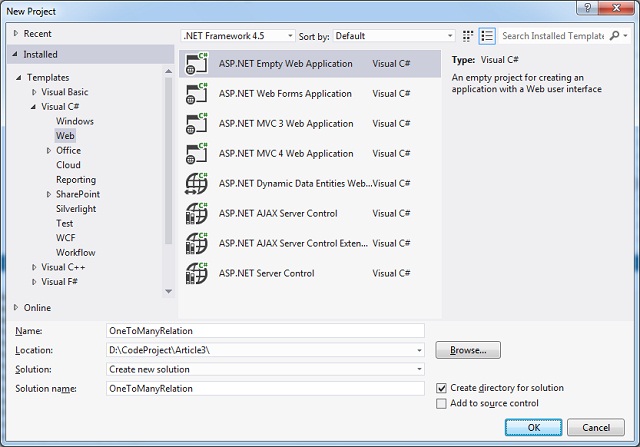
Let’s create a new ASP.NET Empty Web Application - OneToManyRelation > click OK
Right-click on the project > Add a Class file > DAL.cs
We will make this as a static class so that the methods can be called without instantiating any object of this class. Let’s add two public static methods to call the two stored procedures that we have already created.
public static class DAL
{
    public static void DeleteLecturerStudentRelationByLecturerID(int lecturerID)
    {
        //Get the Database Connection string from web.config file
        string connectionString = ConfigurationManager.ConnectionStrings["TESTConnectionString"].ConnectionString;
        using (SqlConnection con = new SqlConnection(connectionString))
        {
            //Create SqlParameter to hold Lectuere ID
            SqlParameter param1 = new SqlParameter();
            param1.ParameterName = "@LecturerID";
            param1.Value = lecturerID;
            //Create SqlCommand to execute the Stored Procedure
            SqlCommand cmd = new SqlCommand("spDeleteLecturerStudentRelationByLecturerID", con);
            cmd.CommandType = CommandType.StoredProcedure;
            //Add the parameter to the SqlCommand object
            cmd.Parameters.Add(param1);
            //Open Sql Connection
            con.Open();
            cmd.ExecuteNonQuery();
        }
    }
    public static void InsertLecturerStudentRelation(int lecturerID, int studentID)
    {
        //Get the Database Connection string from web.config file
        string connectionString = ConfigurationManager.ConnectionStrings["TESTConnectionString"].ConnectionString;
        using (SqlConnection con = new SqlConnection(connectionString))
        {
            //Create SqlParameter to hold Lectuere ID
            SqlParameter param1 = new SqlParameter();
            param1.ParameterName = "@LecturerID";
            param1.Value = lecturerID;
            //Create SqlParameter to hold Student ID
            SqlParameter param2 = new SqlParameter();
            param2.ParameterName = "@StudentID";
            param2.Value = studentID;
            //Create SqlCommand to execute the Stored Procedure
            SqlCommand cmd = new SqlCommand("spInsertLecturerStudentRelation", con);
            cmd.CommandType =CommandType.StoredProcedure;
            //Add both the parameters to the SqlCommand object
            cmd.Parameters.Add(param1);
            cmd.Parameters.Add(param2);
            //Open Sql Connection
            con.Open();
            cmd.ExecuteNonQuery();
        }
    }
}
Now we are only left with frontend changes. Let’s add a new Web Form – WebForm1.aspx (keep the default name)
We will have a ListBox control and a CheckBoxList control. List of all Lecturers will be displayed in ListBox control and all students will be displayed in the CheckBoxList control.
Presentation Layer changes
<table style="width: 500px;" border="1">
    <tr>
        <th>Lecturer</th>
        <th>Student</th>
    </tr>
    <tr>
        <td style="width:50%; height:100px">
            <asp:ListBox ID="lstLecturer" runat="server" Width="100%" Height="100%">
            </asp:ListBox>
        </td>
        <td style="width:50%; height:100px">
            <!-- added Panel to show vertical scrollbar -->
            <asp:Panel ID="Panel2" runat="server" ScrollBars="Vertical" Height="100%">
                <asp:CheckBoxList ID="cblStudent" runat="server" Width="100%">
                </asp:CheckBoxList>
            </asp:Panel>
        </td>
    </tr>
</table>
NOTE: we have added a <asp:Panel> control to show a vertical scrollbar when there are more records to display.
Go to Design view of the page > select the lstLecturer ListBox control > click smart menu > click Choose Data Source

Data Source Configuration Wizard will appear > Select New Data source…

Select Database > click OK

Click New Connection button:

Enter Server name > click Refresh button > Select the Database Name > click Test Connection
Once it’s tested successfully > click OK:

Connection string will be created and selected > click on Next button:

Keep the default connection string name > Click Next button:

Select tblLecturer table > click Next:

Click Test Query button to test the output > click Finish button

Select a data field to display in the ListBox: Name
Select a data field for the value of the ListBox: LecturerID
Click OK button to complete the Data Source Configuration Wizard:

You should find <connectionStrings> section is added in the web.config file:
<connectionStrings>
    <add name="TESTConnectionString" connectionString="Data Source=.\SQLEXPRESS;Initial Catalog=TEST;Integrated Security=True"
        providerName="System.Data.SqlClient" />
</connectionStrings>
Similarly let’s go ahead and bind tblStudent table with cblStudent CheckListBox control.
Now check the WebForm.aspx to see the changes (in bold) that have taken place.
<table style="width: 500px;" border="1">
    <tr>
        <th>Lecturer</th>
        <th>Student</th>
    </tr>
    <tr>
        <td style="width:50%; height:100px">
            <asp:ListBox ID="lstLecturer" runat="server" Width="100%" Height="100%"
                DataSourceID="SqlDataSource1" DataTextField="Name" DataValueField="LecturerID"></asp:ListBox>
            <asp:SqlDataSource ID="SqlDataSource1" runat="server"
                ConnectionString="<%$ ConnectionStrings:TESTConnectionString %>"
                SelectCommand="SELECT * FROM [tblLecturer]"></asp:SqlDataSource>
        </td>
        <td style="width:50%; height:100px">
            <!-- added Panel to show vertical scrollbar -->
            <asp:Panel ID="Panel2" runat="server" ScrollBars="Vertical" Height="100%">
                <asp:CheckBoxList ID="cblStudent" runat="server" Width="100%"
                    DataSourceID="SqlDataSource2" DataTextField="Name" DataValueField="StudentID">
                </asp:CheckBoxList>
                <asp:SqlDataSource ID="SqlDataSource2" runat="server"
                    ConnectionString="<%$ ConnectionStrings:TESTConnectionString %>"
                    SelectCommand="SELECT * FROM [tblStudent]"></asp:SqlDataSource>
            </asp:Panel>
        </td>
    </tr>
</table>
Note: SqlDataSource1 and SqlDataSource2 controls have been added by the Data Source Configuration Wizard.
Let’s run the web site once and see if the page is displaying data as expected:

Now we will add a Button control to call the method which will actually delete the existing mappings and insert new relations in the database.
<asp:Button ID="btnSave" runat="server" Text="Save" OnClick="btnSave_Click" />
Here is the code written in button click event in WebForm1.aspx.cs file:
protected void btnSave_Click(object sender, EventArgs e)
{
    int lecturerId, studentId;
    // Check if a Lecturer is selected
    if (lstLecturer.SelectedIndex >= 0)
    {
        lecturerId = Convert.ToInt32(lstLecturer.Items[lstLecturer.SelectedIndex].Value);
        // Call method to delete all the existing entries from tblLecturerStudent by LecturerID
        DAL.DeleteLecturerStudentRelationByLecturerID(lecturerId);
        foreach (ListItem student in cblStudent.Items)
        {
            if (student.Selected == true)
            {
                studentId = Convert.ToInt32(student.Value);
                // code to insert Lecturer - Student relation in a table
                DAL.InsertLecturerStudentRelation(lecturerId, studentId);
            }
        }
    }
}
Let’s run the web site and click Save button after selecting a Lecturer from the ListBox and one or more Students in the CheckBoxList control. Then verify if the data is getting inserted in the database successfully.
Now we want to have a functionality which will fetch the data from database and display the relationship. Let’s add the following store procedure in the database end:
CREATE PROCEDURE [spGetAllStudentByLecturerID]
 @LecturerID int
AS
BEGIN
 SET NOCOUNT ON;
    SELECT [StudentID] FROM [tblLecturerStudent]
    WHERE [LecturerID] = @LecturerID
END
The idea is we will pass the selected Lecturer ID and fetch all the Students associated with the Lecturer. Let’s add the following static method in DAL.cs file.
public static List<int> GetAllStudentByLecturerID(int lecturerID)
{
    List<int> studentIDs = new List<int>();
    //Get the Database Connection string from web.config file
    string connectionString = ConfigurationManager.ConnectionStrings["TESTConnectionString"].ConnectionString;
    using (SqlConnection con = new SqlConnection(connectionString))
    {
        //Create SqlParameter to hold Lectuere ID
        SqlParameter param1 = new SqlParameter();
        param1.ParameterName = "@LecturerID";
        param1.Value = lecturerID;
        //Create SqlCommand to execute the Stored Procedure
        SqlCommand cmd = new SqlCommand("spGetAllStudentByLecturerID", con);
        cmd.CommandType = CommandType.StoredProcedure;
        //Add the parameter to the SqlCommand object
        cmd.Parameters.Add(param1);
        //Open Sql Connection
        con.Open();
        SqlDataReader dr = cmd.ExecuteReader();
        while (dr.Read())
        {
            studentIDs.Add(Convert.ToInt32(dr["StudentID"]));
        }
    }
    return studentIDs;
}
Set AutoPostBack="true" and OnSelectedIndexChanged="lstLecturer_SelectedIndexChanged" to the lstLecturer ListBox control.
protected void lstLecturer_SelectedIndexChanged(object sender, EventArgs e)
{
    int lecturerId, studentId;
    // Check if a Lecturer is selected
    if (lstLecturer.SelectedIndex >= 0)
    {
        lecturerId = Convert.ToInt32(lstLecturer.Items[lstLecturer.SelectedIndex].Value);
        //Get all the Students associated with the selected Lecturer
        List<int> studentIDs = DAL.GetAllStudentByLecturerID(lecturerId);
        foreach (ListItem student in cblStudent.Items)
        {
            studentId = Convert.ToInt32(student.Value);
            if (studentIDs.Contains(studentId))
            {
                student.Selected = true;
            }
            else
            {
                student.Selected = false;
            }
        }
    }
}
Let’s execute the web site and select one Lecturer from the ListBox control. If there are Students already associated with the selected Lecturer in the database, it will show those Students checked in the CheckBoxList control:

Hope you like this article.
Happy Coding :)