
Getting Started With Windows Phone Development
4.27/5 (8 votes)
I started developing application for the Windows Phone platform a few months ago. There are a lot of things i learned along the way and i want to share all that with you through a series of blog posts. In the current post, we will focus on the basic and will develop a very simple […]
I started developing application for the Windows Phone platform a few months ago. There are a lot of things i learned along the way and i want to share all that with you through a series of blog posts. In the current post, we will focus on the basic and will develop a very simple app for the Windows Phone platform.
Getting The Development Tools
To develop applications for Windows Phone 8, you will need to download and install the Windows Phone 8 SDK. You can get the sdk by going to http://dev.windowsphone.com and clicking on “Download Dev Tools” which will take you to the page from where you can download the Windows Phone 8 SDK. Please be aware of the minimum system requirements that is needed. You will need Windows 8 64 bit or Windows 8 pro 64 bit version or higher if you want to use the Windows Phone 8 Emulator. You will also need Visual Studio 2012/2013 installed. If you don’t have VS 2012/2013 on your machine, the setup will install the Visual Studio 2012 Express for Windows Phone. For running Windows Phone Emulator, you will need Windows 8 pro or higher and a processor that supports SLAT. If your system doesn’t meet the requirement for Emulator, you can still develop applications using the SDK but you will need a Windows Phone 8 device to test your app.
Creating Your First App
Once you have the tools installed, lets being by creating our first application. I am assuming you are familiar with .Net development using C# and are have some familiarity with XAML.
Open Visual Studio 2012 –> Go To File –> New Project. In the Window that opens, select ‘Windows Phone’ option under Visual C# from the left hand pane. You will get different type of options like “Windows Phone App”, “Windows Phone Panorama App”, “Windows Phone Databound App” etc. For this example, select “Windows Phone App” and name it “MyFirstWPApp”. Select the location where you want the application files to be stored. You can use the default location or you can change it if you want. Click on Ok.
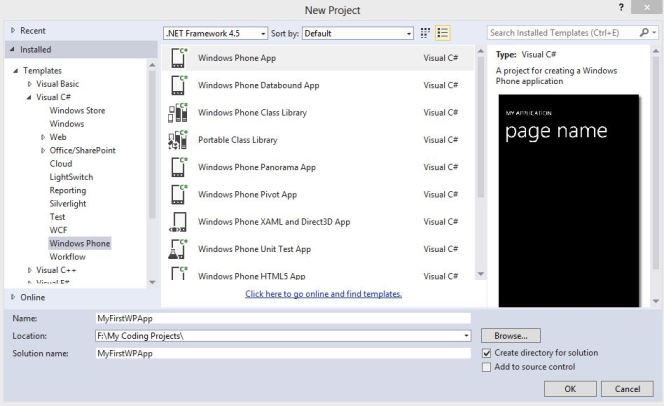
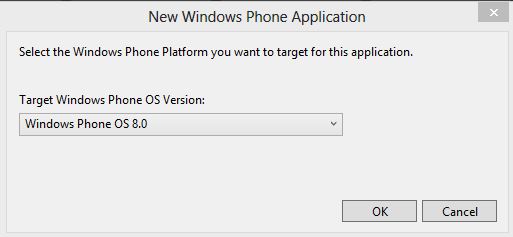
A second dialog box will open using which you can select the Windows Phone OS version that you want to target. If you select Windows Phone OS 7.1, that will be the minimum OS which will be required by your app to run. You can create a Windows Phone 7 application and it will be run on Windows Phone 8 OS but for this example, we are going to make an app for Windows Phone 8 OS, so select Windows Phone OS 8 from the dropdown and click Ok.
After clicking on Ok, a progress bar will appear as it takes some time for the default solution to be created. Once the solution is created, the screen will appear as shown below.
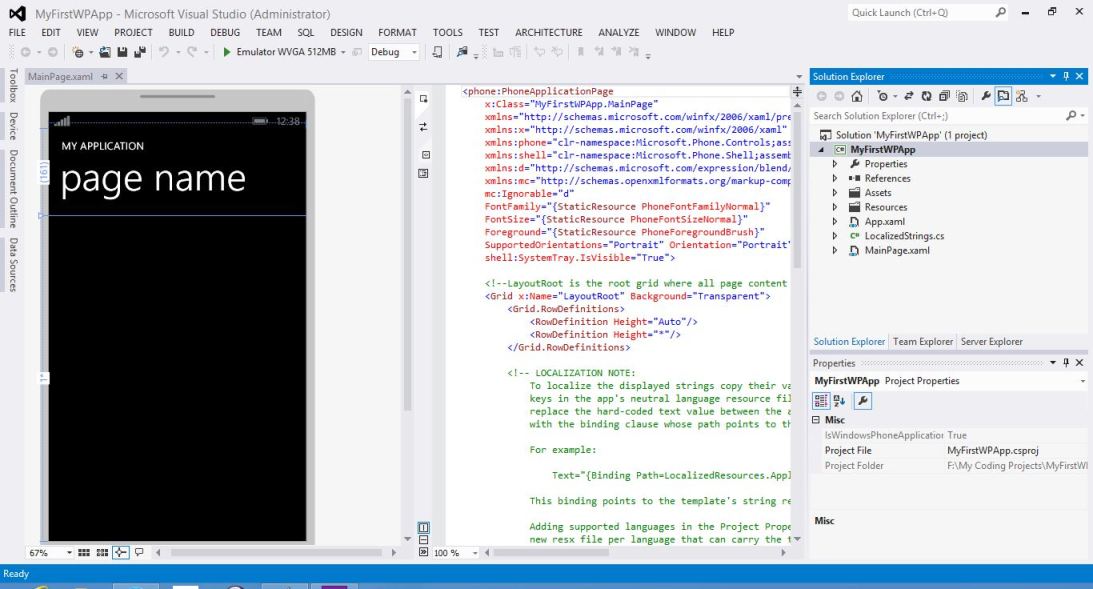
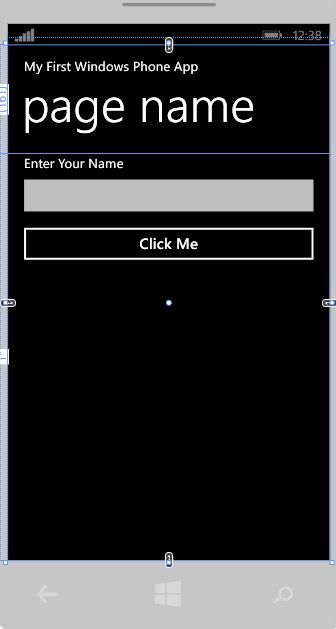
By default, MainPage.xaml is displayed. The middle pane shows the XAML markup that defines the user interface while the left pane displays the output of the markup. It gives us an indication of how the UI will be displayed in the actual phone. The solution explorer displays the files which are part of the solution. The main Layout contains a stackpanel which has 2 textblock controls which display the name of the application and page name. Lets change the text property of the first textblock from “My Application” to “My First Windows Phone App”. Lets also add a couple of controls to the markup. We will add a TextBlock, a TextBox and a button to the “ContentPanel” grid element. For better alignment, we will also add a stack panel inside the grid inside which we will add our controls. Here is the code for the same
<!--ContentPanel - place additional content here-->
<Grid x:Name="ContentPanel" Grid.Row="1" Margin="12,0,12,0">
<StackPanel>
<TextBlock Text="Enter Your Name" Style="{StaticResource PhoneTextNormalStyle}" />
<TextBox x:Name="txtName" />
<Button x:Name="btnClickMe" Content="Click Me" Tap="btnClickMe_Tap_1" />
</StackPanel>
</Grid>
Below is how the UI will look like after the change.
Lets write some code which will be called on the click of the “ClickMe” button. We will do so by handling the Tap event of the button which is also equivalent to the Click event. We will open “MainPage.xaml.cs” file by clicking on the arrow next to MainPage.xaml in the solution explorer and by double clicking on the MainPage.xaml.cs file. Lets add some code to the Tap event which will display a message box with a greeting. Here is the code for the same
private void btnClickMe_Tap_1(object sender, System.Windows.Input.GestureEventArgs e)
{
if (txtName.Text.Length > 0)
{
MessageBox.Show("Hello " + txtName.Text + ", You have just completed your first WP app");
}
else
{
MessageBox.Show("Please enter your Name");
}
}
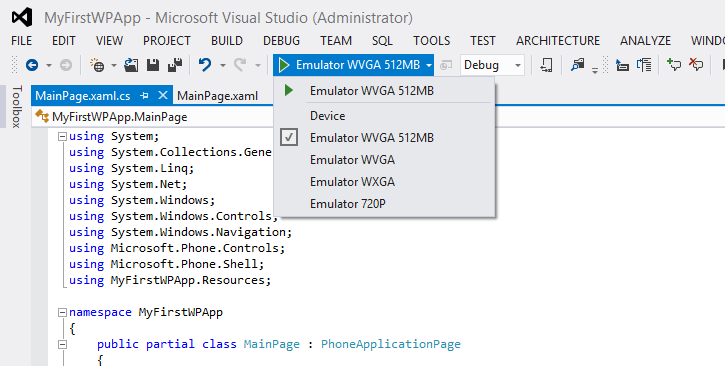
On button tap, we have displayed a message box to greet the user. If nothing is entered in the textbox, we will get a validation message prompting for a valid name. We will build the project to ensure that there are no errors. Once the build is done, we can run the application on the Emulator or our phone. Lets test our application on the emulator. In the Emulator section next to the start debugging button, you will notice that some default emulators for different configurations are provided by default. We have currently selected the “Emulator WVGA 512 MB”. To run the emulator, click on the “Green Arrow” button. Our project will then be compiled and if no errors are found, the emulator will start. It might take some time for the emulator to start for the first time.
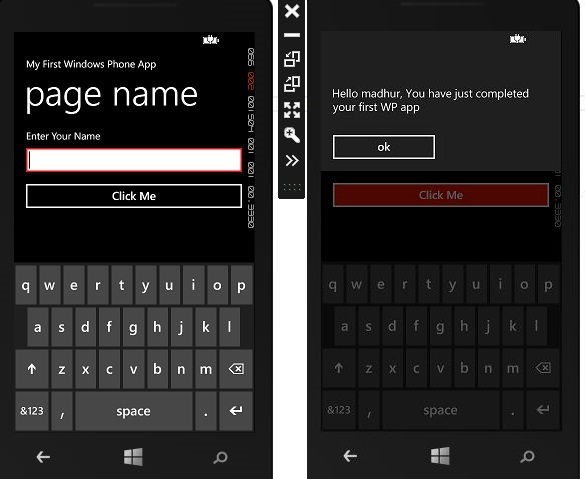
Once the emulator starts, our application will be launched by default and we can then test it. On clicking on the textbox in the emulator will open the digital keyboard. You can click on the keyboard with the mouse to enter the input. Then click on the “ClickMe” button and the Message Popup will appear. So we have successfully tested out first application on the Emulator.
Though it didn’t cover any useful functionality, we got an idea of the basics needed to start development. In the next part, i will focus on Navigation between pages and how to transfer data from one page to another in the application.