
Creating a Chained dropdownlist using jQuery and XML
4.46/5 (11 votes)
This article is about to create a chained drop down list when we want to represent data from hierarchical data sets.

Introduction
This article is about to create a Chained Drop Down Menu where we want to represent data from hierarchical data sets. Here, I’ll be discussing the method to populate server side HTML drop down lists using client side jQuery script. My database is a simple XML data file. The jQuery provides concrete support to XML data files by calling AJAX. AJAX call using jQuery is much faster in response and it gives optimum support to most of ASP.NET controls.
Using the Code
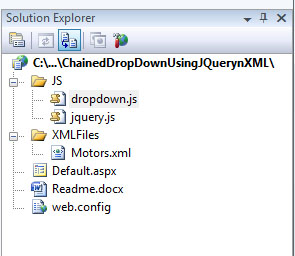
The program in context of demonstration has the use of two .JS files, first is the latest version of jquery file downloaded from jquery website. Another is responsible for this program to work (dropdown.js).
My chained drop down menu goes up to Level2 starting from Level0, however levels can be more or less based upon need. The data in DropDownList at Level0 is specified by hard code on page, two items ‘Cars’ and ‘Bikes’. When user selects ‘Cars’, a list of available ‘Cars’ has been populated in DropDownList at Level1 and the same is the case for ‘Bikes’, a list of available bikes comes up and gets populated. The third DropDownList at Level2 fills with the ‘Brands’ available for selected car or bike at Level1. The whole work is done in two functions defined in ‘dropdown.js’ files. Another function in the same file is being called when the user clicks a button on the page. This click picks data selected from all dropdown lists, and fills it in a division on page (e.g. Cars -- > Tata --> Nano). Initially, the dropdown list at Level1 and Level2 with button is disabled. Once the list at Level1 gets populated, it becomes enabled and when the list at Level2 gets populated, both button and this list get enabled.
There is an XML file ‘Motors.xml’, this file stores all our data. When we need to fill for ‘Cars’ data in <motoc> nodes has been extracted and filled, for ‘Bikes’ <motob>, for ‘Cars Brands’ <motocb>, and for ‘Bikes Brands’ <motobb> are the nodes.
The ids of four elements I’m using on page are: drpMain (dropdown list at Level0), drpMoto (dropdown list at Level1), drpBrand (dropdown list at Level2) and btnGo (click button). So when I’ll be writing about drpMain that is the dropdown list at Level0 and vice versa.
Now the first jQuery function in ‘dropdown.js’ file which is responsible for populating the list at Level1 is given below (this function is called at ‘onchange’ event of ‘drpMain’):
    $.fillM = function()
    {
        $('#drpMoto option').remove();
        $('#drpBrand option').remove();
        $('#drpMoto').attr('disabled',true);
        $('#drpBrand').attr('disabled',true);
        $('#btnGo').attr('disabled',true);
        if($('#drpMain').val() != "0")
        {
            if($('#drpMain').val() == "1")
            {
                $.ajax({
                    type: "GET",
                    url: "XMLFiles/Motors.xml",
                    dataType: "xml",
                    success: function(xml) {
                    $(xml).find('motoc').each(function(){
                        $('#drpMoto').append($('<option></option>').val
			($(this).attr('mcid')).html($(this).attr('mcname')));
                    });
                 }
              });

           }
           else if($('#drpMain').val() == "2")
           {
                  $.ajax({
                    type: "GET",
                    url: "XMLFiles/Motors.xml",
                    dataType: "xml",
                    success: function(xml) {
                    $(xml).find('motob').each(function(){
                    $('#drpMoto').append($('<option></option>').val
			($(this).attr('mbid')).html($(this).attr('mbname')));
                    });
                 }
              });
           }
           $('#drpMoto').removeAttr('disabled');
        }
    }
When there is a change in selection of ‘drpMain’, the options in ‘drpMoto’ and ‘drpBrand’ have been romoved and both of these lists with buttons get disabled. This has been done in the top five lines of the above function.
There is a condition in the sixth line, here the program checks the value which has been selected if found non zero, it means other than default selection has been chosen and the control enters into a conditional block. Otherwise, the control comes out of the function without enabling any disabled element.
When inside the conditional block, it has been checked if the chosen value is 1 (for ‘Cars’) or 2 (for ‘Bikes’). Then the AJAX call for Motor.xml has been performed and the nodes starting with <motoc> has been extracted for chosen value 1 or the nodes starting with <motob> has been extracted for chosen value 2. Data from extracted nodes has now been filled in ‘drpMoto’ (dropdown list at Level1) and ‘drpMoto’ get enabled for selection.
Now the second jQuery function in ‘dropdown.js’ file which is responsible for populating the list at Level2 is given below (this function is called at ‘onchange’ event of ‘drpMoto’):
    $.fillS = function()
    {
        $('#drpBrand option').remove();
        $('#drpBrand').attr('disabled',true);
        $('#btnGo').attr('disabled',true);
        if($('#drpMoto').val() != "0")
        {
            if($('#drpMain').val() == "1")
            {
              $.ajax({
                    type: "GET",
                    url: "XMLFiles/Motors.xml",
                    dataType: "xml",
                    success: function(xml) {
                    $(xml).find('motocb').each(function(){

                        if($(this).attr('mcid') == $('#drpMoto').val())
                        $('#drpBrand').append($('<option></option>').val
			($(this).attr('mcbid')).html($(this).attr('mcbname')));
                    });
                 }
              });
            }
            else if($('#drpMain').val() == "2")
            {
                $.ajax({
                    type: "GET",
                    url: "XMLFiles/Motors.xml",
                    dataType: "xml",
                    success: function(xml) {
                    $(xml).find('motobb').each(function(){

                        if($(this).attr('mbid') ==  $('#drpMoto').val())
                        $('#drpBrand').append($('<option></option>').val
			($(this).attr('mbbid')).html($(this).attr('mbbname')));
                    });
                 }
              });
            }
            $('#drpBrand').removeAttr('disabled');
            $('#btnGo').removeAttr('disabled');
        }
    }
When there is a change in selection of ‘drpMoto’, the options in ‘drpBrand’ have been removed and ‘drpBrand’ with button get disabled. This has been done in the top three lines of the above function.
There is a condition in the fourth line, here the program checks the value which has been selected if found non zero, means other than default selection has been chosen and the control enters into a conditional block. Otherwise the control comes out of the function without enabling any disabled element.
When inside the conditional block, it has been checked if the chosen value is 1 (for ‘Cars’) or 2 (for ‘Bikes’) at ‘drpMain’. Then the AJAX call for Motor.xml has been performed and the nodes starting with <motocb> has been extracted for chosen value 1 or the nodes starting with <motobb> has been extracted for chosen value 2. Data from extracted nodes has now been filtered for chosen Car or Bike then filled in ‘drpBrand’ (dropdown list at Level2) and ‘drpBrand’ and button gets enabled.
One extra thing in this function is the filtration of brands data for a chosen car or bike. This is something like we use foreign keys in SQL/Oracle. The purpose is extraction of data rows in sub table for a particular primary value in base table. But there is no foreign key here, this is done by using a condition for mathing mcid/mbid of base element with sub elements. If there is a match, then filled in ‘drpBrand’ otherwise ignored.
See this portion of the above function:
    $(xml).find('motocb').each(function(){
       if($(this).attr('mcid') == $('#drpMoto').val())
          $('#drpBrand').append($('<option></option>').val
		($(this).attr('mcbid')).html($(this).attr('mcbname')));
    });
When the loop is going on, a condition has been checked each time before filling the data in ‘drpBrand’.
Now our, Level2 DropDownList is available for selection and the button for click. When user clicks the button, the selected results come up in a division on page. See the third function in ‘dropdown.js’ file:
    $.redP = function()
    {
        if($('#drpMain').val() != "0" && $('#drpMoto').val() != "0"
				&& $('#drpBrand').val() != "0")
                $('#dResult').html("Searched for: " +
		$('#drpMain option:selected').text() + "-->" +
		$('#drpMoto option:selected').text() + "-->" +
		$('#drpBrand option:selected').text());
    }
This is the end of the program in demonstration.
Amendments
Regarding this article, I got a query. The enquirer argued that this program does not work with server side postbacks. That means all data gets lost when the page is posted back to the server. All that happens because of the lack of view state while we fill in a control through client side programming. However I have added a solution for it, where I'm managing the state using cookies, one more .JS file that is a cookie plugin has been added in newly uploaded example. To know more about it, please read the Dianal's query and my given suggestions below in the message board.
Points to Ponder
The practical stuff is attached as a demo. You will easily understand when you see the download files. If you're using ASPX DropDownList, you may find difficulty while appending the data to them and collecting selected values. So it is better to use HTML select control and make it server-side by adding runat="server". The latter works perfectly. You might be interested in another article that I wrote which is about doing the same (chained dropdown) using server-side programming. You can read Creating a chained dropdownlist using AJAX and XML.
Final Words
I hope you find the stuff helpful. Thanks for reading. Good luck!