
Deploy an Application to Azure Kubernetes Service
5.00/5 (2 votes)
How to deploy applications to the Azure Kubernetes Cluster powered by arm64-based virtual machines
Who Is This For?
This learning path is dedicated to developers interested in learning how to deploy applications to the Azure Kubernetes Cluster powered by arm64-based virtual machines.
What Will You Learn?
Upon completion of this learning path, you will be able to:
- Create a Kubernetes cluster using the Azure Kubernetes Service.
- Deploy a containerized application to the Azure Kubernetes Service.
Prerequisites
Before starting, you will need the following:
- Azure subscription. Use this link to sign up for a free account: https://azure.microsoft.com/en-us/free/.
- Complete the first and second learning paths of this series.
Why Do You Need Kubernetes?
Containerization offers an excellent way to package your applications with all the required dependencies. Such an approach makes your applications portable. However, you still need to run, manage, and monitor running containers. In practice, the containers can become unresponsive or fail. In such cases, you will need to restart them manually. Also, you often use containers to spin up several instances of the same application or service to balance the load. Running many containers in parallel would require you to schedule containers on several physical or virtual machines. Moreover, you would also need to distribute the incoming traffic onto underlying containers.
Here is where Kubernetes comes into play. Specifically, Kubernetes was created to help automate the many tasks you would otherwise need to perform manually, like restarting failed containers, scheduling them on different machines, and load balancing.
Kubernetes was initially created at Google based on their experience running distributed, containerized workloads on many machines. Kubernetes has been quickly recognized as a handy tool. Since it is open-source, cloud providers also provide managed Kubernetes services, which help you use this technology relatively easily to manage your containerized workloads.
At the top level, the Kubernetes cluster is comprised of the control plane and compute nodes. The control plane makes global decisions about the cluster (like scheduling containers), while the compute nodes are physical or virtual machines. These machines are equipped with container runtime (like Docker), which is necessary to run containers.
In this learning path, you will learn how to create a Kubernetes cluster in Azure. This cluster will use arm64-powered Virtual Machines as compute nodes. Then, you will deploy the containerized People.WebApp to this cluster.
Objective
You will create the managed Kubernetes cluster in Azure, which is integrated with the Azure Container Registry. The cluster will use arm64 VMs as the nodes. This tutorial shows how to manually create the cluster. Optionally, you can use Terraform-based deployment as described here: https://learn.arm.com/learning-paths/servers-and-cloud-computing/aks/cluster_deployment/ .
Create the Kubernetes Cluster
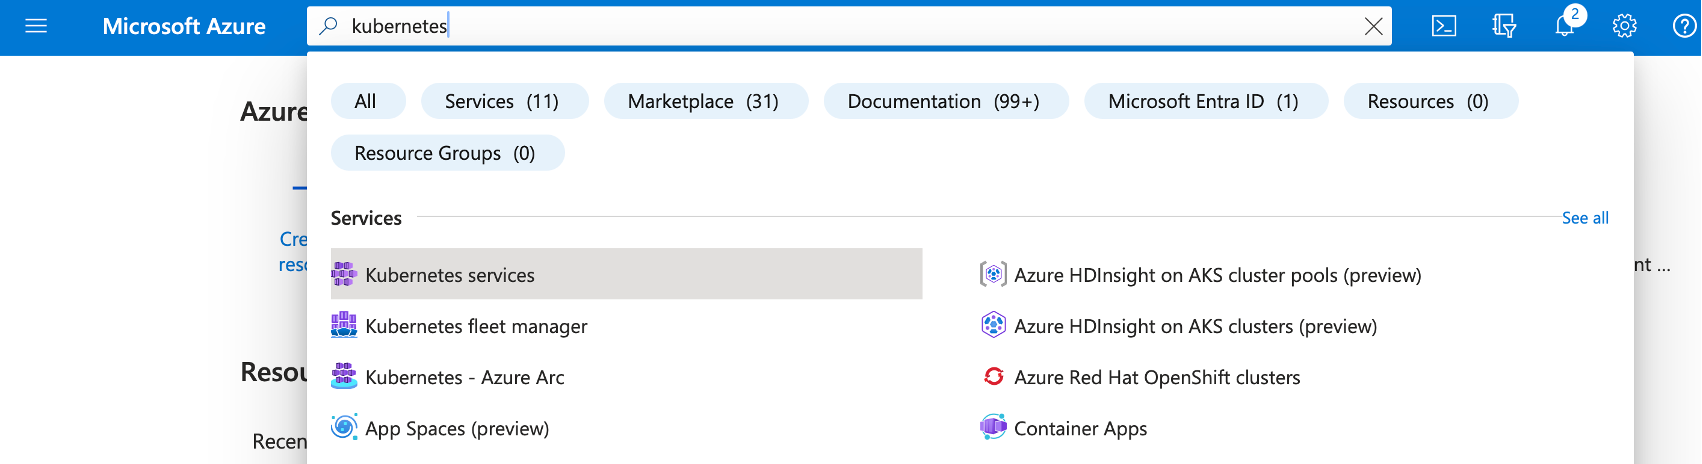
Login to the Azure Portal and type Kubernetes in the search box. Then, look for the Kubernetes services:
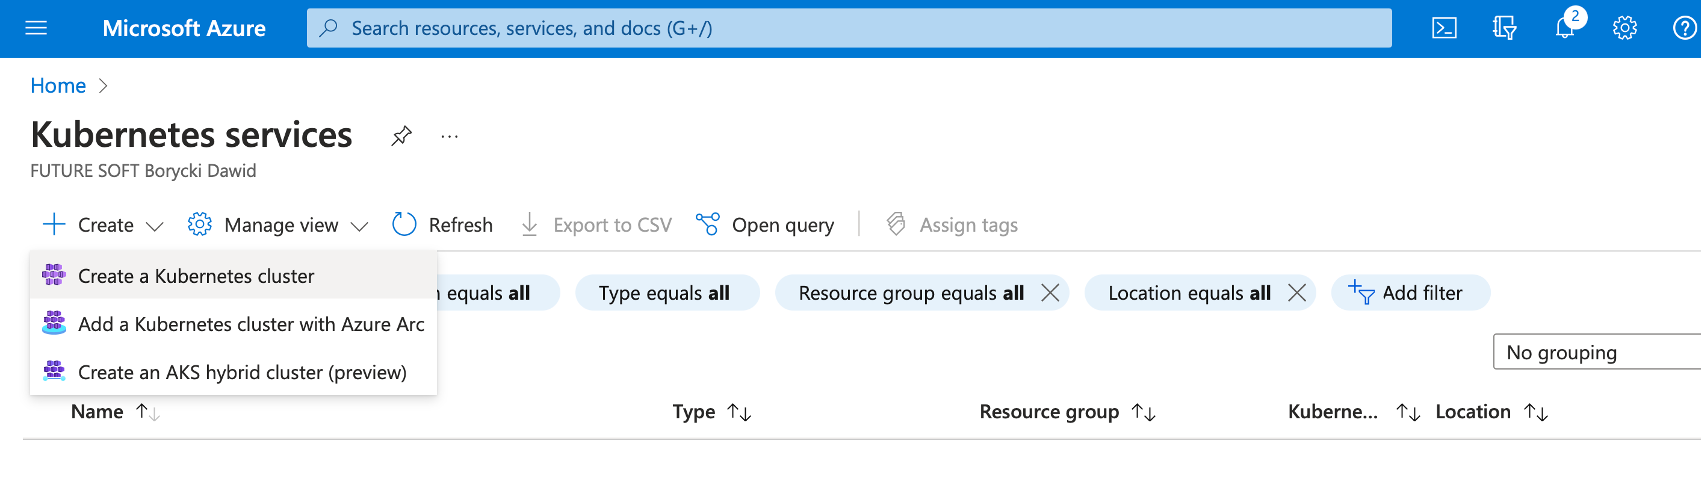
This will open Kubernetes services, click + Create and then select Create a Kubernetes cluster:
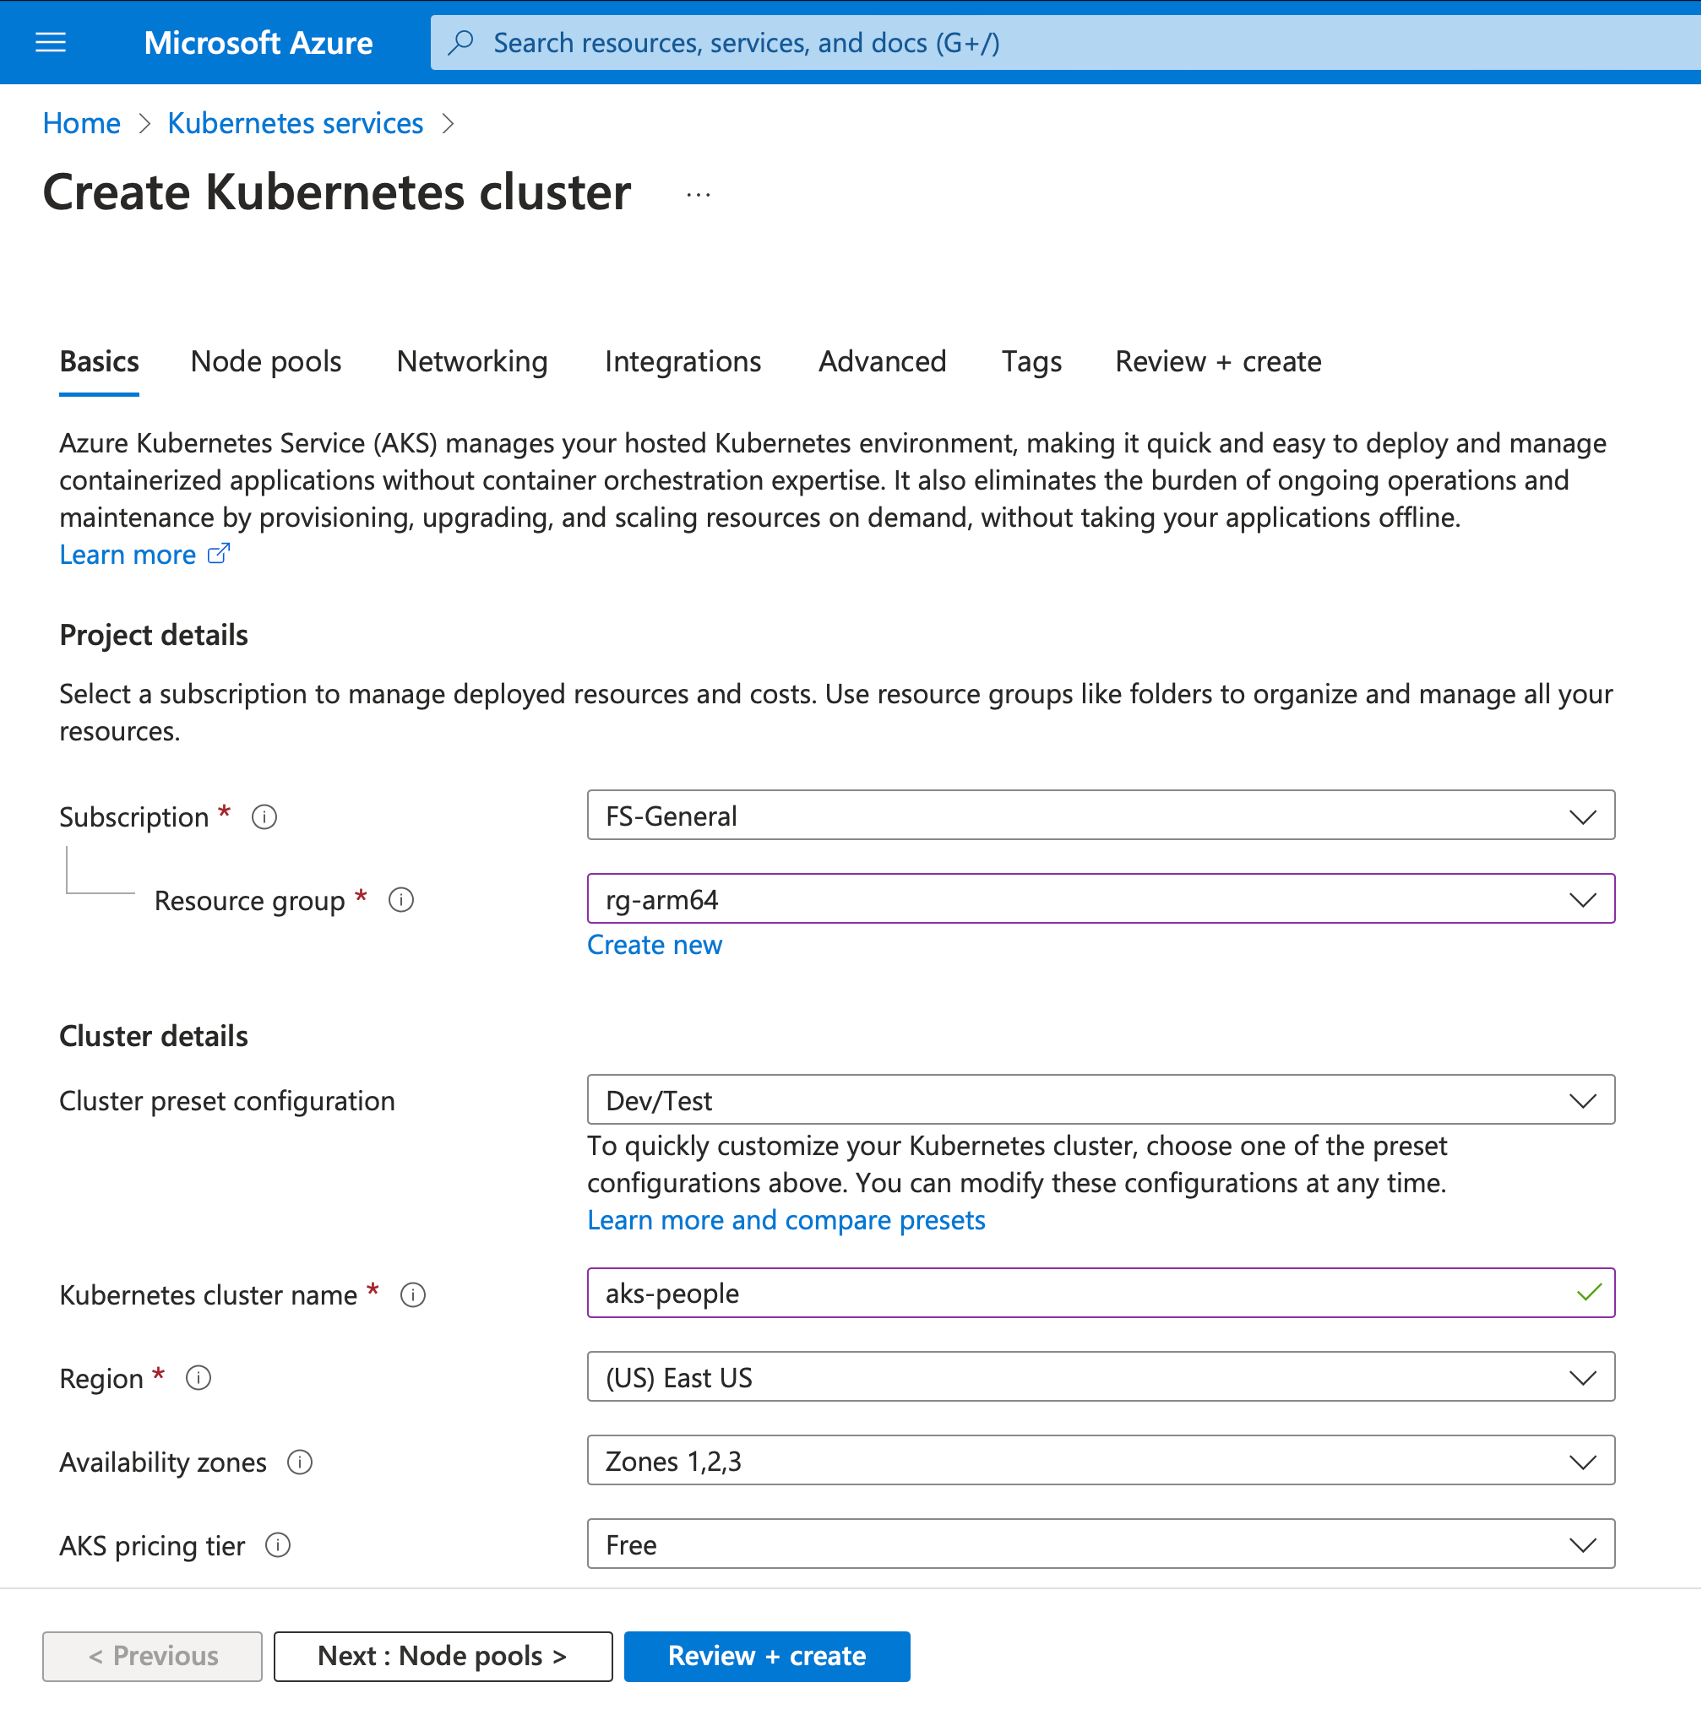
The previous step will activate the Create Kubernetes cluster wizard, which you use to configure your cluster as follows:
- Subscription: select your subscription
- Resource group: rg-arm64
- Cluster preset configuration: Dev/Test
- Kubernetes cluster name: aks-people
- Region: US East (or any other region)
- Availability Zones: Select all (if available). Otherwise, keep the default setting.
- AKS pricing tier: Free
- Kubernetes version: default (here that is 1.26.6)
- Automatic upgrade: Enabled with patch (recommended)
- Authentication and Authentication: Local accounts with Kubernetes RBAC
At this point, your configuration should look as follows:
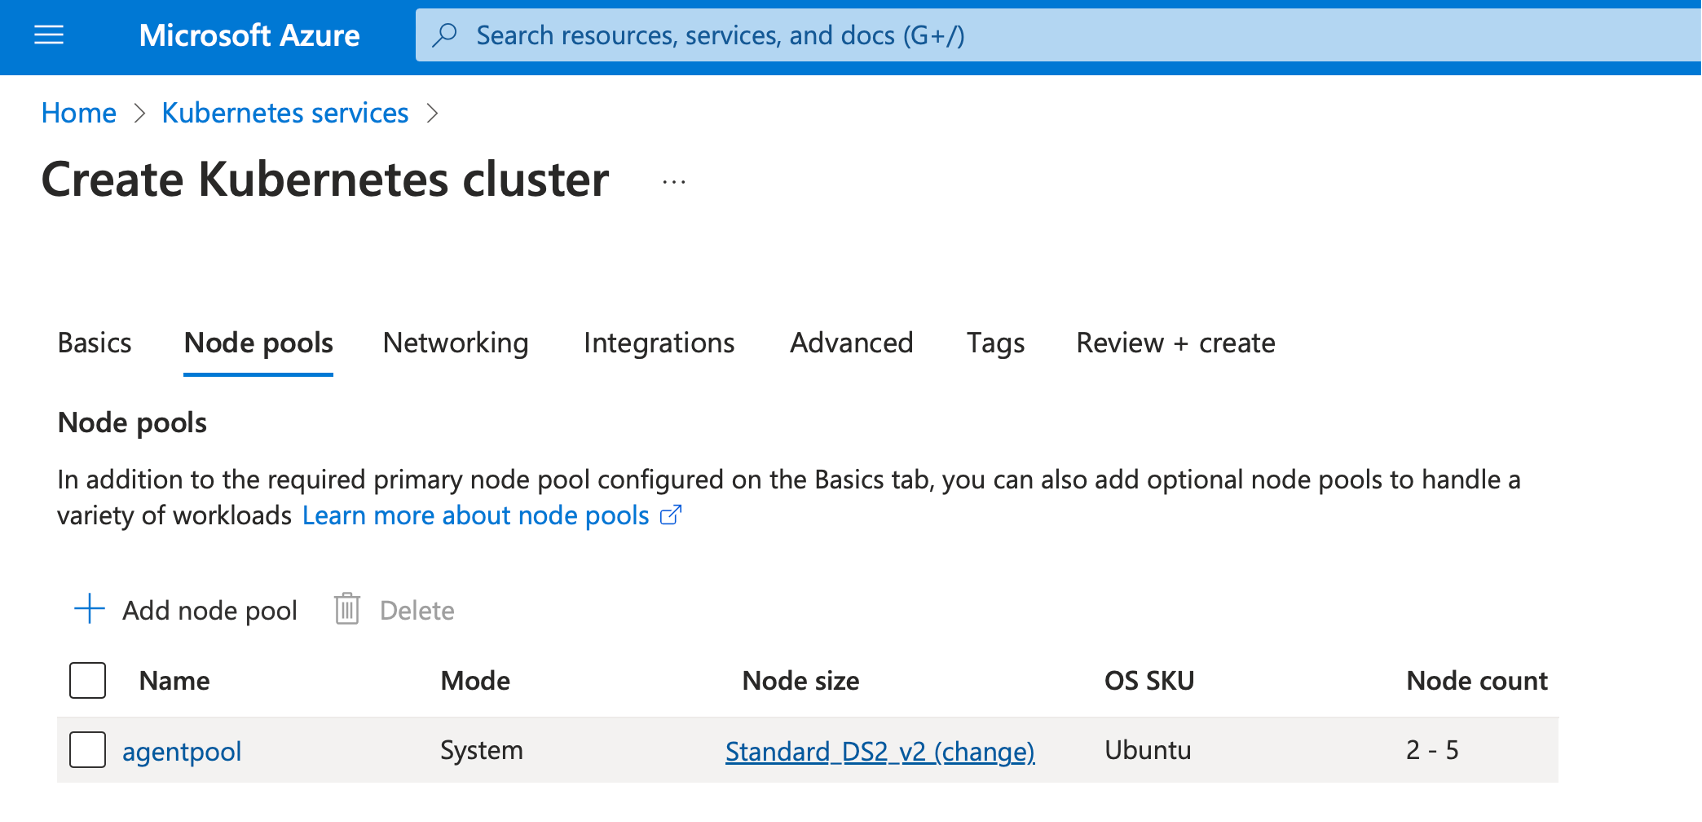
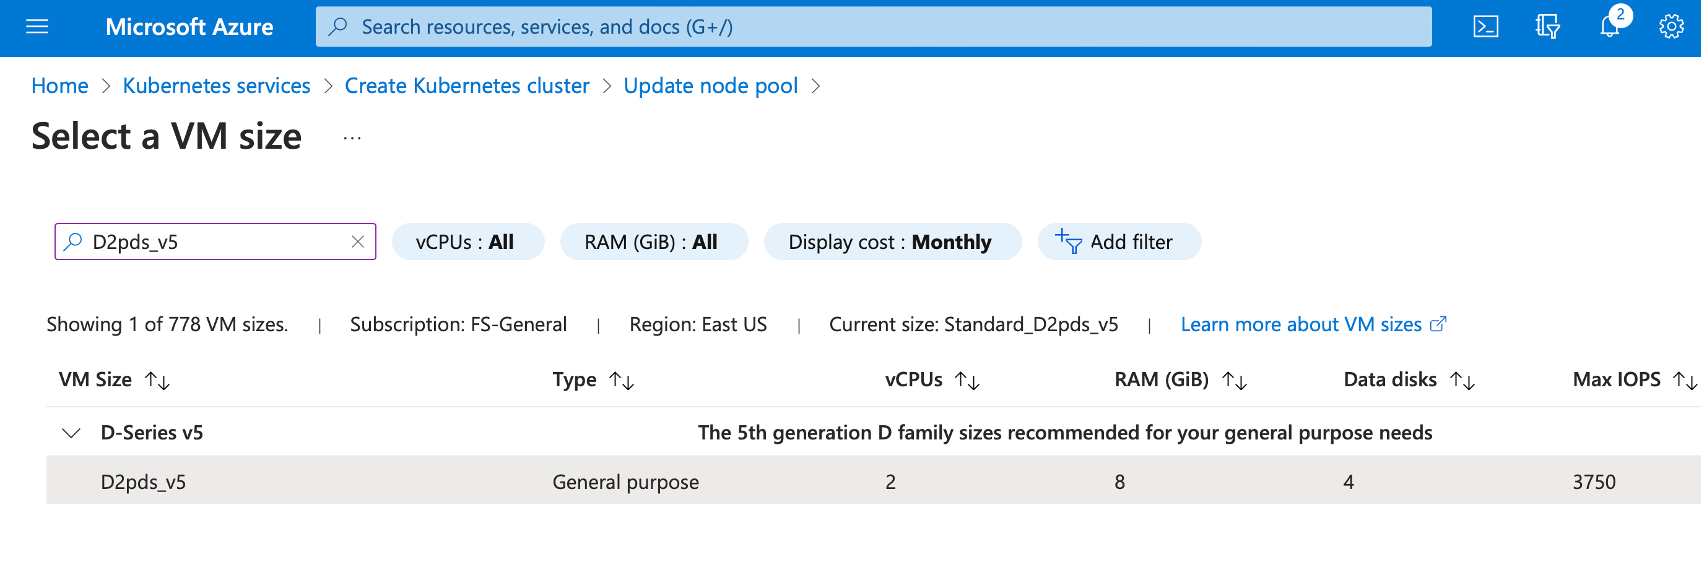
Click Next: Node pools >. This will open the Node pools tab. Under the Node pools tab, click the hyperlink Standard DS2_v2 (change) under the Node size column of the agent pool:
You will see the Update node pool wizard, in which you do the following:
- Under the Scale method, select Manual.
- Set Node count to 1.
- Click Choose a size under the Node size.
- This will open Select a VM size screen, where you look for D2pds_v5 VM (the arm64-based VM you used in the first part of this learning series).
- Click the Select button.
Your Update node pool wizard should look as follows:

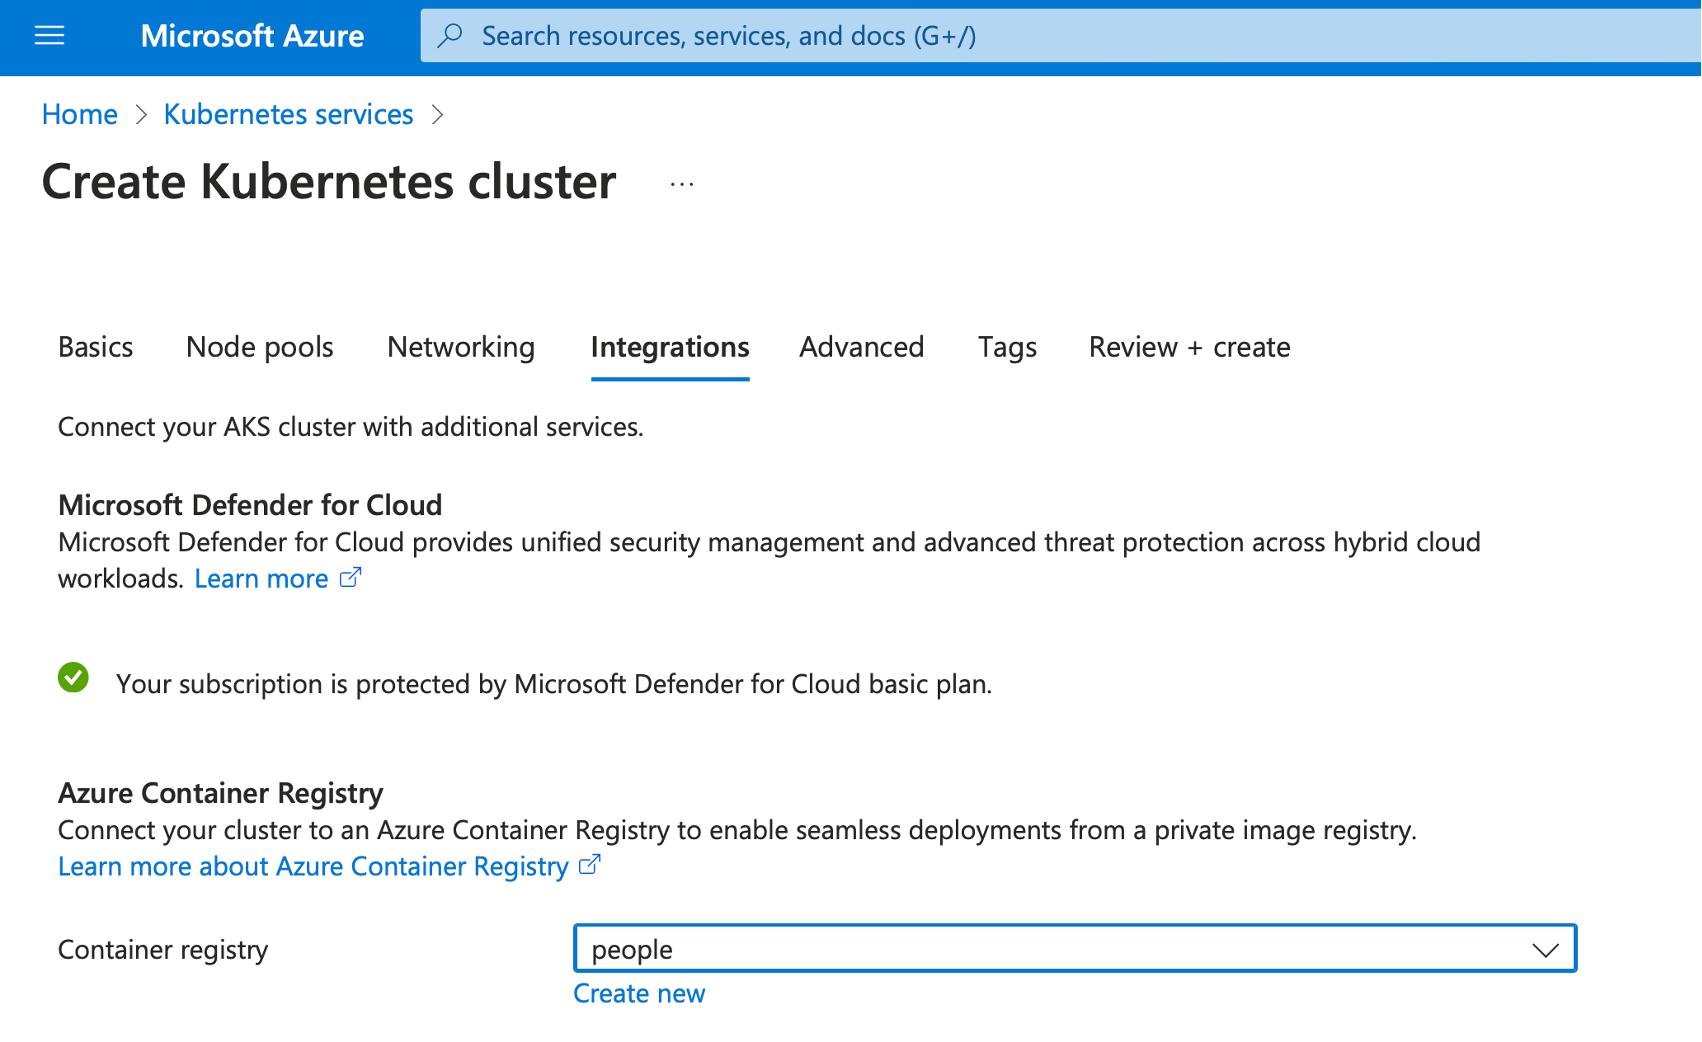
Click the Update button. This will take you back to the Create Kubernetes cluster wizard, where you click the Next: Networking > button. Under the Networking tab, scroll down to Network policy and select None. Then click the Next: Integrations > button.
Under integrations, look for the Container registry and select people (or your Azure Container Registry, if you used a different name):
Finally, click the Review + create button and wait for the validation to complete. Then, click the Create button:
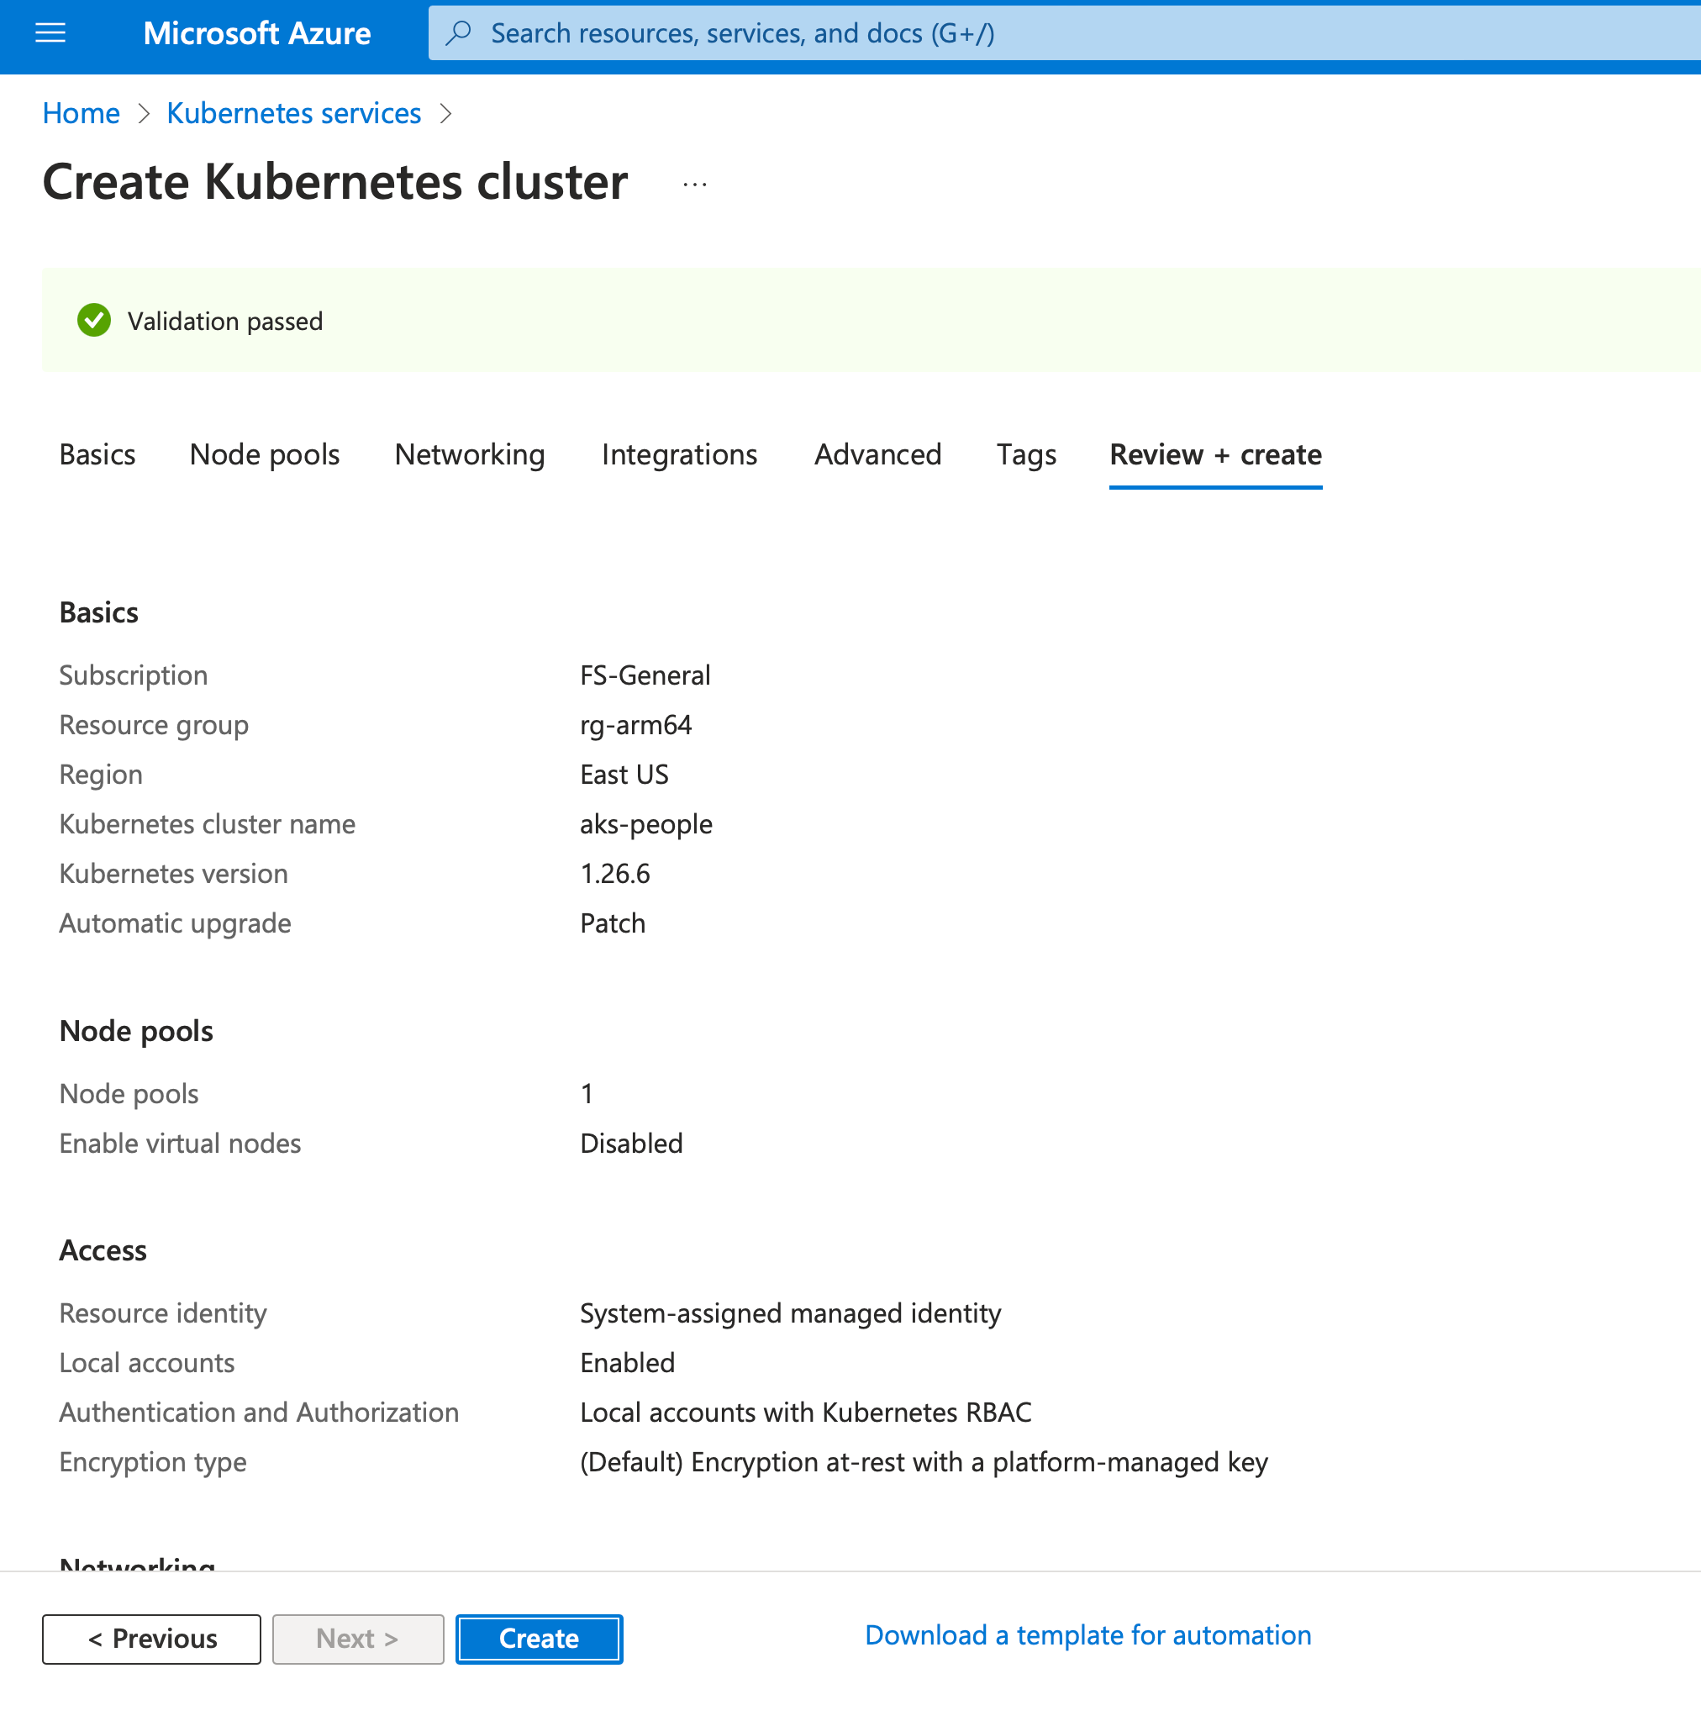
Wait a few moments for the cluster to be deployed, and in the confirmation screen, click the Go to resource button.
Objective
You’ve just created the Kubernetes cluster in Microsoft Azure. This cluster uses arm64-powered Virtual Machines as the compute nodes. You will now connect to this cluster using Azure Cloud Shell.
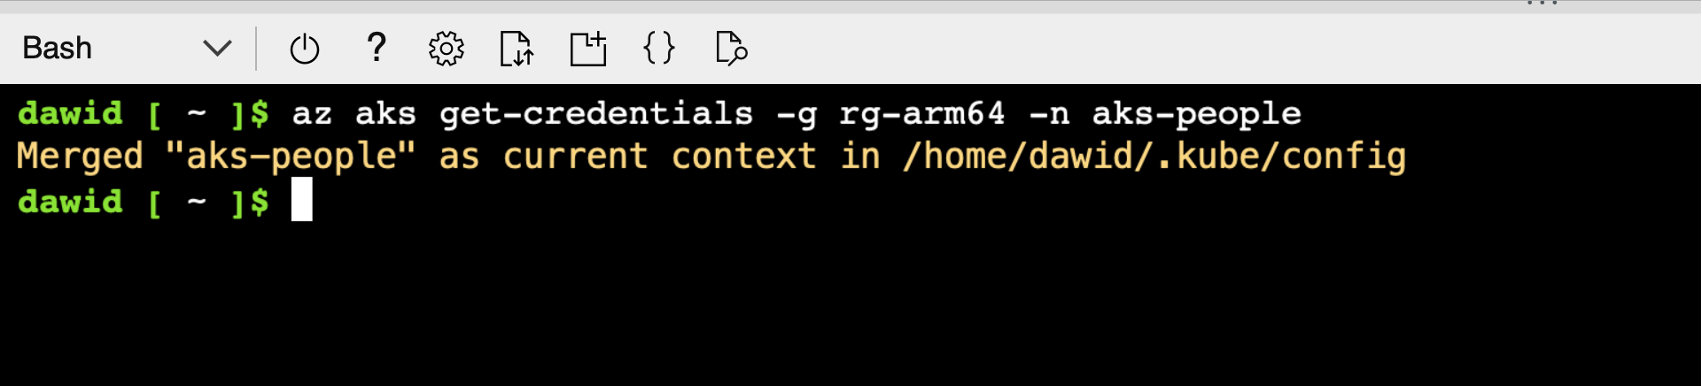
Connecting to the Cluster
To connect to the cluster, proceed as follows:
- Open Cloud Shell (refer to part 2 of this learning path for detailed instruction)
- In the Cloud Shell, type:
az aks get-credentials -g rg-arm64 -n aks-people
You should see the following output from this command:
From now on, you can manage the cluster using the kubectl. This tool provides the command line interface for controlling the Kubernetes control plane. This communication happens over the REST API. So, under the hood, kubectl needs to know the API server address of the control plane. Fortunately, we do not need to explicitly use this address. The az aks get-credentials command we used previously has configured this for us automatically. Therefore, the kubectl commands will be communicating with the cluster we created.
Note
From this point, you can use any kubectl command, and follow many Kubernetes tutorials.
For instance, let’s display the list of nodes by typing the following command:
kubectl get nodes
The output of this command will look as shown below:
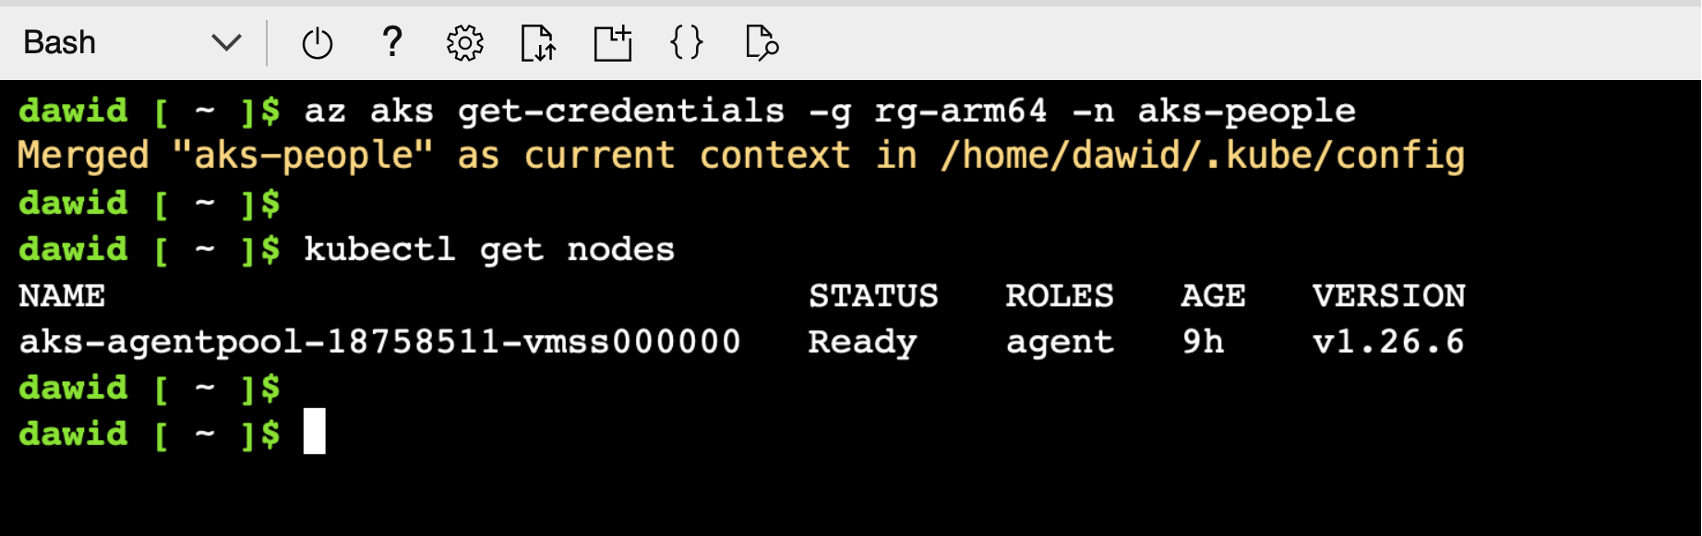
We have one node, which we will now use to deploy the application.
Objective
You will now deploy a containerized application to the Kubernetes cluster running in Azure.
Deploying an Application
To deploy an application to the Kubernetes cluster, you typically use the YAML files containing a workload declaration. To deploy an application, we will use a declaration containing two objects: deployment and a service. A deployment will create a specific number of Kubernetes pods. These are the smallest deployable units in Kubernetes. A single pod includes one or more containers sharing the volumes and network capabilities. Thus, the declaration of the deployment consists of elements such as:
- The container image to be used to spin up containers
- The number of container instances (container replicas)
- Ports on which containers will listen to incoming requests
To expose the pod to other services and the Internet, we will use a Service of the type Load Balancer. Under the hood, Kubernetes will request a public IP from Azure. We will use this IP to access our application.
Let’s now use this declaration to deploy our People.WebApp to the Azure Kubernetes Cluster. To do so, we proceed as follows:
-
Open the Cloud Shell.
-
Download the declaration file by typing:
wget https://raw.githubusercontent.com/dawidborycki/People.WebApp.Declarations/main/Kubernetes/people_aks.yml
- To edit the file, you type:
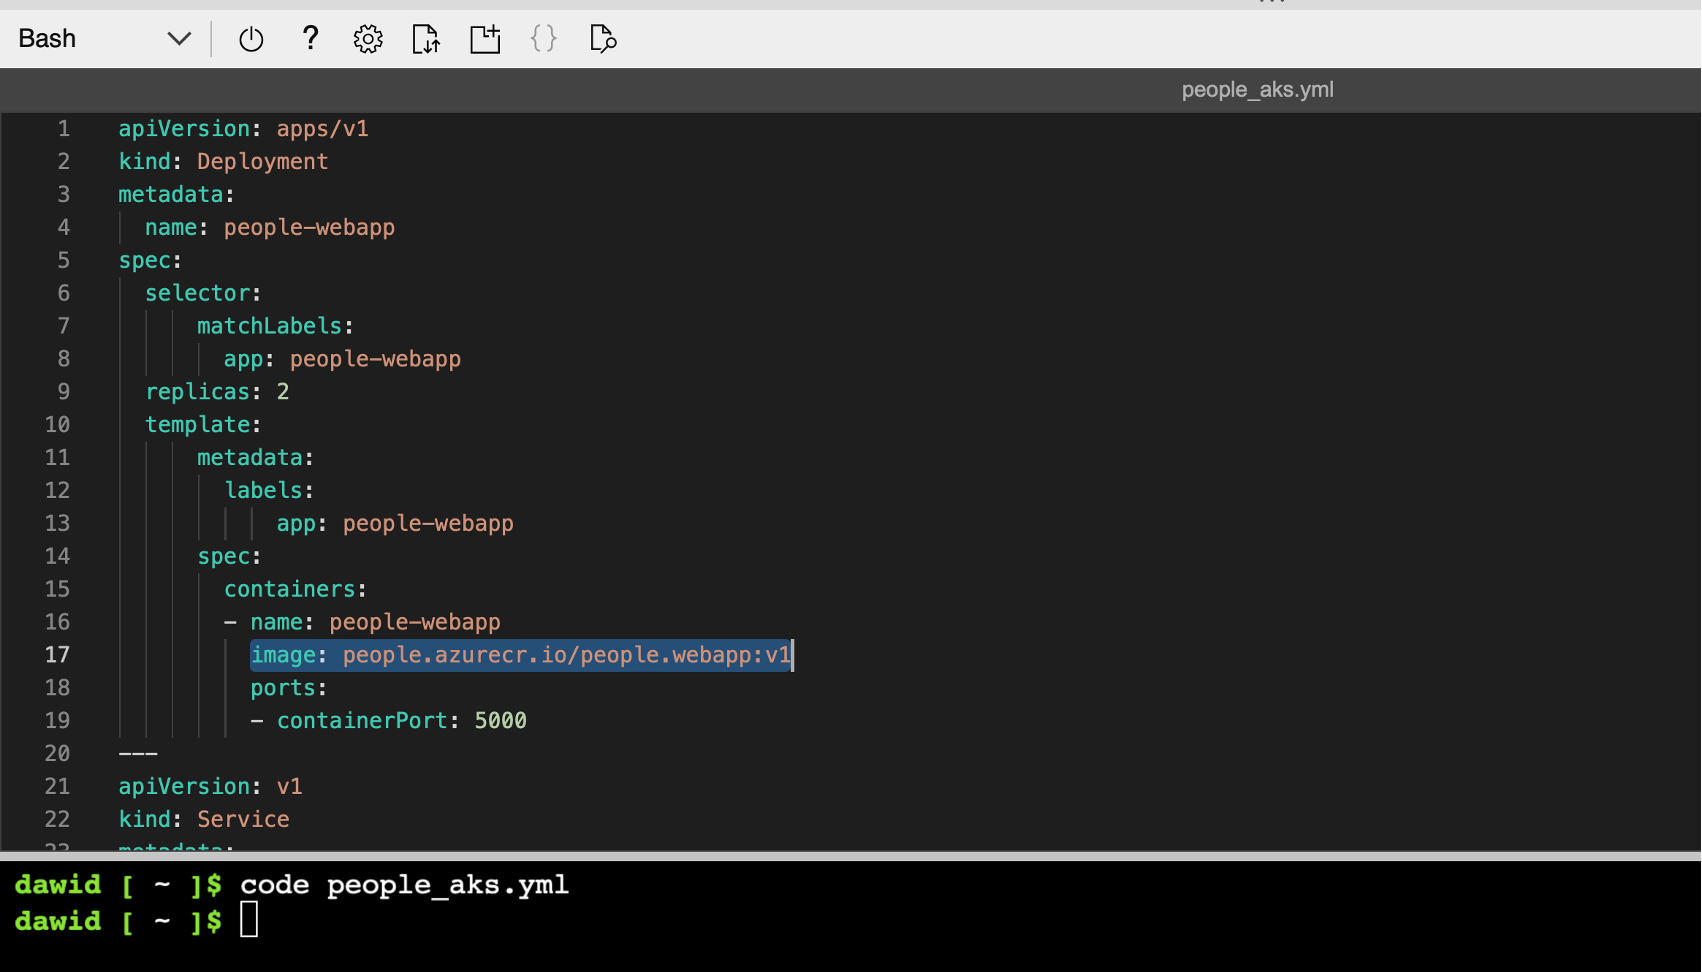
code people_aks.yaml
- This will open the code/text editor in Azure:

-
Check line number 17. In our case, it points to the fully qualified container image name, image: people.azurecr.io/people.webapp:v1. This includes the container registry login server, image name, and image tag. The login server is the same one we created in Part 2 of this learning path series. If you use a different name for either the container registry or the container name, update line 17 correspondingly. Then save the changes to the same file, people_aks.yml (CTRL+S), and close the editor (CTRL+Q).
-
To deploy the workload, type the following command in the Cloud Shell:
kubectl apply -f people_aks.yml
It will take a few moments to deploy the workload. Then, use the following command to display the list of pods:
kubectl get pods
Ensure the status of each pod is running. Then type:
kubectl get svc
This will display the list of services as shown below:
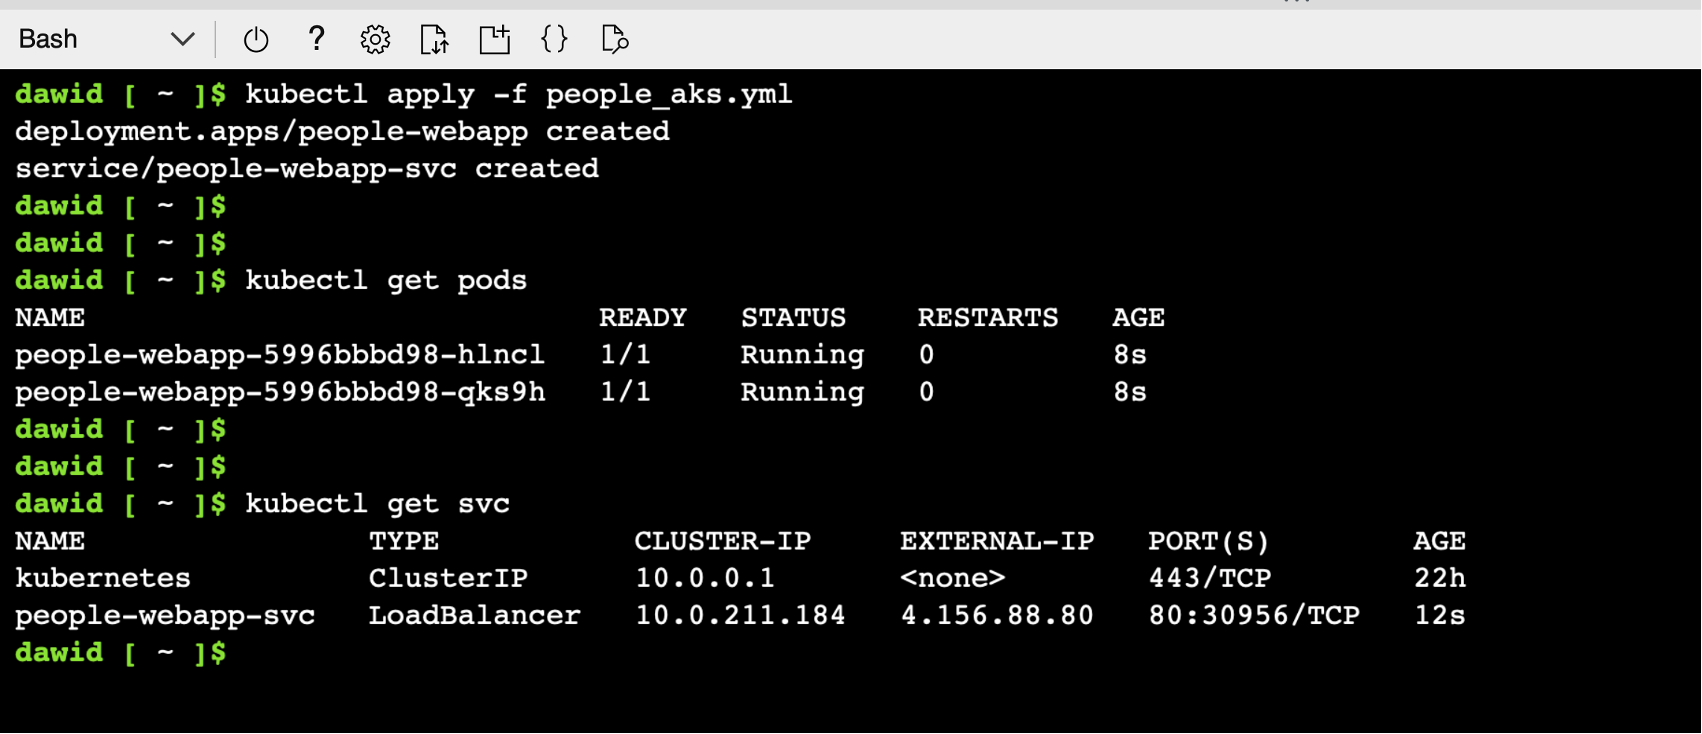
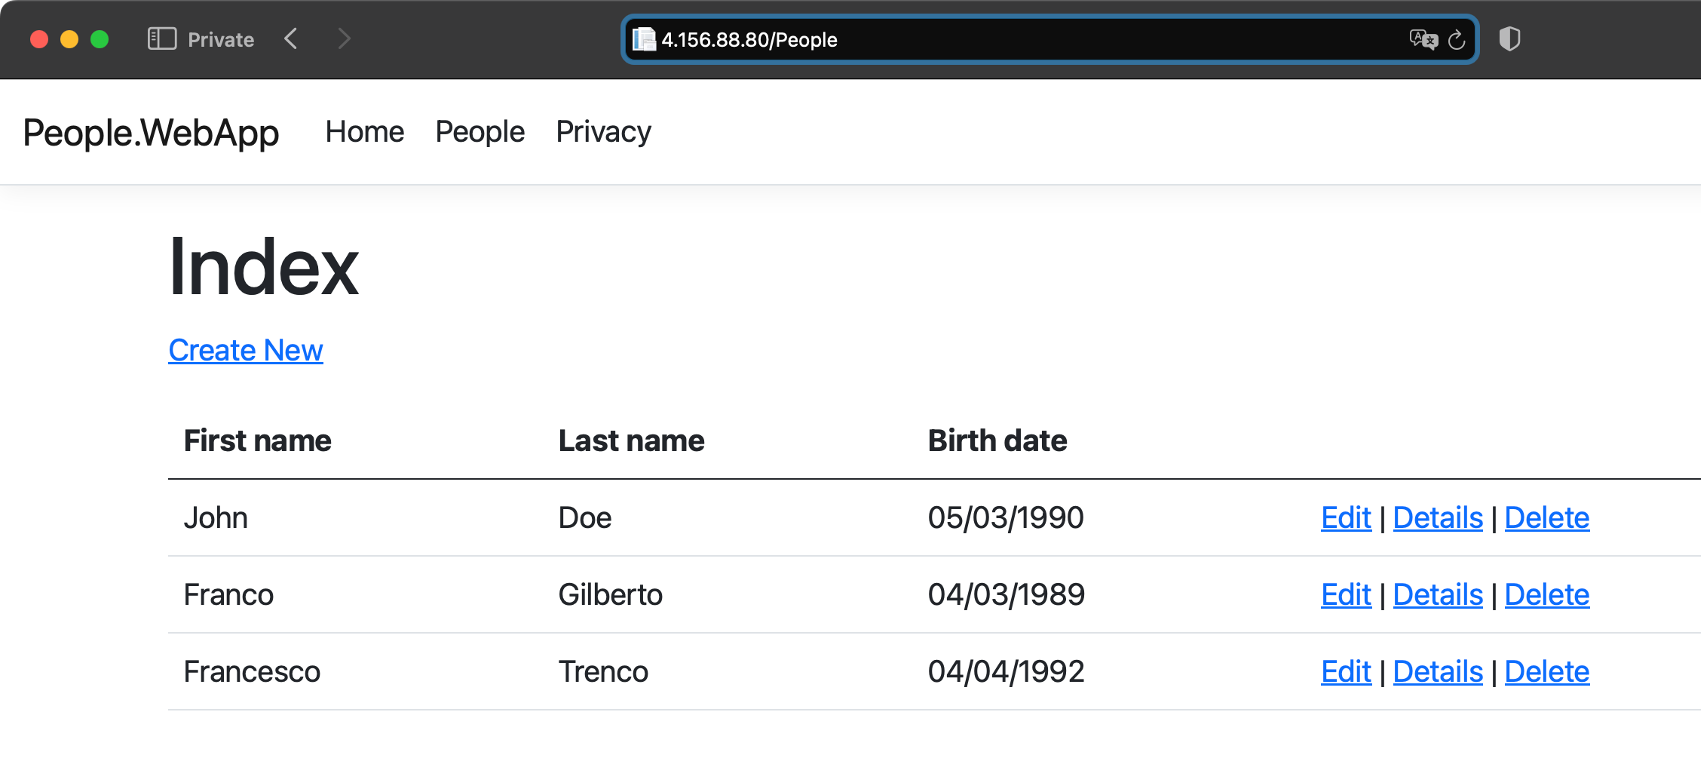
Note the IP address under the EXTERNAL-IP column of people-web-appsvc. That is the Public IP where you can find your application. In my case, that is 4.156.88.80. By typing this IP in the web browser, you will see an application up and running:
Clean Up
To remove all the cloud resources, we deployed for this tutorial, open the Cloud Shell, and type the following command:
az group delete -n rg-arm64 --yes --no-wait
Summary
This tutorial has shown you how to create the Azure Kubernetes cluster with the arm64-powered VMs. Then, you learned how to deploy a containerized application to this cluster. Finally, you exposed the application over the Internet using the LoadBalancer service. Along the way, you saw how to use the Cloud Shell built-in code editor to modify the Kubernetes workload declaration file.
Want to continue learning? Visit learn.arm.com to find more tutorials designed to help you develop quality Arm software faster.