
Leveraging Selenium, NUnit and C# for UI Tests
5.00/5 (1 vote)
How to leverage Selenium for UI tests?
Introduction
Kindly consult the original post here for a full appreciation of this article.
Test-driven development (TDD) is currently widely embraced and is acknowledged for enhancing productivity by automating arduous tests and preventing regression issues. However, tests are typically carried out solely on backend servers and occasionally on the frontend to verify simple features. On the other hand, genuine UI tests are manually conducted by a QA team (or often disregarded), and this manual process can consume a significant amount of time, impeding development and deployment speed. An interesting point to note is that Gerard Meszaros, in his renowned book "xUnit Test Patterns" (which spans 900 pages), only briefly address this subject.
We must acknowledge that conducting UI tests is a challenging task: faithfully reproducing human behavior on a screen becomes particularly difficult, especially considering the myriad possible configurations (Firefox with Linux, Edge with Windows 10, and so forth). While it may not be feasible to simulate all these configurations, we can still check basic conditions when a deployment is completed just to ensure that no regression has been introduced. For example, we can verify that a button is still present and clickable or that a form is correctly filled when submitted.
Important
This doesn't involve checking the precise arrangement of elements or the correctness of the layout. Automating such checks is a highly sophisticated problem that likely requires a significant amount of artificial intelligence.
In this series of articles, we aim to offer a partial solution to this issue by utilizing Selenium and NUnit. We will demonstrate how it is relatively simple to automate some smoke tests to swiftly verify that the UI functions correctly after a deployment. Our approach will be practical in nature: we will quickly introduce Selenium features, guide on setting up an environment with Visual Studio and C#, and provide a few practical examples.
What is Selenium?
Selenium is a suite of tools designed for automating web browsers. It provides a way for developers to write scripts in various programming languages, including Java, C#, Python, and others, to automate interactions with web applications. Selenium supports various browsers, including Chrome, Firefox, Safari, and Internet Explorer, making it a versatile tool for browser automation and testing.
Important
Selenium is not exclusively designed for UI tests and can be utilized for various tasks, such as capturing periodic screenshots of specific web pages. It is fundamentally a browser automation tool.
Selenium consists of three main components: Selenium WebDriver (discussed in this post), Selenium IDE (to be discussed next), and Selenium Grid.
-
Selenium WebDriver is a set of language-specific bindings that enable interaction with a web browser, providing instructions for the browser to follow.
-
Selenium IDE are a series of Chrome, Firefox and Edge extensions that will do simple record-and-playback of interactions with the browser.
-
Selenium Grid enables us to scale by distributing and running tests on several machines and manage multiple environments. We will not cover this feature in these posts.
These initial definitions may appear somewhat abstract at first glance, and the purpose of this article is to provide clarity on these concepts.
How to Set Up Selenium?
Selenium can be utilized with various programming languages, and for the sake of convenience, we are using C# here. However, the principles and concepts discussed are also applicable to languages like Java or Python.
We will also use NUnit as the test runner, but feel free to choose another one that you are familiar with. We assume that the reader is acquainted with this tool.
- In Visual Studio, create a blank solution and name it
EOCS.SeleniumTestsfor example.
- In this solution, add a new NUnit Test Project and name it
EOCS.SeleniumTests.Tests.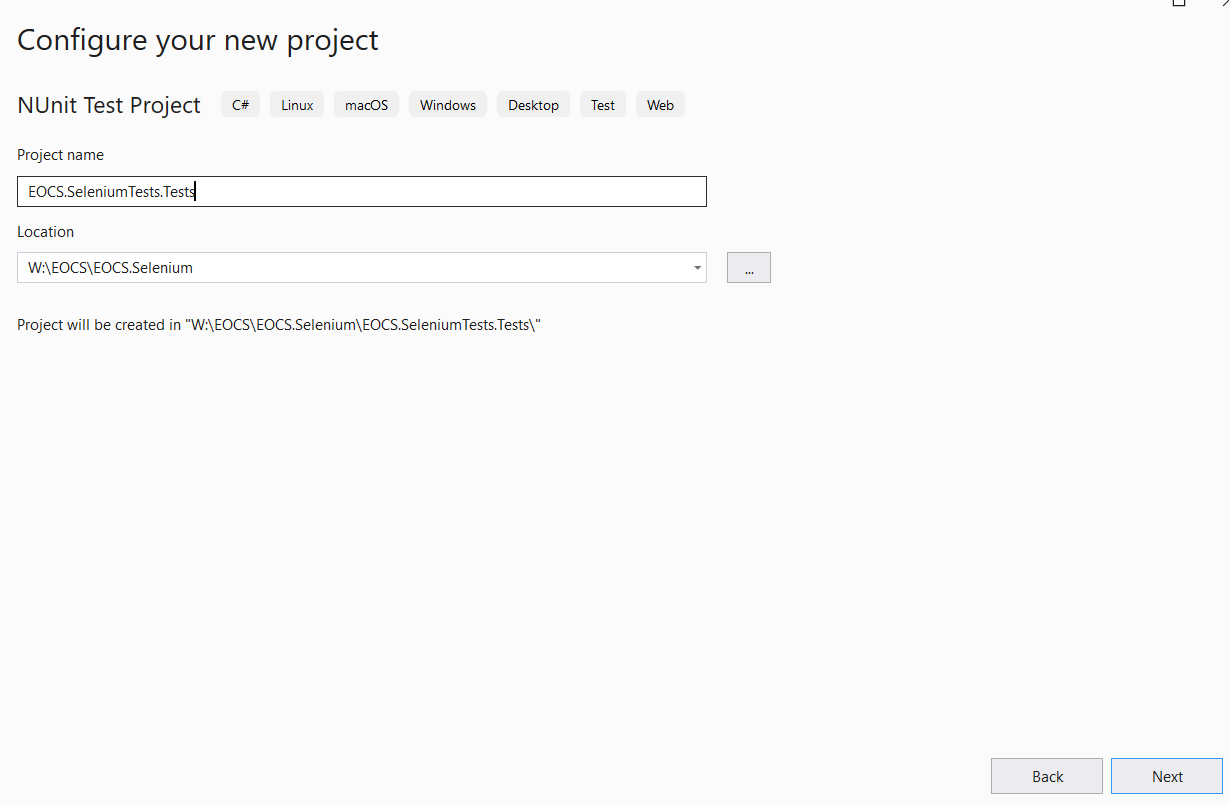
- In this project, add the
Selenium.WebDriverandSelenium.SupportNuGet packages.
Which Example Will We Use to Implement This?
In a real-world scenario, we typically test our own applications. While this may seem obvious, for our demonstration, we will use an existing website to illustrate our examples. We will perform some UI tests on Staples (https://www.staples.com/). We selected it because it is one of the largest ecommerce sites globally.

Similar to many websites nowadays, Staples presents a cookies disclaimer when we first arrive, asking whether we want to accept or decline all cookies. While this may appear straightforward for a human user, when conducting tests, we need to instruct Selenium to account for this action.

Important
When a new test is executed, Selenium treats it as if it is the first visit to the site. Consequently, the cookies disclaimer will always be displayed, and we need to instruct Selenium to ignore it.
Enough Theory, Code Please!
- In the NUnit project, add a new class named ChromeTests.cs and add to it the following code:
[TestFixture]
public class ChromeTests
{
    IWebDriver driver;

    [SetUp]
    public void Setup()
    {
        driver = new ChromeDriver();
        driver.Navigate().GoToUrl("https://www.staples.com/");
    }

    [TearDown]
    public void TearDown()
    {
        driver.Quit();
    }
}
Here, we are instructing Selenium to open a new Chrome browser (referred to as a driver in Selenium terminology) that will be used for ALL the tests conducted in this file and navigate to the specified URL (https://www.staples.com/).
We also specify that the browser instance must be terminated when all the tests have been executed (TearDown method in NUnit).
Information
Here, we are currently utilizing a Chrome instance, but it is entirely possible to create an instance for Firefox or Edge.
[SetUp]
public void Setup()
{
    driver = new FirefoxDriver();
    driver.Navigate().GoToUrl("https://www.staples.com/");
}
Test 1
We will start by adding a very simple test: checking that the page title is as expected.
[TestFixture]
public class ChromeTests
{
    IWebDriver driver;

    [SetUp]
    public void Setup()
    {
        driver = new ChromeDriver();
        driver.Navigate().GoToUrl("https://www.staples.com/");
    }

    [TearDown]
    public void TearDown()
    {
        driver.Quit();
    }

     [Test]
    public void CheckPageTitle()
    {
        var title = driver.Title;
        Assert.AreEqual("Staples® Official Online Store", title);
    }
}
When we run this test, we can see that it passes.
![]()
Test 2
Next, we will proceed with a more practical test: checking that the cart button is correctly displayed when the home page is loaded.
The cart button is accessible via a div with the id "cartMenuHolder", as can be seen in the following screenshot of the DOM.

Information
This process of finding the correct element to interact with is quite cumbersome, and we will address it in the next article.
- Add the following code in the class:
[Test]
public void CheckCartButtonIsDisplayed()
{
    var wait = new WebDriverWait(driver, TimeSpan.FromSeconds(2));

    var a = wait.Until<IWebElement>(d =>
    {
        var divCart = driver.FindElement(By.Id("cartMenuHolder"));
        var a = divCart.FindElement(By.TagName("a"));
        if (a.Displayed) return a;
        return null;
    });

    Assert.IsNotNull(a);
}
With this code, we instruct Selenium to find the cart button within a 2-second timeout and to repeat this operation again and again as long as the element has not been found. In Selenium jargon, this process involves establishing a waiting strategy.
Important
Testing UIs is particularly challenging for this reason: elements are not always displayed in a deterministic manner, and we need to wait for them to appear. However, determining how much time to wait is quite challenging. In this case, we consider that the cart must be displayed in less than 2 seconds; otherwise, it would be deemed an unacceptable delay for a user and should be considered a bug.
Synchronizing the code with the current state of the browser is one of the biggest challenges with Selenium, and doing it well is an advanced topic.
When we run this test, we can see that it passes.
![]()
Test 3
We will now perform one last test and verify that the search feature works as expected: when an item is searched, the site correctly redirects to the corresponding page. This test is more challenging and involves direct interaction with the browser: we need to send a search string to the input text and check that we are correctly redirected. In fact, this is where Selenium excels.
[Test]
public void CheckSearchRedirects()
{
    var wait = new WebDriverWait(driver, TimeSpan.FromSeconds(2));
    wait.IgnoreExceptionTypes(typeof(NoSuchElementException),
                              typeof(ElementNotVisibleException));

    // Find the search input text
    var searchInput = wait.Until<IWebElement>(d =>
    {
        var e = d.FindElement(By.Id("searchInput"));
        if (e.Displayed)
            return e;
        return null;
    });

    // Find the button to perform the search
    var searchButton = wait.Until<IWebElement>(d =>
    {
        var e = d.FindElement(By.CssSelector(".huFWMd"));
        if (e.Displayed)
            return e;
        return null;
    });

    // Fill the search input text with "card"
    searchInput.SendKeys("card");

    // Clicks on the button
    searchButton.Click();

    var expectedUrl = "https://www.staples.com/card/directory_card";
    wait.Until(d =>
    {
        return d.Url == expectedUrl;
    });

    var redirectURL = driver.Url;
    Assert.AreEqual("https://www.staples.com/card/directory_card", redirectURL);
}
This code is quite self-explanatory and reproduces the steps we described in plain English. We can observe how Selenium interacts with the browser using the SendKeys and Click methods.
But when we run this test, we can see that it fails.

The error message is quite explicit (The Other element would receive the click: <iframe src="https://consent...). Another element receives the click, and this element is an iframe. It is, in fact, the cookies disclaimer that we mentioned earlier. As nobody validates this popup, it is always in the foreground and receives the focus instead of our button. Our task will be, therefore, to simulate the validation of this popup.
After inspecting the DOM, we can implement the code below. It must be placed in the SetUp method since the disclaimer must be validated for each test.
[SetUp]
public void Setup()
{
    driver = new ChromeDriver();
    driver.Navigate().GoToUrl("https://www.staples.com/");

    driver.Manage().Timeouts().ImplicitWait = TimeSpan.FromMilliseconds(5000);

    var wait = new WebDriverWait(driver, TimeSpan.FromSeconds(2));
    wait.IgnoreExceptionTypes(typeof(NoSuchElementException),
                              typeof(ElementNotVisibleException));

    var iframe = wait.Until<IWebElement>(d =>
    {
        var disclaimer = d.FindElement(By.XPath("//iframe[@name='trustarc_cm']"));
        if (disclaimer.Displayed) return disclaimer;
        return null;
    });

    // Switch to the frame
    driver.SwitchTo().Frame(iframe);

    // Now we can click the button.
    var button = wait.Until<IWebElement>(d =>
    {
        var b = d.FindElement(By.XPath("//a[@class='required']"));
        if (b.Displayed) return b;
        return null;
    });

    // Simulate a click
    button.Click();

    driver.SwitchTo().DefaultContent();

    wait.Until(d => !d.FindElements(By.ClassName("truste_overlay")).Any());
}
In this scenario, we need to initially locate the iframe, switch to it (as the buttons inside it are not directly accessible via our current document), simulate a click on the button, and finally switch back to the default document. Each of these operations is executed using a waiting strategy to prevent race conditions.
Important
By the way, note how the FindElement method can utilize various selectors such as by ID, by tag, by name, and also by XPath, as demonstrated above.
If we run the test again, we can see that it now passes.
![]()
So far, so good. We are now equipped to perform various UI tests using the following process.
-
Find an element in the DOM (by establishing a waiting strategy if need be) with the
FindElementmethod -
Take action on this element with the
SendKeysorClickmethods -
Check that this action triggered expected behaviors
However, we acknowledge that the first step (finding elements in the DOM) can be tedious. Manually inspecting the source code to search for a div, a button, and similar elements is cumbersome. It would be more practical to have a tool to easily perform this task. Fortunately, this is precisely the goal of Selenium IDE.
Go here for a step-by-step explanation on how to proceed.
History
- 14th December, 2023: Initial version