
Running Automation Tests At Scale Using Appium
0/5 (0 vote)
The article discusses the challenges faced by businesses in releasing mobile applications quickly and the importance of faster time to market (TTM)
With the digital revolution, the main goal of every business nowadays is to digitize their business by giving more power to the end customers. With digitalization, the mobile applications market has flourished, and every business plans to release their mobile applications to the end users as early as possible.
Faster time to market (TTM) has become vital for any business to survive today with increased competition. However, one of the major challenges that businesses face is the release cycle time, which usually gets extended for several reasons.
Following are some of the reasons that most testers face while working with many projects that lead to delays in the mobile application release to the end customers:
- Flakiness of the tests
- Coding issues
- Build generation takes a lot of time, which causes a delay in running automated regression tests and performing manual exploratory testing.
- The automation testing pipeline takes longer than expected, which eventually doesn’t help with faster feedback.
There might be more reasons to add here. However, we have listed a few common problems that many teams face.
For the reasons listed above, let’s discuss the automation pipeline taking longer than expected, which eventually doesn’t help with faster feedback, and also look around the possible solutions.
Consider a scenario of a mobile finance application that helps the end users transfer money and is built for Android and iOS platforms. With both platforms in place, running the automated regression test suite is necessary to get faster feedback on the builds.
For example, each test suite has 50+ test cases to execute. Hence, considering both platforms, we would be required to run 100+ test cases, after which only we could get feedback on the build whether the app is behaving correctly or not.
Say, a test takes around 10 seconds to run, so considering 50 test cases, it would take roughly 500 seconds to run a single test suite for Android automation testing and another 500 seconds for iOS automation testing. So, to run the tests on both platforms, we need around 1000 seconds.
This is the situation where parallel testing helps us speed up the process.
Table of Contents
- What is Appium?
- Setting up the Appium framework
- Writing the first test case using Appium and Java
- Running automation tests at scale using Appium on a cloud grid
- Conclusion
What is Appium?
Before we dive deep into understanding parallel testing and writing mobile automation tests using Appium, let's first understand Appium.
Appium is a popular mobile application testing framework. It is an open-source testing framework and supports multiple programming languages such as Java, JavaScript, C#, Python, PHP, and Ruby. It helps automate the mobile tests for Android and iOS platforms and supports testing the React native apps out of the box. It can be used to test Hybrid, Native, and Web Applications. Check out the blog web vs hybrid vs native apps to learn more about Native, Hybrid, and Web Applications.
With the release of Appium’s 2.0 version, path-breaking changes in the framework have occurred. Appium 2.0 is the most major new release of Appium in over five years. The changes made in Appium 2.0 are not related to the automation behavior for any specific platform; however, it aims to transform Appium into a "Platform" where "drivers" and "plugins" can be easily created and shared. Checkout the blog Appium 2 Migration Guide that will guide you through all the changes made in Appium 2.
In this blog, we will learn how to run mobile automation tests (in series and parallel) on the LambdaTest cloud grid using Appium and Java.
So, let’s get started!
Setting up the Appium framework
Before writing the code, let’s create and set up the project. For example, programming language, mobile automation framework, test runner, and more. In this blog, we will use Java as the programming language, Appium as a testing framework to test mobile applications, TestNG as the test runner, and any IDE you choose.
| Programming Language/ Tools/Framework | Version |
| Java | 17 |
| Appium | 2.0 |
| Appium Java Client | 9.0.0 |
| TestNG | 7.8.0 |
| Maven | 3.9.4 |
First, we need to create a new Maven project in the IDE. After successfully creating the project, let's add the dependencies for Appium and TestNG in the pom.xml file.
<project xmlns="http://maven.apache.org/POM/4.0.0" xmlns:xsi="http://www.w3.org/2001/XMLSchema-instance"
  xsi:schemaLocation="http://maven.apache.org/POM/4.0.0 http://maven.apache.org/xsd/maven-4.0.0.xsd">
  <modelVersion>4.0.0</modelVersion>

  <groupId>io.github.mfaisalkhatri</groupId>
  <artifactId>appium-lambdatest-demo</artifactId>
  <version>1.0-SNAPSHOT</version>
  <packaging>jar</packaging>

  <name>appium-lambdatest-demo</name>
  <url>http://maven.apache.org</url>

  <properties>
    <project.build.sourceEncoding>UTF-8</project.build.sourceEncoding>
    <appium-java-client-version>9.0.0</appium-java-client-version>
    <testng.version>7.8.0</testng.version>
    <lombok-version>1.18.30</lombok-version>
    <maven.compiler.version>3.11.0</maven.compiler.version>
    <java.release.version>17</java.release.version>
    <maven.surefire.version>3.2.2</maven.surefire.version>
    <maven.source.encoding>UTF-8</maven.source.encoding>
    <suite-xml>testng.xml</suite-xml>
    <argLine>-Dfile.encoding=UTF-8 -Xdebug -Xnoagent</argLine>
  </properties>

  <dependencies>
    <!-- https://mvnrepository.com/artifact/io.appium/java-client -->
    <dependency>
      <groupId>io.appium</groupId>
      <artifactId>java-client</artifactId>
      <version>${appium-java-client-version}</version>
    </dependency>
    <!-- https://mvnrepository.com/artifact/org.testng/testng -->
    <dependency>
      <groupId>org.testng</groupId>
      <artifactId>testng</artifactId>
      <version>${testng.version}</version>
      <scope>test</scope>
    </dependency>
    <!-- https://mvnrepository.com/artifact/org.projectlombok/lombok -->
    <dependency>
      <groupId>org.projectlombok</groupId>
      <artifactId>lombok</artifactId>
      <version>${lombok-version}</version>
      <scope>provided</scope>
    </dependency>
  </dependencies>

  <build>
    <plugins>
      <plugin>
        <groupId>org.apache.maven.plugins</groupId>
        <artifactId>maven-compiler-plugin</artifactId>
        <version>${maven.compiler.version}</version>
        <configuration>
          <release>${java.release.version}</release>
          <encoding>${maven.source.encoding}</encoding>
          <forceJavacCompilerUse>true</forceJavacCompilerUse>
        </configuration>
      </plugin>
      <plugin>
        <groupId>org.apache.maven.plugins</groupId>
        <artifactId>maven-surefire-plugin</artifactId>
        <version>${maven.surefire.version}</version>
        <executions>
          <execution>
            <goals>
              <goal>test</goal>
            </goals>
          </execution>
        </executions>
        <configuration>
          <useSystemClassLoader>false</useSystemClassLoader>
          <properties>
            <property>
              <name>usedefaultlisteners</name>
              <value>false</value>
            </property>
          </properties>
          <suiteXmlFiles>
            <suiteXmlFile>${suite-xml}</suiteXmlFile>
          </suiteXmlFiles>
          <argLine>${argLine}</argLine>
        </configuration>
      </plugin>
    </plugins>
  </build>
</project>
The project setup is complete, with the dependencies updated in the pom.xml file.
Writing the first test case using Appium and Java
Before we write the automated tests for the mobile application, we must discuss the application under test and the scenarios we will automate.
The following mobile application from LambdaTest that is built using react-native will be used in this blog for writing the automation tests using Appium:
- Proverbial App on Android
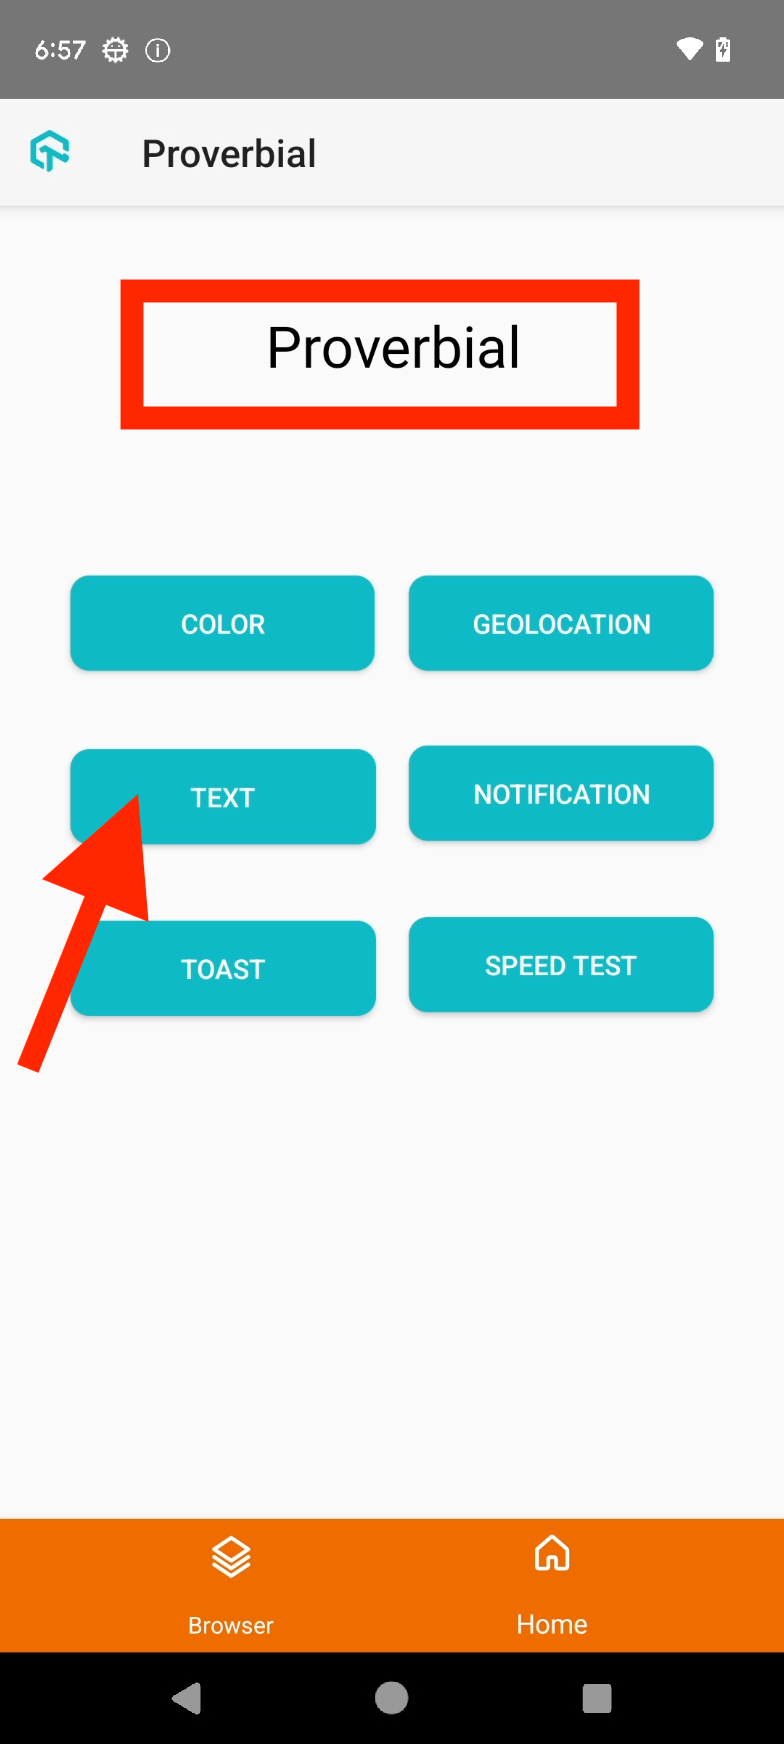
This app opens with a Home Page, a welcome message, and some buttons.
Home Page of the Proverbial mobile app

The following test scenarios will be used to perform mobile automation testing on the Android Proverbial app.
Test Scenario 1
- Open the Proverbial application on the Android real device on the LambdaTest Cloud grid.
- Click the Text button and check that the text Proverbial is displayed.
Test Scenario 2
- Open the Proverbial application on the Android real device on the LambdaTest Cloud grid.
- Click the Notification button and check that the Notification is displayed on the top.
- Close the Notification by clicking on it.

Test Scenario 3
- Open the Proverbial application on the Android real device on the LambdaTest Cloud grid.
- Click the Toast button, check that the Toast message is displayed at the bottom of the screen, and verify its text: "Toast should be visible."

Setting up the configuration
As discussed in the earlier section on setting up the framework, we have already created the Maven project. The following screenshot of the project structure:


We will run the tests on the following Android real devices on the LamdaTest Cloud grid.
| Device # | Platform Name | Platform Version | Device Name |
| 1 | Android | 12 | Samsung Galaxy S22 5G |
| 2 | Android | 13 | Google Pixel 7 |
It is important to note that the mobile application needs to be imported on the LambdaTest Cloud using the LambdaTest APIs for mobile app testing. The app_id received in the response can be used as the value for the "app" desired capabilities in the test.
First, Let’s create a new class for managing the Android Driver and name it AndroidDriverManager. This class will help us set the AndroidDriver, the desired capabilities for running the tests on the LambdaTest Cloud grid to run the tests on different devices, platform versions, etc., and the timeouts for the Android driver.
@Builder
public class AndroidDriverManager {

    private String buildName;
    private String testName;
    private Platform platform;
    private String platformVersion;
    private String deviceName;
    private String app;


    private static final ThreadLocal<AndroidDriver> DRIVER = new ThreadLocal<>();
    private static final String LT_USERNAME = System.getProperty("LT_USERNAME");
    private static final String LT_ACCESS_KEY = System.getProperty("LT_ACCESS_KEY");
    private static final String GRID_URL = "@mobile-hub.lambdatest.com/wd/hub";


    public AndroidDriverManager createAndroidDriver() {
        try {
            setDriver(new AndroidDriver(new URL(format("https://{0}:{1}{2}", LT_USERNAME, LT_ACCESS_KEY, GRID_URL)), setCapabilities()));
            setupBrowserTimeouts();

        } catch (MalformedURLException e) {
            throw new Error("Error while creating Android Driver Session");
        }
        return this;
    }

    public AndroidDriver getAndroidDriver() {
        return AndroidDriverManager.DRIVER.get();
    }

    public void quitDriver() {
        if (null != DRIVER.get()) {
            getAndroidDriver().quit();
            DRIVER.remove();
        }
    }

    private HashMap<String, Object> ltOptions() {
        final var ltOptions = new HashMap<String, Object>();
        ltOptions.put("username", LT_USERNAME);
        ltOptions.put("accessKey", LT_ACCESS_KEY);
        ltOptions.put("platformName", platform);
        ltOptions.put("deviceName", deviceName);
        ltOptions.put("platformVersion", platformVersion);
        ltOptions.put("app", app);
        ltOptions.put("build", buildName);
        ltOptions.put("name", testName);
        ltOptions.put("w3c", true);
        ltOptions.put("isRealMobile", true);
        ltOptions.put("autoGrantPermissions", true);
        ltOptions.put("plugin", "java-testNG");
        ltOptions.put("visual", true);
        ltOptions.put("console", true);
        ltOptions.put("devicelog", true);
        return ltOptions;
    }

    private DesiredCapabilities setCapabilities() {
        DesiredCapabilities capabilities = new DesiredCapabilities();
        capabilities.setCapability("lt:options", ltOptions());
        return capabilities;
    }

    private void setDriver(final AndroidDriver driver) {
        AndroidDriverManager.DRIVER.set(driver);
    }

    private void setupBrowserTimeouts() {
        getAndroidDriver().manage()
                .timeouts()
                .implicitlyWait(Duration.ofSeconds(20));
    }
}
Code Walkthrough
Let us understand the code in the AndroidDriverManager class step by step, as it is the main class that sets the configuration for running the automation tests.
Step 1: ThreadLocal class is used to instantiate the Android Driver instance. It ensures that each thread has an isolated instance of the Android Driver that will help run the tests in parallel.
Step 2: The primary advantage of ThreadLocal is that it helps in a safe driver setting, especially when running tests in parallel. It isolates different threads, providing thread safety even if they set different values on the same ThreadLocal object.
Step 3: This isolation helps run the threads independently and prevents conflicts and issues related to thread overriding.
The following mandatory capabilities must be set for running the tests on the LambdaTest platform. The LambdaTest Capabilities generator can configure these capabilities, ensuring your tests work seamlessly with the LambdaTest platform.
| Capability Name | Description |
| GRID_URL | Remote URL required to run tests on LambdaTest Cloud grid |
| LT_USERNAME | LambdaTest Username |
| LT_ACCESS_KEY | LambdaTest Access Key |

LambdaTest Capabilities Generator allows setting the capabilities by selecting the required configurations easily from the UI. Accordingly, it generates code that can be copy pasted easily into the project to start the mobile automation test seamlessly.
Setting the capabilities in the AndroidDriverManager class
The capabilities generated using the LambdaTest Capabilities generator have been updated in the ltOptions() method used in the createAndroidDriver() method for setting the capabilities on the LambdaTest Cloud grid for Android Driver. This will allow us to run the tests on real Android devices.

The values for the variables platform, platformversion, devicename, app, test, and build name will be supplied on run-time via the testng.xml file.

The AndroidDriver() method of Appium will help us instantiate a new session of Android Driver on the LambdaTest Cloud grid. It will be created by passing the GRID_URL, LT_USERNAME, and LT_ACCESS_KEY and the desired capabilities.
After successfully creating the Android driver session, an implicit wait timeout for 20 seconds will be set using the setupBrowserTimeouts() method.
The Implicit wait is added, so the driver should poll the page until an element is found or the timeout expires. It applies to all the elements on the screen.

Likewise, an Explicit wait can be added for finding or locating an element. It is implemented using the ExpectedConditions class, using the appropriate explicit condition to wait for the element.
The getDriver() method will return the current instance of the Android Driver. This will be used further in the Page Object classes and the test.

Finally, the quitDriver() method is created to quit the driver gracefully.

With this, all the configurations are now set, so let’s move on to write the automated tests for the test scenario we discussed earlier in the article.
Configuring the test
A BaseTest class needs to be created with all the common configuration setup, like starting and stopping the drivers and setting the desired capabilities like the platform, platform version, device name, build name, test name, etc., which are required for running the tests.
This BaseTest class will be extended by the actual Test class.
public class BaseTest {

    protected AndroidDriverManager androidDriverManager;

    @Parameters({"buildName", "testName", "app", "platformName", "version", "device"})
    @BeforeClass(alwaysRun = true)
    public void setupTest(final String buildName, final String testName, @Optional("app") final String app, final Platform platform, final String platformVersion,
                          final String deviceName) {
        this.androidDriverManager = AndroidDriverManager.builder()
                .buildName(buildName)
                .testName(testName)
                .app(app)
                .platform(platform)
                .platformVersion(platformVersion)
                .deviceName(deviceName)
                .build()
                .createAndroidDriver();
    }

    @AfterSuite(alwaysRun = true)
    public void tearDown() {
        this.androidDriverManager.quitDriver();
    }
}
The @Parameters annotation in TestNG helps to configure multiple parameters through the testng.xml file. It is used in this BaseTest class so that different parameter values like Platform, Platform version, device name, test name, build name, App id, etc., can be dynamically updated without any code modification, and the test can be executed accordingly.
Implementation of test scenario
We will write the tests for the 3 test scenarios discussed in the blog. The AndroidTests class is created to house all the test scenarios. It extends the BaseTest class so we can easily use the instance of the AndroidDriverManager class.
public class AndroidTests extends BaseTest {

    private HomePage homePage;

    @BeforeClass
    public void setupTest() {
        this.homePage = new HomePage(this.androidDriverManager);
    }

    @Test
    public void textTests() {
        assertEquals(this.homePage.getText(), "Hello! Welcome to lambdatest Sample App called Proverbial");
        this.homePage.tapOnTextBtn();
        assertEquals(this.homePage.getText(), "Proverbial");
    }

    @Test
    public void notificationTest() {
        this.homePage.tapOnNotificationBtn();
        assertTrue(this.homePage.notificationBar().isDisplayed());
        this.homePage.notificationBar().click();
    }

    @Test
    public void toastMessageTest() {
        this.homePage.tapOnToastBtn();
        assertEquals(this.homePage.toastMessage(), "Toast should be visible");
    }
}
The textTests() method contains the automated verification code for the first test scenario where we check the message text - "Hello! Welcome to lambdatest Sample App called Proverbial" is displayed on the application's Home page once it launches successfully. Next, verification is done for the text "Proverbial" to be displayed correctly when the button with the caption "Text" is tapped.

The notificationTest() method verifies the second test scenario that the notification is displayed once the "Notification" button is tapped. After the notification is displayed, the notification bar is tapped to close it.

The toastMessageTest() method checks that the toast message - "Toast should be visible" is displayed after tapping on the "Toast" button.

You will notice that the HomePage class has been declared globally. This is done as it is used in every test and is instantiated in the setupTest() method that runs before any test is run. So, we have the object of the HomePage class created before any of the tests is invoked. This removes the code duplication of instantiating the HomePage class in every test.

The Page Object Model offers the flexibility of code reusability and reduces code duplication. It allows us easy maintenance of the code as well. Hence, it is widely used in many software test automation projects.
HomePage class is the Page Object class that houses all the elements on the Home Page of the mobile application.
public class HomePage {

    AndroidDriverManager androidDriverManager;
    WebDriverWait wait;

    public HomePage(final AndroidDriverManager androidDriverManager) {
        this.androidDriverManager = androidDriverManager;
        wait = new WebDriverWait(androidDriverManager.getAndroidDriver(), Duration.ofSeconds(20));
    }

    private WebElement textBtn() {
        return androidDriverManager.getAndroidDriver()
                .findElement(AppiumBy.id("Text"));
    }

    public void tapOnTextBtn() {
        textBtn().click();
    }

    public String getText() {
        return androidDriverManager.getAndroidDriver()
                .findElement(AppiumBy.id("Textbox"))
                .getText();
    }

    private WebElement notificationBtn() {
        return androidDriverManager.getAndroidDriver()
                .findElement(AppiumBy.id("notification"));
    }

    public void tapOnNotificationBtn() {
        notificationBtn().click();
    }

    public WebElement notificationBar() {
        return androidDriverManager.getAndroidDriver()
                .findElement(AppiumBy.id("action_bar"));
    }

    private WebElement toastBtn() {
        return androidDriverManager.getAndroidDriver()
                .findElement(AppiumBy.id("toast"));
    }

    public void tapOnToastBtn() {
        toastBtn().click();
    }

    public String toastMessage() {
        return wait.until(ExpectedConditions.presenceOfElementLocated(AppiumBy.xpath("//android.widget.Toast[1]")))
                .getText();
    }
}
The Appium Inspector tool can be used to locate the mobile elements. It is a part of the Appium ecosystem and provides a hassle-free way to find and locate all the mobile elements for Native and Hybrid applications.
The Appium Inspector tool can be used locally by downloading and installing it from GitHub. Next, we need to start the Appium server locally. To inspect the mobile elements, we must provide the desired capabilities with the application path.
The following command can be executed in the terminal to start the Appium Server locally:
appium server --use-drivers uiautomator2
The following logs should be displayed in the terminal once the Appium server starts successfully:

Next, start the Appium Inspector and provide the desired capabilities. The Remote host, Remote Port, and Remote Path must be supplied to connect the Appium Inspector with the Appium Server started locally.
We also need a local device to launch the Android application and inspect the elements. So, we will be using an Android Emulator here. Android Emulator can be started using the Android Studio application. I have created an Android Emulator named "PIXEL XL API 33" that will be used in the demo here to inspect the mobile elements of the Proverbial app.

The following desired capabilities must be provided in the Appium Inspector to launch the application and inspect its elements.

Click on the Start Session button to start inspecting the mobile elements.
The first element we will be located is the message text - "Hello! Welcome to lambdatest Sample App called Proverbial" displayed on the application's Homepage.

It can be seen that the locator strategy used for the message text is an id with the selector - "com.lambdatest.proverbial:id/Textbox". This is used in the HomePage class to return the element's text using the getText() method.

Next, let's locate the Text button. Click on the button in Appium Inspector and check the selector displayed.

The selector for the Text button is "com.lambdatest.proverbial:id/Text" with the id locator strategy. It is used in the textBtn() method in the HomePage class.

Next, we need to locate the Notification button and Notification bar for the verification of the second scenario, we need to click on it.

The selector - "com.lambdatest.proverbial:id/notification" with id locator strategy is provided for the Notification button. It is used in the notificationBtn() method in the HomePage class.

Next, let's locate the Notification bar so we can tap on it to close it after it is displayed.

The selector - "com.lambdatest.proverbial:id/action_bar" is provided for the Notification bar with the id locator strategy. It is used in the notificationBar() method of the HomePage class.

The Toast button needs to be located for clicking on it to automate the third scenario.

It can be seen that the selector - "com.lambdatest.proverbial:id/toast" with id strategy has been provided for the Toast button. It is used in the toastBtn() method to locate the element.

Finally, to locate the toast message, the selector with Xpath - "//android.widget.Toast[1]" is used in the toastMessage() method that returns a text of the element in String format.

Running automation tests at scale using Appium on a cloud grid
The following testng.xml file will run the tests in parallel.
<?xml version="1.0" encoding="UTF-8"?>
<!DOCTYPE suite SYSTEM "http://testng.org/testng-1.0.dtd">
<suite name="Lambda tests Mobile automation test suite"  parallel="tests">
    <test name="Android Proverbial app tests on Samsung S22 5G">
        <parameter name="buildName" value="Android Proverbial app Build"/>
        <parameter name="testName" value="Proverbial android app tests on Samsung S22 5G"/>
        <parameter name="app" value="lt://APP10160252091701161593570567"/>
        <parameter name="platformName" value="ANDROID"/>
        <parameter name="version" value="12"/>
        <parameter name="device" value="Galaxy S22 5G"/>
        <classes>
            <class name="io.github.mfaisalkhatri.tests.AndroidTests">
                <methods>
                    <include name="textTests"/>
                    <include name="notificationTest"/>
                    <include name="toastMessageTest"/>
                </methods>
            </class>
        </classes>
    </test> <!-- Test -->
    <test name="Android Proverbial app tests on Google Pixel 7">
        <parameter name="buildName" value="Android Proverbial app Build"/>
        <parameter name="testName" value="Proverbial android app tests on Pixel 7"/>
        <parameter name="app" value="lt://APP10160252091701161593570567"/>
        <parameter name="platformName" value="ANDROID"/>
        <parameter name="version" value="13"/>
        <parameter name="device" value="Pixel 7"/>
        <classes>
            <class name="io.github.mfaisalkhatri.tests.AndroidTests">
                <methods>
                    <include name="textTests"/>
                    <include name="notificationTest"/>
                    <include name="toastMessageTest"/>
                </methods>
            </class>
        </classes>
    </test> <!-- Test -->
</suite> <!-- Suite -->
It can be seen that there are a total 2 test blocks in the testng.xml file. Both of these tests will be running in parallel. Notice that the parallel="tests" is provided in the line where the suite name is provided. This helps save the test execution time because all the tests are performed concurrently.
The first test block will execute the tests on Android 12 on Samsung S22 5G real device, and the second block will run the tests on Android 13 on Google Pixel 7 real device.
There is no need to worry about the Android driver session overlapping as it is thread-safe, as we have incorporated the ThreadLocal class in the code.

LambdaTest Dashboard provides better insight into the tests executed on the LambdaTest Cloud grid. It gives step-by-step details about the test execution in LambdaTest Analytics. It provides granular details with Video recordings, device logs, screenshots, etc., to get more visibility around the test execution.

Conclusion
Appium is a popular mobile automation framework that allows us to automate Android and iOS application tests. Test Automation gives us faster feedback by running all the regression and functional tests quickly.
By integrating the mobile automation tests with Cloud providers like LambdaTest, we can run the mobile automation tests in parallel and at scale on different platforms, platform versions, and real devices. It provides real devices on demand for testing our Android and iOS applications.
LambdaTest Analytics provides us with fair visibility of the test execution with minute details that can help the test automation engineers create a detailed report of the automation test execution to their software engineering teams and stakeholders.