
VisionFive 2 RISC-V - Building the Linux Kernel
5.00/5 (4 votes)
This article discusses using cross compile tools under x86 Ubuntu Linux to build the Linux kernel for the VisionFive 2 RISC-V SBC.
Table of Contents
- Introduction
- Background
- Using the Code
- Points of interest
- History
Introduction
The Linux community has been working on RISC-V versions of the Linux kernel and other software for years and there are Stackoverflow posts from 2015 with people attempting to compile Linux with RISC-V gcc.
Building a RISC-V version of the Linux kernel has gotten easier as tools such as compilers have matured. There are a number of RISC-V devices supported by the Linux kernel development community with manufacturers working to include their RISC-V devices. The VisionFive 2 by StarFive is not fully supported yet so StarFive has its own Github repository from which the development team is pushing updates into the Linux development team.
The StarFive Github area, starfive-tech · GitHub, has several repositories with the one containing the build materials for the VisionFive 2 SBC, GitHub - starfive-tech/VisionFive2. The VisionFive2 repository contains the software components for the Linux kernel, BusyBox, U-Boot loader, and other components for the VisionFive 2, which uses the JH7110 SOC.
Background
If you have little to no experience, I highly recommend that you prepare yourself for the experience of building the Linux kernel by getting an understanding of the basic procedure. The first thing that I did was to spend some time watching various YouTube videos about the process. The VisionFive 2 Linux build process uses Buildroot so it's good to have a grasp of what that image building tool does. A list of ones that I found helpful:
- Buildroot: building embedded Linux systems made easy
- Making Simple Linux Distro from Scratch
- Getting to Know the Linux Kernel: A Beginner's Guide)
- Linux Kernel Programming 01: Compile and Boot
- Embedded Linux Booting Process
Here are a few documents that may be helpful if you are interested in the internals of making an image and what happens during the booting of a Linux device from turning on the power to getting the login screen:
- Linux kernel newbies (lots of documentation and a Linux community)
- The Pro Git book written by Scott Chacon and Ben Straub
- The Buildroot user manual (Buildroot is used to build one of the images)
- Working with Linux and u-boot (embeddedartists.com)
Here are a few videos and documents about device drivers and modules which can help with understanding the procedure when we look at building a WiFi device driver for the VisionFive 2.
- How do Linux Kernel Drivers Work? (a short overview from Linux Device Drivers book)
- Linux Device Drivers, Third Edition (chapters as PDF)
- How to avoid writing device drivers for embedded Linux
What I found was the procedure for building the Linux kernel is quite intimidating in concept and fairly straightforward in execution if you follow the procedure correctly. Once you start to modify the procedure, you will need to have a better understanding of the internals. The most important first step is to make sure that you have all of the cross compile and build tools for the RISC-V architecture installed.
One thing to remember is that most probably you will not need to make any kind of a substantial change to the Linux kernel itself. Applications and device drivers can be added through the standard package management functionality after the image is built and deployed to a device. What building your own image does allow is to add or remove functionality, for example, to strip down an image to the bare essentials in order to run on a resource constrained device.
I suggest that you develop understanding of the Git version control system. There is a free electronic version of the Pro Git book by Scott Chacon and Ben Straub that covers everything needed for using Git.
The most common problem I had was copy/paste errors when stepping through the procedures. I was selecting and copying text from a document displayed in a browser in Windows and pasting the text into the Ubuntu terminal window command line of the WSL virtual machine.
I have only tried to build images that are put on a microSD card. I have not tried to use the M.2 NVMe card nor build an image for such a card. My understanding is the image built for the SD card is the basis for the image for the eMMC and the NVMe drive. Once you understand the steps of the SD card image, you pretty much understand the build procedure for any version of the device.
There appear to be monthly Debian builds available through the StarFive Debian Repository from the Releases tab of the repository. In the Assets list are a number of Debian package files for applications such as FireFox. The actual Debian image files can be downloaded from one of two storage areas at debian.starfivetech.com. When using the OneDrive link, when it asks for me to authenticate, I just reload the page and try again and it seems to work without authentication.
Build and Test Environment
I used a Windows 11 Pro desktop using Windows Subsystem for Linux (WSL) running Ubuntu. I have a Ubuntu Linux server with Subversion however I did not want to clutter it up with the tools and source for a Linux build when I assumed that I could easily make mistakes that would be most easily addressed by destroying a WSL virtual machine and restarting from scratch.
The PC I use has the following hardware:
- i5-11400 11th Generation Intel processor
- 24 GB of RAM (was 32 GB until a stick failed)
- 1 TB NVMe solid state drive
- an LG 46" 4K display
I purchased a VisionFive 2 with a bundle from Amazon.com that contained the following parts:
- VisionFive 2 version 1.2A SBC
- USB WiFi dongle
- TTY to USB adapter cable
- 64 GB microSD card
- USB to microSD card adapter
A TTY to USB adapter is highly recommended to provide access to the UART pins on the 40-pin connector of the VisionFive 2. When the desktop was unavailable or I needed additional logs and other debug information, I used a terminal emulator as user root to look at what was happening. A terminal emulator will normally have some sort of logging capability allowing you to have a text log to review for information if needed or to include in a forum post if you are seeking assistance.
With some experiments with test Linux kernel builds, I've run the VisionFive 2 headless sitting next to an OrangePi 5 Plus SBC to which I've connected the TTY to USB adapter. The OrangePi 5 Plus is using the keyboard, mouse, and HDMI display I normally use with the VisionFive 2. In those cases, I'm using the gtkterm application on the OrangePi 5 Plus to connect to the VisionFive 2 Linux console through the Port /dev/ttyUSB0 and using the rsh application for a terminal window. I did have a problem with the brltty service taking over the /dev/ttyUSB0 device until I disabled the service (see the discussion below in the section gtkterm connection problem due to brltty service).
I have been using Windows Subsystem for Linux, WSL, with Windows 11 to do my builds. I have run into only one issue, a PATH environment variable problem, that was easily resolved. With WSL, I'm using Ubuntu and doing everything from the command line in a terminal window.
I tried using the TTY to USB adapter with a Windows 10 laptop and Windows would not set up the device driver properly so it didn't work. However the adapter seems to work fine with Linux. During an online discussion, someone recommended using Linux saying that the USB/TTY converter probably used a chip that Windows didn't recognize but Linux is usually fairly good with odd or Chinese knockoff chips.
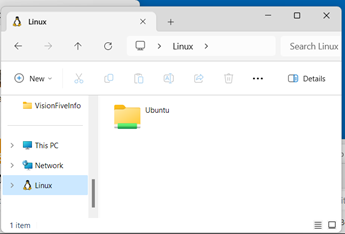
Since the build documentation uses the command line interface, a terminal window with WSL works fine. The only Windows applications I use other than WSL are Chrome web browser, the Raspberry Pi Imager utility, and the PuTTY application suite (which includes the PSFTP utility for transferring files). I have found that moving files between the WSL file space and the Windows file space with the Windows File Manager works smoothly.
I can specify a WSL pathname when using the lcd (local change directory or local cd) command of the psftp utility. What I do is to navigate with the file explorer to the WSL file space and then once I have navigated down to the folder where the file I want to transfer resides, I make a copy of the path displayed in the navigation bar of the File Explorer window and then paste it into the psftp window when building up the lcd command line.
When Windows spins up the Ubuntu virtual machine, the PATH environment variable contains pathnames from Windows containing spaces such as /mnt/c/Program Files/Microsoft SQL Server/110/Tools/Binn/. Due to this difference, when I first tried to make the kernel, I received the following error message:
Your PATH contains spaces, TABs, and/or newline (\n) characters.
This doesn't work. Fix you PATH.
To resolve this, I echoed the $PATH variable to a file then created a simple shell script where I used the export command to set my PATH environment variable with a modified path taking out all of the pathnames with spaces. I then used the source command from the command line to set my PATH to the new value.
There are several applications that you will use when getting source code and components.
- a web browser to traverse the StarFive Github repository and to access various documents
apttool or other package manager for installing software tools- git source management tool,
sudo apt install git - git large file tool,
sudo apt install git-lfs curltool,sudo apt install curlwgettool,sudo apt install wget
The documentation for the two alternative builds provides the apt commands needed to set up your build environment. The two methods do have many tools in common as well as a few that are not shared so to prevent wasting time tracking down errors due to missing tools, take the time to set up your build environment properly.
Source Tree Clone and Pulls
I have both build environments with the source of each image in a different file hierarchy. This way, I can build either version by just going to the root folder of the file hierarchy for that image and then performing the appropriate procedure.
Since it is a lot of source to download and it has been a couple of weeks since I did the git clone of the various repositories, I worked out a procedure to keep my local Git repositories updated.
The two different alternative image builds use Git in different ways. The local version of the StarFive VisionFive2 repository is created with a single git clone command which then pulls down several linked repositories including the Linux source which is physically stored in a separate repository on the StarFive GitHub. The local version of the Debian Image from Scratch is built by using several git clone commands along with several wget commands to manually build directory and file tree holding the source and the other components that are part of the Debian desktop image.
This Stackoverflow post, Can "git pull --all" update all my local branches?, describes some of the difficulties in managing a complex Git structure involving branches. Since there may be multiple Git repositories within a Linux build source tree, it can be a bit challenging to identify them all. What I do is to use the find command to locate directories where there is a .git file since that directory will be the top of a Git repository.
For the StarFive VisionFive2 repository, the procedure for staying up to date I am using currently is to go to the root directory of the tree where I did the git clone of VisionFive2 repository and do a git pull to update that tree followed by using git submodule foreach 'git pull' to update the linked repositories that are submodules.
To update the manually built tree for the Debian Image from Scratch I cd to the top of the directory tree and run a bash script which goes to the several Git repositories that were cloned and perform a git pull in that directory.
Two Alternative Builds
There are two different documented methods for doing a Linux build using the StarFive VisionFive materials that I have found thus far. I will provide my experience on each below.
The first method uses a procedure specified in the README.md file in the StarFive VisionFive2 repository. That procedure builds a Linux kernel with BusyBox for a user interface using Buildroot. This version does not boot with a desktop. The image from that procedure requires using a TTY to USB adapter connected to the UART pins on the 40-pin connector with a terminal emulator on another device allowing access to a command line as the root user (not the user user).
I think what is happening is that with the first version, Linux does not boot into run-level 5 but instead stops at run-level 3 so you must use the Linux console through the TTY to USB adapter since the graphical display manager is not running. See init - How can I see or change default run level? - Ask Ubuntu for a bit of information about run-level. However with the second method, Linux is at run-level 5 and the graphical display manager is running with the HDMI working.
The second method is documented in Building the Debian Image from scratch. The procedure requires various manual procedures to download files, create files using the cat and echo commands, and manually creates the image file using a loop device. The second method involves a fair amount of time and is quite tedious, however the result is a desktop displayed on an HDMI screen connected to the VisionFive 2. This method has two users, root and user (can be elevated using sudo) with the username user the default for the sign in prompt.
In the rest of this article, I will refer to the first method as the VisionFive2 README.md version and the second method as the Debian Scratch Build.
There are several steps during this procedure that can take a long time to complete so be prepared to start some tasks running with a command and then going off to do something else for a few hours.
Beware of copy and paste errors!
After struggling with build errors for days by installing missing packages, I discovered that when I compared the suggested app install list from the README.md file with the list of things I had installed, I realized that the app install list from the README.md file contains most of these. When I retried using the same list by copying and pasting the text from the README.md file, I discovered that the paste operation inserted some kind of a line break character and when I ran the apt install pasted into the Ubuntu command line, the list of packages processed by the apt command was not the complete list I thought I was specifying.
On the other hand, I had another error complaining the sha256 checksum of the GPU driver file did not match what was expected. It appeared the error was due to an incorrect GPU driver file but it was actually due to Git LFS not being installed before doing the Git repository clone with git clone https://github.com/starfive-tech/VisionFive2.git. I thought I had performed the step for installing Git LFS but I had downloaded the package but had not installed it with apt install.
One other thing that I ran into was that errors may not actually stop a build immediately and any error messages or warnings will quickly scroll off the visible part of the terminal window. There are also kernel source files that when compiled will display warnings of various kinds yet will still result in a working system. The sometimes voluminous amount of text scrolling rapidly by in the terminal window can make identification of errors difficult.
Using the Code
Two Methods, Two Different Products
The products created by these two different methods are different. The first method, VisionFive2 README.md method, appears to create a Linux kernel with BusyBox without most of the software content of the official StarFive Debian build whose latest version as of this writing is 202310. The second method, Debian Scratch Build, appears to create a complete replica of the 202310 build with all the software of that build.
The first major difference between the two is that the first method requires a terminal using a TTY to USB adapter connecting the terminal to the VisionFive 2 UART pins on the 40 pin connector. The second method provides a complete desktop that can be used with an HDMI monitor with keyboard and mouse attached to the VisionFive 2 device ports.
Note that the toolchains used for these two methods are slightly different. One important difference is that the compiler used with the first method is a different version of gcc than the compiler used in the second method. This difference was a problem I ran into when trying to add a device driver to support a USB WiFi adapter. When compiling the device driver source for the first, VisionFive2 README.md, method I had to use the compiler from the toolchain used by Buildroot.
Setting Up the Build Tools for the README.md Alternative
The README.md file in the VisionFive2 repository contains a fairly good list of steps. However, during my first experience doing a kernel build, I ran into a couple of missing packages that caused the build to fail. I later discovered that the packages were missing due to a copy/paste error on my part of an apt command in the procedure. This was one of several mistakes that I made due to being a bit careless and over confident.
The README.md file in the directory VisionFive2 mentions the use of Git LFS (Large File Support) which is used to pull down some Third Party components such as the GPU drivers. What I have seen is that not having Git LFS installed can result in errors such as sha256 checksums not matching that appear to have nothing to do with Git LFS not being available.
When I ran the curl command to obtain Git LFS, it took a long time to run and seemed to hang. The only output that I saw was a message printed that mentioned the Ubuntu version I was using. I finally pressed the return key on my keyboard and it seemed to finish. You can double check that git-lfs is available for installation with apt-cache search git-lfs. Then run the apt install.
Cloning and setting up the VisionFive2 Linux build source tree requires that Git be installed and Git LFS be installed first. Before using the git command to clone the source tree, you must have both installed or you will get an incomplete source and Third Party components that are incomplete, yet the build will have few errors indicating the issue.
The VisionFive2 repository README.md file specifies a number of steps including the apt command line used to set up the cross-compile environment. The actual compilation of the source is straightforward, a simple make command that then takes hours to run. The result is an image file that magically appears when the make command completes successfully, much like walking out in the morning to find that the buds of the rose bushes have opened during the night.
Setting Up the Build Tools for the Building From Scratch Alternative
After using the Buildroot system from the VisionFive2 repository, I changed to the procedure from the Building from Scratch document. This required me to do a sudo apt install gcc-riscv64-linux-gnu since that process expects that tool which appears to be a different compiler than the VisionFive2 repository procedure uses. I thought that was the only difference until I ran into another missing application needed, at which point I did what I should have done at the beginning and copied and pasted the sudo apt install needed for the tools as specified in the Building from scratch document and also did the step to export an environment variable VF2_WORK_DIR for the build working directory.
As I worked my way through the steps, the step Create bootstrap rootfs in the Create Debian Root Filesystem section with the debootstrap command took a long time and appeared to hang before starting to slowly display lines of progress. In my first attempt using the command, I did get the error "gpg may be incorrect or out of date." Following the documentation, which mentioned this possible error, I then retried the command with the suggested --no-check-gpg parameter option and it ran fine though it took a long time as in over night in its retrieving and validating.
For the most part, the rest of the procedure of Building from Scratch was a somewhat tedious process of copying and pasting text making sure that everything was properly selected when copying and that the paste was the text copied. My procedure in most cases was to select a line at a time for a copy and paste to ensure that the text was correct.
There is a point at which several files are created or have text lines appended using the cat command to copy text entered in the terminal command line window and place it into a file. Most of these were short files that could be done with a single copy/paste however there were a couple that had to be copy/pasted a section at a time.
As you are going through this tedious process of fetching source and building files, just remember that once it's done, you will only need to do it again if you clear the image build sources that you are creating.
I suggest that you learn something about Linux System Administration and the commands used to administer a Linux system as that will make some of the steps more understandable and less robotic. Spend the time to look up documentation on the various commands such as chroot and others as well as the files created by some of these steps to better understand what is being done.
Two Important Notes
The first important note concerns the step in the Build SD Image section when the /dev/loop30 device is mentioned in the commands. You must replace the text of /dev/loop30 with the specific loop device that is displayed by the losetup command. In the terminal window, I used the command as written in the procedure rather than substituting with my device, /dev/loop0, in place of /dev/loop30 resulting in an error. See the following excerpt.
rick@rchamber2:~/Documents/starfive/github/VF2/create_sd_image$ sudo losetup --partscan --show --find starfive-jh7110-SD-minimal-desktop.img
/dev/loop0
rick@rchamber2:~/Documents/starfive/github/VF2/create_sd_image$ mkdir boot rootfs
rick@rchamber2:~/Documents/starfive/github/VF2/create_sd_image$ sudo mkfs.vfat /dev/loop30p3
mkfs.fat 4.2 (2021-01-31)
mkfs.vfat: unable to open /dev/loop30p3: No such file or directory
rick@rchamber2:~/Documents/starfive/github/VF2/create_sd_image$ sudo mkfs.vfat /dev/loop0p3
mkfs.fat 4.2 (2021-01-31)
rick@rchamber2:~/Documents/starfive/github/VF2/create_sd_image$ sudo mkfs.ext4 -m 0 -L root /dev/loop0p4
mke2fs 1.46.5 (30-Dec-2021)
Discarding device blocks: done
Creating filesystem with 996091 4k blocks and 249488 inodes
Filesystem UUID: ff03fc59-02e2-4ade-b517-779a498d4c63
Superblock backups stored on blocks:
        32768, 98304, 163840, 229376, 294912, 819200, 884736

Allocating group tables: done
Writing inode tables: done
Creating journal (16384 blocks): done
Writing superblocks and filesystem accounting information: done

rick@rchamber2:~/Documents/starfive/github/VF2/create_sd_image$
Secondly, chose the correct image build procedure for the type of storage device - SD card, eMMC, or NVMe card - you are using. I used the eMMC procedure when I should have used the SD card procedure and I found errors when booting from the SD card in my testing and the image failed to boot to the desktop.
The HDMI display showed the following message when booting with the first image I created that used the eMMC procedure with an extra step using sed command to modify the storage device name rather than the SD card image procedure (this is just the last part showing the error):
Begin: Running /scripts/local-block
Begin: Running /scripts/local-block… done. done.
Gave up waiting for root file system device. Common problems: Boot args (cat /proc/cmdline)
Check rootdelay= (did the system wait long enough?) - Missing modules (cat /proc/modules: ls /dev)
ALERT! /dev/mmcblk0p4 does not exist. Dropping to a shell!
Fortunately, the TTY interface showed the initramfs prompt and I was able to do some looking about using the TTY interface. When I looked in /dev at the initramfs prompt with ls /dev/m*, I saw mmcblk1 and each of the expected partitions mmcblk1p4, etc. but not mmcblk0.
I took a look at the three files that were modified using the sed command to change mmcblk1 to mmcblk0 in the eMMC procedure. The file /etc/fstab had nothing more than a comment. The other two had directives that referenced mmcblk0 so I modified those back to mmcblk1. I then redid the SD card image build procedure, leaving out the sed command step, and created an image which I then burned to a microSD card using the Raspberry Pi Imager utility.
I placed the microSD card into the VisionFive 2 drive and booted the device by pressing the power button. After a short time, messages started scrolling on the display followed by a clearing of the screen, a pause, and then the desktop appeared with the sign in prompt.
I signed in and set up WiFi then tried out FireFox. Things looked similar to the 202310 Debian build.
Adding Applications to the Debian Image
Looking at the pathnames used in the wget commands in the Copy applications step of the Create Debian Root Filesystem section of the document, it appears that you could use the most recent version of those applications by using a pathname from the Assets in the StarFive Debian Repository Releases in the wget command line.
Some of the Assets available may not be working properly due to a still not corrected issue in a dependency. For example, as of this writing (Dec-02-2023) Chromium is not working properly and will not open correctly.
As part of investigating building an image containing applications that I have created, I wrote a simple HelloWorld.c application. I cross compiled the source file and put the executable into the /usr/bin folder of the Linux image area. I then built the image and tried it out on the VisionFive 2 and the program was there and it did run.
I also tried including Chromium from the list of Assets that were part of the October 2023 build of the Debian repository into my image. This involved using wget to pull down an Asset from the Debian Releases link. Chromium appeared as one of the applications in my desktop when I booted the image but unfortunately, there is currently, as of Dec-04-2023, a bug that is causing Chromium to crash.
Since I was modifying an already existing image build area, I used the following procedure adapted from the Building Debian from Scratch procedure to add Chromum:
sudo chroot $VF2_WORK_DIR/riscv-chroot-snapshots
cd /opt
wget https://github.com/starfive-tech/Debian/releases/download/v0.11.0-engineering-release-wayland/chromium-103.0.5060.114.deb
dpkg -i chromium-103.0.5060.114.deb
rm chromium-103.0.5060.114.deb
apt clean
history -c
sync
exit
I haven't tried but I would assume that you could use a similar procedure for any additional packages you wanted to add to a Debian build so long as the package was a Debian package compiled for the StarFive VisionFive 2 and a RISC-V compiler or cross compiler.
Compiling Device Drivers
You may want to add your own device drivers to support some piece of equipment. I had an older Tenda U12 USB to WiFi adapter I wanted to use with my VisionFive 2. One thing I found is that there appears to be a standard method and practice about the Makefile used for compiling a device driver and how the make process interacts with the various components needed for a device driver such as the Linux headers. When done properly, the Makefile will allow for a device driver to be compiled under a wide variety of environments including different processors, different architectures, and different locations for external components such as Linux headers.
For information about the writing of device drivers see:
- Let's code a Linux Driver series (some 37 videos that start with a basic HelloWorld driver)
- Linux device driver programming series (some 21 videos using Linux on Beagle Bone)
- Driver implementer's API guide — The Linux Kernel documentation
- Linux Device Drivers: Tutorial for Linux Driver Development
- GNU make
- Building a Linux Kernel Module: Out-of-Tree Development Guide (fastbitlab.com)
There are several tools used with Linux modules that you will need on the VisionFive 2 device itself. These are in the directory /sbin which was not part of the default PATH environment variable.
You may find a need to install the usbutils package, sudo apt install usbutils, on the VisionFive 2 device as it contains the handy tool lsusb that displays a list of connected USB devices with some details such as vendor id.
I was interested in using a Tenda U12 USB WiFi adapter that I had lying around with the VisionFive 2. The USB WiFi dongle that came with the bundle I had purchased only supported the 2.4 Ghz WiFi and the Tenda U12 supported 5 Ghz as well as 2.4 Ghz. However, the Linux kernel available for the VisionFive 2 did not have a driver for the Tenda U12.
The manufacturer had Linux drivers along with drivers for Windows and MacOS however I assumed they were for x86 Linux and not for a RISC-V processor. With that assumption, I did not download and look into them until later when I took a brief look out of curiosity. That is when I discovered the download package included the source code. My bad. I plan to take a further look into the package at a later time.
Failing, Failing, Failing but at Least I Was Learning
For my new USB WiFi driver, I found source on Github for a driver that seemed appropriate, GitHub - cilynx/rtl88x2bu: rtl88x2bu driver updated for current kernels., but wasn't. However, I plunged ahead and figured even if it were the wrong one, I'd learn a lot from my failures until I ran into an insurmountable wall. I used git clone to get a copy of the source of what was the wrong driver, the 88x2bu to compile on my VisionFive 2. The first problem I ran into was the Makefile did not have any provisions for a RISC-V targeting compile, supporting only x86 and ARM. That meant that I had to modify the Makefile in order to compile the driver source.
One question that came up while I was working out changes to the Makefile is whether the processor is Big Endian or Little Endian. The VisionFive 2 is Little Endian as demonstrated by this short C program from the Stackoverflow post riscv - Checking Endianness of RISC-V machine using C-code - Stack Overflow.
// test the endiness type for the architecture
//

#include <stdio.h>

int main()
{
    unsigned long  x = 1;
    unsigned char* p = (unsigned char*)&x;
    printf(" if 1 then little-endian %d\n",(unsigned long)*p);

#if defined(__BYTE_ORDER__)
#if defined(__ORDER_BIG_ENDIAN__) && (__BYTE_ORDER__ == __ORDER_BIG_ENDIAN__)
    printf("  __ORDER_BIG_ENDIAN__ defined\n");
#elif defined(__ORDER_LITTLE_ENDIAN__) && (__BYTE_ORDER__ == __ORDER_LITTLE_ENDIAN__)
    printf("  __ORDER_LITTLE_ENDIAN__ defined\n");
#else
    printf("  defines not set.\n");
#endif
#else
    printf("  No __BYTE_ORDER__ define found.\n");
#endif
    return 0;
}
You will need the Linux headers for your Linux build. If you do not have the correct Linux headers, you will still have problems installing your driver due to a mismatched version magic. See this Stackoverflow post, arm - Cross compiling a kernel module: invalid module format - Stack Overflow. I've used the dmesg command with the grep tool to find more information about a module load failure. Use the uname command with the -r option to find out the kernel release.
What I also ran into was a compilation error that is described in this StackExchange Ubuntu post, kernel - Missing asm/types.h file - Ask Ubuntu. In the answer I posted to this question, I describe how I used a symbolic link so that when the compiler was looking for asm/types.h it would find a symbolic link to the actual location, asm-generic/types.h which appears to have been a change made that is not reflected in older source code.
When I compiled a USB WiFi driver on my VisionFive 2 with incorrect Linux headers which displayed an error when I tried to load it. The following shows using the dmesg command with grep to locate more details about the error along with the Linux release. I then used the modinfo command to display the vermagic or version magic of the USB Serial driver for a ch341 chipset, a device driver bult into Linux, which had the correct vermagic label.
user@starfive:~/Documents$ dmesg | grep 88x2bu
[184363.434896] 88x2bu: version magic '6.0.0-6-riscv64 SMP mod_unload modversions riscv' should be '5.15.0-starfive SMP mod_unload riscv'
user@starfive:~/Documents$ uname -r
5.15.0-starfive
user@starfive:~/Documents$ /sbin/modinfo /lib/modules/5.15.0-starfive/kernel/drivers/usb/serial/ch341.ko
filename:       /lib/modules/5.15.0-starfive/kernel/drivers/usb/serial/ch341.ko
license:        GPL v2
alias:          usb:v9986p7523d*dc*dsc*dp*ic*isc*ip*in*
alias:          usb:v4348p5523d*dc*dsc*dp*ic*isc*ip*in*
alias:          usb:v1A86p7523d*dc*dsc*dp*ic*isc*ip*in*
alias:          usb:v1A86p7522d*dc*dsc*dp*ic*isc*ip*in*
alias:          usb:v1A86p5523d*dc*dsc*dp*ic*isc*ip*in*
alias:          usb:v1A86p5512d*dc*dsc*dp*ic*isc*ip*in*
depends:        usbserial
intree:         Y
name:           ch341
vermagic:       5.15.0-starfive SMP mod_unload riscv
user@starfive:~/Documents$
Linux Headers for Device Drivers
Since the Linux headers for your release and build of Linux is needed for compiling device drivers, where do you get them?
The Building from Scratch procedure has several files in the file tree hierarchy one of which is linux-headers-5.15.0-starfive_5.15.0-starfive-1_riscv64.deb. I transferred this file to my VisionFive 2 device using the PuTTY PSFTP utility and then used the dpkg command to install the package, sudo dpkg -i linux-headers-5.15.0-starfive_5.15.0-starfive-1_riscv64.deb. Then using apt list --installed, I was able to check and see that linux-headers-5.15.0-starfive/now 5.15.0-starfive-1 riscv64 [installed,local] was installed.
However, I still was unable to build a complete device driver because the Linux headers were not the only source the device driver build needed.
At this point, I realized that I had run into another wall and it was time to just think for a bit. So I deleted the directory containing the driver git clone, reverted my /lib/modules changes I had made to make it compile and decided to start over in the morning.
Think Because Sometimes the Answer Is Right There
Starting over, I found this GitHub repository collection of various USB WiFi device drivers, morrownr · GitHub and decided to try again to build a device driver that would support the Tenda U12 on the VisionFive 2.
However, since there were several different driver repositories each of which supported different RealTek chipsets, I had to research which chipset the Tenda U12 had in it. This was a bit more difficult than I thought it would be. I could not find out anything about the chipset from the manufacturer's web site. I finally found this webpage, Tenda U12 - WikiDevi.Wi-Cat.RU, that told me it was the Realtek RTL8812au.
Next, I realized that I had a complete cross compile of the VisionFive 2 Linux desktop build in the Ubuntu session of my Windows Subsystem for Linux and everything I could possibly need to build my drivers was in there some place. And right there in the procedure to Build from Scratch was a step Build vpu driver which showed the steps for building a device driver for the kernel.
I created a new directory ~/Documents/starfive/github/VF2/soft_extra next to the directory ~/Documents/starfive/github/VF2/soft_3rdparty and I did a git clone https://github.com/morrownr/8812au-20210629 in that new directory to download the source.
I spent some time reading the Makefile, working to understand how the various defined constants were being used to set up the build environment. One thing I realized was that the linux file tree in the folder ~/Documents/starfive/github/VF2/linux had several directories which corresponded with the directories in /lib/modules/5.15.0-starfive on the VisionFive 2 which were needed for a device driver compile. Reading further, it appeared that the label KSRC should point to where all the source for the Linux compile was located. So I compiled the driver with the following make command, make CROSS_COMPILE=riscv64-linux-gnu- ARCH=riscv KSRC=$VF2_WORK_DIR/linux and the make completed successfully.
I then put the file 8812au.ko onto the VisionFive 2 using PuTTY PSFTP.
On the VisionFive 2, I used /sbin/insmod to install the driver. I swapped out the USB WiFi dongle I’ve been using and inserted the Tenda U12. After several very long seconds, I checked dmesg and it looked like the driver was engaged and working. I then went into setup and now I could see both my 2.4 Ghz WiFi and the 5 Ghz WiFi. I authenticated in the Setup utility and was able to watch YouTube videos with FireFox.
The next question is whether I could use the same approach for the first image build alternative, the README.md alternative which builds the Linux kernel and BusyBox only without the desktop. I copied the soft_extra directory over into the VisualFive2 repository tree. The first question was where were the Linux kernel materials located that the device driver build would need. At first, I thought it was in the linux file tree off of the root, that is in ~/Documents/starfive/github/VisionFive2/linux, however compiling with that failed with an error of missing the kernel configuration file. Then I realized that the output from the kernel build was in ~/Documents/starfive/github/VisionFive2/work/linux and that seemed to work for a few seconds until I received a new error, cc1: error: incompatible gcc/plugin versions.
rick@rchamber2:~/Documents/starfive/github/VisionFive2/soft_extra/8812au-20210629$ make CROSS_COMPILE=riscv64-linux-gnu- ARCH=riscv KSRC=~/Documents/starfive/github/VisionFive2/work/linux
make ARCH=riscv CROSS_COMPILE=riscv64-linux-gnu- -C /home/rick/Documents/starfive/github/VisionFive2/work/linux M=/home/rick/Documents/starfive/github/VisionFive2/soft_extra/8812au-20210629  modules
make[1]: Entering directory '/home/rick/Documents/starfive/github/VisionFive2/work/linux'
  CC      arch/riscv/kernel/vdso/vgettimeofday.o
cc1: error: incompatible gcc/plugin versions
cc1: error: failed to initialize plugin ./scripts/gcc-plugins/structleak_plugin.so
make[2]: *** [/home/rick/Documents/starfive/github/VisionFive2/linux/scripts/Makefile.build:277: arch/riscv/kernel/vdso/vgettimeofday.o] Error 1
make[1]: *** [/home/rick/Documents/starfive/github/VisionFive2/linux/arch/riscv/Makefile:120: vdso_prepare] Error 2
make[1]: Leaving directory '/home/rick/Documents/starfive/github/VisionFive2/work/linux'
make: *** [Makefile:2510: modules] Error 2
rick@rchamber2:~/Documents/starfive/github/VisionFive2/soft_extra/8812au-20210629$
This implied that I was using a compiler to compile the device driver source that was different from the compiler used to compile the build image source. And I remembered having the vague idea that the two alternative image builds used different tools. This Stackoverflow post, How to retrieve the GCC version used to compile a given ELF executable?, provided a way to check and I used the method in one of the posts to download and build a tool called ELFinfo that indicated the Debian image build is using GCC 11.4.0 and the VisionFive2 repository image build is using GCC 12.2.0.
After a bit of investigation, what I found was that the Buildroot system was pulling down its own toolchain to use when building the VisionFive2 repository version of the Linux image. The name of the compiler as used by Buildroot was also slightly different from what was used with the Build from Scratch Debian desktop build. The name used with the Build from Scratch build was the name of the cross compiler installed in the Ubuntu of the WSL, riscv64-linux-gnu-gcc, where as the Buildroot toolchain was located in the directory ./work/buildroot_initramfs/host/bin and had the name of riscv64-buildroot-linux-gnu-gcc.
I added the path ~/Documents/starfive/github/VisionFive2/work/buildroot_initramfs/host/bin to the $PATH environment variable to make the correct toolchain available. Then I did a cd to the directory containing the 8812au driver to build it. Then used make CROSS_COMPILE=riscv64-buildroot-linux-gnu- ARCH=riscv KSRC=~/Documents/starfive/github/VisionFive2/work/linux to compile the driver.
The question now is how to provide this or any other product to the VisionFive2 image build process so that it will be included in the image. That is something I'm still trying to figure out.
Modifying Linux Kernel and updating VisionFive 2
While I haven't made an actual change to the Linux kernel, one question is how to go about updating just the kernel without touching anything else?
I didn't really have any changes to make however I thought I would just pretend to make a change by recompiling the Linux kernel. The first thing was to find out how to install a new Linux kernel, just the kernel. What I found was that the VisionFive 2 image build procedure created two .deb files: linux-headers-5.15.0-starfive_5.15.0-starfive-5_riscv64.deb, linux-image-5.15.0-starfive_5.15.0-starfive-5_riscv64.deb, and linux-libc-dev_5.15.0-starfive-5_riscv64.deb. If I recompiled again, the -starfive-5_riscv64 part of the file names became -starfive-6_riscv64.
I then found a post which described using sudo apt install with a .deb package and decided to try this with my new Linux kernel that I had built. However when I tried it, the sudo apt install failed with an error about changing /boot/System.map-5.15.0-starfive. I realized that I didn't really understand what I was doing. I spent some time with some reading and then decided to change the kernel release from 5.15.0 to 5.15.11 by changing the variable SUBLEVEL from a value of 0 to a value of 11 in the Makefile using the vi text editor and with the resulting file, linux-image-5.15.11-starfive_5.15.11-starfive-8_riscv64.deb, the sudo apt install worked.
I posted a question into the Unix & Linux StackExchange forum, procedure for updating linux kernel with a test kernel I built which has gone through a number of edits as I've done more reading helped by comments.
Here is the basic procedure that I'm currently using:
- edit the Linux kernel
Makefilewithvito change the variableEXTRAVERSION =toEXTRAVERSION = 1or some other number, not theSUBLEVELvariable I changed initially - rebuild the kernel to create a file with a name similar to linux-image-5.15.01-starfive_5.15.01-starfive-8_riscv64.deb (the -starfive-8_riscv64 part of the name will change every time you build the kernel)
- use the
psftputility to put the file to the VisionFive 2 SBC - use
PuTTYto open a command shell and navigate to the folder where I put the.debfile - use
sudo apt install ./linux-image-5.15.01-starfive_5.15.01-starfive-8_riscv64.deb - reboot the VisionFive 2 with
sudo rebootto reboot the device with the new kernel
This seems to work fine. The uname -a command indicated I was now running my test build Linux kernel.
Booting and u-boot
The VisionFive 2, like many other SBC devices, uses the u-boot boot loader rather than GRUB. The image build includes a copy of u-boot into the image. The u-boot boot loader is what loads the actual Linux kernel and starts execution and u-boot allows you to have multiple kernels and to choose which one you want to boot or if you don't make a choice in a few seconds, a default kernel will be loaded and started.
The VisionFive 2 has a directory, /boot, which contains the various kernel images and the System.map file for each. I found that I had to use sudo ls /boot to see the directory contents as when I did not use sudo, I received an error. When you run sudo apt install on the linux kernel .deb file, the /boot directory is where the Linux kernel is placed.
In order to be able to access the u-boot shell in order to pick a kernel version or to do other u-boot tasks, you must be able to connect to the Linux console. This requires the use of a TTY to USB adapter cable and a PC running a terminal application. When I was doing these experiments with booting my own kernel, I used an OrangePi 5 Plus SBC running Linux using the gtkterm application. I also used the rsh Linux application to remote shell into the VisionFive 2 since I could use the VisionFive 2 headless, without a display or keyboard, with both devices side by side on the dining room table.
gtkterm connection problem due to brltty service
When I was doing these experiments with booting my own kernel, I used an OrangePi 5 Plus SBC running Linux using the gtkterm application. However when tried to connect with gtkterm, the Port menu did not show the device /dev/ttyUSB0 as I expected when I plugged the USB connector of the TTY to USB adapter cable into the OrangePi.
Researching the problem, I found a reddit post that led me to this Stackoverflow post, How do I connect to a terminal to a serial-to-USB device on Ubuntu 10.10 (Maverick Meerkat)?, which had an answer that led me to the solution for my connection problem. Working out from that posted answer my solution, I updated the posted answer I found useful which was too terse to be helpful.
Basically, the problem was a service, brltty or Braile TTY, for the hearing impaired that was taking the /dev/ttyUSB0 port so that it couldn't be used with gtkterm. the command dmesg | grep tty showed the problem with the following logs:
[ 1298.811838] usb 4-1: ch341-uart converter now attached to ttyUSB0
[ 1299.440590] usb 4-1: usbfs: interface 0 claimed by ch341 while 'brltty' sets config #1
[ 1299.442800] ch341-uart ttyUSB0: ch341-uart converter now disconnected from ttyUSB0
I used two commands to first stop the brltty service and then disable it to prevent it from starting back up.
orangepi@orangepi5plus:~$ sudo systemctl disable --now brltty brltty-udev
orangepi@orangepi5plus:~$ sudo systemctl mask brltty brltty-udev
Created symlink /etc/systemd/system/brltty.service → /dev/null.
Created symlink /etc/systemd/system/brltty-udev.service → /dev/null.
orangepi@orangepi5plus:~$
Removing the test Linux build
Since my test Linux build was now the default build, every time I rebooted the device my test Linux kernel was the one running. I decide to revert back to the original image Linux kernel.
First, I wanted to boot with the original Linux kernel to prevent problems with removing my test kernel. Reboot the VisionFive 2 with the console connected using the command sudo /sbin/reboot now. Watch the console output in the gtkterm session on the OrangePi 5 Plus until u-boot paused for a moment to allow me to change which image to load, I pressed the space key then selected the original 5.15.0 kernel to load.
With the original kernel now running, I used rsh to connect to the VisionFive 2 and verified with the uname -a command I was running the original Linux kernel and not my test build. I then used sudo apt remove to remove the test build Linux image package thereby removing my test build kernel.
To ensure I used the correct package name, I used the command apt list "*starfive*" to see a list of the installed Linux kernels to make sure I typed the correct package name. After the removal completed, I then check the /boot directory, sudo ls -l /boot, and the test kernel was no longer there. I rebooted and watched for the u-boot kernel list to display and the test kernel was no longer listed and when it then loaded the default and restarted, the Linux kernel running was the original kernel.
Points of Interest
I was happy to discover that I could use Windows Subsystem for Linux on a Windows PC to perform the VisionFive 2 image builds. There were a few bumps in the road such as the PATH environment variable that contained spaces as well as some copy/paste errors that caused build failures but it all worked out well in the end.
I was not using the TTY to USB adapter connected to the 40 pin connector on the VisionFive 2 in order to see the system terminal output when I first tried my image build. So what I saw on my HDMI monitor was that the image boot was failing when in reality the image I had built did not have support for the desktop. Once I connected up a Linux tablet with the TTY to USB adapter to the VisionFive 2 and was able to see what was happening during the boot, to deduce the incorrect device specified and correct the configuration files and try again.
The YouTube videos about building a Linux kernel were very helpful as they gave me some idea as to what to expect. Those videos also helped me to recognize that the first image I was building did not have a desktop for the HDMI display and was just the Linux kernel with BusyBox that had to be accessed through the system terminal using the TTY to USB adapter.
I've had to learn more about Git version control system and was happy to find the free online book.
I had a basic grasp of Linux System Administration that has been expanded after taking the time to read the documentation of the commands used in the Build from Scratch procedures to build a Debian image with desktop.
When pulling down the source for building the images, it can take a lot of time especially for the Debian Image build. There were a number of times when executing the procedures for building the images that there was a long wait with no feedback that anything was actually happening.
I was pleased when I worked out how to build the device driver for the Tenda U12 USB to WiFi adapter and felt a sense of real accomplishment when I tested it and it worked. I'm looking forward to working out how to build device drivers for both the VisionFive2 stripped down image and the Debian desktop image.
I felt fairly accomplished after working out the procedure for updating just the Linux kernel. I now have a better understanding of the Linux boot sequence.
History
- 5th December, 2023: Initial version
- 7th December, 2023: Added links to some additional resources, rearranged some of the text to improve the flow, added a few details here and there, added section Source tree pulls and clones
- 9th December, 2023: Added section titled Compiling device drivers, added Table of Contents
- 21st February, 2024: Added new section titled Modifying Linux Kernel and updating VisionFive 2 and updated the section about the Build and Test Environment