
Creating Reliable Production and Staging Environment for WooCommerce on AWS
0/5 (0 vote)
A walkthrough on how to create a real staging environment for WooCommerce
Introduction
Every developer faces a significant challenge when working with WordPress and its eCommerce plugin, WooCommerce. In the webshop, products are added, and orders are placed continually. At the same time, your development team is working on new features and needs a way to test their changes without interrupting the live site. Ideally, you would need separate servers for the “production” store and a “staging” environment where new features can be tested in isolation. But how do you synchronize the two environments, ensuring a seamless development process and a high-quality user experience?
The challenge lies in WordPress’s inherent design. WordPress stores different types of data, such as products, orders, and posts, in shared tables like wp_posts and wp_postmeta. As a result, if a developer tries to push changes to the production site, they will face conflicts due to simultaneous changes occurring in these shared tables.
In this guide, we will walk through a reliable process of setting up short-lived staging environments and maintaining a robust production application for your WooCommerce site on Amazon Web Services (AWS) EC2.

Prerequisites
In this article, I describe how to set up the hosting environment on AWS, not how to set up WooCommerce websites or configure web servers. I presume that you already know how to do these.
AWS Terminology
- EC2 (Elastic Cloud Compute) is the AWS service to manage virtual private servers (VPS). A VPS running on EC2 is often called an “instance.”
- EBS (Elastic Block Storage) Volumes are the primary storage devices used in EC2 instances. They are analogous to the hard disk in your computer.
- Snapshots can be created based on volumes. They are an off-site backup containing the complete data set on the volume. In turn, you can create new volumes based on snapshots.
- A key pair is a pair of private and public keys that is used instead of passwords to access your EC2 instances.
Step 1: Building the Production Environment
Creating an EC2 Instance: Begin by logging into your AWS Management Console. From there, navigate to the EC2 dashboard and click Launch Instance.

Name your server as you like; the name is only for your information. Choose an Operating System. I usually pick Ubuntu as it is the most commonly used and has the most know-how material available online. Leave Architecture on 64-bit (x86).
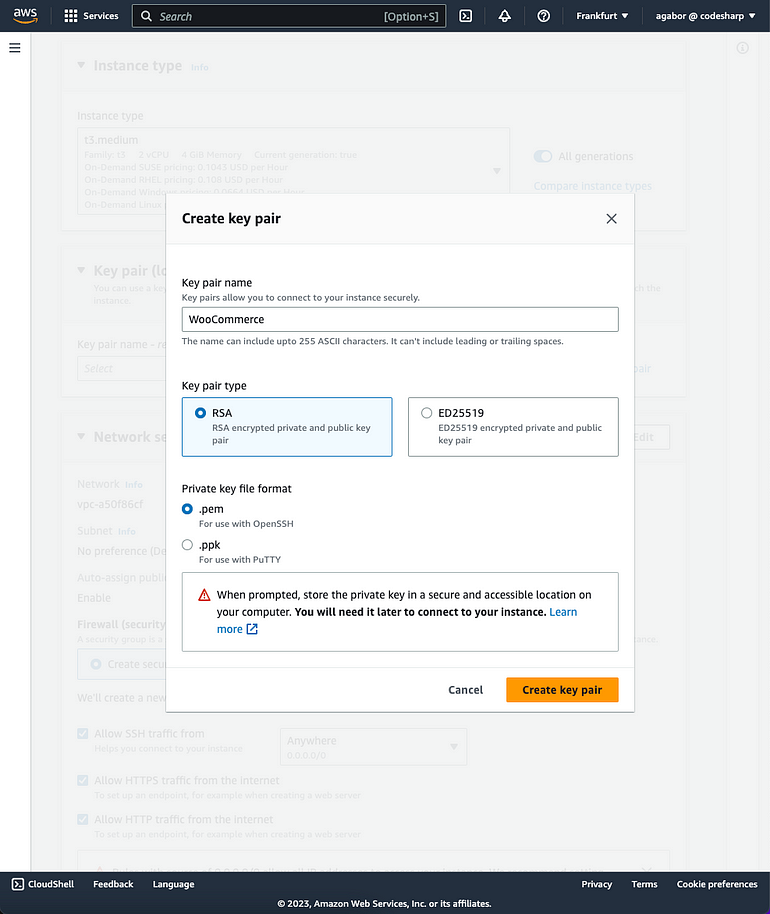
Generate a new key pair. You can leave every setting on default. A key file will be downloaded to your computer, which you will need later to access the server.
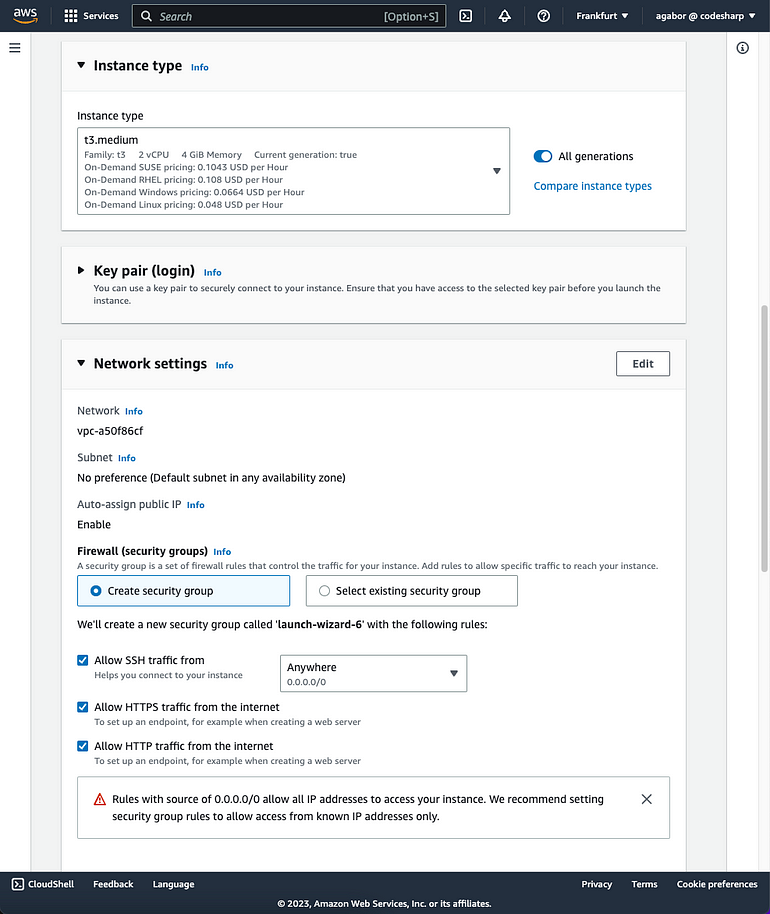
Choose an Instance type. This is a tricky question, as there is no rule on which will suit your store, as resource usage depends on how your store is built and how your web server is configured. But do not worry, you can change this later! “t3” is an excellent general-purpose family, so I usually pick one of those. For a smaller webshop with an average of 500 daily visitors, I would start with a “t3.medium”.
In Network Settings, create a new security group and allow SSH, HTTP, and HTTPS traffic.
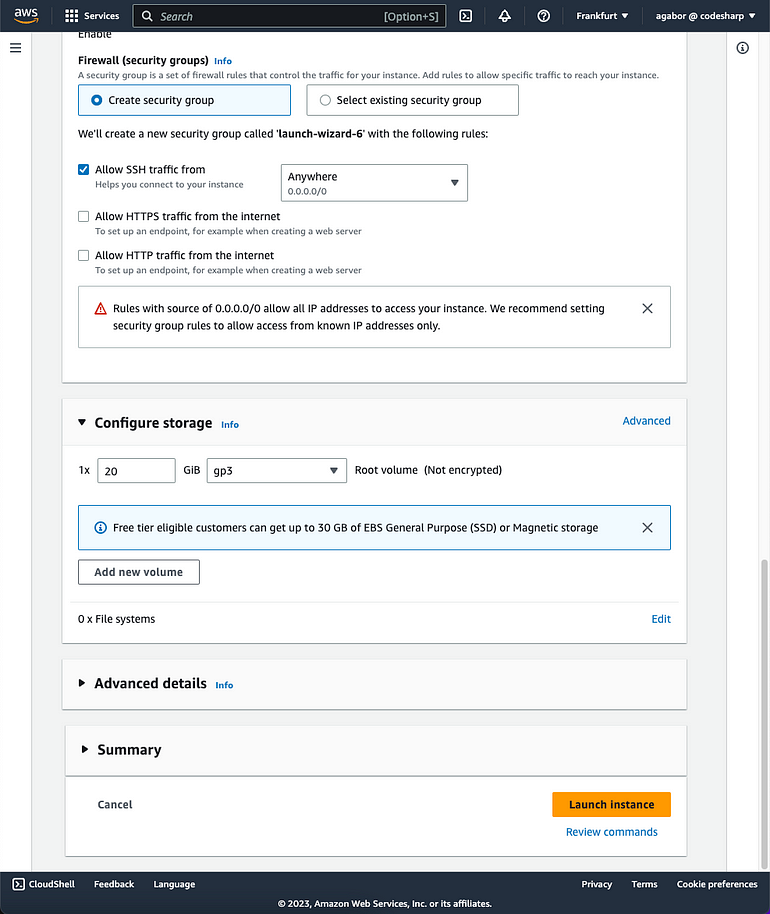
Finally, configure storage—20 GiB of “gp3” storage suits most medium-sized WooCommerce stores. Do not worry; you can increase this later if you run out of disk space. Remember, at AWS, you do not need to store your backups on your server. You can store backups as snapshots which is much cheaper.
Now, you can launch the server. Wait for the Instance state to turn “running.” You can connect your server using SSH. If you have picked Ubuntu as your operating system, the username will be “ubuntu,” and the IP address can be found on the lower panel. You will also need the key pair that you downloaded earlier.
ssh -i /path/my-key-pair.pem ubuntu@18.194.234.218
Set up your website. If you want to copy files from your local machine to the server, you can use an SFTP client, as most modern SFTP client support authenticating with key pairs.
Step 2: Creating the Staging Environment
Creating an Identical EC2 Instance: Follow the above process to create a clone of your production environment. Reuse the key pair and the security group that you created earlier.
When your staging server is up and running, the first thing you need to do is to shut it down.

Go to the Volumes menu under Elastic Block Storage. Pick the volume attached to your production server, and create a snapshot.

Go to the Snapshots menu, and wait for the snapshot to complete, which might take a minute. Mark the snapshot, and create a volume from it.

Putting the volume in the same availability zone as your staging server is essential.

Pick the volume currently attached to your staging server, and detach it. You may delete this volume after it is detached.

Pick the newly created volume, and click “Attach volume” in the actions menu.

Name your device as /dev/sda1, as this is the default boot device on Ubuntu. This may vary on different distributions.
Start your staging server, which should now be identical to your production server. To reach this server, you will need to change the domain name. You will need to SSH into this server, as shown earlier.
To assign a test domain, use the WordPress CLI:
wp option update home http://your-test-domain.com
wp option update siteurl http://your-test-domain.com
You may also need to change this in your web server and DNS configuration.
Step 3: Development and Testing
It is now your turn to work on the staging server. Remember, you can reset the state anytime by recreating the volume from the original snapshot!
Step 4: Transitioning Production to Maintenance Mode
When you are done working on new features, you should push those features into production. Before any migrations, switch the production environment to maintenance mode. This ensures no fresh orders are placed or changes made during migration, avoiding data loss.
No built-in switch inside WooCommerce would put the site into maintenance mode. You can configure your web server to show a maintenance page or use a plugin.
Step 5: Migrating Data
In software development, usually, we would take the changes deployed to the staging environment and push those changes to the production environment. However, this would be challenging because of the inherent design of WordPress and WooCommerce, which I mentioned in the introduction. It is much simpler to take the changes from production, re-apply them on the current staging server, and transfer the whole thing into production.
Let’s consider what those changes in production can be:
- New orders may arrive.
- The state of the existing orders may change.
- New products might be added.
- New media (images) might be added to the products.
- Existing products might be edited.
Plenty of plugins can migrate these entities from one WooCommerce site to another. However, if you want to automate this process, write your own code using WordPress REST API, WooCommerce REST API, SQL scripts, and SCP (secure copy).
Step 6: Updating the Production Server
You can now update your production server by creating a snapshot from the staging volume and creating a new volume from this snapshot. This process is the same as the one described above. By attaching this new volume to your production server, the production environment is updated with all the changes made and tested in the staging environment.
As the production server is now a clone of the staging server, you must set the production domain in your WordPress and web server settings.
wp option update home http://your-production-domain.com
wp option update siteurl http://your-production
Step 7: Housekeeping
The final step in this process involves cleaning up post-update. Terminate the staging EC2 instance and delete the staging EBS volume. The beauty of these staging environments lies in their temporality in that they only exist for the development sprint’s duration.
And there you have it! With AWS and EC2, you can efficiently set up transient staging environments and maintain a robust production application for your WooCommerce site. The real charm of this process is its repeatability for every development sprint, guaranteeing a secure development and deployment process. Here’s to a smoother WooCommerce experience!
History
- 23rd June, 2023: Initial version
- 23rd June, 2023: Fixed images