
Connecting Azure Authentication to Other Providers Article One: Linking Azure AD with On-Premises Active Directory
5.00/5 (1 vote)
This article guides you through establishing Azure authentication in a Spring Boot application using an on-premises AD server.
When working with an application in Azure and on-premises, there’s no need for users to switch back-and-forth between two different logins. You can share account information between the two locations and enable a more seamless login process for your users with Active Directory (AD) authentication. Microsoft does the heavy lifting for authentication and authorization while you focus on other important aspects of your application.
This article guides you through establishing Azure authentication in a Spring Boot application using an on-premises AD server. The authentication follows a hybrid model where the Spring Boot application authenticates users from an Azure AD and an on-premises AD server.
To follow along with this tutorial, you should have:
- Some Java experience
- Access to Azure Cloud Platform
- Access to Microsoft AD running on a local on-premises server
Setting up a Spring Boot Application
The demo code is a Spring Boot application for guestbook notes. The application provides a basic form for its users to provide their feedback. We build the application using the Spring MVC and Thymeleaf frameworks.
You can generate the project using start.spring.io.

First, specify Group, Artifact, and Name details, then click Generate. Extract the generated project and open it using your favorite integrated development environment (IDE) editor. Then, ensure that you can compile the source code using the Maven command:
./mvnw clean install

Collecting User Details
Next, add the following HTML form in the same src/main/resources/templates folder as the bookentry.html file. The form contains the following two fields:
- The
namefield provides the user’s name. - The
messagefield provides a text area to submit the user's comments.
The application user can submit the details by clicking a Submit button.
<!DOCTYPE html>
<html lang="en" xmlns="http://www.w3.org/1999/xhtml" xmlns:th="http://www.thymeleaf.org">
<head>
   <meta charset="utf-8"/>
   <link crossorigin="anonymous" href="https://cdn.jsdelivr.net/npm/bootstrap@5.0.2/dist/css/bootstrap.min.css"         integrity="sha384-EVSTQN3/azprG1Anm3QDgpJLIm9Nao0Yz1ztcQTwFspd3yD65VohhpuuCOmLASjC" rel="stylesheet">
</head>
<body>
<div class="container-sm">
   <h2>Message Details</h2>
   <h4>Drop your Entry</h4>
   <form action="#" method="post" th:action="@{/}" th:object="${bookentry}">
       <div class="form-group row">
           <label class="col text-center" for="nameInput">Name</label>
           <input class="col" id="nameInput" th:field="*{name}" type="text"/>
       </div>
       <div class="form-group row">
           <label class="col text-center" for="msgInput">Message</label>
           <textarea class="col" id="msgInput" th:field="*{content}" type="text"/>
       </div>
       <button class="btn btn-primary" type="submit">Submit</button>
   </form>
   <br>
</div>
</body>
</html>
We retrieve the HTML for the browser using a GET request. Additionally, we use a POST request to save the data. So, we create a BookController class that can support these APIs.
@Controller
public class BookController {
private BookEntryDTO savedValue;

@GetMapping({"/"})
public String loadBookEntry(Model model) {
    	BookEntryDTO dto = new BookEntryDTO();
    	model.addAttribute("bookentry", dto);
    	return "bookentry";
}

@PostMapping({"/"})
public String saveBookEntry(BookEntryDTO entry, Model model) {
    	savedValue = entry;
    	return "redirect:/";
}
}
The loadBookEntry method provides the Thymeleaf template, bookentry, and model to the Spring servlet in the above APIs. The servlet generates the required HTML and returns an HTML response.
On the other hand, the POST method returns the GET page using an internal redirect. The method also updates the submitted values in an in-memory collection. You can extend the application to use a database of your choice, but this is out of scope for the current application. However, the data requires a BookEntryDTO class, which contains the properties for the HTML form:
public class BookEntryDTO {

    private String name;
    private String content;

    public String getName() {
    return name;
    }

    public void setName(String name) {
    this.name = name;
    }

    public String getContent() {
    return content;
    }

    public void setContent(String content) {
    this.content = content;
    }

}
Run the application by using the spring-boot run command. The command starts the webserver on port 8080, and you can access the application in the browser using http://localhost:8080/.

Enabling Azure Authentication
Next, we must enable authentication using the Azure AD.
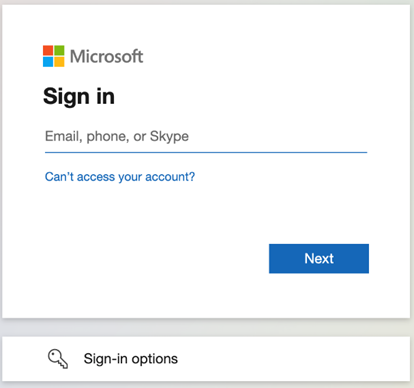
Log in to the Azure Cloud Platform and click Azure Active Directory.

This action loads your default tenant. You can use the default AD for authentication or create a new one by clicking Manage tenants > Create a tenant.
Complete the Organization name, Initial domain name, and Country/Region fields. Then, click Create to add the new tenant.

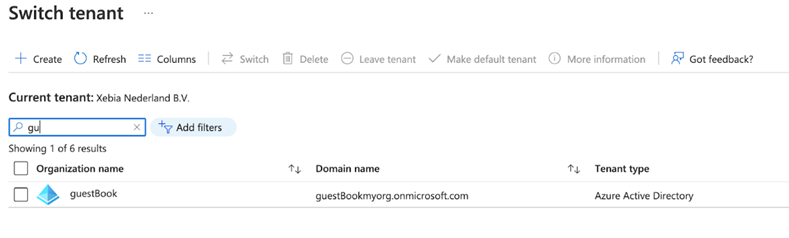
The newly-created tenant is on the Switch tenant page. Select the tenant and click Switch to work with this tenant.
Registering the Application
We must configure the guestBook project with the details of the newly created tenant. First, move to the Register an application area, under the Azure tenant area, and click New Registration. We must only provide a name — use gsWeb. By default, the AD can work with a single tenant, sufficient for the project setup. After submitting the new name, Azure displays the client ID and tenant ID details.

We must also provide a client secret, so move to the Certificates & Secrets area of the gsWeb app. Click New secret to generate a secret for the project.
Now that we have created the AD with the application, we can configure it for authenticating users in the project. The AD shares identity information using JWT tokens. So, we must specify the type and location of token exchange.
Since the guestBook project is a web application, select the type webapp, and set the token return URL to http://localhost:8080/login/oauth2/code. This URL is the one we configured to accept the validated token.

Integrating the Application
Azure AD exchanges information using the OAuth protocol. So, we must add the required dependencies for OAuth and Azure AD.
<dependency>
   <groupId>com.azure.spring</groupId>
   <artifactId>azure-spring-boot-starter-active-directory</artifactId>
   <version>3.9.0</version>
</dependency>


<dependency>
   <groupId>org.springframework.boot</groupId>
   <artifactId>spring-boot-starter-oauth2-client</artifactId>
</dependency>
The Spring Boot starter requires the following additional parameters to connect to the correct Azure AD:
Tenant-Id: identifies the Azure AD.Client-Id: the ID the Azure AD application generated at registration.Client Secret: associated with the Azure AD application registration.
Provide these parameters as part of the application.properties file in the src/main/resources folder, like this:
# Azure AD properties
azure.activedirectory.tenant-id: XXXX-3d8e-4862-acf7-XXXXXX
azure.activedirectory.client-id: ef5f98aa-XXXX-4c1f-aa74-XXXXX
azure.activedirectory.client-secret: XXX~wI1tSr77AJGafaLug-XXXXXX
We enable authentication using Spring Security annotations. Moreover, applying these annotations to a separate SecurityConfig class is preferable because we can fine-tune security according to our application’s needs.
@EnableWebSecurity
@EnableGlobalMethodSecurity(prePostEnabled = true)
public class AADOAuth2LoginSecurityConfig extends AADWebSecurityConfigurerAdapter {


@Override
protected void configure(HttpSecurity http) throws Exception {
    	super.configure(http);
    	http.authorizeRequests()
            	.anyRequest().authenticated();
}


}
The above adapter uses the default redirect URI (/login/oauth2/code/). We can customize this URI by specifying the property azure.activedirectory.redirect-uri-template and configuring the OAuth processing location.
Since we enabled authentication for all requests, the application has a UserPrincipal for every request. In this way, we can modify the GET request to read the principal user's username rather than ask the user.
@GetMapping({"/"})
public String loadBookEntry(Model model, @AuthenticationPrincipal OidcUser principal) {
BookEntryDTO dto = new BookEntryDTO();
dto.setName(principal.getName());
model.addAttribute("bookentry", dto);
return "bookentry";
}
Now, start the application and access its URL. The application uses Azure-based authentication. We can log in using the email address we used to create the Azure Cloud Platform account, as the account is an administrator account.
Alternatively, we can add users to the Azure AD tenant and log in using those credentials.
Adding On-Premises AD Authentication
Azure AD provides a mechanism for authenticating users using an on-premises Microsoft AD. Azure AD Connect supports the following two topologies for user authentication:
- Password hash synchronization is a method for synchronizing a user's on-premises AD password with Azure AD using a hashing technique.
- Pass-through authentication is a login method allowing users to use the same password on-premises and in the cloud without requiring additional infrastructure.
By default, AD Connect enables password hash synchronization, which we use for the guestBook application. Refer to the AD Connect documentation to read more about the other supported features.
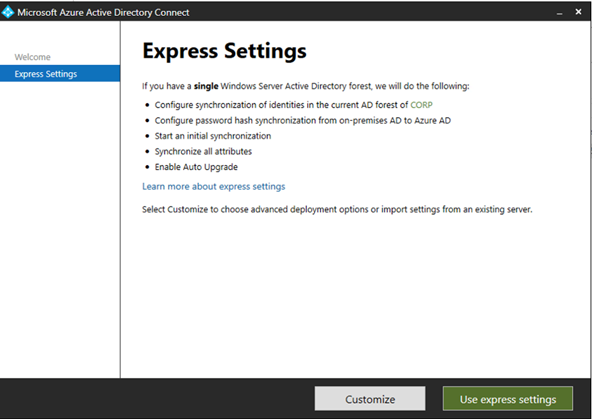
Start by installing AD Connect on the server deployed with Microsoft AD. AD Connect detects the AD server’s domain. The installer presents an express configuration process with default values that we can customize to suit our needs.
Next, the service requires admin credentials for the Azure AD (guestbookmyorg.onmicrosoft.com) and the Microsoft AD.

These credentials initiate a synchronization process between the on-premises and cloud AD. The process replicates all data in the on-premises AD and saves it in the Azure AD, and vice versa, using a preconfigured list of rules.

After clicking Install, it can take several minutes to complete the process.
After the installation, go to the Azure Active Directory Users area and validate all active on-premises AD users.

We can add new users to the on-premises AD, too. The system replicates these users and saves them in the Azure AD, which takes some time. Alternatively, we can trigger the synchronization process manually to export this data to Azure Cloud Platform.

Since the system replicated all on-premises AD data, we can perform application authentication without any additional changes. On-premises users can now use the guestBook application as well.

Next Steps
You now know how to integrate Azure-based authentication with a Spring Boot application. Azure AD provides seamless integration with Spring Boot-based applications using OAuth.
Azure AD also provides connectors for an on-premises Microsoft AD. The connector can synchronize data in the two platforms. In turn, it enables authenticating users of either platform.
The hybrid model mitigates the intense frustration associated with supporting multiple integration models. So, developers can remain focused on supporting the business rather than handling diverse integration challenges.
Continue to the next article in this series to learn how to use Azure AD for social login.
To learn more about the evolution of the Azure Active Directory (Azure AD), check out The Developer's Guide to Azure.