
Cross-Solution Microsoft Identity for Java Developers Part 2: Using MSAL with the Microsoft Graph and Office 365 Data
5.00/5 (2 votes)
In this article we use the access token this application receives to make requests to another Spring-based microservice.
In the previous article of this three-part series, we registered an application with Azure AD and wrote a simple web application to authenticate users via their Azure credentials. This authentication provides a convenient method for securing our web application. Still, we can use the credentials we received to do far more than lock down web pages.
Azure AD enables us to attach permissions to access a wide variety of external data and applications exposed by the Microsoft Graph API. These permissions allow our application to seamlessly interact with services like email, calendar, notes, and much more.
In this tutorial, we’ll create a Spring Boot microservice that queries calendar events on behalf of the logged-in user and returns the results to our frontend web application.
You can find this tutorial’s frontend application’s source code in the mcasperson/SpringMSALDemo GitHub repo under the events-microservice branch and the calendar microservice in the mcasperson/SpringMSALCalendarMicroervice GitHub repo.
Registering a New Application
Azure AD represents the microservice as a new application. First, we open the Azure Active Directory resource, click the App registration link, and then click the New registration button:

We then name our application "CalendarAPI" and click the Register button:

Take note of your Application (client) ID and Directory (tenant) ID, as you’ll need these later on when launching the Spring application.
We also need to generate a password. We click the Client credentials link:

Next, we click the New client secret button, name the new secret, and click the Add button:

Note the Value, as Azure won’t show it again.

To allow the frontend web application to call our microservice, we need to expose the registration application as an API. To do this, we click the Expose an API link in the left-hand menu.

Our API needs an ID for the frontend web application to reference. We click the Set button next to Application ID URI, then click the Save button to accept the default value.
Note the URI, as you’ll need it later.

Scopes indicate the data or functionality the API exposes. We need to define a scope indicating that this API accesses calendar information on a user’s behalf.
First, we click the Add a scope button. We then enter ReadCalendar in the Scope name field and select the Admin and users option. Next, we enter Read user calendar events in the Admin consent display name field, enter Allow the application to read the user’s calendar events in the Admin consent description field, and click the Add scope button:

Azure then displays the new scope:

Our application uses the Microsoft Graph API to access a user's calendar. To perform this action, we need to grant additional permissions to the API.
We click the API permissions link in the left-hand menu, then click the Add a permission button:

Next, we select Microsoft Graph from the API list. Expand the Calendar option, select the Calendar.Read permission, and click the Add permissions button:

Because this microservice is a headless application, end-users don’t log into it directly. This means end users don’t have a convenient opportunity to grant these new permissions.
As administrators, we can grant this permission on behalf of users. To do this, we click the Grant admin consent for <Organization name> button:

Then select Yes:

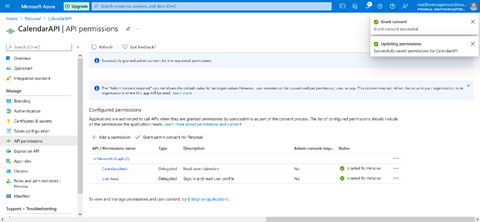
We have now granted the permissions
Building the Spring Boot Microservice
We’ll use Spring Initializr to bootstrap our calendar API microservice. First, let’s add the following dependencies to the template:
- Spring Web, providing the built-in web server.
- OAuth2 Resource Server, allowing us to configure our application as a resource server.
- OAuth2 Client, providing classes to make OAuth2 authenticated HTTP requests.
- Azure Active Directory, providing integration with Azure AD.

Then, we click GENERATE.
Configuring Spring Security
Unlike our frontend web application with selective rules for which resources require authentication, our microservice has simple rules that require authenticating all resource requests.
We configure these settings in the AuthSecurityConfig class:
// src/main/java/com/matthewcasperson/calendarapi/configuration/AuthSecurityConfig.java

package com.matthewcasperson.calendarapi.configuration;

import com.azure.spring.aad.webapi.AADResourceServerWebSecurityConfigurerAdapter;
import org.springframework.security.config.annotation.web.builders.HttpSecurity;
import org.springframework.security.config.annotation.web.configuration.EnableWebSecurity;

@EnableWebSecurity
public class AuthSecurityConfig extends AADResourceServerWebSecurityConfigurerAdapter {

    @Override
    protected void configure(HttpSecurity http) throws Exception {
        super.configure(http);
        // @formatter:off
        http
            .authorizeRequests()
                .anyRequest()
                .authenticated();
        // @formatter:on
    }
}
Our class extends the AADResourceServerWebSecurityConfigurerAdapter class, which enables JSON Web Token (JWT) based authentication. We then call the fluent interface the HttpSecurity class exposes to ensure our application authenticates all requests.
Providing an OAuth2 Web Client
Our microservice will make HTTP calls to other OAuth2 resource servers, specifically the Microsoft Graph API. These HTTP calls require the correct headers to succeed. We could construct the headers ourselves, but a more convenient solution is to have Spring build the appropriate request for us.
To do this, we need to register a WebClient instance for our controller to consume. WebClient is a modern, non-blocking HTTP client, which the RestTemplate API docs recommend over the older RestTemplate because it efficiently supports sync, async, and streaming.
The WebClientConfig class defines a method called webClient that creates a WebClient instance with an OAuth authorization filter. This method is annotated with @Bean, allowing us to inject the WebClient instance into other Spring classes:
package com.matthewcasperson.calendarapi.configuration;

import org.springframework.context.annotation.Bean;
import org.springframework.context.annotation.Configuration;
import org.springframework.security.oauth2.client.OAuth2AuthorizedClientManager;
import org.springframework.security.oauth2.client.web.reactive.function.client.ServletOAuth2AuthorizedClientExchangeFilterFunction;
import org.springframework.web.reactive.function.client.WebClient;

@Configuration
public class WebClientConfig {
    @Bean
    public static WebClient webClient(OAuth2AuthorizedClientManager oAuth2AuthorizedClientManager) {
        ServletOAuth2AuthorizedClientExchangeFilterFunction function =
                new ServletOAuth2AuthorizedClientExchangeFilterFunction(oAuth2AuthorizedClientManager);
        return WebClient.builder()
                .apply(function.oauth2Configuration())
                .build();
    }
}
Creating the REST Controller
Our microservice exposes a single endpoint called /events defined in the CalendarController class. The complete code for the CalendarController class is below:
// src/main/java/com/matthewcasperson/calendarapi/controllers/CalendarController.java

package com.matthewcasperson.calendarapi.controllers;

import org.springframework.beans.factory.annotation.Autowired;
import org.springframework.security.oauth2.client.OAuth2AuthorizedClient;
import org.springframework.security.oauth2.client.annotation.RegisteredOAuth2AuthorizedClient;
import org.springframework.web.bind.annotation.GetMapping;
import org.springframework.web.bind.annotation.RestController;
import org.springframework.web.reactive.function.client.WebClient;

import static org.springframework.security.oauth2.client.web.reactive.function.client.ServerOAuth2AuthorizedClientExchangeFilterFunction.oauth2AuthorizedClient;


@RestController
public class CalendarController {

    private static final String GRAPH_CALENDAR_ENDPOINT = "https://graph.microsoft.com/v1.0/me/calendar/events";

    @Autowired
    private WebClient webClient;

    @GetMapping(value = "/events", produces = "application/json")
    public String events(@RegisteredOAuth2AuthorizedClient("graph") OAuth2AuthorizedClient graph) {
        return callMicrosoftGraphEndpoint(graph);
    }

    private String callMicrosoftGraphEndpoint(OAuth2AuthorizedClient graph) {
        if (null != graph) {
            String body = webClient
                    .get()
                    .uri(GRAPH_CALENDAR_ENDPOINT)
                    .attributes(oauth2AuthorizedClient(graph))
                    .retrieve()
                    .bodyToMono(String.class)
                    .block();
            return body;
        } else {
            return "Graph request failed.";
        }
    }
}
Let’s break down this code.
We annotate the class with @RestController to expose a RESTful API:
@RestController
public class CalendarController {
The GRAPH_CALENDAR_ENDPOINT constant defines the URL of the resource to query from the Microsoft Graph API. You can find these URLs in the List events documentation.
private static final String GRAPH_CALENDAR_ENDPOINT = "https://graph.microsoft.com/v1.0/me/calendar/events";
We inject the WebClient we created in the previous section as a property:
    @Autowired
    private WebClient webClient;
We also define the /events endpoint. It takes an instance of OAuth2AuthorizedClient as its first parameter. The @RegisteredOAuth2AuthorizedClient("graph") annotation defines the client to make requests to the Microsoft Graph API. Here, the name graph refers to a client we'll describe in the application.yml file in the next section.
Behind the scenes, this code exchanges the JWT token the frontend passes in for a second on-behalf-of (OBO) token. OBO tokens allow our microservice to interact with downstream resource servers on behalf of the original user. They do this while identifying this microservice as the client performing the request.
We then call callMicrosoftGraphEndpoint to perform the network request to the Graph API:
    @GetMapping(value = "/events", produces = "application/json")
    public String events(@RegisteredOAuth2AuthorizedClient("graph") OAuth2AuthorizedClient graph) {
        return callMicrosoftGraphEndpoint(graph);
    }
The callMicrosoftGraphMeEndpoint function performs the network request to the Graph API, and returns the result as a string:
    private String callMicrosoftGraphEndpoint(OAuth2AuthorizedClient graph) {
        if (null != graph) {
            String body = webClient
                    .get()
                    .uri(GRAPH_CALENDAR_ENDPOINT)
                    .attributes(oauth2AuthorizedClient(graph))
                    .retrieve()
                    .bodyToMono(String.class)
                    .block();
            return body;
        } else {
            return "Graph request failed.";
        }
    }
Configuring the Spring Boot Microservice
Our final step in configuring the microservice is editing the application.yml file. The complete file is below:
server:
  port: 8081
azure:
  activedirectory:
    client-id: ${CLIENT_ID}
    client-secret: ${CLIENT_SECRET}
    app-id-uri: ${API_URL}
    tenant-id: ${TENANT_ID}
    authorization-clients:
      graph:
        scopes:
          - https://graph.microsoft.com/User.Read
          - https://graph.microsoft.com/Calendars.Read
logging:
  level:
    org:
      springframework:
        security: DEBUG
We exposed this microservice on port 8081 to allow it to run alongside the frontend web application:
server:
  port: 8081
We then define the details of the Azure AD application. The properties we define here are the same as we noted in the first article of this series. The only exception is the app-id-uri property, which is the Application ID URI we created earlier in this tutorial:
azure:
  activedirectory:
    client-id: ${CLIENT_ID}
    client-secret: ${CLIENT_SECRET}
    app-id-uri: ${API_URL}
    tenant-id: ${TENANT_ID}
Next, we define a client called graph that requires reading a user’s details and calendar events. These scopes match those we added to the Azure AD application earlier. We reference this client name in the @RegisteredOAuth2AuthorizedClient annotation:
    authorization-clients:
      graph:
        scopes:
          - https://graph.microsoft.com/User.Read
          - https://graph.microsoft.com/Calendars.Read
Running the Microservice
To build and run the application, we run the following PowerShell:
$env:CLIENT_SECRET="Application client secret"
$env:CLIENT_ID="Application client ID"
$env:TENANT_ID="Azure AD tenant ID"
$env:API_URL="Application API URI"
.\mvnw spring-boot:run
Or Bash:
export CLIENT_SECRET="Application client secret"
export CLIENT_ID="Application client ID"
export TENANT_ID="Azure AD tenant ID"
export API_URL="Application API URI"
./mvnw spring-boot:run
Our microservice is now ready to be called from the frontend web application.
Calling the Microservice from the Frontend Application
We need to update the frontend web application to call the microservice and display the resulting calendar events on a web page.
Creating a WebClient
To make network requests to the microservice, we must construct an instance of the WebClient class. As with the microservice application, we do this in the WebClientConfig class:
package com.matthewcasperson.demo.configuration;

import org.springframework.context.annotation.Bean;
import org.springframework.context.annotation.Configuration;
import org.springframework.security.oauth2.client.OAuth2AuthorizedClientManager;
import org.springframework.security.oauth2.client.OAuth2AuthorizedClientProvider;
import org.springframework.security.oauth2.client.OAuth2AuthorizedClientProviderBuilder;
import org.springframework.security.oauth2.client.registration.ClientRegistrationRepository;
import org.springframework.security.oauth2.client.web.DefaultOAuth2AuthorizedClientManager;
import org.springframework.security.oauth2.client.web.OAuth2AuthorizedClientRepository;
import org.springframework.security.oauth2.client.web.reactive.function.client.ServletOAuth2AuthorizedClientExchangeFilterFunction;
import org.springframework.web.reactive.function.client.WebClient;

@Configuration
public class WebClientConfig {
    @Bean
    public OAuth2AuthorizedClientManager authorizedClientManager(
            ClientRegistrationRepository clientRegistrationRepository,
            OAuth2AuthorizedClientRepository authorizedClientRepository) {

        OAuth2AuthorizedClientProvider authorizedClientProvider =
                OAuth2AuthorizedClientProviderBuilder.builder()
                        .clientCredentials()
                        .build();

        DefaultOAuth2AuthorizedClientManager authorizedClientManager =
                new DefaultOAuth2AuthorizedClientManager(
                        clientRegistrationRepository, authorizedClientRepository);
        authorizedClientManager.setAuthorizedClientProvider(authorizedClientProvider);

        return authorizedClientManager;
    }

    @Bean
    public static WebClient webClient(OAuth2AuthorizedClientManager oAuth2AuthorizedClientManager) {
        ServletOAuth2AuthorizedClientExchangeFilterFunction function =
                new ServletOAuth2AuthorizedClientExchangeFilterFunction(oAuth2AuthorizedClientManager);
        return WebClient.builder()
                .apply(function.oauth2Configuration())
                .build();
    }
}
Creating an Events Controller
We next create a new controller called EventsController to respond to requests to the /events path. As we did with the microservice REST controller, the events function injects a client containing an OBO token to call the microservice.
// src/main/java/com/matthewcasperson/demo/controllers/EventController.java

package com.matthewcasperson.demo.controllers;

import com.matthewcasperson.demo.model.GraphEvent;
import com.matthewcasperson.demo.model.GraphValues;
import org.springframework.beans.factory.annotation.Autowired;
import org.springframework.http.*;
import org.springframework.security.oauth2.client.OAuth2AuthorizedClient;
import org.springframework.security.oauth2.client.annotation.RegisteredOAuth2AuthorizedClient;
import org.springframework.stereotype.Controller;
import org.springframework.web.bind.annotation.GetMapping;
import org.springframework.web.client.RestTemplate;
import org.springframework.web.reactive.function.client.WebClient;
import org.springframework.web.servlet.ModelAndView;

import java.util.List;

import static org.springframework.security.oauth2.client.web.reactive.function.client.ServerOAuth2AuthorizedClientExchangeFilterFunction.oauth2AuthorizedClient;

@Controller
public class EventsController {

    @Autowired
    private WebClient webClient;

    @GetMapping("/events")
    public ModelAndView events(
            @RegisteredOAuth2AuthorizedClient("calendar-api") OAuth2AuthorizedClient client) {

        List<graphevent> events = getEvents(client).value();
        ModelAndView mav = new ModelAndView("events");
        mav.addObject("events", events);
        return mav;
    }

    private GraphValues getEvents(OAuth2AuthorizedClient client) {
        try {
            if (null != client) {
                return webClient
                        .get()
                        .uri("http://localhost:8081/events")
                        .attributes(oauth2AuthorizedClient(client))
                        .retrieve()
                        .bodyToMono(GraphValues.class)
                        .block();
            }
        } catch (Exception ex) {
            System.out.println(ex);
        }

        return new GraphValues(List.of());
    }
}</graphevent>
Three records represent the JSON response the microservice returns: GraphValues, GraphEvent, and GraphEventDate:
// src/main/java/com/matthewcasperson/demo/model/GraphValues.java

package com.matthewcasperson.demo.model;

import java.util.List;

public record GraphValues(List<graphevent> value) {}

// src/main/java/com/matthewcasperson/demo/model/GraphEventDate.java

package com.matthewcasperson.demo.model;

import java.text.ParseException;
import java.text.SimpleDateFormat;
import java.util.Date;
import java.util.Locale;
import java.util.TimeZone;

public record GraphEventDate(String dateTime, String timeZone) {
    public Date getFormattedDateTime() throws ParseException {
        SimpleDateFormat formatter = new SimpleDateFormat("yyyy-MM-dd'T'hh:mm:ss.SSS", Locale.ENGLISH);
        formatter.setTimeZone(TimeZone.getTimeZone(timeZone));
        return formatter.parse(dateTime);
    }
}

// src/main/java/com/matthewcasperson/demo/model/GraphEvent.java

package com.matthewcasperson.demo.model;

public record GraphEvent(String subject, GraphEventDate start) {}</graphevent>
Creating an Events Template
Next, we create a Thymeleaf template, called events.html, that loops over the events and builds an HTML table:
<!doctype html>
<html lang="en">
<head>
    <meta charset="utf-8">
    <title>MSAL and Spring Demo</title>
    <link href="bootstrap.min.css" rel="stylesheet">
    <link href="cover.css" rel="stylesheet">
</head>

<body class="text-center">

<div class="cover-container d-flex h-100 p-3 mx-auto flex-column">
    <header class="masthead mb-auto">
        <div class="inner">
            <nav class="nav nav-masthead justify-content-center">
                <a class="nav-link" href="/">Home</a>
                <a class="nav-link" href="/profile">Profile</a>
                <a class="nav-link active" href="/events">Events</a>
            </nav>
        </div>
    </header>

    <main role="main" class="inner cover">
        <h2>Outlook Events</h2>
        <table>
            <tr th:each="event: ${events}">
                <td th:text="${event.subject}" />
                <td th:text="${event.start.formattedDateTime}" />
            </tr>
        </table>
    </main>
</div>

<script src="jquery-3.6.0.min.js"></script>
<script src="bootstrap.min.js"></script>
</body>
</html>
Updating the Application Configuration
Finally, we update the application.yaml file with a new client to call the calendar API microservice. We set the CALENDAR_SCOPE environment variable to something like api://2e6853d4-90f2-40d9-a97a-3c40d4f7bf58/ReadCalendar, which is the scope the Calendar API application exposes.
# src/main/resources/application.yml

azure:
  activedirectory:
    tenant-id: ${TENANT_ID}
    client-id: ${CLIENT_ID}
    client-secret: ${CLIENT_SECRET}
    authorization-clients:
      calendar-api:
        scopes:
          - ${CALENDAR_SCOPE}

logging:
  level:
    org:
      springframework:
        security: DEBUG
Running the Frontend Application
To build and run the application, we run the following PowerShell:
$env:CLIENT_SECRET="Application client secret"
$env:CLIENT_ID="Application client ID"
$env:TENANT_ID="Azure AD tenant ID"
$env:CALENDAR_SCOPE="The Calendar API ReadCalendar scope e.g. api://2e6853d4-90f2-40d9-a97a-3c40d4f7bf58/ReadCalendar"
.\mvnw spring-boot:run
Or Bash:
export CLIENT_SECRET="Application client secret"
export CLIENT_ID="Application client ID"
export TENANT_ID="Azure AD tenant ID"
export CALENDAR_SCOPE="The Calendar API ReadCalendar scope e.g. api://2e6853d4-90f2-40d9-a97a-3c40d4f7bf58/ReadCalendar"
./mvnw spring-boot:run
Then, we open http://localhost:8080/events and log in. Note that the login prompt now requests permission to read calendar events:

When we click Accept, our frontend application displays upcoming calendar events:

Next Steps
In this tutorial, we created a Spring Boot microservice to query the Microsoft Graph API on behalf of the frontend application user. We configured the microservice in Azure AD with additional permissions granting it access to the Microsoft Graph API and exposing a scope requested when logging into the frontend.
The result is a distributed microservice architecture forwarding resource requests to multiple OAuth resource servers while maintaining the original user’s identity and the identity of the individual resource servers that participate in the transaction.
In this series’ next and final article, Using MSAL to Access Azure APIs, we’ll use the OBO OAuth flow to call a service in Azure. Then, we’ll communicate the results back to the frontend application via a shared database.