
Building a Face Recognition App with Blazor
5.00/5 (7 votes)
How to build a facial recognition app using Blazor and Azure Cognitive Services

Introduction
The Azure Face API is an incredibly powerful facial recognition service in the cloud. In this article we'll learn how you can interact with the library, and build a Blazor application that leverages the Face API functions.
You can use these powerful image recognition and machine learning technologies in your next Blazor application.
We'll explore different parts of the Face API, in this project we'll focus on face detection. We'll build an app that detects a face and returns some handy attributes for it.
Getting Started with Azure Cognitive Services
The Face API is a part of Azure Cognitive Services, and you can create an account and try it out on the free tier.
The Cognitive Services tools cover a wide range of AI services, and Face API is only a small part of it. But it brings in AI services that are easy for developers to learn, no machine learning expertise required.
You can Create a Free Azure Account here if you don't have one.
Create an Azure Face API Account
In your Azure Portal, click "Create a resource".

In the Create a resource dialog, just type in the word "Face"

This will bring up the Face API.

When creating the API, You'll need to enter some fields:

Here's what is required to create the service:
- Subscription: The subscription plan you will use
- Resource Group:The resource group to use (I created a new one)
- Region: What area of the world your app will be hosted in
- Name:What you'll name the app. This will create a subdomain with this name.
- Pricing Tier:Choose between Free (20 calls per minute, 30k calls per month) or Standard (10 calls per second)
Note that is not currently legal to use this service if you're a police department in the United States.
Once you've filled out all the fields, click "review and create".
Your Face API is now ready.
Connecting to the API
You can connect to this API and immediately send POST or GET commands to it. You can use CURL or any tool you'd usually use for this. For this example, I'll use Postman which you can use for free to test your APIs, or API services.
To connect to this API, you'll need the following:
- Your Cognitive Services Endpoint URL
- Your API Key
- Which attributes you'd like to return
You can get this information by selecting your Face API service, and choosing "Keys and Endpoint" from the left hand menu:

We'll copy this information to build our request in Postman.
Create a new POST request in Postman. Use your endpoint URL. It should look like this:
https://[Your Service Name].cognitiveservices.azure.com/
Then we'll add the following to the end of it to access the Face API:
face/v1.0/detect?

Then, we can add in the attributes we want and put them a key named returnFaceAttributes.

Next, we'll select headers. Then add our API key we retrieved above and put in a key named Ocp-Apim-Subscription-Key

Next, in the body, select "raw" and then choose "JSON" as the datatype. Create an object with a URL parameter, that contains the URL to the image you want to analyze.
{
    url: "[URL to Image]"
}

When you click send, you'll get a JSON response with a faceId and a set of attributes:

Now, we've successfully connected to the Face API. Let's build a Blazor App to do this!
If you'd like to learn more about the Azure Face API, Pluralsight has a great course you can check out, Microsoft Azure Cognitive Services: Face API.
Create a New Blazor Server App
Open up Visual Studio and create a new Blazor application.

Make sure .NET 5.0 and Blazor Server App are selected.

and create the application.
Clean up the Application
The default Blazor server application is nice, but we want to get rid of some of the components in it that we won't use.
Delete the following files.
/Data folder:
- /Data/WeatherForecast.cs
- /Data/WeatherForecastService.cs
/Pages folder:
- /Pages/Counter.razor
- /Data/FetchData.razor
Then, open up /Shared/NavMenu.razor
Remove the following code:
  <li class="nav-item px-3">
    <NavLink class="nav-link" href="counter">
      <span class="oi oi-plus" aria-hidden="true"></span> Counter
    </NavLink>
  </li>
  <li class="nav-item px-3">
    <NavLink class="nav-link" href="fetchdata">
      <span class="oi oi-list-rich" aria-hidden="true"></span> Fetch data
    </NavLink>
  </li>
These are the navigation links. We'll replace them with a link to the page we're going to build.
  <li class="nav-item px-3">
    <NavLink class="nav-link" href="attributes">
      <span class="oi oi-plus" aria-hidden="true"></span>Image Attributes
    </NavLink>
  </li>
Finally, open up Startup.cs and remove the line:
using blazorfacerec.Data;
Then look for the ConfigureServices method:
public void ConfigureServices(IServiceCollection services)
{
  services.AddRazorPages();
  services.AddServerSideBlazor();
  services.AddSingleton<WeatherForecastService>();
}
And remove this line:
services.AddSingleton<WeatherForecastService>();
And save the file. Now it's all cleaned up and ready for us to add our page.
Store our API Key
The Azure Face API uses an API key that you don't want to store in your source code. Here's how you can avoid that.
In your Package Manager Console, type in the following:
dotnet user-secrets init
You should see something that looks like this:

You will see a new entry in your .csproj file that looks like this:
<UserSecretsId>xxxxxxx-xxxx-xxxxxxxx-xxxx-xxxxxxxx</UserSecretsId>
Now save your API key with the following command:
dotnet user-secrets set "FaceApiKey" "[ Your API Key ]"
To verify, type in:
dotnet user-secrets list
And you should see something that looks like this:

Now we'll create a small service to inject that key into our application.
Create a file named AppConfiguration.cs and add in the following:
namespace (Your namespace name)
{
    public class AppConfiguration
    {
        public string ApiKey { get; set; }
    }
}
Open up Startup.cs and locate the ConfigureServices method. Add the following:
var config = new AppConfiguration {ApiKey = Configuration["FaceApiKey"]};
services.AddSingleton<AppConfiguration>(config);
Now you can inject this anywhere, and access that key without leaving it in your source code. This is just one method of storing secrets in Blazor.
Creating The Razor Component
Now comes the fun part. We're going to add a Blazor page that calls the Azure Face API and returns results on our page.
This code will all be contained in a single Razor Component.
Creating the Razor Page
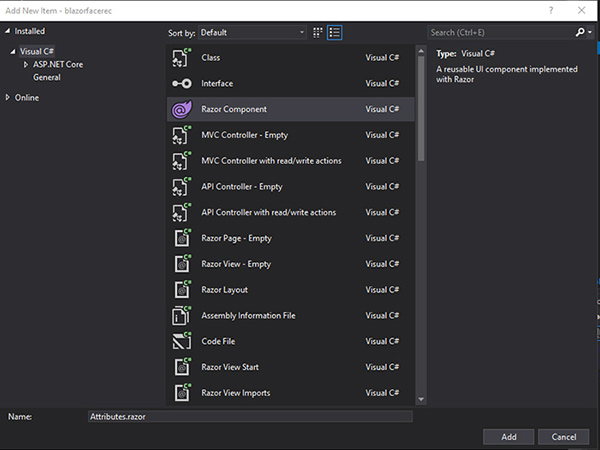
Create a new file in the Pages folder and name it Attributes.razor.
Add the following to the top of the page:
@page "/attributes"
<h3>Get Attributes from Image</h3>
Now, you should be able to run the Blazor application and see the heading displayed on the page.
Let's add in the following HTML to the page:
<label>Image Url: </label>
<input @bind="imageUrl" />
<br />
<br />
<button @onclick="@processImage">Process Image</button>
<br />
<br />
This will give an interface for putting in a URL to an image to process. Notice we are binding to the imageUrl property and a processImage method. We'll create those.
Display the Results
Here we will display the results of the API call on the page. This will go below the code we just wrote.
  @if (faces != null)
  {
      @foreach (var face in faces)
      {
          <div class="row">
              <div class="col-md-8">
                  <h2>Jeremy</h2>
                  <div style="float: left;">
                      <img src="@imageUrl" height="100" width="100" />
                  </div>
                  <div style="margin-left: 10px; float: right;">
                      <ul>
                          <li><strong>Image ID:</strong> @face.faceId</li>
                          <li><strong>Gender: </strong>@face.faceAttributes.gender</li>
                          <li><strong>Age:</strong> @face.faceAttributes.age</li>
                          <li><strong>Glasses?:</strong> @face.faceAttributes.glasses</li>
                          <li><strong>Emotion:</strong> @face.topEmotion</li>
                      </ul>
                  </div>
              </div>
          </div>
      }
  }
This is the display code that the user will see. Now we'll add in the backend code to make it happen.
Creating the Models
Next, we'll create some models to store our data in.
This code will go between the code brackets at the bottom of your component:
@code {

}
We'll create some classes to store the data returned from the Face API. We need to store:
- The URL to the image to process
- A face object
- Face Attributes
- Emotion that was detected
We'll create an object named "Payload"
public class DataPayload
{
    public string Url { get; set; }
}
This just stores a URL in a string that we can send in our POST command.
Next we'll create a Face Attribute object. This contains the attributes we've asked the service to return.
We'll store the gender, age, and emotions the Face service finds in the image.
public class FaceAttribute
{
    public string Gender { get; set; }
    public float Age { get; set; }
    public string Glasses { get; set; }
    public Emotion Emotion { get; set; }
}
Emotions are returned as a collection with values assigned to each attribute, like this:
"emotion": {
  "anger": 0.0,
  "contempt": 0.0,
  "disgust": 0.0,
  "fear": 0.0,
  "happiness": 1.0,
  "neutral": 0.0,
  "sadness": 0.0,
  "surprise": 0.0
}
So we'll store each of those values in an Emotion object:
public class Emotion
{
  public float Anger { get; set; }
  public float Contempt { get; set; }
  public float Disgust { get; set; }
  public float Fear { get; set; }
  public float Happiness { get; set; }
  public float Neutral { get; set; }
  public float Sadness { get; set; }
  public float Surprise { get; set; }
}
Next we'll create a "Face" object. This contains the GUID returned by the Face Service, as well as the Attributes.
We'll also create a string for the "top emotion". We'll iterate through the Emotion class and find the emotion with the highest value, and store it here.
public class Face
{
  public Guid FaceId { get; set; }
  public FaceAttribute FaceAttributes { get; set; }
  public string TopEmotion { get; set; }
}
These are the main objects to handle our information. So let's do something with it.
Properties
There are a few properties we'll want to store at the root of our component. Let's add these at the top, right after the @code {
private readonly string _baseUrl = "https://[Your Subdomain].cognitiveservices.azure.com/";
This is the base URL for your endpoint that you created in the Azure Portal above.
private string ImageUrl { get; set; }
This is the image URL that we submit in the form we created above. This is the image that will be processed by the Face API.
private Face[] _tmpfaces;
This is temporary storage where we'll put the faces returned from the API. We'll iterate through it, process the data and store it in this List for final retrieval:
private List<Face> _faces;
Then we'll create a dictionary for our Emotions:
private Dictionary<string, float> _emotions;
This will make more sense when we build out the processing system in the next section.
[Inject]
private AppConfiguration _config { get; set; }
This is where we'll inject the configuration, so we can grab our API key to send to the Azure Face service.
Processing Emotions
For this step, I've decided to pick just one emotion out of our list:
"emotion": {
  "anger": 0.0,
  "contempt": 0.0,
  "disgust": 0.0,
  "fear": 0.0,
  "happiness": 1.0,
  "neutral": 0.0,
  "sadness": 0.0,
  "surprise": 0.0
}
From here we'll find the largest value and pick that emotion. You may choose to show all the data, but this is the best way I've found to determine what emotion the picture conveys.
Create a method named ProcessEmotions()
public void ProcessEmotions()
{
}
The first thing we'll do is loop through each face in _tmpfaces (where we will temporarily store results)
foreach (Face face in _tmpfaces)
{
}
In that loop, we'll create a dictionary to store the values:
var emotionValues = new Dictionary<string, float> {
  {"Anger", face.FaceAttributes.Emotion.Anger},
  {"Contempt", face.FaceAttributes.Emotion.Contempt},
  {"Disgust", face.FaceAttributes.Emotion.Disgust},
  {"Fear", face.FaceAttributes.Emotion.Fear},
  {"Happiness", face.FaceAttributes.Emotion.Happiness},
  {"Neutral", face.FaceAttributes.Emotion.Neutral},
  {"Sadness", face.FaceAttributes.Emotion.Sadness},
  {"Surprise", face.FaceAttributes.Emotion.Surprise}
};
Next, we'll loop through those values to find the top value:
float topValue = 0;
string topValueName = "";

foreach (var emotion in emotionValues)
{
  if (emotion.Value > topValue)
  {
    topValue = emotion.Value;
    topValueName = emotion.Key;
  }
}
Finally, we'll create a new "Face" and add it to the final list of Faces to be used by the UI.
Face ourFace = new Face { FaceId = face.FaceId, FaceAttributes = face.FaceAttributes, TopEmotion = topValueName };
_faces.Add(ourFace);
Great, now we can find the top emotion returned, let's build the final method to make the API call and get the data we need.
Calling the API
Now we tie it all together, and create the call to the Face API, and send that data to our UI.
We'll create an async method to Process the image sent from the UI.
private async Task ProcessImage()
{
}
In this method, we'll initialize our _faces list. First we want to make sure it's clear of any previous results:
_faces = null;
Then we'll initialize it:
_faces = new List<Face>();
Next we'll create an HttpClient to communicate with the API:
HttpClient client = new HttpClient { BaseAddress = new Uri(_baseUrl + "/face/v1.0/detect?returnFaceAttributes=age,glasses,emotion,gender&ReturnFaceLandmarks=true") };
In this statement we're creating a new client, and setting our BaseAddress. This will be our base url (a subdomain created by Azure), then we add the folder to go to the Face API.
Finally we add in all the attributes we'd like it to return.
Then we'll create a response message:
HttpResponseMessage response = null;
Next we want to create a payload and insert our information in it. Then we'll serialize that into JSON:
var payload = new DataPayload { Url = ImageUrl };
var payloadString = new StringContent(System.Text.Json.JsonSerializer.Serialize(payload), Encoding.UTF8, MediaTypeNames.Application.Json);
Next, we'll add in our API key to authenticate with the Face API. We'll pull this from the secret key in the config object we created earlier:
client.DefaultRequestHeaders.Add("Ocp-Apim-Subscription-Key", _config.ApiKey);
Then we'll send a POST to the API with our payload:
response = await client.PostAsync(client.BaseAddress, payloadString);
Finally, we'll check to see we received the proper response in JSON. If so, we'll read in the content and build our temporary Face list.
Then we'll make a call to ProcessEmotions() to insert the top emotion and finalize our Face object.
if (response.Content is object && response.Content.Headers.ContentType.MediaType == "application/json")
{
  var content = await response.Content.ReadAsStringAsync();
  _tmpfaces = JsonSerializer.Deserialize<Face[]>(content, new JsonSerializerOptions { PropertyNameCaseInsensitive = true });
  ProcessEmotions();
}
Now our ProcessImage() method is complete.
The Final Component should look like this:
  @page "/attributes"
  @using System.Text.Json;
  @using System.Net.Mime;
  @using System.Text;

  <h3>Get Attributes from Image</h3>

  <label>Image Url: </label>
  <input @bind="ImageUrl" />
  <br />
  <br />
  <button @onclick="@ProcessImage">Process Image</button>
  <br />
  <br />

  @if (_faces != null)
  {

      @foreach (var face in _faces)
      {
        <div class="row">
            <div class="col-md-8">
                <div style="float: left;">
                    <img src="@ImageUrl" height="100" width="100" />
                </div>
                <div style="margin-left: 10px; float: right;">
                    <ul>
                        <li><strong>Image ID:</strong> @face.FaceId</li>
                        <li><strong>Gender: </strong>@face.FaceAttributes.Gender</li>
                        <li><strong>Age:</strong> @face.FaceAttributes.Age</li>
                        <li><strong>Glasses?:</strong> @face.FaceAttributes.Glasses</li>
                        <li><strong>Emotion:</strong> @face.TopEmotion</li>
                    </ul>
                </div>
            </div>
        </div>
      }
  }

  @code {

      private readonly string _baseUrl = "https://blazorfacerec.cognitiveservices.azure.com/";
      private string ImageUrl { get; set; }
      private Face[] _tmpfaces;
      private List<Face> _faces;
      private Dictionary<string, float> _emotions;

      [Inject]
      private AppConfiguration _config { get; set; }


      private async Task ProcessImage()
      {
          _faces = null;
          _faces = new List<Face>();

          HttpClient client = new HttpClient { BaseAddress = new Uri(_baseUrl + "/face/v1.0/detect?returnFaceAttributes=age,glasses,emotion,gender&ReturnFaceLandmarks=true") };

          HttpResponseMessage response = null;

          var payload = new DataPayload { Url = ImageUrl };

          var payloadString = new StringContent(System.Text.Json.JsonSerializer.Serialize(payload), Encoding.UTF8, MediaTypeNames.Application.Json);

          client.DefaultRequestHeaders.Add("Ocp-Apim-Subscription-Key", _config.ApiKey);

          response = await client.PostAsync(client.BaseAddress, payloadString);

          if (response.Content is object && response.Content.Headers.ContentType.MediaType == "application/json")
          {
              var content = await response.Content.ReadAsStringAsync();
              _tmpfaces = JsonSerializer.Deserialize<Face[]>(content, new JsonSerializerOptions { PropertyNameCaseInsensitive = true });
              ProcessEmotions();
          }
      }

      public void ProcessEmotions()
      {
          foreach (Face face in _tmpfaces)
          {
              var emotionValues = new Dictionary<string, float> {
                  {"Anger", face.FaceAttributes.Emotion.Anger},
                  {"Contempt", face.FaceAttributes.Emotion.Contempt},
                  {"Disgust", face.FaceAttributes.Emotion.Disgust},
                  {"Fear", face.FaceAttributes.Emotion.Fear},
                  {"Happiness", face.FaceAttributes.Emotion.Happiness},
                  {"Neutral", face.FaceAttributes.Emotion.Neutral},
                  {"Sadness", face.FaceAttributes.Emotion.Sadness},
                  {"Surprise", face.FaceAttributes.Emotion.Surprise}

              };

              float topValue = 0;
              string topValueName = "";

              foreach (var emotion in emotionValues)
              {
                  Console.WriteLine("Key: " + emotion.Key + "Value: " + emotion.Value);

                  if (emotion.Value > topValue)
                  {
                      topValue = emotion.Value;
                      topValueName = emotion.Key;
                  }
              }

              Face ourFace = new Face { FaceId = face.FaceId, FaceAttributes = face.FaceAttributes, TopEmotion = topValueName };
              _faces.Add(ourFace);
          }
      }

      public class DataPayload
      {
          public string Url { get; set; }
      }

      public class Face
      {
          public Guid FaceId { get; set; }
          public FaceAttribute FaceAttributes { get; set; }
          public string TopEmotion { get; set; }
      }

      public class FaceAttribute
      {
          public string Gender { get; set; }
          public float Age { get; set; }
          public string Glasses { get; set; }
          public Emotion Emotion { get; set; }
      }

      public class Emotion
      {
          public float Anger { get; set; }
          public float Contempt { get; set; }
          public float Disgust { get; set; }
          public float Fear { get; set; }
          public float Happiness { get; set; }
          public float Neutral { get; set; }
          public float Sadness { get; set; }
          public float Surprise { get; set; }
      }
  }
Now that it's ready, lets run it!
The Completed Application
We can now run the application, and I can see the field for the Image URL, and a "Process Image" button.

Now I can drop in a URL to picture of my face and try it out:
As you can see, we now have the image I sent over, the "Image ID" returned by the Face API, as well as the attributes inferred from the image.
It guessed I'm a male, 43 years old wearing reading glasses. The top emotion was "happiness".
I can upload any image I want into here and analyze it.
Conclusion
In this project, we:
- Created an Azure Cognitive Service (Face API)
- Sent some test calls to the service with Postman
- Built a Blazor application to interact with it
Our Blazor application can send a URL to the service, have it analyze and return attributes we can use for display. This a great way to analyze images and see what attributes come back.
In the next article in this series, we'll do even more with the Azure Face API and add functionality to our Blazor Application.
If you'd like to learn more about the Azure Face API, Pluralsight has a great course you can check out, Microsoft Azure Cognitive Services: Face API.
If you'd like to learn more about the building Blazor applications, check out Blazor: Getting Started.