ASP.NET Core: Building a Robust Authentication and Authorization System using IdentityServer
4.11/5 (7 votes)
Build a robust authentication and authorization system using IdentityServer and ASP.NET Core 3.1
What the Heck is OAuth 2.0?
OAuth 2.0 is an authorization protocol that allows a user to grant 3rd party apps access to the user’s resources without actually revealing the user’s identity or credentials. The point to notice here is that it’s an authorization protocol and should be only used for authorization scenarios not for authentication workflow.

Why OpenID Connect?
OAuth 2.0 is very elegant in solving authorization problems but we needed a solution to handle user authentication use cases. Smart brains came together to build an efficient solution. OpenID Connect is an identity protocol built on the top of the OAuth 2.0 framework.
Say Hi to IdentityServer! 👋
IdentityServer is an OpenID Connect and OAuth 2.0 framework for ASP.NET Core. IdentityServer is an officially certified implementation of OpenID Connect.
As per official documentation of IdentityServer, it has a number of jobs and features:
- protect your resources
- authenticate users using a local account store or via an external identity provider
- provide session management and single sign-on
- manage and authenticate clients
- issue identity and access tokens to clients
- validate tokens
The Hello World Program
In this tutorial, we will build a central authentication system that will handle the authentication request from an MVC and an angular app to access protected resources.


We will set up a central authentication system using IdentityServer. Then we will create an MVC app whose secured pages can be accessed after authentication by the authentication server. We will also create an Angular app that would be able to access secured API after authentication.
Steps Required to Set Up the Central Authentication System — View From 1000 Feets
- Create MVC ASP.NET Core project
- Add
IdentityServerNuGet packages - Add EF Core NuGet packages to store clients and configuration
- Configure
IdentityServerServices in Startup - Add
IdentityServerpipeline in the middleware - Seed Clients and Resources data in the Database
- Create
AccountControllerto handle Register and Login scenario
Setting Up Authentication Server From Ground Up
- Create an empty MVC dotnet core project.
- Add required NuGet packages.

These are a few packages that we need to setup
IdentityServer,AspNetIdentity, and lastly EF for persistence. - Let's configure
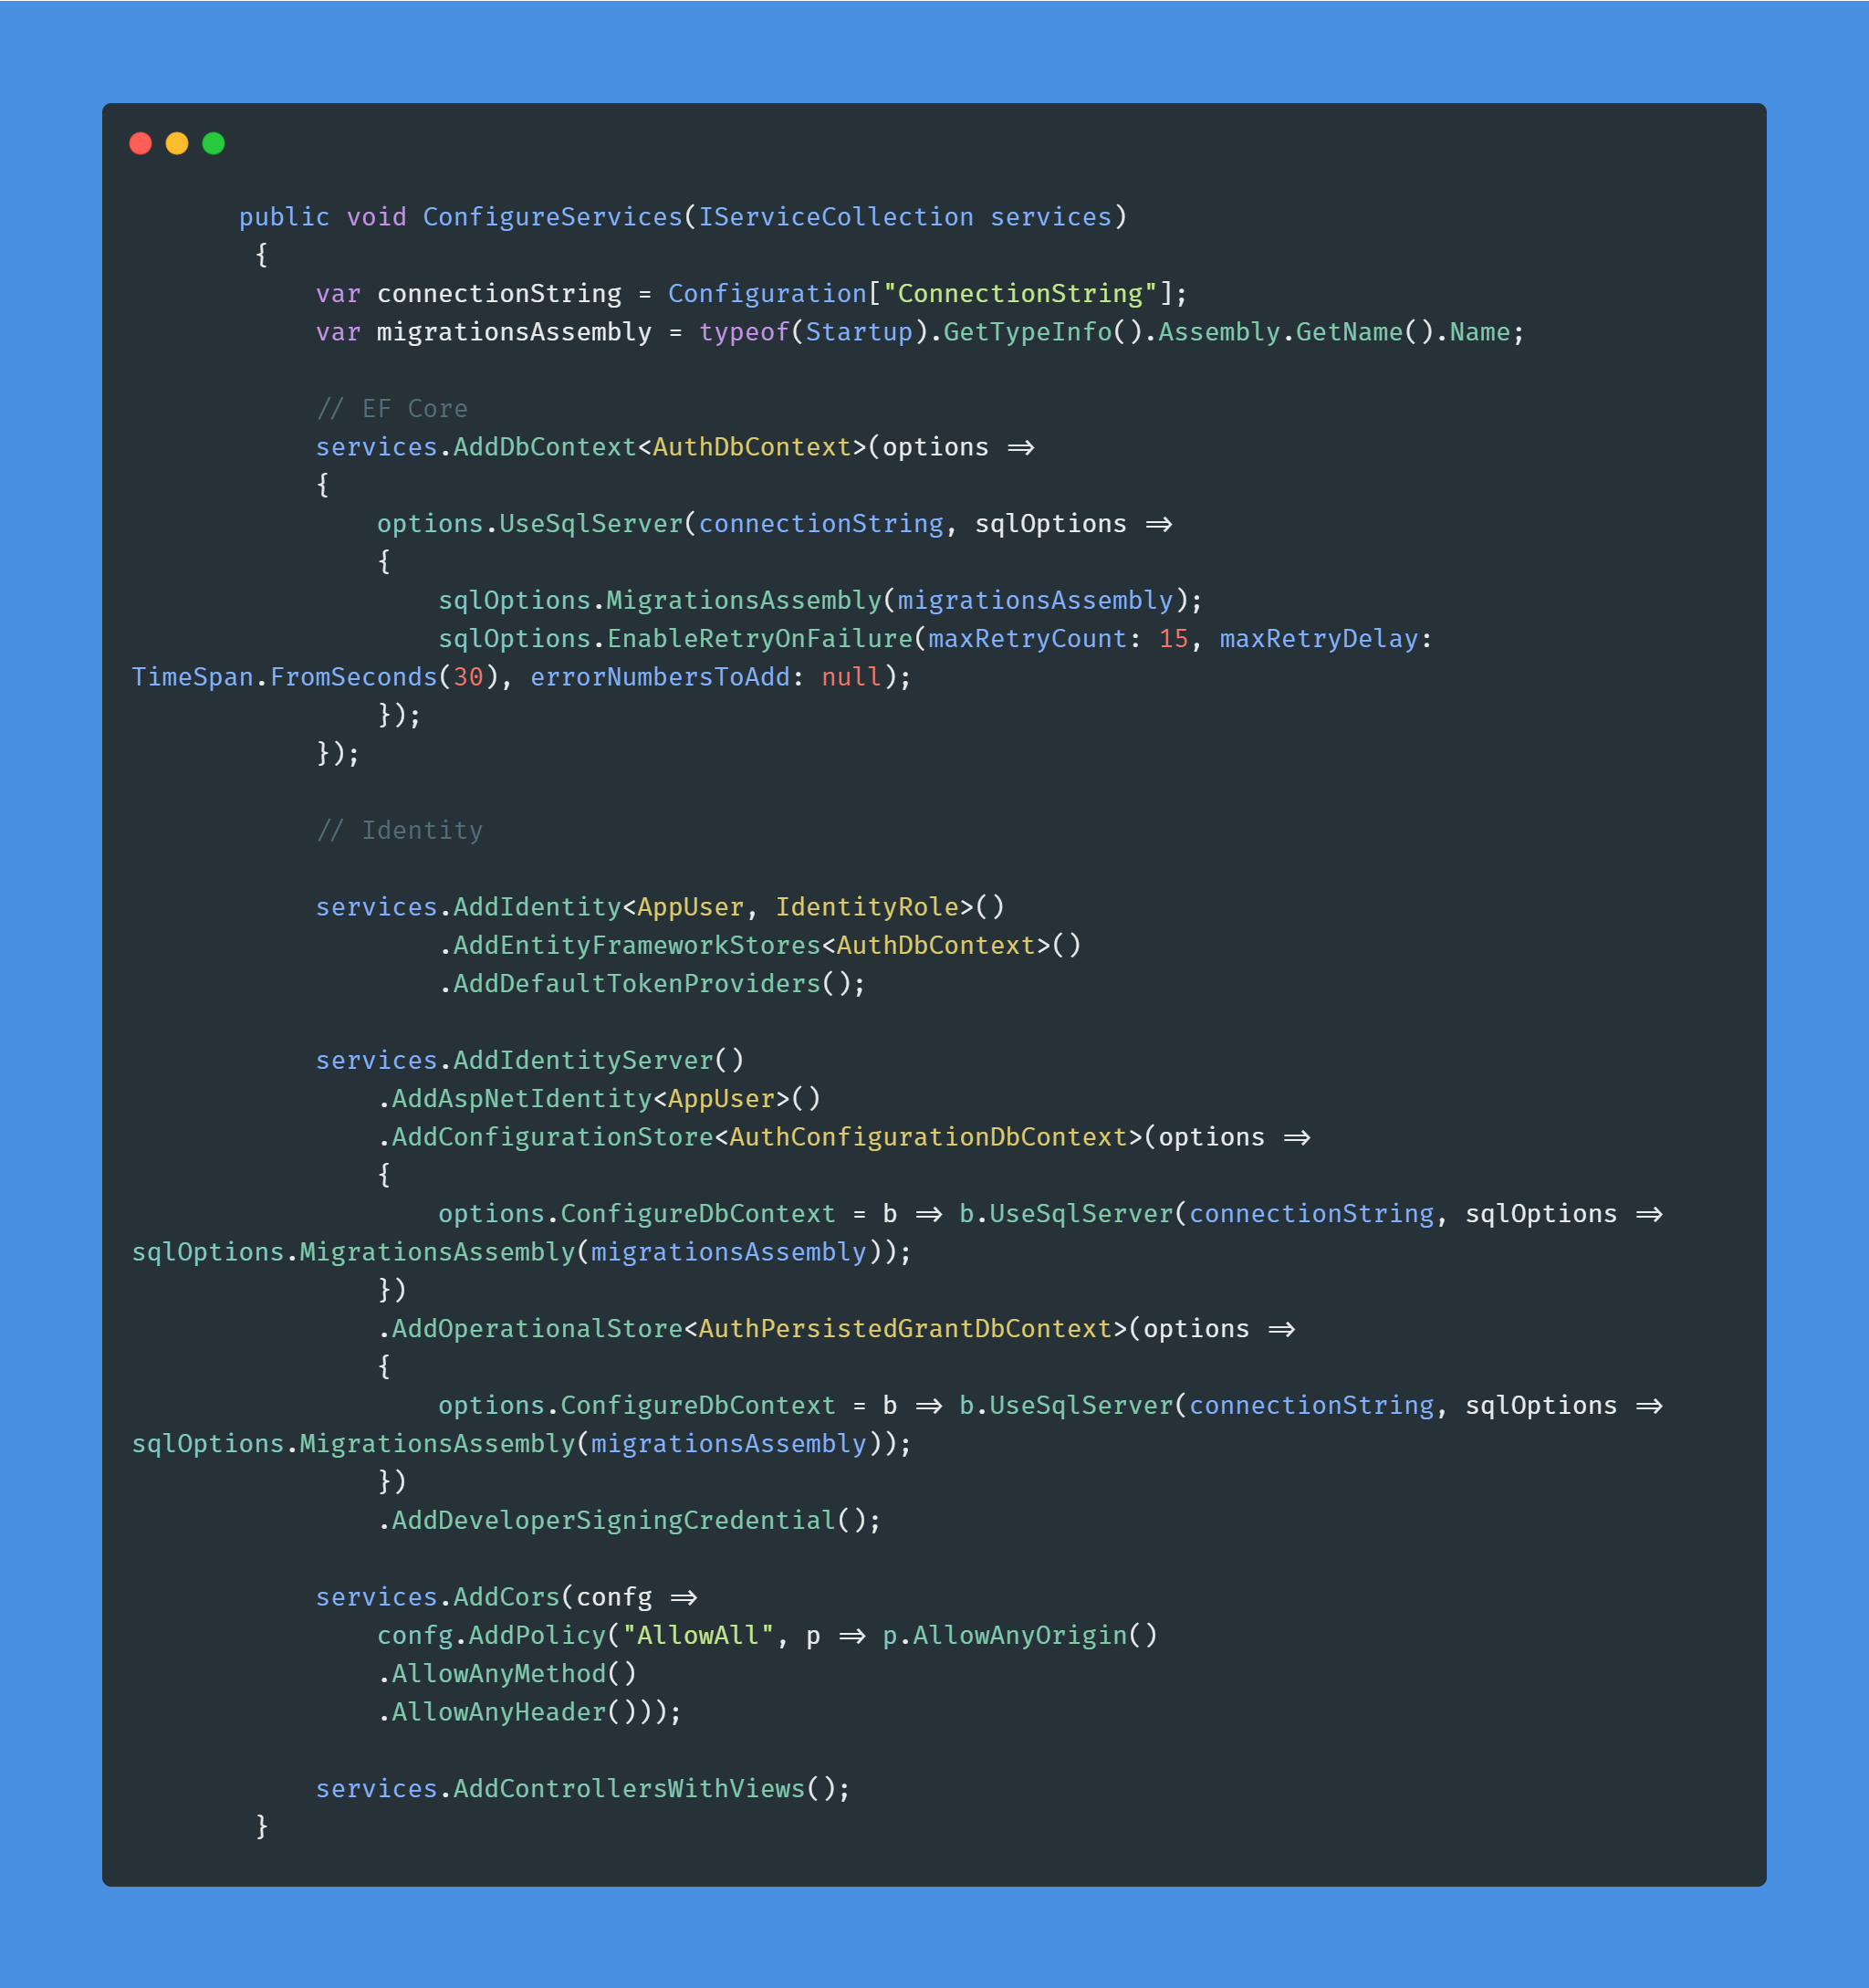
IdentityServer,AspNetIdentity, and EF in the startup file.
Let’s understand what we did here. Firstly, we configured the entity framework by creating our own
DbContext, then we configuredAspNetIdentityusing the sameDbContext. Lastly, we configuredIdentityServerby providing our customConfiguartionDBContextandPersistedGrantDbContext. All the clients and resource information will be stored via these contexts. - In the middleware pipeline, we just need to add a single line to configure
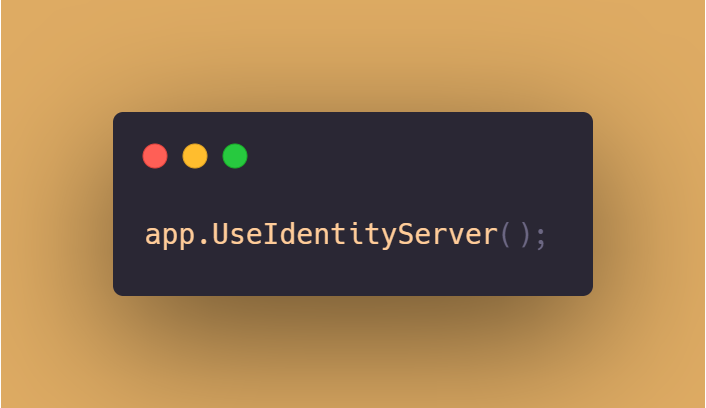
IdentityServermiddleware.
Custom
DbContextclasses:using AuthorizationServer.Models; using Microsoft.AspNetCore.Identity.EntityFrameworkCore; using Microsoft.EntityFrameworkCore;namespace AuthorizationServer.Persistence { public class AuthDbContext : IdentityDbContext<AppUser> { public AuthDbContext(DbContextOptions<AuthDbContext> options) : base(options) { }protected override void OnModelCreating(ModelBuilder builder) { base.OnModelCreating(builder); builder.HasDefaultSchema("Identity"); } } }using IdentityServer4.EntityFramework.DbContexts; using IdentityServer4.EntityFramework.Options; using Microsoft.EntityFrameworkCore;namespace AuthorizationServer.Persistence { public class AuthConfigurationDbContext : ConfigurationDbContext<AuthConfigurationDbContext> { public AuthConfigurationDbContext (DbContextOptions<AuthConfigurationDbContext> options, ConfigurationStoreOptions storeOptions) : base(options, storeOptions) { }protected override void OnModelCreating(ModelBuilder modelBuilder) { base.OnModelCreating(modelBuilder); modelBuilder.HasDefaultSchema("Identity"); } } }using IdentityServer4.EntityFramework.DbContexts; using IdentityServer4.EntityFramework.Options; using Microsoft.EntityFrameworkCore;namespace AuthorizationServer.Persistence { public class AuthPersistedGrantDbContext : PersistedGrantDbContext<AuthPersistedGrantDbContext> { public AuthPersistedGrantDbContext (DbContextOptions<AuthPersistedGrantDbContext> options, OperationalStoreOptions storeOptions) : base(options, storeOptions) { }protected override void OnModelCreating(ModelBuilder modelBuilder) { base.OnModelCreating(modelBuilder); modelBuilder.HasDefaultSchema("Identity"); } } }Nothing fancy, we just created our custom
DbContexts so that we can have a custom schema name. - After wiring up of all the
DbContexts, we can create a seed class to seed our clients and resources information. We can add all the information directly to the database or we can seed data at the bootup time of the app.
We need the information of clients that will be authenticated by
IdentityServer, in our case, we have two clients, one MVC app and another is an Angular app. We need to specify what resources are allowed for these apps. The Angular app will need access toWeatherAPIs along withOpenIdandProfile. Similarly, the MVC app will need access toOpenIdandProfile. We need to addWeatherAPIas a scope. URLs of the clients are the URL on which the apps are hosted. - Now we need a controller and a view that could manage registration and login of the users.
 AccountController.cs
That’s it, our AuthenticationServer is ready to handle authentication and authorization requests.
Building an MVC App
Let’s say we have an MVC app and its pages are secured which can only be accessed after authentication.
We need to configure its startup to make it aware of the AuthenticationServer and Authentication mechanism.

AddOpenIdConnect method takes options where we specify the URL of the AuthenticationServer and ClientId, ClientSecret and ResponseType. ClientId should be the same as we configured in the authentication server.
Now create a view home/secret and add [Authorize] attribute to its controller/action method. After that, if a user tries to access the secret view, it will redirect the request to the authentication server, and after providing a valid username and password, the user will be able to see the page.
Setting Up an Angular App
For an Angular app, we need some backend APIs to which the app can communicate. Then we will set up the authentication mechanism in the API. Angular app after authentication sends JWT token to API after that, API will validate that token and claims from the authentication server.
Let’s configure the authentication mechanism in the API startup file.

If you closely look, we have set up the URL of the authentication server and also specified the name of the claim/scope we want in the token.
Coming to our Angular app, we require a solid npm package that can take care of all the boilerplate code that is required to set up the connection between the Angular app and the authentication server.
Let’s “angular-auth-oidc-client” package to our app.
The package is very awesome as it handles most of our workload, we just need to write a configuration function where we specify the URL of the authentication server and claims/scopes that we want and some redirect URLs. That’s it and we are solid.


Let’s write some code for login the user and after a successful login, call the API to get the data by sending the token in the header obtained from the authentication server.

Final Words
By using IdentityServer, we can take authentication/authorization logic out of our main app and make it more loosely coupled. IdentityServer helps us to create a central authentication system. In the world of microservices, we do a central authentication system like the one created via IdentityServer.
I have attached screenshots of the code snippet here but you can find the complete source code on GitHub.
Resources
- https://oauth.net/2/
- https://auth0.com/docs/protocols/protocol-oauth2
- https://openid.net/connect/
- https://auth0.com/docs/protocols/openid-connect-protocol
😄 Happy coding!!
History
- 5th October, 2020: Initial version
