
Row Level Data Security in Tableau - Part 1
5.00/5 (2 votes)
Step by Step Implementation of Row Level Data Security in Tableau
Overview of Data Security in Tableau
When we talk about data security in Tableau, there come various options in our mind like we can implement security based solely in a database or we can go for implementing security based on Tableau Server Groups and User Filters or even we can apply security using a hybrid approach.
Which one is the best approach out of all the available data security options provided by Tableau is a difficult question to answer in one line. The answer to this question depends upon certain factors based on the structure of your organization and business model.
If your organization structure remains static and does not change very often, Server groups could be a good option. But for an organization which sees frequent changes in its org structure and security rules, a database-oriented security configuration could be a better approach.
Overall, a hybrid approach could be a more successful option where it could meet the current and future requirements of the business.
What this Article is About?
This article is written with an intent to give an end to end idea of handling row-level data security using both approaches:
- Data security using tableau server groups (keeping configuration only in Server groups)
- Data security using a hybrid approach (keeping configuration in Server groups along with database)
After going through this article, the user will be able to understand the concept very well and can apply the technique to their real-time projects.
We shall see the step by step implementation of data security based on real-time requirements. This article has been divided in two sections.
In the first section, we shall be using Tableau Server groups to keep the security configuration and use this configuration for data access control. In the second section, part of the configuration will be kept in the database and we shall see how to use a hybrid approach.
For handling data security (Using Tableau User Filter option), one can refer to Data Security in Tableau article.
Business Requirements (Security Configuration Kept in Tableau Server Groups)
For explanation and sample implementation purpose, we have selected a subset of data of a financial organization. Data set consists of data related to two branches and head office for two lines of business and support departments.
In this organization, there are four levels of access which are mentioned below:
- President - Can View all data of the company across all department and all branches
- Line Manager - He is responsible for any single line of business like Finance, HR, etc. so he can view data of his line of business across all branches.
- Branch Manager - He is responsible for his branch, so he can view the data for all departments for his branch.
- Branch Department Manager - He is responsible for a single department in a branch so he should be able to see the data for his department in his branch only. This is the lowermost level of access.

Following are the departments in this data set:

Following are the Branches in this data set:

Following is the list of users:

Now the requirement is to give access as per the following security matrix:

Solution Concept
Following are the high level steps to achieve the above mentioned requirement of implementing security:
- Create server groups at Tableau Server
- Add users in their respective Server Groups
- Create User Filter (Calculated field at Tableau Desktop)
- Apply User filter in the worksheet of the workbook for access control
- Test access control
Step by Step Solution
Create Tableau Server Groups at Tableau Server
Group in Tableau Server is an object which holds the information of the users. You can create groups based on active directory users created locally in Tableau Server.
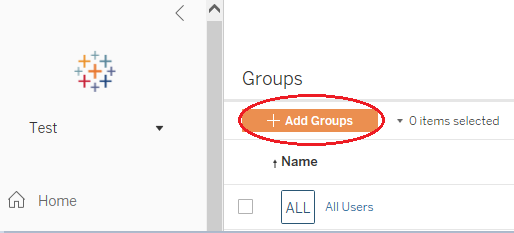
In order to create groups in Tableau Server, log in to Tableau Server, select your site and go to groups menu by following the navigation mentioned in the screenshot below:

The following screen opens:

Click on the Add Groups button:

Click on the Add Groups button:
It will open the screen to add the group. If you are using Active Directory, select the option of Active Directory Group, else select the option of local Groups.

By analyzing the business requirement, we can categorize the groups into three main categories of the groups. Following chart demonstrates the category, name and logic for each group that should be created to handle the business requirement.

Add the following groups in Tableau Server as shown below:

Add User in the Server Groups
In order to add users in the site, go to users page from the link as mentioned below:
Add all 9 users in the site:

Next step is to assign the users their respective server groups as we had planned earlier as per users business roles.
Following are the groups in which we need to assign the users:

In order to assign the groups to users, follow the steps mentioned below. For example, let’s assign server groups to Manoj.
Click on users menu, go to user Manoj and click on three dots. It opens a small menu, select the Group Membership option as shown below:

Now select the groups which are applicable for this user:

Click Save button to save the groups assignment for user Manoj.
We have intentionally selected the Branch Departmental user which has maximum groups to be assigned. Repeat the same steps for all users mentioned in User Server Groups Assignment table.
Create User Filter (Calculated field at Tableau Desktop)
Once we have created the server groups, the next step is to create a calculated field which will be used as a filter in each group.
In order to create this calculated field, open tableau desktop, click to create a calculated field:

Name it User Filter and write the following condition in it:

ISMEMBEROF() is a built in function of Tableau which checks if logged in user is a member of server group passed to this function.
CMPCODE is a field which refers to data of branch. Values in this column could be SHJ (which refers to Sharjah) or MCT (which refers to Muscat).
DEPARTMENT is a field which refers to the department. Values in this column could be Parts, Service or Null wherever department is not applicable. This will be handled in the second part of the article. This case is applicable to data which does not belong to any specific department like it is related to group level and only the president should be able to see such data.
For example, if logged in user is a member of PRESIDENT group, the condition will return a value of 1 else it will return a value of 0.
For simplicity and for the purpose of explanation, only president is shown first, later logic for all levels need to be added in the same calculated field.
So the complete logic looks like this:

“IF” conditions are written to make sure that it returns 1 only when a user is a member of all his related server groups, e.g., it will return 1 for Sharjah Parts Manager when he is member of BRANCH-DEPT-MANAGER, SHARJAH-SHJ and PARTS server groups and value of CMPCODE (a field which contains location) is SHJ (which refers to Sharjah) and value of DEPARTMENT field is Parts.
This is an implementation which is written for business requirement mention above, definitely, it could be more complex if the requirement is more complicated.
We shall be handling more complex requirements in the second part of this article where we shall keep some part of the configuration in the database.
Apply User Filter in the Workbook for Access Control
Following are the departments and branches in the data:

Once user filter is ready, ‘User filter’ needs to be applied to worksheet to control the data access. Place the ‘User Filter’ in the filter shelf as shown below:

It will look like this:

Now since we have applied the security filter to the workbook, the department and branches data will be restricted based on the assigned groups.
Test Access Control
Let's check the data access for different users:
Checking Data Access for President
User Muhammad is president and should be able to see all branches and departments. In order to check his accessible data, let’s select user Muhammad as shown below:

It’s clear from the above screenshot that Muhammad is able to see all branches and all departments across the company.
Checking Data Access for Line Manager - Parts
User Mickey is Parts Line Manager and should be able to see all branches across the company for Parts department. In order to check his accessible data, let’s select user Mickey as shown below:

It’s clear from the above screenshot that Mickey is able to see all branches for Parts department.
Checking Data Access for Line Manager – Service
User Wasim is Service Line Manager and should be able to see all branches across the company for the Service department. In order to check his accessible data, let’s select user Wasim as shown below:

It’s clear from the above screenshot that Wasim is able to see all branches for the Service department.
Checking Data Access for Branch Manager – Sharjah
User Jeffry is Sharjah Branch Manager and should be able to see all departments in Sharjah Branch. In order to check his accessible data, let’s select user Jeffry as shown below:

It’s clear from the above screenshot that Jeffry is able to see all departments for Sharjah branch.
Checking Data Access for Branch Manager – Muscat
User Yusra is Muscat Branch Manager and should be able to see all departments in Muscat Branch. In order to check his accessible data, let’s select user Yusra as shown below:

It’s clear from the above screenshot that Yusra is able to see all departments for Muscat branch.
Checking Data Access for Branch Department Manager – Sharjah Parts Manager
User Yousaf is Sharjah Parts Manager and should be able to see only Parts department in Sharjah. In order to check his accessible data, let’s select user Yousaf as shown below:
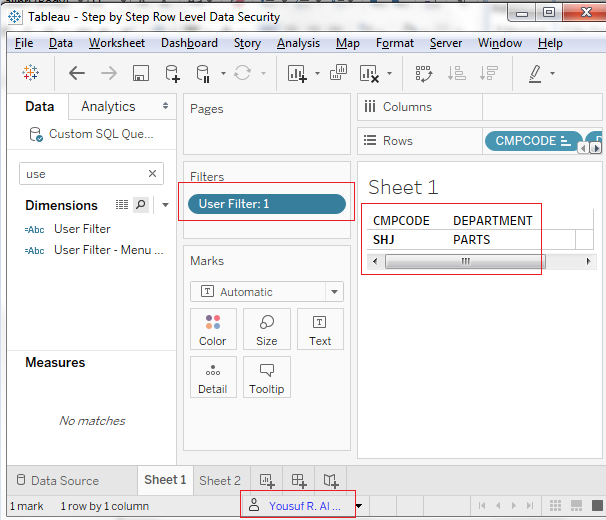
It’s clear from the above screenshot that Yousaf is able to see Parts department for Sharjah branch.
Checking Data Access for Branch Department Manager – Sharjah Service Manager
User Manoj is Sharjah Service Manager and should be able to see only the Service department in Sharjah. In order to check his accessible data, let’s select user Manoj as shown below:

It’s clear from the above screenshot that Manoj is able to see the Service department for Sharjah branch.
Checking Data Access for Branch Department Manager – Muscat Parts Manager
User Ahmad is Muscat Parts Manager and should be able to see only Parts department in Muscat. In order to check his accessible data, let’s select user Ahmad as shown below:

It’s clear from the above screenshot that Ahmad is able to see Parts department for Muscat branch.
Checking Data Access for Branch Department Manager – Muscat Service Manager
User Ani is Muscat Service Manager and should be able to see only the Service department in Muscat. In order to check his accessible data, let’s select user Ani as shown below:

It’s clear from the above screenshot that Ani is able to see Service department for Muscat branch.
Conclusion
We have checked all nine users one by one and have verified that every user is allowed to see only his related data as per configuration set by the business. We handled all configuration in the Server Groups. Maintaining security in Tableau Server groups is very flexible since you can administer and modify the access level by merely assigning and removing users from server groups.
One disadvantage of this approach is that the user filter calculated field needs to be modified if any new department or branch is added in the organization. So this approach should be avoided where organization structures change very frequently.
So it is recommended to analyze the structure of organizations and the trend of changes in organization hierarchies while planning and implementing the security in Tableau.
Continued...
In part 2 of implementing Row Level Data Security in Tableau, I'll explain how to implement the same using security configuration partially kept in database. Keep in touch.
History
- 11th June, 2020: Initial version