
Building a Discord Bot in Azure using Microservices
5.00/5 (6 votes)
Over the next few posts, I am going to go through designing and building a Discord bot application using a microservices architecture and implementing a variety of services within Azure.
Introduction
This is the first in a series of posts on building a Discord bot using the Discord.Net library and was initially posted on my blog / website. The current version of this bot can be found at the GitHub Project here and further posts will update this repository.
Building services using a microservices architecture offers a number of benefits, especially when combined with the serverless options cloud providers can offer. This combination allows you to build a variety of small services, that cost very little, but can scale up with minimal to no additional effort and handle burst scaling really well. Over the next few posts, I am going to go through designing and building a microservices application using a variety of services within Azure. The application I am going to create to help learn more about this in a chat bot for Discord, a realtime chat application, with a few integrated services to provide some basic functionality. This will be a little different to a lot of microservice application examples in that Discord bots use web hooks to establish a session that receives a constant stream of messages.
**NOTE: ** I have assumed that you have had a look at Discord bots in the past, have some knowledge about them and maybe even have a Discord application created. If you do not, I recommend having a quick look at this guide to setting up an application and go through some of the Discord documentation first.
With that said, let’s have a look at the initial overall architecture we are going to implement here.

The first component we are going to build is the Discord bot proxy using the Discord .Net library to proxy messages into a storage queue for later processing. This removes a lot of the load from the front-end bot to try and unblock the queue in high load situations. Once in a message queue, we can then use functions to monitor, split and process individual messages as required. Next we can take those messages and perform internal and external operations on them, such as persisting them to a database or table storage, using machine learning tools, accessing CDN content, calling an external API and much more.
Let’s start in this post by creating the Discord bot proxy.
Step 1 - Create a Project
We are going to use a Dot Net Core console application to create the basic Discord bot proxy. This will allow us to create a slimline application that we can run on a webservice with minimal resources.

Load up Visual Studio 2019 (I’m using Community edition) and create a new Console App (.NET Core) application. This will start a pretty basic console application with nothing in it. Not very exciting, but a console application allows you to create a package without any extra components that we don’t need.
Step 2 - Add Dependencies
 >
>
To begin, let's add a few packages to our console application that we are going to use within this application. Double click on the project file and make sure it contains the following packages / code:
<Project Sdk="Microsoft.NET.Sdk">

  <PropertyGroup>
    <LangVersion>latest</LangVersion>
    <OutputType>Exe</OutputType>
    <TargetFramework>netcoreapp2.2</TargetFramework>
  </PropertyGroup>

  <ItemGroup>
    <PackageReference Include="Discord.Net" Version="2.0.1" />
    <PackageReference Include="Microsoft.Extensions.Configuration.CommandLine"
                               Version="2.2.0" />
    <PackageReference Include="Microsoft.Extensions.Configuration.EnvironmentVariables"
                               Version="2.2.0" />
    <PackageReference Include="Microsoft.Extensions.Configuration.Json" Version="2.2.0" />
    <PackageReference Include="Microsoft.Extensions.Hosting" Version="2.2.0" />
    <PackageReference Include="Microsoft.Extensions.Hosting.Abstractions" Version="2.2.0" />
    <PackageReference Include="Microsoft.Extensions.Logging" Version="2.2.0" />
    <PackageReference Include="Microsoft.Extensions.Logging.Configuration" Version="2.2.0" />
    <PackageReference Include="Microsoft.Extensions.Logging.Console" Version="2.2.0" />
    <PackageReference Include="Microsoft.Extensions.Logging.Debug" Version="2.2.0" />
  </ItemGroup>

  <ItemGroup>
    <Content Include="**\*.json" Exclude="bin\**\*;obj\**\*"
     CopyToOutputDirectory="PreserveNewest" />
  </ItemGroup>

  <ItemGroup>
    <None Remove="Config\appsettings.Development.json" />
    <None Remove="Config\appsettings.json" />
    <None Remove="Config\appsettings.Production.json" />
    <None Remove="Config\hostsettings.json" />
  </ItemGroup>

</Project>
Specifically, we are going to add the following four components to our console application:
- Discord.Net - This provides the SDK for connecting to and accessing the Discord Servers
- Configuration Extension - This provides a configuration provider to configure the application outside of code
- Hosting Extension - This allows us to start and stop the service gracefully and provide set tasks when starting and stopping.
- Logging Extension - This allows us to log events with different debug levels to help catch and troubleshoot events.
After these package reference declarations, we also have two groups that tell Visual Studio to copy json configuration files to the output directory and prevent the removal of some very specific config files. You can read more about this in the Configuration Fundamentals page of the dot net core documentation.
Step 3 - Configure Logging and Configuration
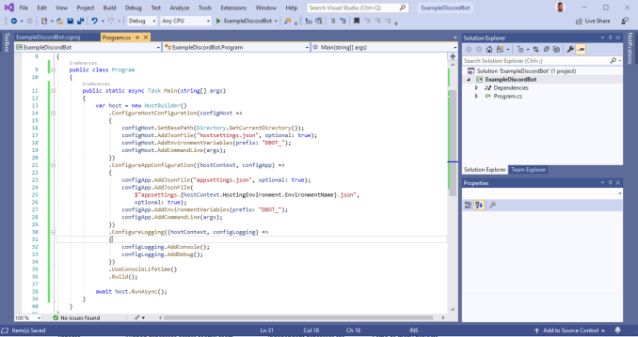
Now we have the dependencies added, let’s code up the basic configuration and logging systems. Firstly, let’s make our program asynchronous by changing the signature of the Main method in the program to:
public static async Task Main(string[] args)
Next, we create a new host builder and inject the configuration system for the host and the application using the following code:
.ConfigureHostConfiguration(configHost =>
{
    configHost.SetBasePath(Directory.GetCurrentDirectory());
    configHost.AddJsonFile("Config/hostsettings.json", optional: true);
    configHost.AddEnvironmentVariables(prefix: "BOT_");
    configHost.AddCommandLine(args);
})
.ConfigureAppConfiguration((hostContext, configApp) =>
{
    configApp.AddJsonFile("Config/appsettings.json", optional: true);
    configApp.AddJsonFile(
        $"Config/appsettings.{hostContext.HostingEnvironment.EnvironmentName}.json",
        optional: true);
    configApp.AddEnvironmentVariables(prefix: "BOT_");
    configApp.AddCommandLine(args);
})
This code first injects a way to control application configuration at the host level using a hostsettings.json file in the Config directory, retrieving config settings using environment variables with the BOT_ prefix, and finally using any commands passed through the command line. Secondly, this code then injects a way to control application configuration at the application level using appsettings.json and appsettings..json files in the Config directory, retrieving config settings using environment variables with the BOT_ prefix, and finally using any commands passed through the command line.
Next, we add logging that can leverage our configuration system to specify the log levels using the following code:
.ConfigureLogging((hostContext, configLogging) =>
{
    configLogging.AddConfiguration(hostContext.Configuration.GetSection("Logging"));
    configLogging.AddConsole();
    configLogging.AddDebug();
})
And finally, we end the program class off by building the host and running the class asynchronously. When we run our program now, we should get the following console output:

Pretty boring, right? You will notice that the application also thinks it’s in a production hosting environment, so let’s add some config files to the project to allow us to control the application a little better.

Firstly, create a Config folder in the base section of your project, then add a new JSON file called appsettings.json. This file should contain the following code and sets the defaults for the application:
{
  "Logging": {
    "LogLevel": {
      "Default": "Warning"
    }
  },
  "AllowedHosts": "*"
}
Next, create two addition json files, appsettings.Development.json and appsettings.Production.json to hold the settings for development environments and production environments. These two files will set the logging options for the application. The appsettings.Development.json looks like this:
{
  "Logging": {
    "LogLevel": {
      "Default": "Debug",
      "System": "Information",
      "Microsoft": "Information"
    }
  }
}
This sets the logging for development where you want to have a bit more information supplied. For production, this can be changed to warnings, errors or critical as required. There are a number of ways we can set the environment, the easiest for us at the moment is to create a hostsettings.json file and add the key-pair of environment: Development.

If we run the console application, we now see that the environment is set to Development, which is what we want at this stage.
Step 4 - Adding the Discord Socket Service
Now we have our basic environment, configuration and logging system set up, let’s create our core Discord Socket service that will connect to the Discord servers and catch events from the servers the bot joins.

Add a new class called the DiscordSocketService. This class will be the primary interface between Discord and our bot application. To run this class in the background, it will need to implement the IHostedService interface. This interface has two methods to implement, StartAsync and StopAsync. Leave the StopAsync method empty at the moment as we aren’t going to need to clean anything up at this point.

Firstly, we are going to declare a couple of local variables that we will inject into the service:
- an
ILoggervariable that will be used to log different messages - an
IApplicationLifetimevariable that will be used to control starting and stopping service components
Secondly, let’s create the class constructor that will inject logger and the application lifetime services. Finally, we create and register three functions for when the application starts, stops and then finally finishes. For each of these functions, add a logging message using the format _logger.LogInformation("<MESSGAE>");. For instance, in the OnStarted method, we might have an information message that OnMessage has started.

To start using this service, we need to register it in the main program using the .ConfigureServices function in the HostBuilder.

Now when we run the service, we should see the logging messages display in the console. With the basic service commands hooked up, let's expand it to actually connect to Discord.
Let’s expand the class constructor to inject the configuration service and we are going to pull a Discord bot token from the configuration file. This bot token, generated from the Discord site, needs to be added to the hostsettings using the key-pair "DISCORD_BOT_TOKEN": "<YOURTOKEN>".
Now, add the following code to the OnStarted function:
Discord.LogSeverity logLevel = LogSeverity.Info;

if (_config["LOGLEVEL"] == "DEBUG")
    logLevel = LogSeverity.Debug;
else if (_config["LOGLEVEL"] == "WARNING")
    logLevel = LogSeverity.Warning;
else if (_config["LOGLEVEL"] == "ERROR")
    logLevel = LogSeverity.Error;

// Setup the Discord Client Configuration
discordClient = new DiscordShardedClient(new DiscordSocketConfig
{
    LogLevel = logLevel
});

ConfigureEventHandlers();

discordClient.LoginAsync(Discord.TokenType.Bot, botToken).Wait();
discordClient.StartAsync().Wait();
Most of this code is to set the logging so that we can see what is happening. The last four lines are the most important. Firstly, we create a new sharded Discord client. While this is not overly important until your bot joins a lot of servers, it doesn’t make much different to configure this from the start. Next, the ConfigureEventHandlers function will be a private function that registers all the different Discord events that the bot can listen too. We will configure that function in a minute. The last two lines log the bot in, then start the client processing. Before we move to the ConfigureEventHandlers function, let’s also add the line discordClient.LogoutAsync(); to the OnStopping function. This will log the Discord Client out cleanly when the application is ended.
The ConfigureEventHandlers function is where we add all the different handlers for the events fired from the Discord servers the bot is attached to. In the example code, I have created and wired up the majority of these event handlers, however let's take a look at the most frequently used one to see what this pattern looks like:
discordClient.MessageReceived += async m => await RecieveMessage(m);
This code basically allows you to add a function to the specific Discord event delegate so that your bot can process events, in this case whenever a Discord user sends a message. For the example code, I have added some dummy code that allows the bot to respond to a !ping command in Discord with !pong. Once the application is started and connected, the bot will respond with this response.
Summary
So that is a basic Discord bot that implements some of the recommended patterns in Dot Net Core in regards to configuration, logging and background services. We could just add our bot code directly into this as required if we really wanted to however, for my purposes, the next stage for me will be to wire the majority of these events up to Azure Storage queues. I hope you can join me for that next part next time.
Additional Information
Again, you can find the example code for this bot as a GitHub Project here. Potentially, this could be an easy way for you to start and expand on a Discord bot in a fairly simple way by getting a token, adding it to the hostsettings.json file and adding your bot to the server. If you want to do that, go right ahead and I would love to hear if you have used it for your bot.
History
- 27th August, 2019: Initial version