
SharePoint Framework (SPFx) extensions, Field Customizers – Customizing Managed Metadata Field
5.00/5 (2 votes)
Customizing Managed Metadata Field using SPFx
Introduction
Generating dashboard on SharePoint list, using JSON Column Formatting is quiet common task in SharePoint platform. But once it comes with Managed Metadata type of column, as of now, JSON Column Formatting will not support.
So, if there is any requirement, to mark/render a cell with a colour background when the value is empty or blank for field/column type Number, Date and Time and Managed Metadata, first two will be achieved very easily.
Using JSON Column Formatting, displaying colour background for empty or blank cell having Text, Number and Date Time type of column is quite easy. But JSON Column Formatting is not supported for Managed Metadata.
In order to achieve the same functionality, field customization in SharePoint Framework Extensions (SPFx) is the other options as per Microsoft Documentation.
Background
In my quest of implementing Field Customizer extension for Managed Metadata, I am unable to get any suitable example from the Net. Almost all available topics are based on the default implementation provided by Microsoft for the basic Number type of column.
Also, it is not clearly mentioned that, whether the Field Customizer extension will be applicable to the existing field of a list or always need to add the new site-column as deployed by the extension and implement the same as a new list column.
The answer is YES. We can implement Field Customizer extension in the existing field of a list or add as a new site-column as deployed by the extension and implement the same as a new list column.
Prerequisites
For developing SPFx applications, following are the prerequisites:
- Install developer tools - NodeJS (NodeJS LTS version 8)
- Install a code editor (example Visual Studio Code)
- Install Yeoman and gulp to kick-start new projects. Use the following command in the command prompt:
npm install -g yo gulp
- Install Yeoman SharePoint generator to quickly create a SharePoint client-side solution project. Use the following command in the command prompt:
npm install -g @microsoft/generator-sharepoint
- Trusting the self-signed developer certificate to test your custom solutions from your development environment, uses HTTPS by default. Once a project has been created with the Yeoman generator for the SharePoint Framework, execute the following command from within the root folder of the project.
gulp trust-dev-cert
To get detailed information about setting up your SharePoint Framework development environment, check this Microsoft documentation - Set up your SharePoint Framework development environment
Creating Field Customizers Extension Project for Managed Metadata
Run Windows Powershell or Command prompt as administrator and create a new project directory named “FieldCustomizer-MMD” in your preferred location using the below command:
md FieldCustomizer-MMD
Move to the newly created project directory using the below command:
cd FieldCustomizer-MMD
Create the new ManagedMetadata extension by running the Yeoman SharePoint Generator.
yo @microsoft/sharepoint
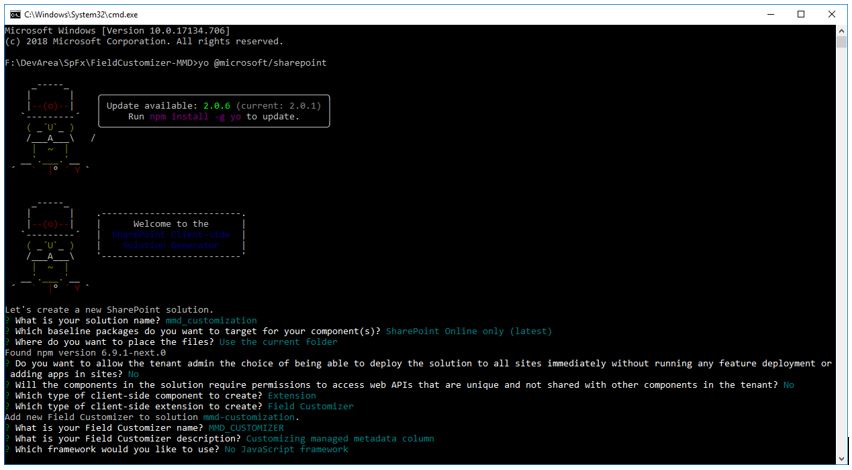
Provide the Required Information When Prompted
- Keep the default
FieldCustomizer-MMDfor “What is your solution name?” and select Enter. - Keep SharePoint Online only (latest) for “Which baseline packages do you want to target for your component(s)?” and select Enter.
- Keep Use the current folder for “Where do you want to place the files?” and select Enter.
- Select No (N) to require tenant admin install extension on each site and press Enter. Here, make sure you select No (N). If you choose Yes (y), Elements.xml feature deployment file will not be generated through scaffolding.
- Choose Extension for “Which type of client-side component to create?” (Use arrow keys)
- Select Field Customizer as extension type from the list of available options.
As soon as you select Field Customizer, next group of prompts asks for information regarding your extension.
- Add
MMD_CUSTOMIZERas your extension name, and press Enter. - Add “
Customizing managed metadata column” as the description for “What is your Field Customizer description?” and select Enter. - Select Field Customizer as extension type from the list of available options.
- Select “No JavaScript framework” as Which framework would you like to use?
At this moment, Yeoman installs the needed dependencies and scaffolds the solution files along with the Field Customizer extension. This may take some time.
When scaffolding is done, successful scaffold message will be displayed.

To start the code editor (Visual Studio Code), type the following command
code .
Solution Structure
Default solution structure will be displayed as follows. This is the basic SharePoint Framework solution structure, with similar configuration options across all solution types.
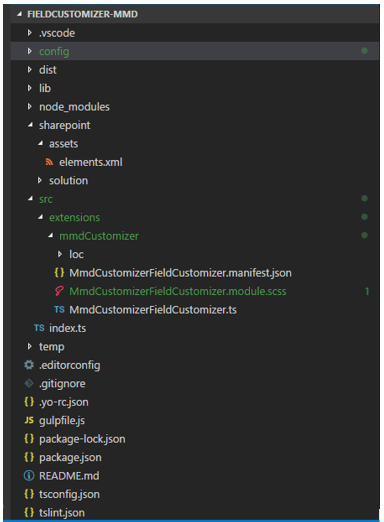
Important Files
- MmdCustomizerFieldCustomizer.manifest.json
This file contains extension type and a unique id for the extension.
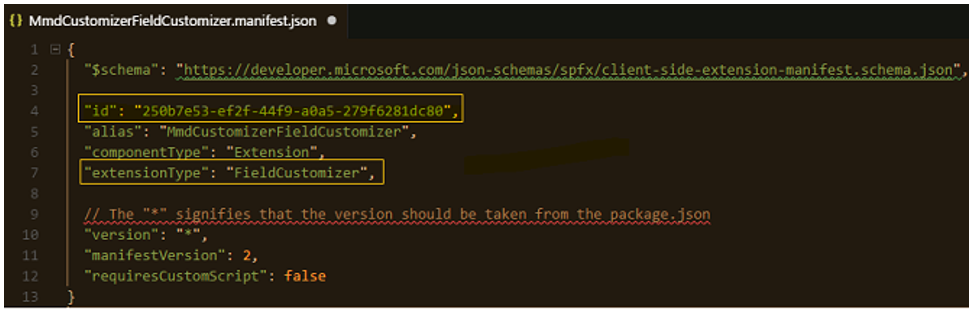
{ "$schema": "https://developer.microsoft.com/json-schemas/spfx/ client-side-extension-manifest.schema.json", "id": "250b7e53-ef2f-44f9-a0a5-279f6281dc80", "alias": "MmdCustomizerFieldCustomizer", "componentType": "Extension", "extensionType": "FieldCustomizer", // The "*" signifies that the version should be taken from the package.json "version": "*", "manifestVersion": 2, // If true, the component can only be installed on sites where Custom Script is allowed. // Components that allow authors to embed arbitrary script code should set this to true. // https://support.office.com/en-us/ // article/Turn-scripting-capabilities-on-or-off-1f2c515f-5d7e-448a-9fd7-835da935584f "requiresCustomScript": false } - MmdCustomizerFieldCustomizer.ts
The logic for the Field Customizer is contained in the
OnInit(),onRenderCell(), andonDisposeCell()methods.Default code will be generated by the Yeoman SharePoint Generator.
In order to fulfil the requirement, i.e., displaying colour background in the view of Sharepoint list for a managed metadata column containing blank value, the following code needs to be implemented in the
onRenderCell()method: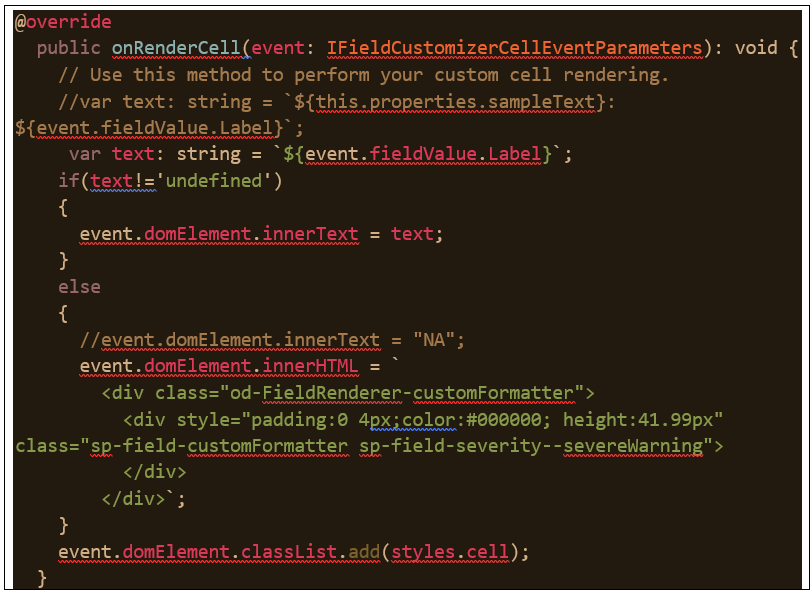
@override public onRenderCell(event: IFieldCustomizerCellEventParameters): void { // Use this method to perform your custom cell rendering. //var text: string = `${this.properties.sampleText}: ${event.fieldValue.Label}`; var text: string = `${event.fieldValue.Label}`; if(text!='undefined') { event.domElement.innerText = text; } else { //event.domElement.innerText = "NA"; event.domElement.innerHTML = ` <div class="od-FieldRenderer-customFormatter"> <div style="padding:0 4px;color:#000000; height:41.99px" class="sp-field-customFormatter sp-field-severity--severeWarning"> </div> </div>`; } event.domElement.classList.add(styles.cell); } - MmdCustomizerFieldCustomizer.module.scss
Update the style in this file for the specific colour to be displayed if the column is blank.
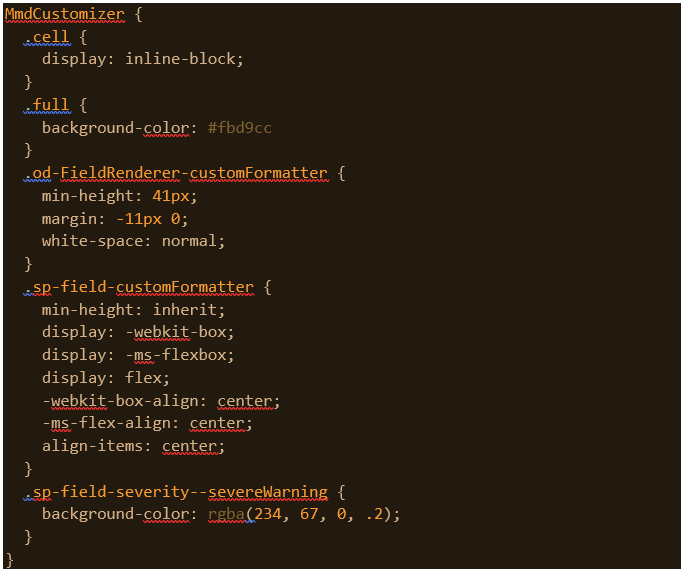
MmdCustomizer {
  .cell {
    display: inline-block;
  }
  .full {
    background-color: #fbd9cc
  }

  .od-FieldRenderer-customFormatter {
    min-height: 41px;
    margin: -11px 0;
    white-space: normal;
  }

  .sp-field-customFormatter {
    min-height: inherit;
    display: -webkit-box;
    display: -ms-flexbox;
    display: flex;
    -webkit-box-align: center;
    -ms-flex-align: center;
    align-items: center;
  }

  .sp-field-severity--severeWarning {
    background-color: rgba(234, 67, 0, .2);
  }

}
Debug the Field Customizer Application
To test/debug the application, we need to use them directly against a live SharePoint Online site. We don’t have to deploy the customization to the app catalog. Some simple configuration will enable debugging capability of this application.
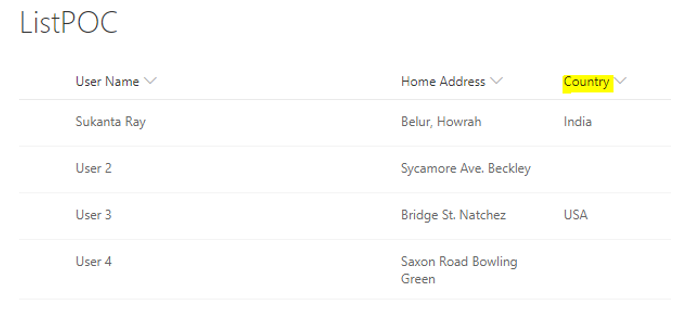
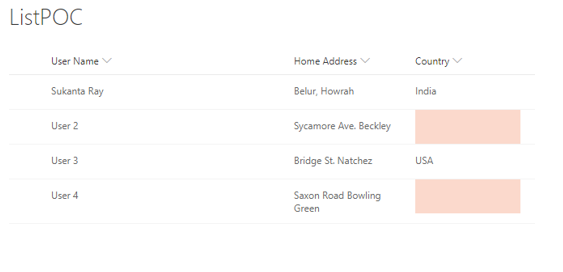
To test this, I have created the following List having Country as Managed Metadata field.
Open serve.json file from config folder. Update InternalFieldName attribute as “Country” based on the taxonomy/managed metadata field name, which we have in our existing list. Update also the pageUrl attributes to match a URL of the list which we just created in the preview steps.
After edits, your serve.json should look like:
{
  "$schema": "https://developer.microsoft.com/json-schemas/core-build/serve.schema.json",
  "port": 4321,
  "https": true,
  "serveConfigurations": {
    "default": {
      "pageUrl": "https://netxplore.sharepoint.com/Lists/ListPOC/AllItems.aspx",
      "mmdCustomizer": {
        "Country": {
          "id": "250b7e53-ef2f-44f9-a0a5-279f6281dc80",
          "properties": {
            "sampleText": "Value"
          }
        }
      }
    },

    "mmdCustomizer": {
      "pageUrl": "https://netxplore.sharepoint.com/Lists/ListPOC/AllItems.aspx",
      "fieldCustomizers": {
        "Country": {
          "id": "250b7e53-ef2f-44f9-a0a5-279f6281dc80",
          "properties": {
            "sampleText": "Value"
          }
        }
      }
    }
  }
}
To compile the code and host it from the local machine, use the following command from the powershell/cmd prompt:
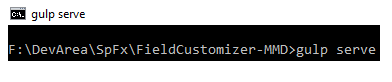
When the code compiles without errors, it serves the resulting manifest from https://localhost:4321. This will also start the default browser within the URL defined in serve.json file.
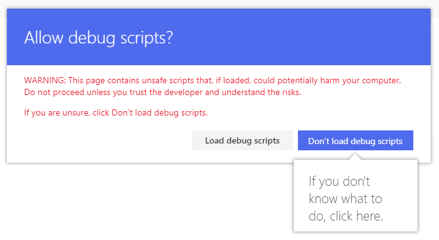
Navigate to the default browser and click “Load debug scripts” to proceed loading scripts from local host.
Notice how the “Country” column is now presented with colour background for the empty record, which has customized and provided as a property for the Field Customizer.
Deploy the Extension to Sharepoint Online
As we have tested our solution properly in debug mode, we can package this to be deployed automatically as part of the solution package deployed to the sites. We need to install the solution package to the site where it should be installed, so that the extension manifest is white listed for execution.
We need to associate the following properties in the SPField object at the site or list level.
ClientSiteComponentIdis the identifier (GUID) of the Field Customizer, which has been installed in the app catalog.ClientSideComponentPropertiesis an optional parameter, which can be used to provide properties for the Field Customizer instance.
We need to associate ClientSideComponentId to specific objects for the extension to be visible.
Field Definition to Be Added in the Solution Package for Deployment
The default field definition is automatically created and will then be used to automatically deploy needed configurations when the solution package is installed on a site. The default field definition is defined in the elements.xml file under sharepoint folder and assets sub folder in the root of the solution:
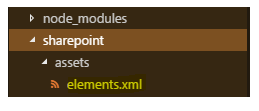
Open the elements.xml file inside the sharepoint\assets folder.
Note the following XML structure in elements.xml. The ClientSideComponentId property has been automatically updated to the unique ID of the Field Customizer available in the MmdCustomizerFieldCustomizer.manifest.json file in the src\extensions\mmdCustomizer folder.
We will need to adjust this file matching on our field type and details.
<?xml version="1.0" encoding="utf-8"?>
<Elements xmlns="http://schemas.microsoft.com/sharepoint/">
    <Field ID="{23d1a782-c24c-4b97-bfdf-36bd4660f037}"
    Name="TxFieldFx"
    DisplayName="TaxonomyField"
    Type="TaxonomyFieldType"
    Required="FALSE"
    Group="SPFxTaxonomyColumns"
    ClientSideComponentId="250b7e53-ef2f-44f9-a0a5-279f6281dc80">
    </Field>
</Elements>
To ensure that the element.xml file is taken into account while the solution is being packaged, default scaffolding added needed configuration to define a feature framework feature definition for the solution package.
Open package-solution.json from the config folder. The package-solution.json file defines the package metadata as shown in the following code:
{
  "$schema": "https://developer.microsoft.com/json-schemas/spfx-build/
              package-solution.schema.json",
  "solution": {
    "name": "mmd-customization-client-side-solution",
    "id": "675fdae4-58e1-43c8-8d3c-6d2c475abbbe",
    "version": "1.0.0.0",
    "includeClientSideAssets": true,
    "isDomainIsolated": false,
    "features": [
      {
        "title": "Application Extension - Deployment of custom action.",
        "description": "Deploys a custom action with ClientSideComponentId association",
        "id": "0b0d302f-3460-4c93-8752-aa806745cfb5",
        "version": "1.0.0.0",
        "assets": {
          "elementManifests": [
            "elements.xml"
          ]
        }
      }
    ]
  },
  "paths": {
    "zippedPackage": "solution/mmd-customization.sppkg"
  }
}
Notice also that by default, includeClientSideAssets attribute is set to true, meaning that the JavaScript assets are automatically packaged inside of the sppkg file.
Deploy the Field Customizer Extension to SharePoint Online
Now we are ready to deploy the solution to the SharePoint site.
We will use the ship option with this packaging, so that all assets are packaged automatically inside of the solution package.
- In the console window, enter the following command to package the client-side solution that contains the extension so that we get the basic structure ready for packaging:

- Execute the following command so that the solution package is created:

- The command creates the package in the sharepoint/solution folder:
mmd-customization.sppkgNow we can deploy the package that was generated to the app catalog. We can deploy the package to the tenant's app catalog or in any specific site collection’s app catalog.
Upload the
mmd-customization.sppkglocated in the sharepoint/solution folder to the app catalog.Please note that SharePoint will display the trust dialog and asks you to trust the client-side solution with SharePoint Online as the domain. Assets will be automatically hosted either from app catalog URL or from Office 365 public CDN, depending on your tenant settings.
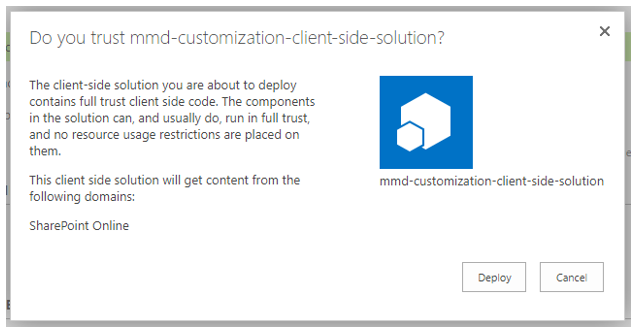
- Select the Deploy button.
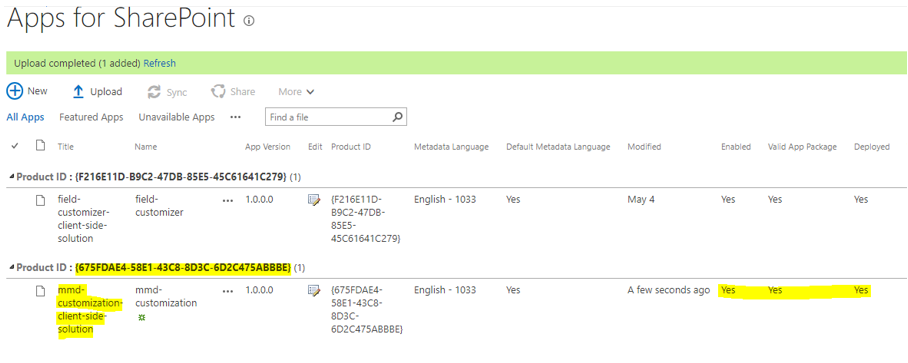
Once deployed, it will be displayed in the App Catalog as deployed.
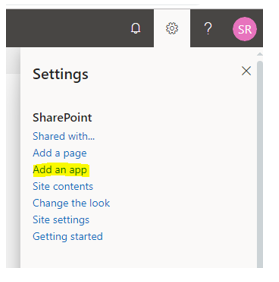
Now the installed App should be added and activated in the respective site collection. In order to do this, select the gears icon on the top navigation bar on the right, and then select Add an app to go to your Apps page.
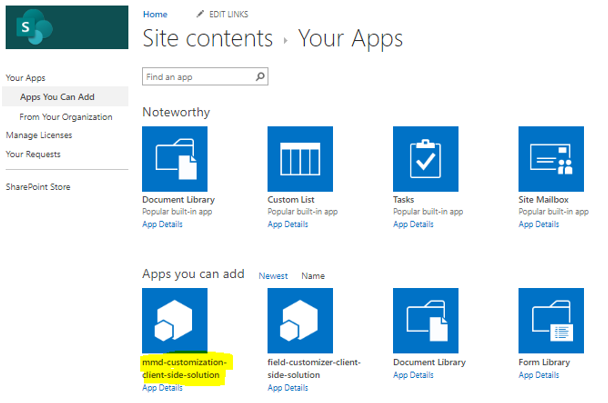
It will open all the available Apps. Select the mmd-customization-client-side-solution to install in the site.
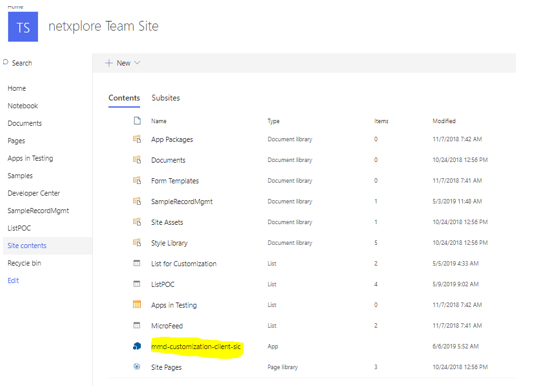
After the installation is complete, refresh the page by selecting F5. The App will be available in the site content.
Now we can use this extension for the new list or we can apply the same for the existing one.
Applying Extension for the New List
- Create a new list.
- When the new list is created, on the Site Contents page, select Settings from the menu of the newly created list.
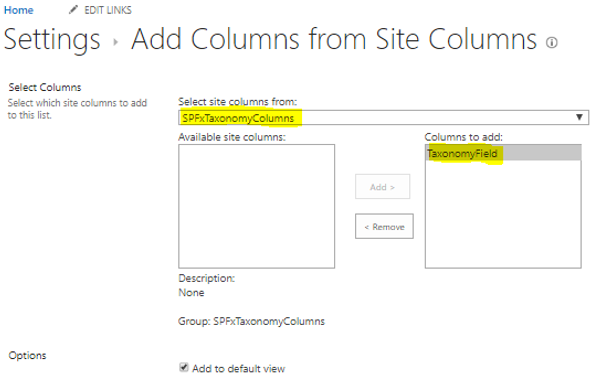
- Under Columns, select Add from existing site columns.
- Under the
SPFxTaxonomyColumnsgroup, select the “TaxonomyField” field that was provisioned from the solution package, and then select OK.
- Column “
TaxonomyField” will be added to your list. - Now rename the column with the desired name, e.g., “
Country”
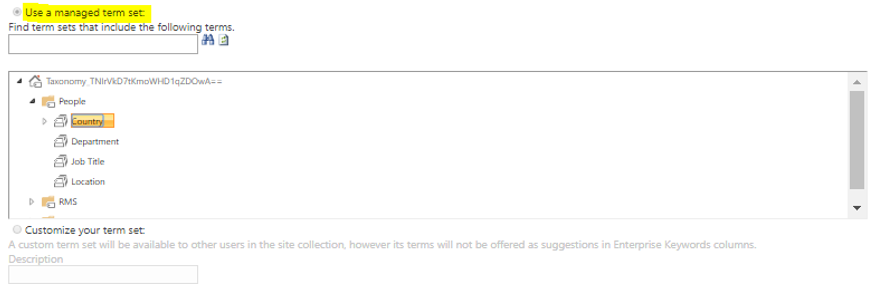
- Configure it with existing Term Set, so that the same can be used in the list. For this example, it is configured with country.
Now if you enter the data in the list and left the
countryfield as blank,countryfield will be displayed with colour background.
Applying Extension in the Existing List for Any Existing Managed Metadata Column
If we have any existing list with managed metadata column which is not created from the site column group “SPFxTaxonomyColumns/TaxonomyField”, we can have the same functionality without modifying the list or adding the new site column.
By associating ClientSideComponentId (mentioned in the elements.xml) of the installed app/extension with the existing field/column (here managed metadata column), we can achieve the same functionality (in this case, colour background for empty cell).
In order to do this, we need to take the help of PowerShell script (PnP).
- First, take the Guid of the list and the name of the column in which the functionality will be applied
- Then, connect to the site using the following command:
Connect-PnPOnline –Url https://abcdxxxxx.sharepoint.com –Credentials (Get-Credential
- Then update the Client Side component ID of the existing field with the Client Side component ID of the installed app/extension using the following command:
Set-PnPField
- Name of the column to be updated:
-Identity 'Country'
- Client Side component ID of the installed app/extension:
-Values @{ClientSideComponentId=[GUID]"250b7e53-ef2f-44f9-a0a5-279f6281dc80"} - GUID of the list to be updated
-List '1af75e99-bdfb-47ae-a51a-960080d15eb6'
Set-PnPField -Identity 'Country'
             -Values @{ClientSideComponentId=[GUID]"250b7e53-ef2f-44f9-a0a5-279f6281dc80"}
             -List '1af75e99-bdfb-47ae-a51a-960080d15eb6'
Once this command gets executed successfully, the managed metadata column will be functioning as mentioned above.
You can add multiple managed metadata column in a single list or in the different list with same updated client side component ID to have the identical functionality. As long as the extension installed in the site and the client side component ID is associated with the controls, it will work as expected.
History
- 10th June, 2019: Initial version