Full on rainbow spirograph using HTML5 and CoffeeScript
5.00/5 (2 votes)
Rainbow spirograph using HTML5 and CoffeeScript.

So intense. We've heard how HTML5's canvas element will provide device-independent in-browser graphics – and now I want a taste! After seeing some magnificentdemos, I started wondering what the plumbing looks like. I haven't touched any graphical code since maybe 1994 in QBasic, so come along with me as I learn.
Also, I'm giving CoffeeScript a spin. I saw a presentation by Daniel Mohl at Codestock a few weeks ago and thought it was fantastic. You write in a terse-clean-"modern" language and get the functionally equivalent JavaScript out the other end. So long to writing function(){...} every three lines! Much of the syntax is based on Ruby, so it's an easy language to read - I'll comment on any syntax that isn't immediately obvious.
But the important question is - what to draw? I follow a few graphic design blogs and remember seeing some neat geometric patterns on veerle's blog done in Adobe Illustrator. These were inspired by the kaleidoscopic artwork of Andy Gilmore – check them out, some of the pieces are kind of hypnotic. The specific creation that motivated Veerle's tutorial can be seen here. It has a beautiful simplicity. As Veerle mentions - we don't want to make an exact replica, but instead use some of the patterns as a starting point of something original.

The absolute first step is to draw a circle, just like it was in the Illustrator tutorial by Veerle. Well, part of a circle. I found it easiest to get the desired results using an "arc". This is a term that simply means "a specific section along the side of the circle". What this entails for the HTML5 canvas is specifying the center point of the circle, the radius, and the angles at the start and end the arc. My trigonometry knowledge has deteriorated over the years (if it ever existed to begin with) – but this is pretty simple. The right-most point on the circle has an angle of 0p, travelling clockwise to the bottom-most point is .5p, the left-most has 1p, up to the top at 1.5p, and a full circle is (of course) 2p. To draw a full circle, you'd type in context.arc(0,0,radius,0,Math.PI * 2). Note: the angles I learned in school were oriented counterclockwise, yet most of the examples I've seen for HTML5 canvas are clockwise – most likely because the y-axis increases in a downward direction instead of up. I'll keep it clockwise here.
Access the HTML5 Canvas using CoffeeScript
But what's this context, you ask? I might have lied about the first step – the super-absolute first step will be to set up the HTML5 canvas object so that we can draw on it. Here's a complete example of a using CoffeeScript in a script tag with the in-browser compiler to accomplish this.
<!DOCTYPE html>
<html>
    <head>
        <title>Full on rainbow Spirograph</title>
        <script src="scripts/jquery-1.7.2.min.js" type="text/javascript"></script>
        <script type="text/coffeescript">
            canvasSize = 300
            # shortcut for jquery's document ready
            jQuery ->
                # get the canvas element (using jquery)
                canvas = $('#myCanvas')[0]
                # set the width and height of the canvas element
                canvas.width = canvas.height = canvasSize
                # get the API object for drawing on the canvas
                ctx = canvas.getContext '2d'

                # make a dark background
                ctx.fillStyle = '#002b36'
                ctx.fillRect(0,0,canvasSize,canvasSize)

                # write some text
                ctx.font = '30px Arial'
                ctx.fillStyle = 'white'
                ctx.fillText("#myCanvas", 80, 150)
        </script>
    </head>
    <body>
        <canvas id="myCanvas"></canvas>
    </body>
    <!--download in-browser coffee-script compiler at -->
    <!-- https://github.com/jashkenas/coffee-script/raw/master/extras/coffee-script.js
        -->
    <!-- coffee-script.js goes AFTER all the CoffeeScript.
        -->
    <script type="text/javascript" src="scripts/coffee-script.js"></script>
</html>
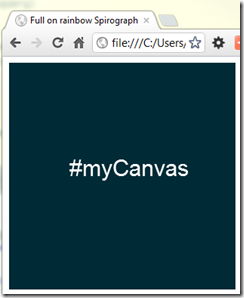
This generates a page containing a dark 300x300 rectangle with "#myCanvas" written in white. This is great for kicking the tires, but the script is getting compiled down to JavaScript each time the page loads. It's preferable to compile it ahead of time. With a little tooling this process becomes nearly transparent. In Visual Studio a great option is the Web Workbench extension by Mindscape. It automatically compiles your CoffeeScript (and Sass and LESS) scripts each time the file is saved. After making this change, the code now looks like...
<!DOCTYPE html>
<html>
    <head>
        <title>Full on rainbow Spirograph</title>
        <script src="scripts/jquery-1.7.2.min.js" type="text/javascript"></script>
        <script src="scripts/CoffeeScript_Compiled.js" type="text/javascript"></script>
    </head>
    <body>
        <canvas id="myCanvas"></canvas>
    </body>
</html>
# CoffeeScript_Compiled.coffee
canvasSize = 300

$ ->
    canvas = $('#myCanvas')[0]
    canvas.width = canvas.height = canvasSize
    ctx = canvas.getContext '2d'

    ctx.fillStyle = '#002b36'
    ctx.fillRect(0,0,canvasSize,canvasSize)

    ctx.font = '30px Arial'
    ctx.fillStyle = 'white'
    ctx.fillText("#myCanvas", 80, 150)
// CoffeeScript_Compiled.js
(function() {
  var canvasSize;

  canvasSize = 300;

  $(function() {
    var canvas, ctx;
    canvas = $('#myCanvas')[0];
    canvas.width = canvas.height = canvasSize;
    ctx = canvas.getContext('2d');
    ctx.fillStyle = '#002b36';
    ctx.fillRect(0, 0, canvasSize, canvasSize);
    ctx.font = '30px Arial';
    ctx.fillStyle = 'white';
    return ctx.fillText("#myCanvas", 80, 150);
  });

}).call(this);
Circular
Now that the canvas is ready to draw on – let's get back to that arc. Like from the Illustrator tutorial, I'm aiming to make a leaf-like object that can be duplicated around a central axis. First I'll create the right side of the leaf.
# cache the math stuff
pi = Math.PI
cos = Math.cos
sin = Math.sin

$ ->
    canvas = $('#spriospectrum-arc')[0]
    ctx = canvas.getContext '2d'

    # make center of the canvas the (0,0) coordinate
    ctx.translate(size/2, size/2)

    # radius of the complete circle
    radius = size / 4

    # create the arc shape
    ctx.beginPath()
    ctx.arc(0, 0, radius, 1.7 * pi, .3 * pi, false)
    ctx.closePath()

    # fill it in with a color
    ctx.fillStyle = '#fdf6e3'
    ctx.fill()
The first bits are again to set up the canvas context – I'll omit those from now on. The first line of interest contains the <a href="http://www.html5canvastutorials.com/advanced/html5-canvas-transform-translate-tutorial/"> translate</a> function – this reorients the context to the specified point. Anything drawn on the canvas afterwards will treat this point as the center. Here I pass in size/2, size/2 - which makes the center of the canvas the 0,0 coordinate.
The next line computes a radius based off the size of the canvas – I simply did a fourth of the canvas dimensions so that it would fit with room to spare.
Next comes the definition of the arc's shape – or the path that the arc will make. The first step is a call to <a href="http://www.html5canvastutorials.com/tutorials/html5-canvas-paths/"> beginPath</a>(). This is done so that the first point of the arc it is drawn as the beginning of the shape. If I had drawn anything else on the canvas before this (which I actually have – more on that later), it would continue the previous path, drawing a line between that last piece and the arc. I've found it's easier to explicitly begin and close the path rather than to assume it's a fresh canvas – especially when you start composing more complex drawings.
Finally – the actual call to <a href="http://www.html5canvastutorials.com/tutorials/html5-canvas-arcs/"> arc</a>! Since we've translated the canvas to center point we're passing in the 0,0 coordinate so that the circle gets drawn in the exact middle. Next comes the radius variable which we've already defined. Now comes the tricky bit – the beginning and end angles of the arc. Going back to the circle schematic – I'm defining the beginning point slightly past the top (to the right), and the end point slightly before the bottom (to the left). By "slightly", I mean by 0.2 for each side. Multiply these values by p, and it's ready to be drawn! Oh – and the final parameter indicates that it should be drawn counter-clockwise. Completely assembled, the call looks like arc(0, 0, radius, 1.7 * pi, .3 * pi, false)
Finally, a fillStyle is specified as a color using hex RGB and the arc is drawn by calling <a href="http://www.html5canvastutorials.com/tutorials/html5-canvas-shape-fill/"> fill</a>(). Voila!
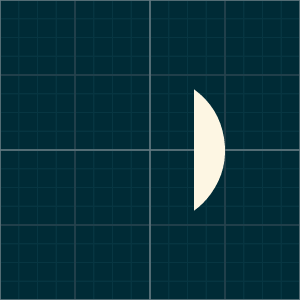
Well... that seems like a lot of work to draw something so trivial! It'll get more interesting in a little bit...
Leafy
The first half of the leaf has been drawn – now for the other half. There are a number of ways to go about this – I'll go over a few that I've found. In this first pass, we'll simply draw another arc on the opposite side of the circle.
ctx.beginPath()
ctx.arc(0, 0, radius, 1.7 * pi, .3 * pi, false)
ctx.arc(0, 0, radius, .7 * pi, 1.3 * pi, false)
ctx.closePath()
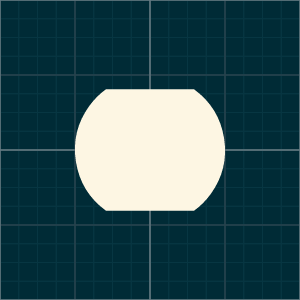
Ok – not a bad start. This time I draw the same arc on the right as before and then continue on with a second call to arc on the left side of the circle – arc(0, 0, radius, .7 * pi, 1.3 * pi, false). The only differences are the start and end angle. Going clockwise, the first arc goes from 1.7p to .3p, and then the second arc continues at .7p and ends at 1.3p. Filling in this path produces the shape seen above.
The obvious problem is all that extra space in the middle of the circle – it's definitely not leafy so it's got to go! I'll start over with just the arc on the right side. To allow us to easily figure out where the leaf will go, it'll be good to have an easy-to-spot anchor point. For this, I chose the bottom bottom-most point of the leaf which which will be located at 0,0. All that's needed is a bit of math.
 It's clear to see that the bottom-most point of the arc is below-and-right to the canvas center point. To do this, we'll move the coordinates for the center of the circle up and to the left. But how much? To calculate, we'll use a little trig. The coordinates on a circle can be calculated, given the angle ?, with
 x = cos(?) and y = sin(?). So, the offset for x will be -cos(.3p) * radius and for y will be -sin(.3p) * radius...
ctx.arc(
        -cos(.3 * pi) * radius,
        -sin(.3 * pi) * radius,
        radius, 1.7 * pi, .3 * pi, false)

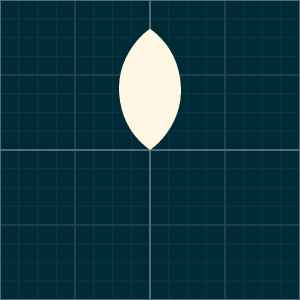
Success! Now the same process for the left-side...
ctx.arc(
        -cos(.7 * pi) * radius,
        -sin(.7 * pi) * radius,
        radius, .7 * pi, 1.3 * pi, false)
Rotate
Another way to skin this cat is to use the rotate() function to spin the canvas around. Now I'll try drawing the first arc, flipping the context, and then drawing the exact same arc.
drawArc = ->
    ctx.arc(
        -cos(.3 * pi) * radius,
        -sin(.3 * pi) * radius,
        radius, 1.7 * pi, .3 * pi, false)

ctx.beginPath()
drawArc()
ctx.rotate(pi) # rotate by half a circle
drawArc()
ctx.closePath()
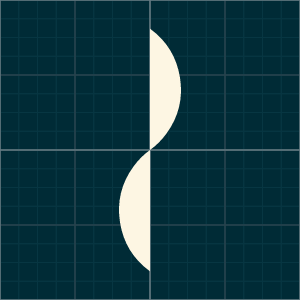
Kind of neat looking – but it obviously didn't turn out quite right. It rotated around the center and ended up both vertically and horizontally on the opposite side. This can be fixed with some additional translation...
startAngle = 1.7 * pi
endAngle = .3 * pi

drawArc = -> ctx.arc(0, 0, radius, startAngle, endAngle, false)

ctx.beginPath()
ctx.translate(-cos(endAngle) * radius, -sin(endAngle) * radius)
drawArc()
ctx.rotate(pi)
ctx.translate(-cos(endAngle) * radius * 2, 0)
drawArc()
ctx.closePath()

This time I'm drawing the arc at 0,0 and doing a translate before the first arc, and a rotate and translate before the second arc. It turns out to look the same the leaf before, but the code gets a bit more muddy. I prefer the previous implementation if this is what it takes. Also notice that I've added a few variables to capture the start and end angles – this will be important in just a little bit...
But first, you may have noticed that the height of the leaf, from bottom to top, is some length, but what exact length is not immediately obvious. It'd be helpful to be able to define the leaf by a given height...
height = size/2
arcDelta = .2
arcAngles =
    start: (1.5 + arcDelta) * pi,
    end: (.5 - arcDelta) * pi

# a little trig to base the leaf's radius on a desired height
radius = height / (sin(arcAngles.end) * 2)

ctx.beginPath()
ctx.arc(
    -cos(arcAngles.end) * radius,
    -sin(arcAngles.end) * radius,
    radius, arcAngles.start, arcAngles.end, false)

ctx.rotate(pi)

ctx.arc(
    -cos(arcAngles.start) * radius,
    -sin(arcAngles.start) * radius,
    radius, arcAngles.start, arcAngles.end, false)

ctx.closePath()

So, to compute the desired radius given for a given height, you can divide that height by the ratio between the center point and the leaf's bottom, sin(endPoint), multiplied by 2 to account for the top half: radius = height / (sin(arcAngles.end) * 2)
Also note that I'm trying the rotate again, except I'm just repositioning the center point of the second arc instead doing that messy translate. This allows the leaf to be defined by only one set of start and end angles which get reused in the second arc.
Finally, I've added another variable, arcDelta, to capture the offset between the top and bottom angle. So, rather than specifying 1.7p and .3p, now we only need .2 which will get added to 1.5p and subtracted from .5p.
Composing
Now to the fun stuff – the process to draw a leaf can now be encapsulated and we can start drawing neat patterns. Let's make a class for the leaf.
class Leaf
    constructor: (height, @fillStyle = '#fdf6e3', arcDelta = .2) ->
        @arcAngles =
            start: (1.5 + arcDelta) * pi,
            end: (.5 - arcDelta) * pi
        @radius = height / (sin(@arcAngles.end) * 2)
    draw: () ->
        # saving now allows the context's state to be restored
        # when we're done drawing
        ctx.save()

        ctx.beginPath()
        ctx.arc(
            -cos(@arcAngles.end) * @radius,
            -sin(@arcAngles.end) * @radius,
            @radius, @arcAngles.start, @arcAngles.end, false)

        ctx.rotate(pi)

        ctx.arc(
            -cos(@arcAngles.start) * @radius,
            -sin(@arcAngles.start) * @radius,
            @radius, @arcAngles.start, @arcAngles.end, false)

        ctx.closePath()

        ctx.fillStyle = @fillStyle
        ctx.fill()

        ctx.restore()
var Leaf;
    Leaf = (function() {

      Leaf.name = 'Leaf';

      function Leaf(height, fillStyle, arcDelta) {
        this.fillStyle = fillStyle != null ? fillStyle : '#fdf6e3';
        if (arcDelta == null) {
          arcDelta = .2;
        }
        this.arcAngles = {
          start: (1.5 + arcDelta) * pi,
          end: (.5 - arcDelta) * pi
        };
        this.radius = height / (sin(this.arcAngles.end) * 2);
      }

      Leaf.prototype.draw = function() {
        ctx.save();
        ctx.beginPath();
        ctx.arc(-cos(this.arcAngles.end) * this.radius, -sin(this.arcAngles.end) *
          this.radius, this.radius, this.arcAngles.start, this.arcAngles.end, false);
        ctx.rotate(pi);
        ctx.arc(-cos(this.arcAngles.start) * this.radius, -sin(this.arcAngles.start) *
          this.radius, this.radius, this.arcAngles.start, this.arcAngles.end, false);
        ctx.closePath();
        ctx.fillStyle = this.fillStyle;
        ctx.fill();
        return ctx.restore();
      };

      return Leaf;

    })();
I've added the compiled JavaScript for comparison to the right. This is where CoffeeScript starts to spread its wings. The class definition is much neater – the prototype functions are taken care of, the this repetitive-keystroke-injury-waiting-to-happen is replaced with @, you've got default values for arguments – and this is just scratching the surface. So, now that we can easily draw some leaves...
ctx.translate(size/2, size) #bottom center
leaves = [
    new Leaf(size, '#c3d5eb')
    new Leaf(size/9 * 8, '#648dcf', .25)
    new Leaf(size/5 * 4, '#12204d', .3)
    new Leaf(size/2, 'white', .35)
    ]
leaf.draw() for leaf in leaves

Now we're cooking with gas! (badum-ching - I'll be here all week). The next step is to draw the spirograph from the Illustrator tutorial...
class SpiroLeaves
    constructor: (leafCount, radius, arcDelta = 1/10) ->
        @rotateAngle = (pi*2)/leafCount
        hsla = (i) -> "hsla(#{i/leafCount*360}, 100%, 50%, .2)"
        @leaves =
            (new Leaf(radius, hsla(i), arcDelta) for i in [leafCount..0])

    draw: (ctx) ->

        ctx.save()
        for leaf in @leaves
            leaf.draw(ctx)
            ctx.rotate(@rotateAngle)
        ctx.restore()

ctx.globalCompositeOperation = "lighter"
spiroLeaves = new SpiroLeaves(18, size / 2)
spiroLeaves.draw(ctx)
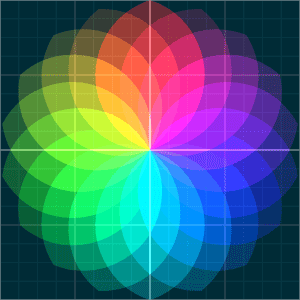
A few notes...
- The
SpiroLeavesconstructor takes...- leafCount – which is how many leaves you want to be drawn... it is used to calculate the angle to rotate between each leaf -
@rotateAngle = (pi*2)/leafCount - radius – which is simply passed as the height for each leaf
- arcDelta – which how "skinny" or "squat" the leaves will be. Can be values between 0 and .5, with the larger the value, the skinnier.
- leafCount – which is how many leaves you want to be drawn... it is used to calculate the angle to rotate between each leaf -
- The hue of each leaf is calculated this function -
hsla = (i) -> "hsla(#{i/leafCount*360}, 100%, 50%, .2)". This produces a gradient hue between 0 and 360, with 100% saturation, 50% lightness, and an alpha value of .2. Read more here at w3.org. - Before drawing, the context is set to
<a href="http://mudcu.be/journal/2011/04/globalcompositeoperation/"> globalCompositeOperation</a> = "lighter"so that the colors in overlapping leaves will reinforce each other.
Finally – let's do something really cool and animate this. I'll draw two overlapping copies of the SpiroLeaves slowly rotating in opposite directions.
spiroLeaves = new SpiroLeaves(18, size)

i = 0
drawFrame = ->
    ctx.clearRect(0,0,size, size)

    ctx.save()
    ctx.globalCompositeOperation = "darker"
    ctx.translate(size / 2 - sin(i/200) * size/20, size / 2 - cos(i/200) * size/20)
    ctx.rotate(i/1000)
    spiroLeaves.draw(ctx)
    ctx.restore()

    ctx.save()
    ctx.globalCompositeOperation = "lighter"
    ctx.translate(size / 2 + sin(i/100) * size/10, size / 2 + cos(i/100) * size/10)
    ctx.rotate(2-i/250)
    spiroLeaves.draw(ctx)
    ctx.restore()
    i += 1

setInterval drawFrame, 25
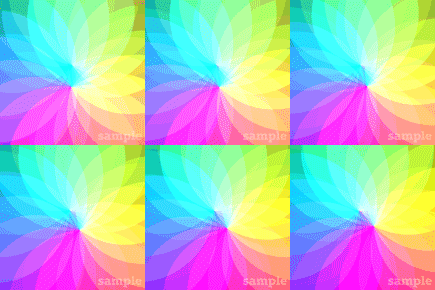
Nice! I've made a jsfiddle with this code setup – feel free to tinker and make something of your own. Here's the link. Also, if you'd like to bring your CPU to its knees, make the canvas full screen.
This is my first foray into both HTM5 Canvas and CoffeeScript and I'm simply sharing what I've learned. So, please feel free to make any corrections and/or suggestions.
HTML5 Canvas resources: HTML5 Canvas Tutorials, HTML5 Canvas Cheat Sheet
CoffeeScript resources: CoffeeScript.org, CoffeeScript Cookbook, The Little Book of CoffeeScript
P.S. – I had mentioned that I had already drawn something on the canvas before the leaves. This would be the grid pattern – here's the code:
# draws a nice grid on the canvas
drawGrid = (ctx, styles) ->
    line = (x1,y1,x2,y2) ->
        ctx.beginPath()
        ctx.moveTo(x1,y1)
        ctx.lineTo(x2,y2)
        ctx.closePath()
        ctx.stroke()

    divideAndStroke = (styles, divisions = 2) ->
        if (styles.length > 1)
            divideAndStroke(styles[1..], divisions * 2)
        ctx.strokeStyle = styles[0]
        for i in [0..size] by (size/divisions)
            line(i,0,i,size)
            line(0,i,size,i)

    ctx.save()
    ctx.lineWidth = 1;

    divideAndStroke styles

    ctx.restore()

$ ->
    # draw all the grids
    $('canvas').each ->
        this.width = size
        this.height = size
        ctx = this.getContext '2d'
        ctx.fillStyle = '#002b36'
        ctx.fillRect(0,0,size,size)
        drawGrid(ctx, ['#657b83','#29434C','#073642','#073642'])