
Facebook Webpart for SharePoint - Part 1
4.38/5 (5 votes)
In this two series article, we will show how to create Facebook webparts. In this first part, we will develop the ShowWall webpart, that will enable you to fetch walls/posts made by a user on your own SharePoint portal. In the second part, we will develop the webpart for posting updates to Facebook.


Introduction
More and more businesses are moving towards using SharePoint portal as their public facing websites, due to the ease of adding functionality through webparts. With the rise of social networks like Facebook and Twitter, you often provide updates on these networks as well as display the updates on your website. So in this two series article, we will show you the way we can create Facebook webparts, that will allow you to update Facebook directly from SharePoint as well as view the updates on your portal. In this first part, we will develop the ShowWall webpart that will enable you to fetch walls/posts made by a user on your own SharePoint portal. All the source code can be downloaded from the attached zip file and is also available on our open source project:
What You’ll Need Preinstalled
To follow along with this demonstration, you will need to have the following requirements installed:
- SharePoint 2010
- Visual Studio 2010
Creating the Project
- Use Visual Studio 2010 for creating a new Empty SharePoint project called
ShowWall.

- When prompted by the SharePoint Customization Wizard, provide a site URL and validate it. Then select the option to Deploy as a farm solution. Click finish.

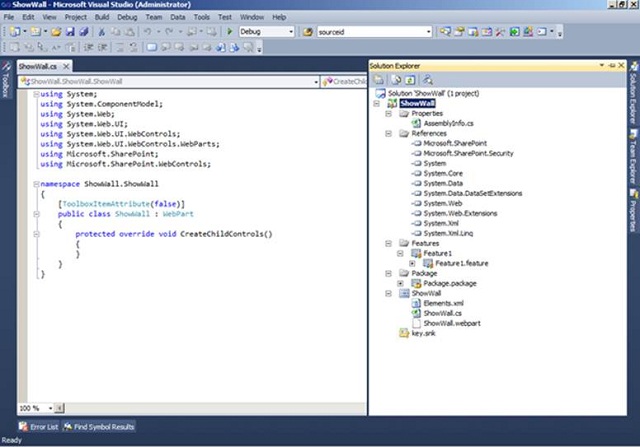
- This will create a solution for you with default project items. Finally, add a new item of type WebPart to the solution.

- This creates a solution. The important files are Element.xml, ShowWall.cs and ShowWall.webpart.
Implementing the Main Code
- Now, we start to put our code in ShowWall.cs class. For serialization purposes, the ShowWall.cs class must have a default, parameter-less constructor. Add a Web control
Label lblMessage. ThisLabelcontrol is used to show exception message occurred during retrieving user walls. We are required to add three namespaces namely:System.IO,system.Net, andMicrosoft.SharePoint.WebPartPagesas this code will use some classes available in those namespaces. - We will need settings for the Facebook userid whose updates we will fetch. To provide this functionality, we need to add a separate region named “
Webpart properties” for storing all webpart properties like user id, wall count and show description. These settings will be used by the SharePoint administrator to change the webpart settings and display. This section is a part of ShowWall.cs class. Please check the below code snippet for providing webpart Facebook Settings Section.#region Webpart Properties [WebBrowsable(true), Category("Facebook Settings"), Personalizable(PersonalizationScope.Shared), WebPartStorage(Storage.Shared), DefaultValue(""), WebDisplayName("Code:"), WebDescription("Please enter authorization code")] public string OAuthCode { get; set; } ..... - To design the webpart UI, we are required to override the
CreateChildControls()method of theWebpartbase class. There are two main purposes of this method - one is to create UI controls to be displayed on webpart and the second purpose is to fetch the authenticated user posted walls and set those to the created UI.ShowPagedFeeds()method is called to configure the paging on the webparttry { if (!String.IsNullOrEmpty(this.OAuthCode)) ) { //first get the authentication token oAuthToken = CommonHelper.GetOAuthToken("read_stream", OAuthClientID, OAuthRedirectUrl, OAuthClientSecret, OAuthCode); this.Page.Header.Controls.Add(CommonHelper.InlineStyle()); ShowPagedFeeds(); } else { .... } } oAuthTokenis the string variable that gets the user authentication token to be used in getting the user feeds from the facebook.This method is written in a common helper class CommonHelper.cs.public static string GetOAuthToken(string scope, string OAuthClientID, string OAuthRedirectUrl, string OAuthClientSecret, string OAuthCode) { string oAuthToken = string.Empty; string url = string.Format("https://graph.facebook.com/oauth/access_token?client_id={0}&redirect_uri={1}&client_secret={2}&code={3}&scope={4}", OAuthClientID, OAuthRedirectUrl, OAuthClientSecret, OAuthCode,scope); url = url.Replace(" ", string.Empty); //get the server certificate for calling https ServicePointManager.ServerCertificateValidationCallback = new System.Net.Security.RemoteCertificateValidationCallback(ValidateFacebookCertificate); WebRequest request = WebRequest.Create(url) as HttpWebRequest; using (HttpWebResponse response = request.GetResponse() as HttpWebResponse) { StreamReader reader = new StreamReader(response.GetResponseStream()); string retVal = reader.ReadToEnd(); oAuthToken = retVal.Substring(retVal.IndexOf("=") + 1, retVal.Length - retVal.IndexOf("=") - 1); } return oAuthToken; }Now the paging is applied on to the webpart so that the administrator can control the number of feeds to be displayed on the SharePoint portal.
private void ShowPagedFeeds()
        {
            UpdatePanel refreshName = new UpdatePanel();
            ScriptManager scriptHandler = new ScriptManager();
            UpdateProgress updateProgress = new UpdateProgress();
            ......

            //Create the header
            if (this.ShowHeader)
            {
                trContent = new TableRow();
                tcContent = new TableCell();
                tcContent.Controls.Add(CommonHelper.CreateHeader(this.UserID, this.oAuthToken, this.ShowHeaderImage));
              ...
            }

            trContent = new TableRow();
            tcContent = new TableCell();

            //get the feeds here
            tcContent.Controls.Add(ShowFeeds(string.Empty));

           .......
            if (ScriptManager.GetCurrent(this.Page) == null)
            {
                this.Controls.Add(scriptHandler);
            }
            this.Controls.Add(refreshName);
            this.Controls.Add(updateProgress);
            lbtnNext.OnClientClick = pagingTable.ClientID + ".style.visibility='hidden';";
}
Inside the above method
ShowFeeds()method is called, which is responsible for the main table inside which all the required information is shown, also it merges the previous feeds with the new ones if the more post button is clicked. This accepts one argument which isFeedUrl, this feedUrl is the URL of the facebook, from where all the feeds are returned (as per the paging). This also keeps the previous feeds into the ViewState so that there will be no hits to the facebook server for the previous feeds.private Table ShowFeeds(string FeedURL) { Table mainTable = null; int i = 0; TableRow tr; TableCell tc; TableCell tcImage; mainTable = new Table(); mainTable.Width = Unit.Percentage(100); mainTable.CellSpacing = 0; mainTable.CellPadding = 0; int feedsCount = 0; JSONObject me = GetFeeds(FeedURL); if (me.Dictionary["data"] != null) { JSONObject[] feedsprev = new JSONObject[1]; JSONObject[] feeds = me.Dictionary["data"].Array; feedsCount = feeds.Length; ... ViewState["html"] = mergedFeeds; foreach (JSONObject feed in mergedFeeds) { .... } } if (feedsCount < WallCount) { ViewState["next"] = ""; } else { ViewState["next"] = me.Dictionary["paging"].Dictionary["next"].String; } return mainTable; }- Now we come to the real meat, i.e., getting the updates from Facebook. Fortunately, the
GraphAPI is very simple.This method returns the JSON object to the ShowFeeds method which contains all the feeds returned from the facebookprivate JSONObject GetFeeds(string FeedURL) { JSONObject obj = null; string url; HttpWebRequest request; try { if (string.IsNullOrEmpty(FeedURL)) { if (!String.IsNullOrEmpty(oAuthToken)) { if (IsPosts) { //if we need to show the user feeds only then call posts rest api url = string.Format("https://graph.facebook.com/{0}/posts?access_token={1}&limit={2}", this.UserID, oAuthToken, WallCount); } else { //else we need to call the feed rest api url = string.Format("https://graph.facebook.com/{0}/feed?access_token={1}&limit={2}", this.UserID, oAuthToken, WallCount); } } else { throw (new Exception("The access token returned was not valid.")); } } else { //this is the url that we got for next feed url...no need to generate the url from scratch url = FeedURL; } //now send the request to facebook request = WebRequest.Create(url) as HttpWebRequest; using (HttpWebResponse response = request.GetResponse() as HttpWebResponse) { ... } } } catch (Exception Ex) { LblMessage = new Label(); LblMessage.Text = Ex.Message; this.Controls.Add(LblMessage); } return obj; } After getting the feeds we need to parse the feeds according to the information that needs to be shown on the webpart. Each information is added into a new row/column depending upon the UI design.
private Table ParseFeed(JSONObject feed, int counter) { Table feedTable; TableRow feedTableRow; TableCell feedTableCell; HyperLink objHyperLink; Table childTable = new Table(); TableRow childRow = new TableRow(); TableCell childCell; //first table row in main feed table feedTable = new Table(); feedTableRow = new TableRow(); feedTable.Rows.Add(feedTableRow); //first of all see what is the type of this feed switch (feed.Dictionary["type"].String) { case "status": if (feed.Dictionary.ContainsKey("message")) { //first cell and add table of status data .. childCell.Text = feed.Dictionary["message"].String; .... } if (feed.Dictionary.ContainsKey("story")) { //first cell and add table of status data .. childCell.Text = feed.Dictionary["story"].String; .... } break; case "photo": case "link": case "video": //create a feed table cell and add child table ... if (feed.Dictionary.ContainsKey("picture")) { ... image.ImageUrl = feed.Dictionary["picture"].String; ..... } if (feed.Dictionary.ContainsKey("message")) { //next row childRow = new TableRow(); childTable.Rows.Add(childRow); childCell = new TableCell(); childRow.Cells.Add(childCell); //Remove the link from the message string message = feed.Dictionary["message"].String; if(message.ToLower().Contains("http")) { message = message.Remove( message.IndexOf("http"), feed.Dictionary["link"].String.Length); } childCell.Text = message; } if (feed.Dictionary.ContainsKey("name")) { ... } if (feed.Dictionary.ContainsKey("description")) { //first cell and add table of status data //next row ... } break; } //second row in main feed table to display the additional information feedTableRow = new TableRow(); feedTable.Rows.Add(feedTableRow); //first cell for feed icon feedTableCell = new TableCell(); feedTableRow.Cells.Add(feedTableCell); ... if (feed.Dictionary.ContainsKey("icon")) { ... } if (feed.Dictionary.ContainsKey("created_time")) { ... } childRow = new TableRow(); childTable.Rows.Add(childRow); //Show Likes info if (feed.Dictionary.ContainsKey("likes")) { .... } else // Show only like image { childCell = new TableCell(); childRow.Cells.Add(childCell); System.Web.UI.WebControls.Image img_Like = new System.Web.UI.WebControls.Image(); img_Like.ImageUrl = ImagePath + "Likes.png"; ... } //show Comments Info if (feed.Dictionary.ContainsKey("comments")) { //Showing Comment image ... img_Comment.ImageUrl = ImagePath + "comments.png"; img_Comment.CssClass = "fbLikes"; childCell.Controls.Add(img_Comment); //Showing Text childCell = new TableCell(); childRow.Cells.Add(childCell); Label lbl_Comment = new Label(); lbl_Comment.Text = "View all " + feed.Dictionary["comments"].Dictionary["count"].String + " Comments"; lbl_Comment.CssClass = "fbLikes mrgn"; // get the story id string[] fbinfo = feed.Dictionary["id"].String.Split('_'); lbl_Comment.Attributes.Add("onClick", "javascript:window.open('https://www.facebook.com/" + this.UserID + "/posts/" + fbinfo[1] + "','_newtab');"); img_Comment.Attributes.Add("onClick", "javascript:window.open('https://www.facebook.com/" + this.UserID + "/posts/" + fbinfo[1] + "','_newtab');"); childCell.Controls.Add(lbl_Comment); } return feedTable; }- The below method uses a relative time which is obtained as follows:
private string RelativeTime(string pastTime) { DateTime origStamp = DateTime.Parse(pastTime.ToString()); DateTime curDate = DateTime.Now; TimeSpan ts = curDate.Subtract(origStamp); string strReturn = string.Empty; if (ts.Days > 365) //years { if (ts.Days == 365) strReturn = "about " + 1 + " year ago"; else strReturn = "about " + ts.Days / 365 + " years ago"; } else if (ts.Days >= 30) //months { if (ts.Days == 30) strReturn = "about " + 1 + " month ago"; else strReturn = "about " + ts.Days / 30 + " months ago"; } else if (ts.Days >= 7) //weeks { if (ts.Days == 7) strReturn = "about " + 1 + " week ago"; else strReturn = "about " + ts.Days / 7 + " weeks ago"; } else if (ts.Days > 0) //days { strReturn = "about " + ts.Days + " days ago"; } else if (ts.Hours >= 1) //hours { strReturn = "about " + ts.Hours + " hours ago"; } else { if (ts.Minutes >= 1) { strReturn = "about " + ts.Minutes + " minutes ago"; } else strReturn = "about " + ts.Seconds + " seconds ago"; } return strReturn; } - Now the Event reciever is added on the click of the show older posts button i.e..
lbtnNext_Click. This calls for more feeds to be shown on the webpart including the previous one.void lbtnNext_Click(object sender, EventArgs e) { tcContent.Controls.Clear(); tcContent.Controls.Add(ShowFeeds(Convert.ToString(ViewState["next"]))); if (string.IsNullOrEmpty(Convert.ToString(ViewState["next"]))) { Literal ltrTxtMessage = new Literal(); ltrTxtMessage.Text = "There are no more posts to show."; tcpaging.Controls.Clear(); tcpaging.Controls.Add(ltrTxtMessage); } } - Finally, on clicking of the more posts button is added over the progress template which stops the page from postback and reloading the whole page again.This is a seperate class file ProgressTemplate.cs which is inherited from the ITemplate interface.
public void InstantiateIn(Control container) { Table tblProgress = new Table(); tblProgress.Width = Unit.Percentage(100); tblProgress.CellSpacing = 0; tblProgress.CellPadding = 0; TableRow trProgress = new TableRow(); TableCell tcProgress = new TableCell(); tcProgress.HorizontalAlign = System.Web.UI.WebControls.HorizontalAlign.Center; tcProgress.Height = 20; tcProgress.Attributes.Add("style", "background-color: #EDEFF4;border: 1px solid #D8DFEA;"); Image img = new Image(); img.ImageUrl = ImagePath; tcProgress.Controls.Add(img); trProgress.Controls.Add(tcProgress); tblProgress.Controls.Add(trProgress); container.Controls.Add(tblProgress); } - If any exception occurs, then we show this in the label.
catch (Exception Ex)
{
    LblMessage = new Label();
    LblMessage.Text = Ex.Message;
    this.Controls.Add(LblMessage);
}
Building and Deploying the Webpart
- Now build the solution in Visual Studio and deploy the solution by clicking on Deploy.
- Make sure that you have safecontrol entry in the web.config of the application for the ShowWall Project DLL.
- After successful deployment, open up your SharePoint website. Go to Site Actions -> Site Settings -> Galleries->Web parts. Here you should find the ShowWall webpart listed.

- To use it on your page, follow the mentioned steps. Open the page where you want to use the Show Wall webpart. Let us create a new page called
ShowWallTestPage. For this, first go to Site Pages->All Pages.

- Click Add new page link and click on Create to create the new page.

- Now you see a blank page. Click Insert Tab under the Editing Tools head, and then click again on Web Part.

- Move to Brickred in Categories Section. Select the ShowWall Webpart and click Add. ShowWall webpart is added to the page. Click Edit WebPart icon available in the right side of ShowWall WebPart Title and click on Edit Web Part.

- This will open Web Part properties window in the right side. Refer to the below image.

- Insert your user id. It is mandatory. Put some integer in Wall Count. It will show the number of posted walls on your web part. If you will check Show description, it will show you the time and date of wall else not. Click Save & Close button available at Top Ribbon. You are done! You should see the webpart filled with your posts on Facebook.

Conclusion
In this article, we saw the process of building a SharePoint webpart integrated with Facebook. This is a good starting point for building almost any functionality provided by Facebook through the graph API, including friends, photos, like button and more. In the second part of this article, we will show you how to post on Facebook through a webpart. However, if you want to do a fast forward and are comfortable with the code, you can directly go to http://code.google.com/p/sharepoint-facebook-wall.
History
- 11th March, 2011: Initial version
Authors
Nitin Gupta is the SharePoint architect and heads the Microsoft Small Business group at BrickRed Technologies. Abhinav Maheshwari is the CTO of BrickRed and has a keen interest in SharePoint and other portal frameworks. Both are members of the Technology Specialists Group at Brickred Technologies, which is a leading provider of mission critical applications for small and medium businesses.