Introduction to Serverless Computing using Azure Functions
1.86/5 (6 votes)
One of the quickest way to get your code up and running in Azure is to use Azure Functions which makes use of the serverless architecture. When we say serverless, it means that we don’t have to worry about the provisioning and maintaining of virtual machines or servers.
One of the quickest way to get your code up and running in Azure is to use Azure Functions which makes use of the serverless architecture. When we say serverless, it means that we don’t have to worry about the provisioning and maintaining of virtual machines or servers. We just write a function and Azure takes care of finding a server to run it on. The server is abstracted away from us and we can focus more on implementing the business logic than worrying about the servers and their maintenance. Azure functions also offers a consumption based billing model so we only pay when our functions are actually running. Azure functions are also scalable. If there is greater load, azure functions will automatically scale to multiple servers to meet the demand. All this happens automatically without any manual intervention.
Functions are nothing but a code that can be triggered in response to some event. Azure functions supports different programming languages like C#, Javascript, F#, Java etc. As it follows an event driven model, functions are executed in response to some events which are called triggers. Azure function support different type of triggers. You can use a timer to execute your function at specific schedule. Other options also include triggering the function when a new Blob is added to the blob storage or a new record is added at CosmosDB. You can also call the function using HttpRequest, which makes it possible to create WebAPI using it as it can respond to different type of requests like GET, POST, PUSH, DELETE.
Apart from triggers, Azure functions also support different type of input and output bindings which makes it easier to integrate with other services. If you want your function to write to table storage, you can use a Table storage output binding. The binding take care of sending the data to the table storage and you only need to define the message that you want to store. Similarly input bindings enables you to read content from EventQueue, CosmosDB etc without writing any boilerplate code as the binding takes care of that. This saves a lot of time as you can focus more on implementing the business logic.
There are different ways in which we can create an Azure Function App. You can create and test them directly using the Azure Portal. You can also use Visual Studio 2017 to create Function App. Visual Studio provides a lot of different templates that can be used and it also allows debugging and testing the functions locally. We can also use “Azure Function Core Tools”, a set of command line cross platform tools which can be used to develop function app without any IDE and in different platforms. Visual Studio Code can also be used to develop function app using the Core tools.
In this post, we will see how to create a function app using the Azure Portal.
Create Function App using Azure Portal
You will need an active azure subscription. If you don’t have one, go to this link and you can register for a free azure account which allows you to use azure services worth $200 free for 30 days.
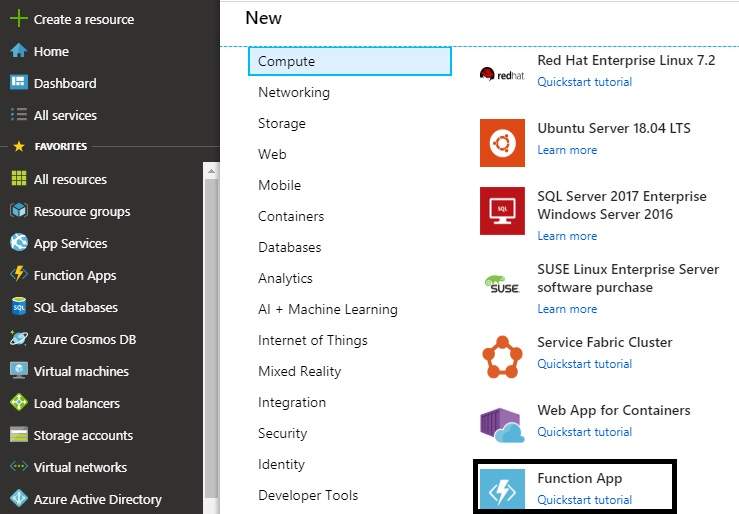
In the Azure Portal, go to dashboard, click ‘Compute’ and select ‘Function App’.
You will get a screen where you will have to add the information about the function app. First give a name to your function app. The name has to be unique as the same will be used to call your function app in Azure. If you enter a name that is already in use, azure will show an error. Next you need to select the Resource Group for the app. A resource group is a logical container for the resources of the solution. It is good for organising the resources together for a particular project. You can enter a name for the resource group or can select the default that azure has provided. Select the OS as ‘Windows’, the hosting plan as ‘Consumption Plan’ , Run Time stack as ‘.Net’. You can select the region which is closest to where you are. Let azure create a storage account also and you can disable the app insights for now. The screen will look similar to one shown below
Once you are done, click ‘Create’ and azure will create the Function App. You will see a notification telling that the deployment is in progress
Once the deployment is complete, the notification will be updated as shown below
Click on Go to Resource and then you will be taken to Function App’s dashboard as shown below
Our function app is ready and running although we haven’t added any functions. You will be able to access the function app using the URL shown. If you click on the URL right now, you will be taken to page which will highlight that the function app is running. Now let’s create our first function
Create a function inside Function App
Click on the “+ New Function” option or the “+” sign beside the functions in the side. The create new Function screen will come asking you to select the development environment
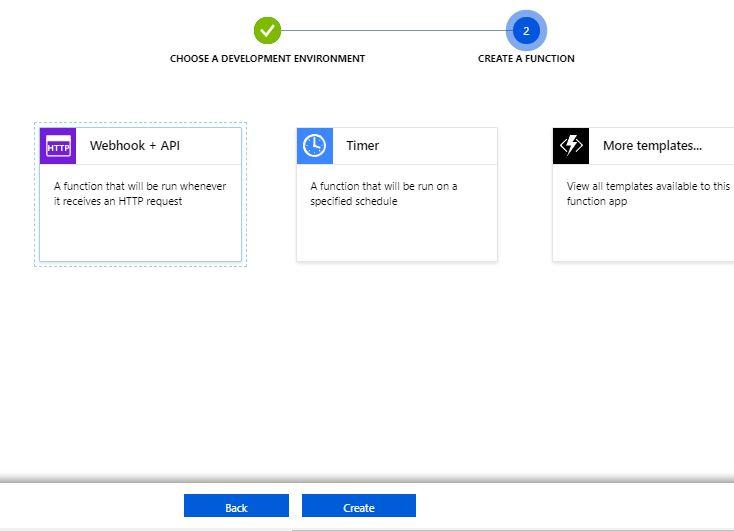
We can develop the function app using variety of tools including Visual Studio, VS code or any other editor. In this example, we will see how we can develop the app in the portal itself without using any development environment. Select the “In-portal” option and click continue. You will be asked to select the type of function as shown below
Select the “WebHook + Api” option as this will enable us to call the function using an HTTP request. Click on Create. Azure will create the function and will generate some default code for the same. The in portal editor will also open where you will be able to modify the code.
The default code is quite simple. It looks for a name parameter in the query string as well as in the request body. If the name is present, the greeting is displayed else you will get the bad request response. Now as the default function app is created, let’s see how we can call the same.
Click on the “Get Function URL” and copy the URL present. If you look at the URL, it will contain the function app path along with the name of the function that you are calling. It also contains a query parameter “code” which is an access code which you need to pass while calling the function. This is used for authentication. Enter the URL in the browser and hit enter.
You will get a response saying “Please pass a name on the query string or in the request body”. As the function expects a name, we will need to pass the same in the request. Add the “&name=John” to the end of the URL and hit enter. Now you will get “Hello, John” as a response.
Great, you just created your first function app that responds to Http request. Thought it doesn’t do anything useful, you got an idea how easy and quick it is to create a function app in azure without using or installing any tools. Also we didn’t have to provision any infrastructure as Azure is taking care of the same. And with the Consumption plan, we only pay when our function is executed.
In my next article, we will take a look at how to create the Function App using visual studio that uses different triggers and also interacts with other azure services.


