
Xamarin Forms - Validations Made Simple
4.90/5 (13 votes)
This article will assume you have basic knowledge of C# and Xamarin Forms and shows how to implement the Xamarin Form Validations using simple Data Annotations applied on the models.
Introduction
Recently, for one of our customers, we have started building a mobile application using Xamarin Forms to support both iOS and Android Devices. One of the design aspects which we need to consider is form validations.
We have the following design goals for the form validations:
- All the field validations (like required, email) should be done on submit of a form. The validation messages should be shown under each field if it fails.
- Since we had the developers who came from ASP.NET MVC technology and they are new to Xamarin Forms, the validation design should be simple to implement and consistent across the technology.
- Like ASP.NET MVC, Data Annotations validation should be followed in Xamarin Forms.
This article will assume you have basic knowledge of C# and Xamarin Forms and shows how to implement the Xamarin Form Validations using simple Data Annotations applied on the models.
Pre-requisites
You will need the latest version of Visual Studio 2017 with Xamarin workloads and emulators installed.
Step 1 – Create a New Xamarin Forms Project
Let's start creating a new Xamarin Forms project using Visual Studio 2017 and choose File -> New -> Project.

In the New Project windows, Choose Cross-Platform -> Mobil App (Xamarin Forms) as shown below:

Enter the project name as Validation Demo and click OK, the below option dialog will be displayed:
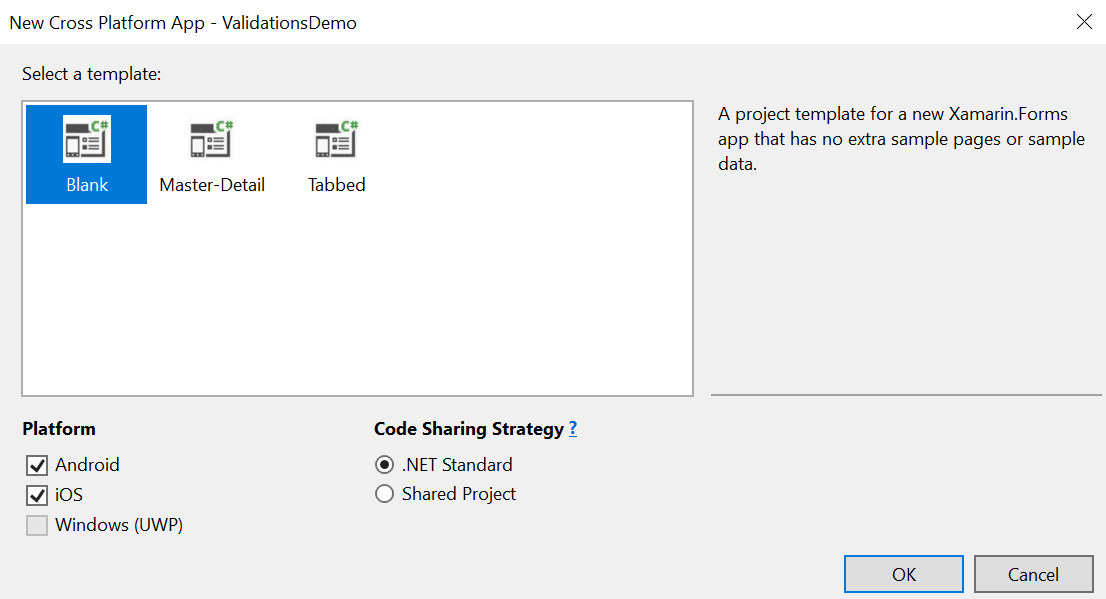
In the above screen, select Blank Project and click OK, the below project will be created.

Select the emulator and run the project, you should be able to see the Main Page with welcome text as below:

Step 2 – Create a Login Page using XAML
For our validation example, we will add two entry fields (Username and Password) along with Login button to our MainPage.xaml.
We will implement the below validation logic when we submit the form:
- The field
Usernameis required. - The field
Usernameshould be a valid email address. - The field
usernameshould be of maximum length of 20 characters. - The field
Passwordis required.
Let's open the MainPage.xaml and modify the XAML as below:
<?xml version="1.0" encoding="utf-8" ?>
<ContentPage xmlns="http://xamarin.com/schemas/2014/forms"
             xmlns:x="http://schemas.microsoft.com/winfx/2009/xaml"
             xmlns:local="clr-namespace:ValidationsDemo"
             x:Class="ValidationsDemo.MainPage">
    <StackLayout Padding="20">
        <Label Text="Login" HorizontalOptions="Center" FontSize="50"/>
        <Label Text="{Binding Message}"
        IsVisible="False" TextColor="Red"/>
        <Label Text="Username"/>
        <Entry Text="{Binding LoginModel.Username}"/>
        <Label x:Name="LoginModel_UsernameError"
        IsVisible="False" TextColor="Red" />
        <Label Text="Password" />
        <Entry IsPassword="true" Text="{Binding LoginModel.Password}"/>
        <Label x:Name="LoginModel_PasswordError"
        IsVisible="False" TextColor="Red" />
        <StackLayout Orientation="Horizontal">
            <Switch IsToggled="{Binding LoginModel.RememberMe}"
            HorizontalOptions="Start" />
            <Label Text="Remember"
            HorizontalOptions="FillAndExpand" VerticalTextAlignment="Center"/>
        </StackLayout>
        <Button Text="Login"
        Command="{Binding LoginInCommand}" BackgroundColor="LightBlue" />
    </StackLayout>
</ContentPage>
Note: For our validations to work, we are adding error labels under each entry fields with naming convention Entry Binding Field Name Error. The "." Is replaced with "_".
Step 3 – Create Login Model Class
Create the Login Model class which holds our validation logic as below. Make sure to add System.ComponentModel.Annotations Nuget Package to the project.
using System.ComponentModel.DataAnnotations;
namespace ValidationsDemo.Model
{
    public class LoginModel
    {
        [Required, MaxLength(20), EmailAddress]
        public string Username { get; set; }
        [Required]
        public string Password { get; set; }
        public bool RememberMe { get; set; }
    }
}
Note: In the above model, all our validation requirements are applied as data annotations using Required, MaxLength(20) and EmailAddress attributes.
Step 4 – Create View Model Class
Since Xamarin forms recommend to use MVVM patterns, we will create a View Model Class with name MainPageViewModel.cs as shown below:
namespace ValidationsDemo.ViewModel
{
    public class MainPageViewModel
    {
        public LoginModel LoginModel { get; set; } = new LoginModel();
        public ICommand LoginInCommand { get; }
        private Page _page;
        public MainPageViewModel(Page page)
        {
            _page = page;
            LoginInCommand = new Command(async () => await LoginAsync());
        }

        private async Task LoginAsync()
        {
            if (!ValidationHelper.IsFormValid(LoginModel, _page)) { return; }
            await _page.DisplayAlert("Success", "Validation Success!", "OK");
        }
    }
}
Note: In the above code, in LoginAsync command, we have a ValidationHelper.IsFormValid(LoginModel, _page) code which will do all the magic of validation to the form based on the validation attributes. We will look into the details of Validation Helper class in the next section.
Step 5 – Bind the View Model Class to Page
Open the MainPage.xaml.cs file and just assign the ViewModel class instance to Main Page Binding Context as shown below:
using ValidationsDemo.ViewModel;
using Xamarin.Forms;
namespace ValidationsDemo
{
    public partial class MainPage : ContentPage
    {
        public MainPage()
        {
            InitializeComponent();
            this.BindingContext = new MainPageViewModel(this);
        }
    }
}
Step 6 – Create Validation Helper Class
Create a new class called ValidationHelper and add a public method IsFormValid with signature as below:
public static class ValidationHelper
    {
        public static bool IsFormValid(object model, Page page)
        {
            HideValidationFields(model, page);
            var errors = new List<ValidationResult>();
            var context = new ValidationContext(model);
            bool isValid = Validator.TryValidateObject(model, context, errors, true);
            if (!isValid)
            {
                ShowValidationFields(errors, model, page);
            }
            return errors.Count() == 0;
        }
        private static void HideValidationFields
            (object model, Page page, string validationLabelSuffix = "Error")
        {
            if (model == null) { return; }
            var properties = GetValidatablePropertyNames(model);
            foreach (var propertyName in properties)
            {
                var errorControlName =
                $"{propertyName.Replace(".", "_")}{validationLabelSuffix}";
                var control = page.FindByName<Label>(errorControlName);
                if (control != null)
                {
                    control.IsVisible = false;
                }
            }
        }
        private static void ShowValidationFields
        (List<ValidationResult> errors,
        object model, Page page, string validationLabelSuffix = "Error")
        {
            if (model == null) { return; }
            foreach (var error in errors)
            {
                var memberName = $"{model.GetType().Name}_{error.MemberNames.FirstOrDefault()}";
                memberName = memberName.Replace(".", "_");
                var errorControlName = $"{memberName}{validationLabelSuffix}";
                var control = page.FindByName<Label>(errorControlName);
                if (control != null)
                {
                    control.Text = $"{error.ErrorMessage}{Environment.NewLine}";
                    control.IsVisible = true;
                }
            }
        }
        private static IEnumerable<string> GetValidatablePropertyNames(object model)
        {
            var validatableProperties = new List<string>();
            var properties = GetValidatableProperties(model);
            foreach (var propertyInfo in properties)
            {
                var errorControlName = $"{propertyInfo.DeclaringType.Name}.{propertyInfo.Name}";
                validatableProperties.Add(errorControlName);
            }
            return validatableProperties;
        }
        private static List<PropertyInfo> GetValidatableProperties(object model)
        {
            var properties = model.GetType().GetProperties().Where(prop => prop.CanRead
                && prop.GetCustomAttributes(typeof(ValidationAttribute), true).Any()
                && prop.GetIndexParameters().Length == 0).ToList();
            return properties;
        }
    }
Step 7 – Run the Project and Test the Validations
We are done with the basic form validation implementation and it is time to test. Let’s run the project by targeting available emulator and you should be seeing the below Login screen. To execute various test cases, click on Login button.


Points of Interest
Inserting an error label below each entry field with proper naming conventions in XAML page and calling ValidationHelper.IsFormValid will accomplish our validations.
History
- 19th January, 2019: Initial version
This is my first article, and I hope you will like to save your time by using validation helper.