
Building a Restful API With ASP.NET Web API
4.80/5 (14 votes)
In this article we'll build test and consume an asp.net web api.
Introduction
Let’s have a quick review of ASP.NET MVC Architecture. So when the request arrives at our application MVC Framework hands off that request to an action in a controller, this action most of the time returns a view which is then parsed by razor view engine and then eventually HTML markup is returned to the client. So in this approach html markup is generated on the server and then return to the client.

There is an alternative way to generate the HTML markup, we can generate it on the client. So instead of our action returning HTML markup, they can return raw data.

What is the benefit of this approach?
There are numbers of benefits of generating markup on the client.
- It requires fewer server resources (it potentially improves the scalability of the application because each client will be responsible for generating their own views)
- Raw Data often requires less bandwidth than HTML markup. So the data potentially arrives faster at the client. And this can improve the perceived performance of the application.
- This approach supports the broad range of clients like mobile and tablet apps.
These apps are simply called endpoints get the data and generate the view locally. We call these endpoints Data Services (Web APIs) because they just return data, not markup.
Web APIs are not just limited to cross devices, it also widely used in our Web Applications to add the new features like many popular websites like youtube, facebook and twitter expose public data services which we can consume in our web applications. We can merge their data with the data in our application and provide new experiences to the new user. These are the benefits.
These data services are just not only to get the data, we’ve services to modify the data like adding the customer etc. The framework we use to build these data services is called web APIs. This framework was developed after ASP.Net MVC but it follows the same architecture and principals of ASP.NET MVC so it has routings, controllers, actions, action result and so on. There are also few minor differences that we’ll see here. In .Net Core, Microsoft has merged these both frameworks (ASP.NET MVC & ASP.NET Web API) into a single framework.
Restful Convention
So you know what is http services and what is web api. Here we’ll develop an application which supports few different kinds of requests.
GET /api/customers (to get the list of customers)
GET /api/customers/1 (to get the single customer)
POST /api/ customers (to add the customer and add the customer data in request body)
Don’t confuse about GET and POST request of the data, we use get a request to get the list of the resource or data. And we use post request to create the new one.
Now to update the student we use PUT request.
PUT /api/customers/1
So the id of the customer is in the url and the actual data or properties to update will be in the request body. And finally to delete the student.
Delete /api/customers/1
We send HttpDelete request to the endpoint. So what you see here, in terms of request types and endpoints is a standard convention referred to ask REST (Representational State Transfer)
Building An API
This class derives from ApiController as opposed to Controller. If you’re working with any existing project then just add a new folder in controllers folder and add the api controller here. And add these actions but before defining the actions in apis, this is my Customer model class
public class Customer
{
    public int Id { get; set; }

    [Required]
    [StringLength(255)]
    public string Name { get; set; }

    public bool IsSubscribedToNewsLetter { get; set; }

    [Display(Name = "Date of Birth")]
    public DateTime? Birthdate { get; set; }

    [Display(Name = "Membership Type")]
    public byte MembershipTypeId { get; set; }

    // it allows us to navigate from 1 type to another
    public MembershipType MembershipType { get; set; }
}
And here is my DbContext class
public class ApplicationDbContext : IdentityDbContext<ApplicationUser>
{
    public ApplicationDbContext()
        : base("DefaultConnection", throwIfV1Schema: false)
    {
    }

    public static ApplicationDbContext Create()
    {
        return new ApplicationDbContext();
    }

    public DbSet<Customer> Customers { get; set; }
    public DbSet<MembershipType> MembershipTypes { get; set; }
}
Now it would be easy for you to write actions for Api.
public IEnumerable<Customer> GetCustomers()
{
}
Because we’re returning a list of objects. This action by convention will respond to
// Get /api/customers
So this is the convention built into ASP.Net Web API. Now in this action we gonna use our context to get the customers from the database.
namespace MyAPI.Controllers.Api
{
    public class CustomersController : ApiController
    {
        private readonly ApplicationDbContext _context;

        public CustomersController()
        {
            _context = new ApplicationDbContext();
        }

        // GET /api/customers
        public IEnumerable<Customer> GetCustomers()
        {
            return _context.Customers.ToList();
        }
    }
}
If the resource isn’t found, we return not found httpresponse otherwise we return the object.
// POST /api/customers
[HttpPost]
public Customer CreateCustomer(Customer customer)
{
}
So this is the customer argument will be in the request body and ASP.NET Web API Framework will automatically initialize this. Now we should mark this action with HttpPost because we’re creating the resource. And if we’re following the naming convention then we don’t even need to place the action verb on the action.
// POST /api/customers
public Customer PostCustomer(Customer customer)
{
}
But originally it isn’t so good approach, Let’s suppose you refactor the code in future and rename your action then surely your code will break. So always prefer to use Http verbs on the top of action.
Now let’s insert the customer object into the database with post request of api action.
// POST /api/customers
[HttpPost]
public Customer CreateCustomer(Customer customer)
{
    if (!ModelState.IsValid)
    {
        throw new HttpResponseException(HttpStatusCode.BadRequest);
    }

    _context.Customers.Add(customer);
    _context.SaveChanges();

    return customer;
}
Another action let’s suppose we want to update the record.
// PUT /api/customers/1
[HttpPut]
public void UpdateCustomer(int id, Customer customer)
{
    if (!ModelState.IsValid)
    {
        throw new HttpResponseException(HttpStatusCode.BadRequest);
    }

    var custmr = _context.Customers.SingleOrDefault(x => x.Id == id);

    // Might be user sends invalid id.
    if (custmr == null)
    {
        throw new HttpResponseException(HttpStatusCode.NotFound);
    }

    custmr.Birthdate = customer.Birthdate;
    custmr.IsSubscribedToNewsLetter = customer.IsSubscribedToNewsLetter;
    custmr.Name = customer.Name;
    custmr.MembershipTypeId = customer.MembershipTypeId;

    _context.SaveChanges();
}
Here in this scenario, different people have different opinions to return the void or the object. And if we make the delete action of Api,
// Delete /api/customers/1
[HttpDelete]
public void DeleteCustomer(int id)
{
    var custmr = _context.Customers.SingleOrDefault(x => x.Id == id);

    // Might be user sends invalid id.
    if (custmr == null)
    {
        throw new HttpResponseException(HttpStatusCode.NotFound);
    }

    _context.Customers.Remove(custmr);
    // Now the object is marked as removed in memory

    // Now it is done
    _context.SaveChanges();
}
This is how we use restful convention to build the api.
Testing the API
If we run the application and request the api controller, we can see the list of customers in XML based language.
<a href="http://localhost:53212/api/customers">http://localhost:53212/api/customers</a>

So ASP.NET Web API has what we call media formatter. So what we return from an action (in our case the list of customer will be formatted based on what the client asks) let me explain what I mean and what I’m trying to say.
Inspect the browser on above screen and refresh the page, here you’ll see the customer request.

Here look at Content Type, if you don’t set the content type header in our request by default the server assumes application/xml.
Note: General is the Request Header, Response Headers is our Response Header here. As you can see in Request Header, we don’t have any content type. Now let me show you the best to test the api and get the data in json.
Install Postman Desktop App in your machine. And copy the browser link with localhost port number and paste it into the postman.
And here we put the url of the request with localhost and here the response comes back in json.

And if we click on the Header tab, here we’ll see our request header content type is application/json

Most of the time we’ll be using json because it is native for javascript code and much faster than xml. XML media format is largely used in large organizations like government because they’re behind the modern technology. Json format is more lightweight because it doesn’t have redundant opening and closing tabs like xml.
Little Confusion:
Sometimes when you’re working with Apis or with postman, mostly people confuse about the interface of Postman because they have not ever used postman before. It is very simple just keep in mind,

So if you’re working with request and trying to change some information of request then focus on request header and if you’re monitoring the response then watch the results in response headers. As they’re looking same and sometimes when the scroll down the request header vanishes. So don’t confuse about the things.
Now let’s insert a customer in the database with Api Post Action.

Select the Post request from the dropdown and in request body tab. You can insert the customer with key value pairs on clicking form-data. But most of the time we use json format. So click on raw and write the json here.

Don’t put Id property in json because it is hard and fast rule when we insert the data in database, the id is automatically generated on the server.
Now click on Send Button and here I’ve successfully inserted the data with Post api action and gets the response.

Here the above block is request block and the below block is response block. You might face some kind of error here like this.

If you read the error message ‘The request entity’s media type ‘text/plain’ is not supported for this resource’. This is the error message.
Now to resolve this error. Click on Header tab and add the value for content-type (‘application/json’)

And here the values has been added. Look the status code for request is 200 OK and we can see the response body below.
Now let’s update the customer entity.

And look it has been updated.

Now let’s delete one record similarly, just select Delete in dropdown and specify the id with forward slash in the url and click on Send button. It will be automatically deleted.
Best Practice:
The best practice is when you build the api and before consuming it in application. It would be better to test the api through Postman.
Data Transfer Objects (DTO)
So now we’ve build this api but there are couple of issues with this design. Our api receives or returns Customer object. Now you might be thinking what’s wrong with this approach? Actually Customer object is part of the domain model of our application. It is considered implementation details which can change frequently as we implement new features in our applications and these changes potentially grab existing clients that are dependent on the customer object i.e. if we rename or remove our property this can impact the client that are dependent upon the property. So basically we make the contract of the api as stable as possible. And here we use DTOs.
DTO is the plain data structure and is used to transfer data from the client on server or vice versa that’s why we called it data transfer object. By creating DTOs, we reduces the chances of our APIs breaking as we refactor our domain model. Ofcourse we should remember that changing these DTOs that can be costly. So the most important thing is our api should not receive or return the Customer model class object.
Another issue by using domain object here in API is we’re opening the security holes in our application. A hacker can easily pass additional data in json and they will be mapped to our domain object. What if one of this property should not be updated, a hacker can easily bypass this but if we use DTO we can simply exclude the properties that can be updated. So add a new folder in your project with name DTOs and Add the class CustomerDTO and copy all the properties of Customer domain model class with their data annotation attributes and paste it in CustomerDTO. Now remove the navigation properties from CustomerDTO because it is creating the dependency to MembershipType domain model class.
namespace MyAPI.DTOs
{
    public class CustomerDTO
    {
        public int Id { get; set; }

        [Required]
        [StringLength(255)]

        public string Name { get; set; }

        public bool IsSubscribedToNewsLetter { get; set; }

        public DateTime? Birthdate { get; set; }

        public byte MembershipTypeId { get; set; }
    }
}
Now the next thing is we want to use to CustomerDTO in our api instead of Customer domain class object. So to reduce a lot of code to bind the properties one by one, we use Automapper.
Automapper
Install the automapper package from Package Manager Console.
PM > Install-Package Automapper -version:4.1
Now add the new class in App_Start (MappingProfile.cs) and inherit it from Profile.
using AutoMapper;

namespace MyAPI.App_Start
{
    public class MappingProfile : Profile
    {
    }
}
Now create the constructor and add the mapping configuration between 2 types.
public class MappingProfile : Profile
{
    public MappingProfile()
    {
        Mapper.CreateMap<Customer, CustomerDTO>();
        Mapper.CreateMap<CustomerDTO, Customer>();
    }
}
The first argument of the CreateMap is the Source and the second one is destination. When we use the CreateMap method, automapper automatically uses the reflection to scan these types. It finds their properties and maps them based on their names. This is why we called automapper (a convention based mapping tool) because it uses the property names as the convention to map objects. So here is mapping profiles, now we need to load it when the application started.
Now open the Global.asax.cs file and write the code for Application_Start()
protected void Application_Start()
{
    Mapper.Initialize(c => c.AddProfile<MappingProfile>());
    GlobalConfiguration.Configure(WebApiConfig.Register);
    AreaRegistration.RegisterAllAreas();
    FilterConfig.RegisterGlobalFilters(GlobalFilters.Filters);
    RouteConfig.RegisterRoutes(RouteTable.Routes);
    BundleConfig.RegisterBundles(BundleTable.Bundles);
}
Now open CustomerController of Api. And let’s start changes here.
// GET /api/customers
public IEnumerable<CustomerDTO> GetCustomers()
{
    return _context.Customers.ToList();
}
Now we want to return CustomerDTO type instead of Customer object. Now we need to map this Customer object to CustomerDTO. So we use linq extension method.
// GET /api/customers
public IEnumerable<CustomerDTO> GetCustomers()
{
    return _context.Customers.ToList()
    .Select(Mapper.Map<Customer, CustomerDTO>);
}
Mapper.Map<Customer, CustomerDTO>
This delegates does the mapping. As we can see we’re not placing function call small brackets because we’re not calling the function here. We just reference it here. Mapping function automatically calls, when it executes.
// GET /api/customers/1
public Customer GetCustomer(int id)
{
    var customer = _context.Customers.SingleOrDefault(x => x.Id == id);

    // This is part of the RESTful Convention
    if (customer == null)
    {
        throw new HttpResponseException(HttpStatusCode.NotFound);
    }

    return customer;
}
In this function, as we are returning one object so we don’t use Select extension method. Here we directly use mapper
// GET /api/customers/1
public CustomerDTO GetCustomer(int id)
{
    var customer = _context.Customers.SingleOrDefault(x => x.Id == id);

    // This is part of the RESTful Convention
    if (customer == null)
    {
        throw new HttpResponseException(HttpStatusCode.NotFound);
    }

    return Mapper.Map<Customer, CustomerDTO>(customer);
}
Now come on the next CreateCustomer action,
// POST /api/customers
[HttpPost]
public CustomerDTO CreateCustomer(CustomerDTO customerDto)
{
    if (!ModelState.IsValid)
    {
        throw new HttpResponseException(HttpStatusCode.BadRequest);
    }

    var customer = Mapper.Map<CustomerDTO, Customer>(customerDto);
    _context.Customers.Add(customer);
    _context.SaveChanges();

    // Here we make our CustomerDto completely fill, because after
    // adding customer to Customer table (id is assigned to it)
    // & Now we assigned this id to customerDto
    customerDto.Id = customer.Id;

    return customerDto;
}
This is how we works with Dtos and Automapper.
Now let’s update the UpdateCustomer action api method.
// PUT /api/customers/1
[HttpPut]
public void UpdateCustomer(int id, CustomerDTO customerDto)
{
    if (!ModelState.IsValid)
    {
        throw new HttpResponseException(HttpStatusCode.BadRequest);
    }

    var custmr = _context.Customers.SingleOrDefault(x => x.Id == id);

    // Might be user sends invalid id.
    if (custmr == null)
    {
        throw new HttpResponseException(HttpStatusCode.NotFound);
    }

    Mapper.Map<CustomerDTO, Customer>(customerDto, custmr);
    //custmr.Birthdate = customerDto.Birthdate;
    //custmr.IsSubscribedToNewsLetter = customerDto.IsSubscribedToNewsLetter;
    //custmr.Name = customerDto.Name;
    //custmr.MembershipTypeId = customerDto.MembershipTypeId;

    _context.SaveChanges();
}
So this is how we map objects using Automapper. Now automapper has a few features that you may find useful in certain situations i.e. if your property names don’t match, you can override the default convention or you can exclude some of its properties from mapping or you may wanna create custom mapping classes. If you want to learn more, you can learn from Automapper documentation.
IHttpActionResult
Alright look at this CreateCustomer action method
// POST /api/customers
[HttpPost]
public CustomerDTO CreateCustomer(CustomerDTO customerDto)
{
    if (!ModelState.IsValid)
    {
        throw new HttpResponseException(HttpStatusCode.BadRequest);
    }

    var customer = Mapper.Map<CustomerDTO, Customer>(customerDto);
    _context.Customers.Add(customer);
    _context.SaveChanges();

    // Here we make our CustomerDto completely fill, because after
    // adding customerDto to Customer table (id is assigned to it)
    // & Now we assigned this id to customerDto
    customerDto.Id = customer.Id;

    return customerDto;
}
Here we’re simply returning CustomerDto which would eventually result in response like this

But in restful convention when we create a resource, the status code should be 201 or created. So we need more control over the response return from an action and to make this happen, instead of returning CustomerDto we return IHttpActionResult. This interface is similar to ActionResult we’ve in MVC framework so it is implemented by few different classes and here in ApiController, we’ve bunch of methods to create an instance of one of the classes that implement IHttpActionResult interface.
Now here if the model is not valid instead of throwing an exception, use the helper method BadRequest()
// POST /api/customers
[HttpPost]
public IHttpActionResult CreateCustomer(CustomerDTO customerDto)
{
    if (!ModelState.IsValid)
        return BadRequest();

    var customer = Mapper.Map<CustomerDTO, Customer>(customerDto);
    _context.Customers.Add(customer);
    _context.SaveChanges();

    // Here we make our CustomerDto completely fill, because after
    // adding customerDto to Customer table (id is assigned to it)
    // & Now we assigned this id to customerDto
    customerDto.Id = customer.Id;

    return Created(new Uri(Request.RequestUri + "/" + customer.Id),
        customerDto);
}
As we can see if the ModelState is not valid, it is returning BadRequest and if customer has been added then we return the Uri with this resource id in Created() with the object we’ve finally created the new one.

Look here we created one more resource and now the status is 201 Created. And if we look the location tab

That’s the uri of newly created customer. This is part of the restful convention. So in Web Apis, we preferred to use IHttpActionResult as the returntype of your actions.
Now let’s make changes in the rest of the actions in this Web Api. And here is the complete code of our Api
public class CustomersController : ApiController
{
    private readonly ApplicationDbContext _context;

    public CustomersController()
    {
        _context = new ApplicationDbContext();
    }

    // GET /api/customers
    public IHttpActionResult GetCustomers()
    {
        return Ok(_context.Customers.ToList()
            .Select(Mapper.Map<Customer, CustomerDTO>));
    }

    // GET /api/customers/1
    public IHttpActionResult GetCustomer(int id)
    {
        var customer = _context.Customers.SingleOrDefault(x => x.Id == id);

        // This is part of the RESTful Convention
        if (customer == null)
            return NotFound();

        return Ok(Mapper.Map<Customer, CustomerDTO>(customer));
    }

    // POST /api/customers
    [HttpPost]
    public IHttpActionResult CreateCustomer(CustomerDTO customerDto)
    {
        if (!ModelState.IsValid)
            return BadRequest();

        var customer = Mapper.Map<CustomerDTO, Customer>(customerDto);
        _context.Customers.Add(customer);
        _context.SaveChanges();

        // Here we make our CustomerDto completely fill, because after
        // adding customerDto to Customer table (id is assigned to it)
        // & Now we assigned this id to customerDto
        customerDto.Id = customer.Id;

        return Created(new Uri(Request.RequestUri + "/" + customer.Id),
            customerDto);
    }

    // PUT /api/customers/1
    [HttpPut]
    public IHttpActionResult UpdateCustomer(int id, CustomerDTO customerDto)
    {
        if (!ModelState.IsValid)
        {
            return BadRequest();
        }

        var custmr = _context.Customers.SingleOrDefault(x => x.Id == id);

        // Might be user sends invalid id.
        if (custmr == null)
        {
            return NotFound();
        }

        Mapper.Map<customerdto, customer="">(customerDto, custmr);

        _context.SaveChanges();
        return Ok(custmr);
    }

    // Delete /api/customers/1
    [HttpDelete]
    public IHttpActionResult DeleteCustomer(int id)
    {
        var custmr = _context.Customers.SingleOrDefault(x => x.Id == id);

        // Might be user sends invalid id.
        if (custmr == null)
        {
            return NotFound();
        }

        _context.Customers.Remove(custmr);
        // Now the object is marked as removed in memory

        // Now it is done
        _context.SaveChanges();

        return Ok(custmr);
    }
}</customerdto,>
Let me mention this point here, as you can see we’ve 2 parameters in UpdateCustomer. If the parameter is primitive type like we’ve int id then we’ll place this parameter in route url or with query string. And if we want to initialize our complex type like here we’ve CustomerDTO then we’ll always initialize it from request body in postman. So don’t be confuse about this thing here.
Now let’s update and delete the json object through postman. If you focus on the UpdateCustomer action parameter, here we’ve 1st parameter has record id and the 2nd parameter is the Customer domain model class object.
Look it is working with Id in request header because our entity is complete here.

But if we don’t provide the id in the request header, we’ll get the error.

And the exceptionMessage is “The property ‘Id’ is part of the object’s key information and cannot be modified.” Actually this exception happens on this line,
Mapper.Map<CustomerDTO, Customer>(customerDto, custmr);
Because customerDto doesn’t contain the Id but custmr (which is the object variable of Customer model class) has an Id property. And here we need to tell Automapper to ignore Id during mapping to customerDto to custmr. So, come on to the Mapping Profile
public class MappingProfile : Profile
{
    public MappingProfile()
    {
        Mapper.CreateMap<Customer, CustomerDTO>();
        Mapper.CreateMap<CustomerDTO, Customer>()
            .ForMember(c => c.Id, opt => opt.Ignore());
    }
}
And look it is working now,
Consuming the Web API
After proper testing of the api, now it is the time of consuming the api. Most important thing is which I would like to mention here. Now our api is ready, you can consume this api in any client. Here we’re showing you the sample of consuming with Visual Studio application. If you’ve build this api with us then you can consume it in php, python, in any framework application with the help of jquery ajax. Now we’ll use jquery to call our api. Look this screen, here I’m showing some customers.
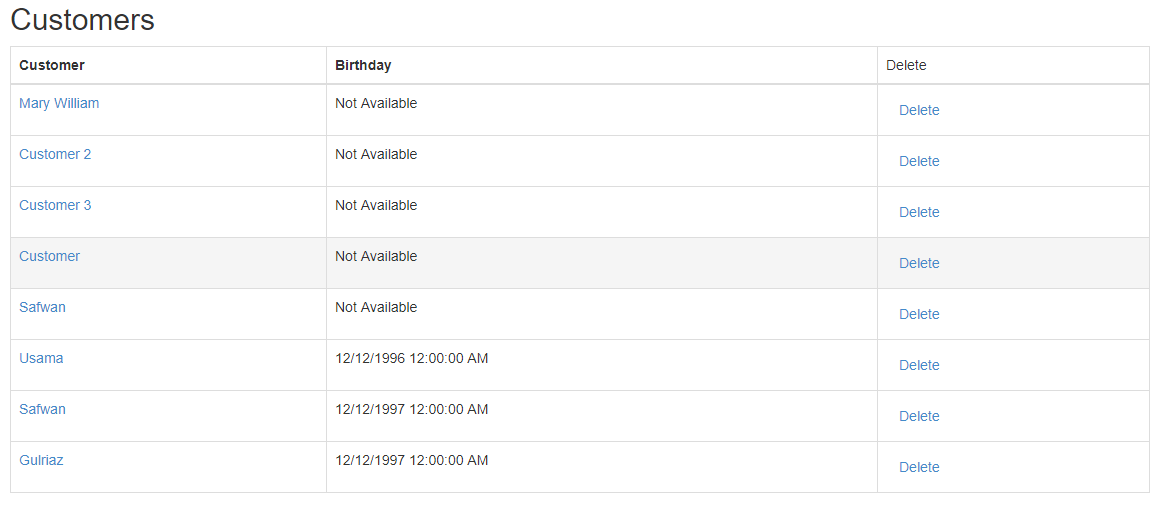
Now what we want is to delete the row on clicking the delete button. So if you get the idea how we’re rendering the items on the screen, obviously using foreach loop. So on Delete anchor tag click we want record id as well to pass this id to the web api Delete action and on success remove the row.
@foreach (var customer in Model)
{
    <tr>
        <td>@Html.ActionLink(customer.Name, "Edit", "Customers", new { id = customer.Id }, null)</td>
        @if (customer.Birthdate != null)
        {
            <td>
                @customer.Birthdate
            </td>
        }
        else
        {
            <td>Not Available</td>
        }
        <td>
            <button data-customer-id="@customer.Id" class="btn btn-link js-delete">Delete</button>
        </td>
    </tr>
}
This is the html. Now I want to call my api through ajax.
@section scripts{
    <script>
        $(document).ready(function() {
            $('#customers .js-delete').on('click',
                function () {
                    var button = $(this);
                    if (confirm('Are you sure you want to delete this client?')) {
                        $.ajax({
                            url: '/api/customers/' + button.attr('data-customer-id'),
                            method: 'DELETE',
                            success: function() {
                                button.parents('tr').remove();
                            }
                        })
                    }
                });
        });
    </script>
}
This is how we work with ajax and apis. Now you might be thinking here I’m just passing the id to the customers api and targeting Delete action and on success event I’m removing the row directly. You might think this scenario in different way, because every developer has its own taste.
You might think like first we delete the record with Delete method and then get all the records from GetCustomers() method of Web Api and then render all these items through each loop of jquery. But this scenario takes too much time and effort. Look when I click on the Delete anchor tag and show the result in inspect browser, the status is 200 ok. It means everything is working fine, our code (Delete action) is working as we expects. So we don’t any need to again verify the items how much items we’ve in the database and render it through each loop.
Just make your scenario simple, and remove the record as I do here.
Conclusion
So the conclusion is always follow the Restful convention when you’re working with Web Apis. Web Apis are very lightweight than SOAP based web services. They are cross platform. Restful Http verbs helps in the application a lot to insert, delete, update, get the records. Here we see how we use the postman and there are 2 different panes like request header and response header. Most of the time developers confuse about how to use Web Api actions with jquery ajax. Here we also consume the action as well.