
Step by Step Process to Deploy Web Application to Azure with VSTS-CI/CD Pipeline
4.50/5 (2 votes)
Step by step process to deploy web application to Azure with VSTS-CI/CD pipeline
Introduction
This article is about publishing ASP.NET MVC application to Azure or on premise server using CI/CD pipelines in the Visual Studio team services.

Background
The user should have some knowledge about the application deployment process onto server or to cloud.
Prerequisite
User should have an account in Visual Studio team services. If you have any of the MSDN or Visual Studio subscriptions, you can use VSTS.
User should have an account in Azure for deploying and creating application on the cloud side.
If you already have code set up in VSTS, you can skip to step 4.
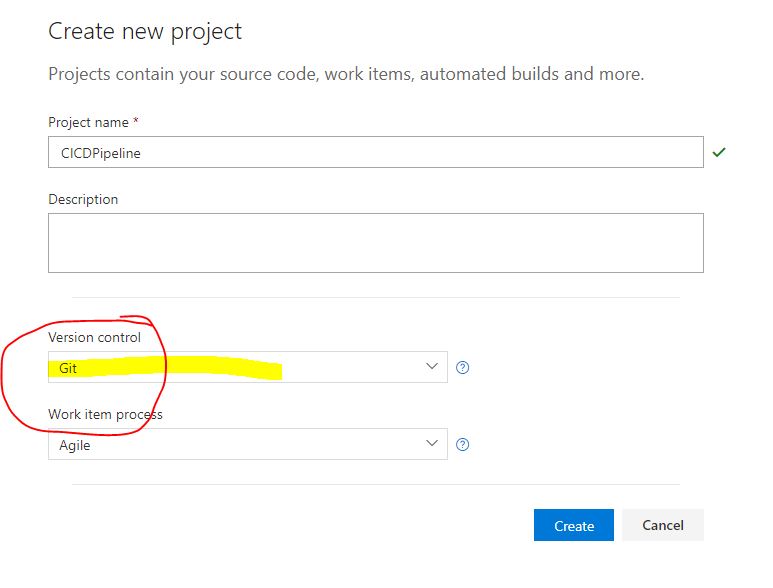
Step 1: Create VSTS Project
In VSTS, create a project under your account.

You can select the Source control version as GIT or TFS. I selected Git because TFS creates problems with branching which is used in Azure for deployment in later stages. You can define which branch has to be deployed to the Azure and which is required field.
Step 2
Clone the branch that is created by VSTS to your local repository. You can use the option "Clone in Visual Studio" that makes it simpler to MAP and create your local branch.


You will get a message that the clone was successful. Create a new MVC Web project into that clone from the Team services itself. This would save you time to move and copy the project from other folders.

Step 3: Push the Branch to VSTS
Create a local branch for your local copy and push everything to VSTS.

Once you push it, you will see it in the VSTS.

Step 4: Create Build in VSTS
Click on the set up build.

You will get prepopulated dropdowns. You can change the settings here with the branch for different build.

Select a Template
You can select any template based on your application. I have chosen ASP.NET.

You can use any build option based on the requirement. I have selected Build Solution. You can find more information here.

Hit the save and Queue button. A pop up appears with to save build definition. You have to select the agent queue in this. Agent is compiler from VSTS that builds your application for VSTS. You can select many options and OS. I have selected Hosted VS2017. You can also set up various other properties like the Build Configuration and Platform, etc. or your own parameter by clicking on the add button.
Hit the save and queue again.

You can see the build in progress under the build definitions.
Step 5: Create Release Definition
Click on the release tab under the Build and Release. Create new definition.
Select a template. I am choosing Azure App service Deployment since I would be hosting it on the Azure Cloud.
Give the environment the name as Test or according to your situation.

Create an artifact from the build definition that we created.

Set Continuous Build Trigger
Trigger is used to tell VSTS when to start the deployment.

You can also schedule the trigger by time.
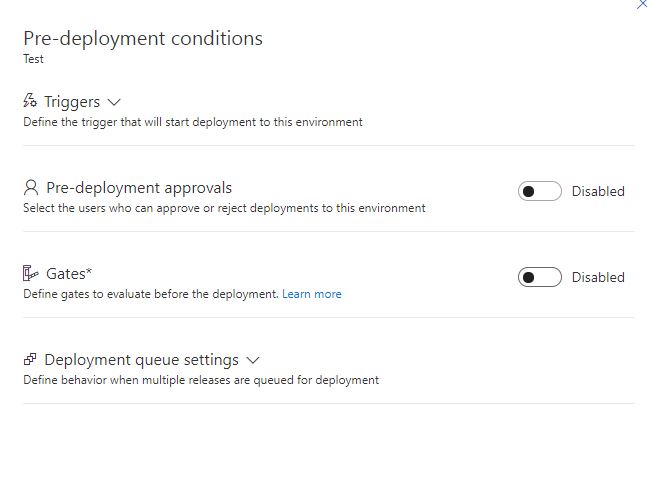
Pre Deployment Conditions
You can add conditions for deployment. You can have multiple environments and so you can set condition on previous environments successful deployment and test. For example, deploy to production only when the app is successfully deployed to test.
Step 6: Create CD Pipeline in Azure
Create Azure app service in Azure.

Click on the service and select Continuous Delivery from the options.

Configure the CD service.

Select the appropriate options that you created in the VSTS. Most of the options would be pre populated.

Configure CD to ASP.NET or according to your scenario.

If you want to set up load test, you can use this option to set up load test.
Click OK and Azure will set up your continuous delivery. The application would be deployed.
Test your application on the web.
You can also see the updates in VSTS about the release and status.
I hope this article would be helpful. Let me know if there is a chance for improvement of this article and I will try to make the changes.
Thanks for reading!