
Build and Release Process for SQL Server Database Scripts using Online TFS
In this article, I will explain step by step how to create Continuous Build and Release process for SQL Server Scripts for Database. All the steps are self explanatory with relevant screenshots.
Introduction
As we all know, Continuous Build is greatly preferred in all areas whether it's a Web Application, Window Service, Web Service, Error Logging Services deployment or Reports Deployment. Similarly, we can also automate deployment of database once we are ready with all the SQL scripts.
Background
There are many ways in which auto deployment of SQL scripts can be done. Lots of free tools are available in the marketplace. Here, I am focusing on a simple and straightforward way of Build & Release for SQL Scripts using online TFS 2017. We need to create a SQL Project, adding all required scripts in it and then creating a ".dacpack" which will help in deployment. All steps are mentioned below which anyone can follow and create Release.
Step by Step
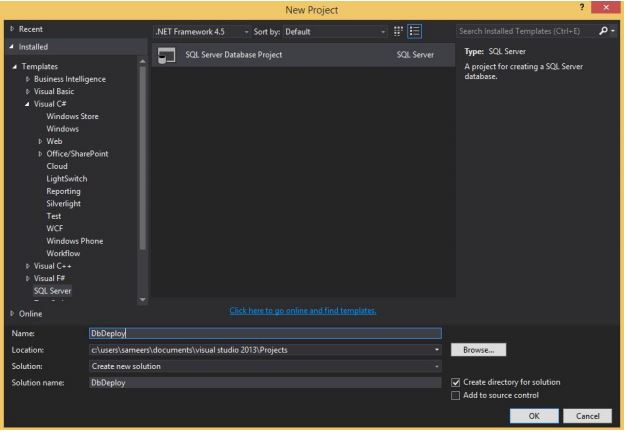
- Go to File -> New Project and then Select SQL Server. Under it, select SQL Server Database Project.
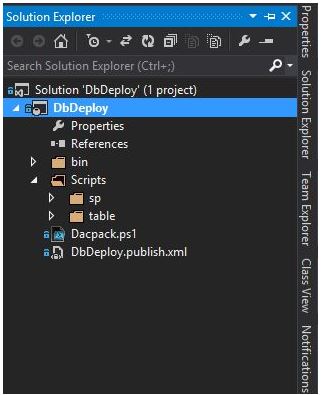
- Next, in solution explorer, you will find a new project like below. Here, I have added two folders, one is SP and the other is table. In these folders, I am going to add few SQL scripts.
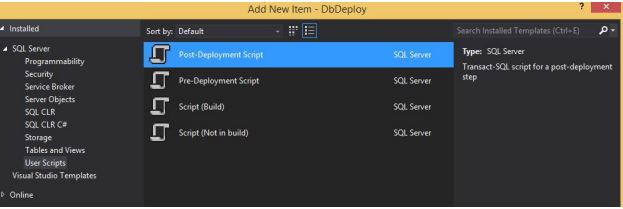
- Right click on table folder, add new item, select script and choose Post Deployment Script. Give it some meaningful name. This will get added in your table folder with “.SQL” extension.
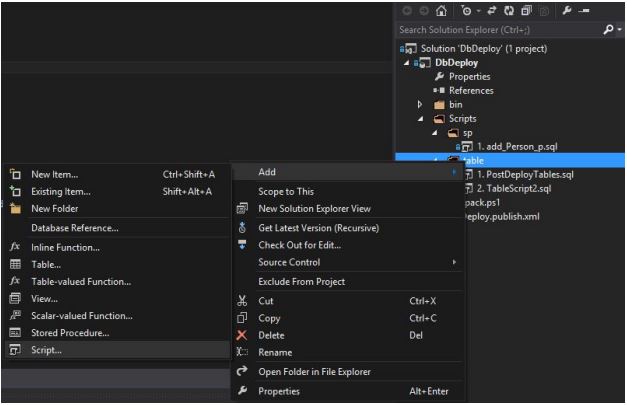
- Similarly, add any number of scripts you want. You can directly add “.SQL” scripts into this project directly or under any folder. In this way, we can add Store Procedure script in SP folder.
- Now build this project, it will succeed in no errors syntactically, otherwise you have to check your scripts to be error free.
- When you build this project, you will find “. dacpac” file under bin folder. This will help in deploying our project through continuous build via online TFS. Make sure you check in bin folder also.
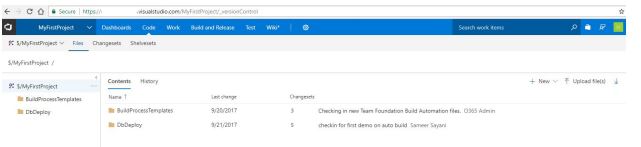
- Here, I am connected to online TFS so I have checked in this project to my TFS online Repository.
- Looking into online TFS repository under code segment, you can see my project checked in.
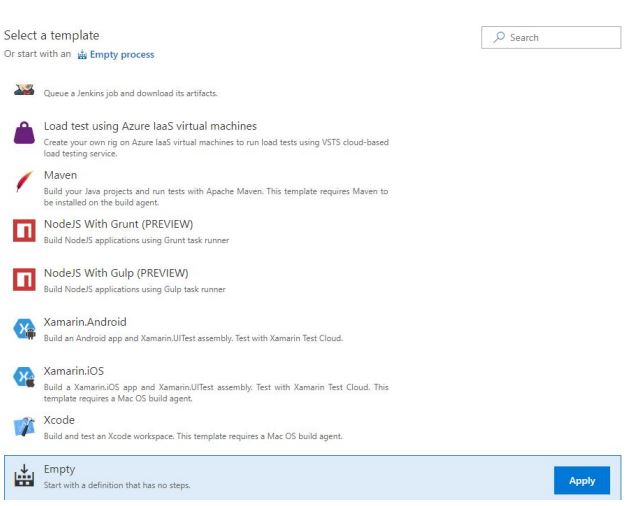
- Our code repository is ready, next we need to create Build. Select Build from “Build & Release” tab. Add New build, select a template, “Empty Template” then Apply.
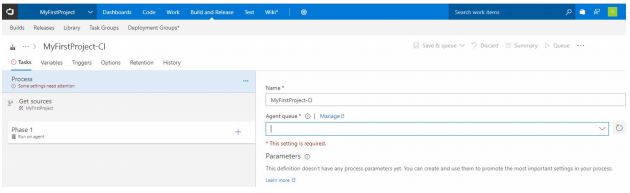
- This will take us to Build steps. First you will find “Process”, then Resources which will show your Resource name as in my case is “
MyFirstProject”. Also, it will have phase like “Phase1” which will Run on Agent.Looking at Process, it might be showing alert message beneath it saying “setting attention needed”. This is because we need to select an agent pool under Agent Queue. By default, it will show Hosted and Default (no agent pool). We need to have our own agent pool in order to queue new build. Now how to add agent queue is simple.
You need to download agent for under agent pool from settings tab, configure it and run a PowerShell command. All these steps are already explained on MSDN.
- Refer to the below links:
- https://docs.microsoft.com/en-us/vsts/build-release/actions/agents/v2-windows
- https://blogs.msdn.microsoft.com/devops/2017/04/10/deploying-to-on-premises-environments -with-visual-studio-team-services-or-team-foundation-server/
- https://channel9.msdn.com/Blogs/MVP-VisualStudio-Dev/tfsbuild01
- Under
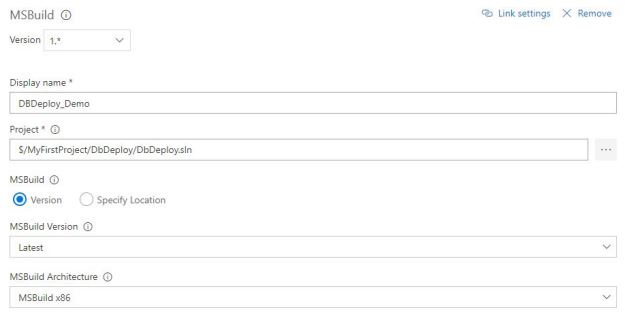
Phase1, we have to add various Tasks. First task we need to add is MSBuild.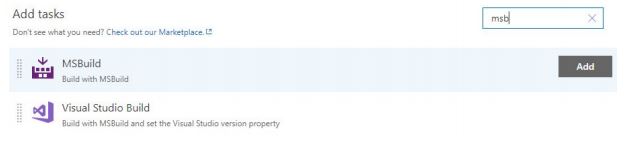
- Once task is added, give it a display name and select project repository from the location. This will be our project solution file. We can select it by browsing for the project. Note that these are the mandatory fields to be filled.
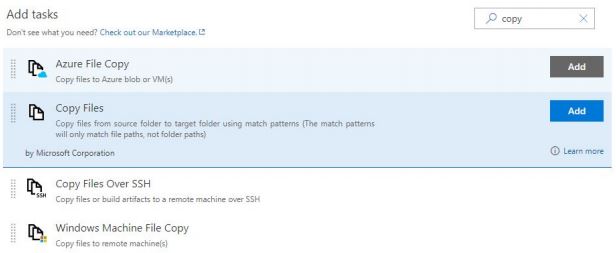
- We are done with the first task. Second & third task is to Copy Files (.SQL script files). For this, we need to add task for Copy Files. Add it.
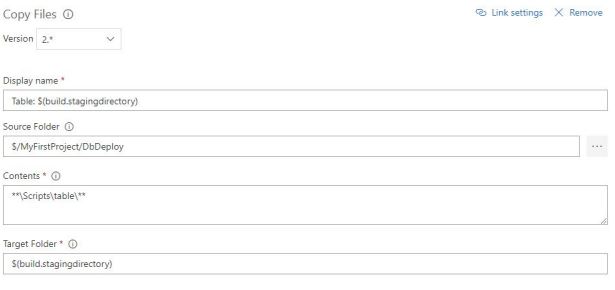
- Once the task is added, there are various steps under it. We need to give it a display name. Select Source Folder by browsing for the project similarly we did in previous task. Next, there will be a step to add Contents. Here, we need to tell from where to pick SQL scripts. Syntax for selecting table scripts is “**\Scripts\table\**”. This tells that scripts will be present under Scripts\table folder which is the same as what we have in our project checked in. Also set target folder. I am setting it with default value which is “
$(build.stagingdirectory)”. This means target folder will be created under artifacts.To check more on how to define variables, please check this link:
https://docs.microsoft.com/en-us/vsts/build-release/concepts/definitions/build/variables?tabs=batch
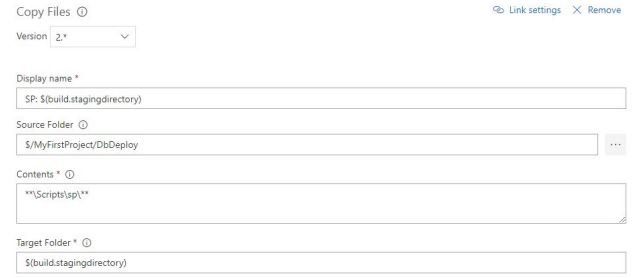
- Following similar steps, we need to add one more task which is for Stored procedures.
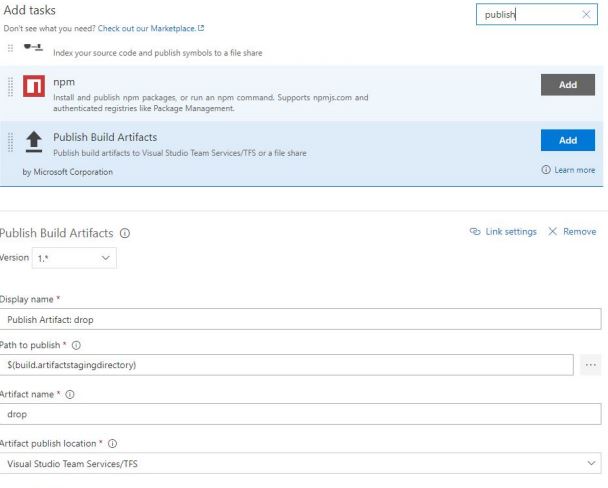
- Last step in Build process is Publish Artifacts. Add this task. Add display name for it, set path to publish similarly as we did in previous steps, give a name to Artifacts (default is drop) and also select Publish Artifact Location which is in this case VSTFS.
- Here, all the tasks we need are done. Next, we need to set some variables under variables tab.
Name of variable Value system.debugtrue(can betrue/false)$(build.artifactstagingdirectory)c:\agent\_work\1\a (default location of build server) $(build.stagingdirectory)c:\agent\_work\1\a - We are done with the build process. Now we need to run Queue Build. Once we queue build, it will run all the tasks we added in Build. If any task fails, build will stop and show us error log which we need to fix until then build will not proceed. If build succeeds, it will show all green with status success. Also most important, when you click on Artifacts tab, it will show you your project artifacts which is the ready to go package that we need to deploy on Release process. Note that this comes with the same name which we assigned “
drop”.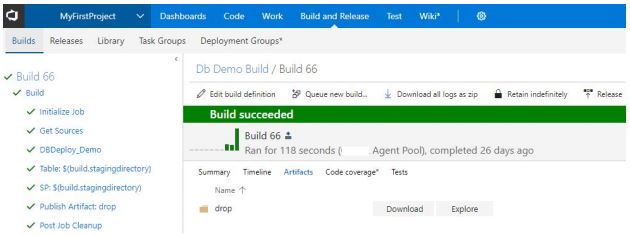
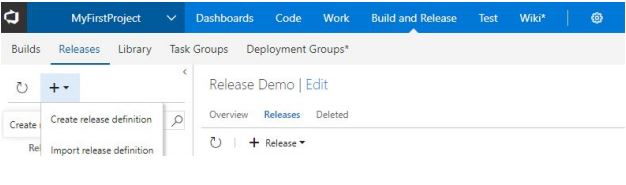
- Till here, we are ready with our Artifacts that need to be deployed on desired server (cloud or VM). For deployment, we need to add Release process. Release process will deploy the artifacts created by Build process. In order to create Release Definition, again go to top level tab “Build and Release”, click on Release and create new Release definition.
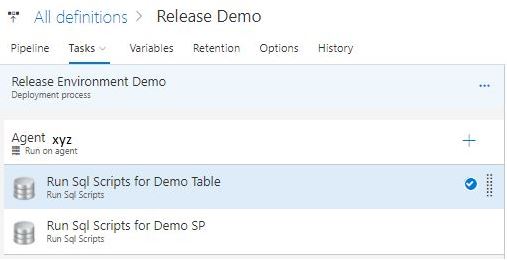
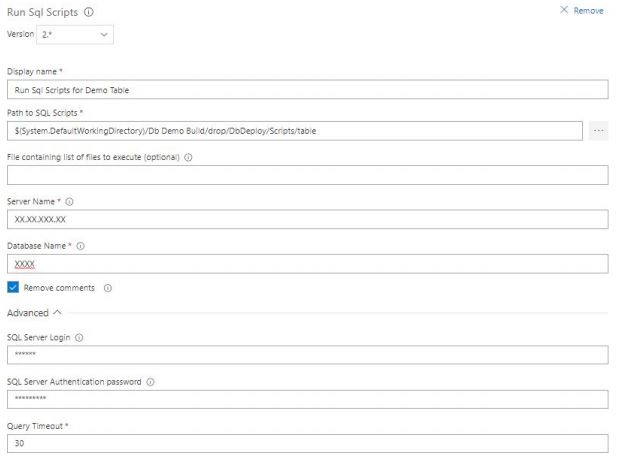
- Just like we did in Build, here for Release Definition, we need to select a template. Select Empty Process. Afterwards, we will see two segments, Artifacts and Environments initially both will be empty. Under Artifacts, select artifacts which will automatically shown. Next add Environments. Give it a name and add two new tasks. One for tables script and other for stored procedures.
- Next, we need to set values for all required variables as shown in the below screenshot. Here, we need display name, SQL script path, Server name, Database name, SQL login credentials to be provided.
- Following similar steps, we need to add stored procedures script also just pick script path from SP.
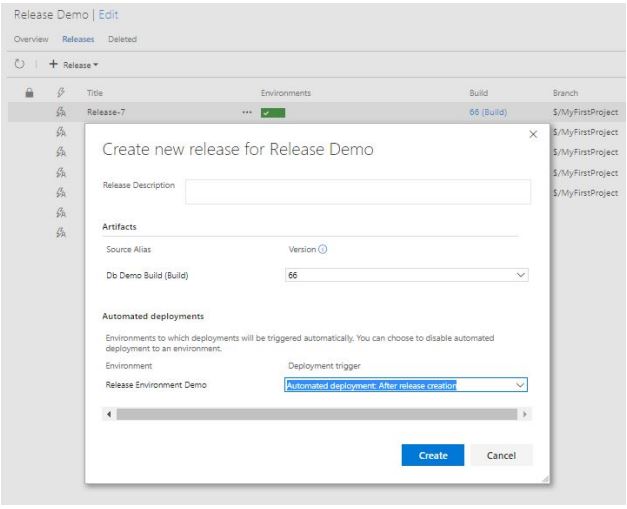
- Our Release Definition is ready now. One last step is to Create New Release. It will automatically pick the stable version of build. Once it's created, we need to select Deploy. It will succeed all green else there might be some issue in creating Release Definition. Please note here the issue can only be in Release Definition and not in Build Definition as Release is created only on the basis of stable Build.
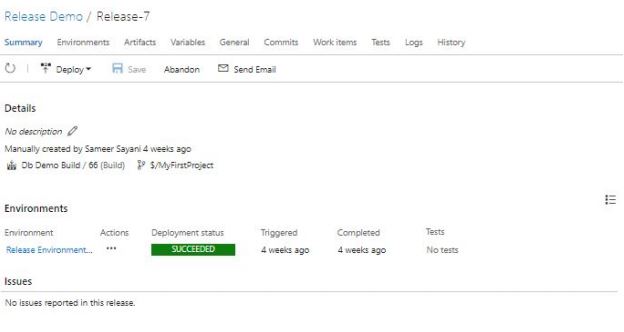
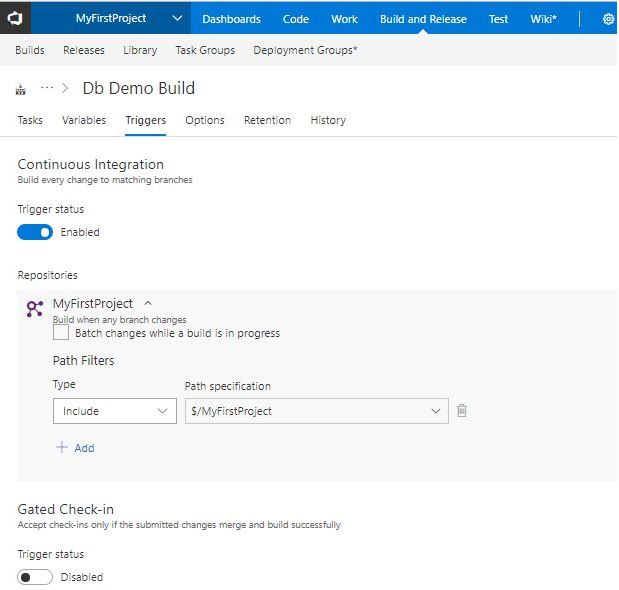
- As all succeeded now so our database should be updated with table and SP. In this way, we can automate the process of DB deployment. Note that we can set Build and Release to Auto Deploy or Manual as required. To make continuous integration, we need to set Trigger for CI under Triggers tab in Build. So whenever we are going to check in new script files, it will automatically trigger build. If all succeeds, then new artifacts will be created which we have to refer in new Release, otherwise Release will automatically pick last stable build artifacts version.
Point of Interest
Any time some new scripts are added or any modification in existing script are made, we need to rebuild SQL project to re-generate ".dacpack" which will further help us in Build to drop latest artifacts and then we can refer to the same artifacts version in New Release. Finally, the above steps are need to be followed in order to meet the desired goal.
Next is What?
Next, I will post an article on auto deployment of SSRS Reports using Powershell script & also through VSTFS.