
Simple CRUD Operation with Razor Pages
3.86/5 (7 votes)
In this article, we are going to learn how to perform CRUD Operation with Razor Pages in ASP.NET CORE 2.0

In this article, we are going to learn how to perform CRUD Operation with Razor Pages in ASP.NET CORE 2.0. Before getting started, let’s cover some basics about Razor pages.
What are Razor Pages?
Razor Pages is a new feature of ASP.NET Core MVC that makes coding page-focused scenarios easier and more productive. (Definition from https://docs.microsoft.com/en-us/aspnet/core/mvc/razor-pages/?tabs=visual-studio)
Where to Use Razor Pages?
There are some pages in the application which are not too big where you still require creating a controller and add action Method, along with that, we need to add View.
In this part, we can use Razor Pages, which has code behind in it, we just need to add a Razor Page and on view “Customer.cshtml”, you can design your view and on the same page, you can write code for handling requests such as Get and Post. However, if you think you want to separate it, then you can use code behind of that “Customer.cshtml.cs”.

Pre Prerequisite for Razor Pages Application
- Install .NET Core 2.0 SDK
URL: https://www.microsoft.com/net/download/core


- Install Visual Studio 2017 version 15.3 or later
URL: https://www.visualstudio.com/downloads/
Visual Studio Community 2017
Free, fully-featured IDE for students, open-source and individual developers.
Let’s start with Create Razor Pages application.
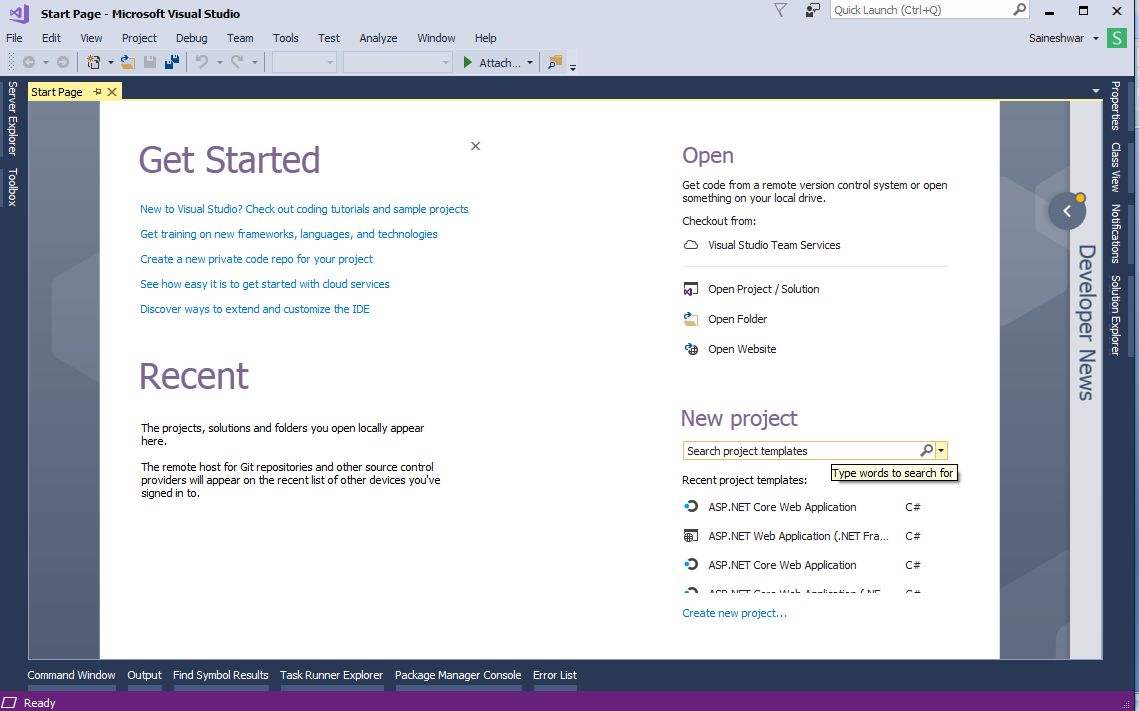
Creating Razor Page Project
For creating a project, just choose File Menu from Visual Studio IDE, then → New inside that, choose Project.

After choosing a project, a new dialog will pop up with the name “New Project”. In that, we are going to choose Visual C# Project Templates → Web → ASP.NET Core Web Application. Then, we are going to name the project “RazorPagesDemo”.

After naming the project, we are going to click on the OK button to create a project.
A new dialog will pop up for choosing templates for Creating an “ASP.NET Core Web Application”. In that template, we are going to Create an ASP.NET Core Razor Pages application. That's why we are going to choose “Web Application”. Next, we will have the option to choose a framework: .NET Core, .NET Framework, and also ASP.NET Core Version. In that, we are going to choose “.NET Core” and “ASP.NET Core 2.0” as ASP.NET Core Version as click on OK button to create a project.

After clicking on the OK button, it will start to create a project.

Project Structure
You will see some new project structures in this project. There are no Model, View, or Controller folders in this project.
You will only be able to see the Pages folder, which is where all the Razor pages are stored.

One thing which is back again from ancestors is a little code behind to make things a little easier.

Ya Razor pages have code behind.

In the first steps, we are going to add a model folder and inside that folder, we are going to add Customer Model.
Creating Model Folder and Adding Customer Model in It
In this part, we are going to add a Model folder in the “RazorPagesDemo” project. After adding the folder, next we are going to add Customer class (Model) in the Models folder.
For Details, See Below Snapshot

After adding Customer Model now, next we are going to add a property to this class.
Adding Properties and DataAnnotations to Customer Model
In Razor pages, you can use the same DataAnnotations which are there in MVC.
using System;
using System.Collections.Generic;
using System.ComponentModel.DataAnnotations;
using System.ComponentModel.DataAnnotations.Schema;
using System.Linq;
using System.Threading.Tasks;

namespace RazorPagesDemo.Models
{
    [Table("CustomerTB")]
    public class Customer
    {
        [Key]
        public int CustomerID { get; set; }
        [Required(ErrorMessage = "Enter Name")]
        public string Name { get; set; }
        [Required(ErrorMessage = "Enter Address")]
        public string Address { get; set; }
        [Required(ErrorMessage = "Enter Country Name")]
        public string Country { get; set; }
        [Required(ErrorMessage = "Enter City Name")]
        public string City { get; set; }
        [Required(ErrorMessage = "Enter City Phoneno")]
        public string Phoneno { get; set; }
    }
}
After completing with adding model and DataAnnotations next, we are going to add Razor page.
Adding Razor Page to Project
For adding Razor page, just right click on the Pages folder, then select Add → inside that, select New Item.

After selecting New Item, a new dialog will pop up with name “New item”. In that, we are going to select Razor Page Item and name it as “Customer.cshtml” and click on Add button.

After clicking on the Add button, below is the Pages folder structure. In this part, you can see “Customer.cshtml” View with “Customer.cshtml.cs” code behind which will have all handlers’ part to handle the request.

Understanding “Customer.cshtml” View
This “Customer.cshtml” file looks more like a Razor View.
In Customer.cshtml view, the first thing you are going to see is @page directive which tells Razor view engine that this page is a Razor page, not MVC View and it makes a page to handle the request directly without going to the controller.

Next, you can see @model is a CustomerModel is a code-behind class name.

The CustomModel file name is the same name as the Razor page file “Customer.cshtml.cs” just “.cs” appended at last.
This CustomModel class inherits from PageModel which makes this class to handle the request.
Next thing you can see in CustomModel is OnGet method (handler) which handles the get request.
Let’s start with a simple example, then we are going to start with CRUD operation.
Displaying Message
using System;
using System.Collections.Generic;
using System.Linq;
using System.Threading.Tasks;
using Microsoft.AspNetCore.Mvc;
using Microsoft.AspNetCore.Mvc.RazorPages;
namespace RazorPagesDemo.Pages
{
    public class CustomerModel : PageModel
    {
        public string WelcomeMessage { get; set; }

        public void OnGet()
        {
            WelcomeMessage = "WelCome to Razor Pages by Saineshwar Bageri";
        }
    }
}
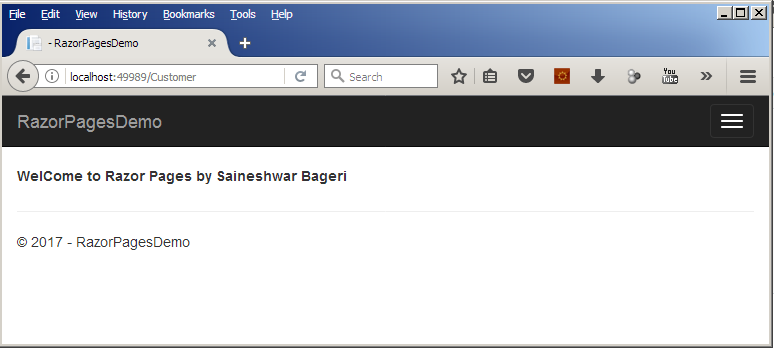
In this part, we have simply added a string with the name WelcomeMessage and assigned a value to it.
Next, on view, we are going to display a message in the following format:

Now Save Application and run.
And to access page, just enter the Page Name “Customer”.
URL: - http://localhost:######/Customer
E.g. ####### (port number)
Wow, we have created our first Razor page.
CRUD Operation with Razor Pages
The first thing we are going to do is Create Customer. To do that, we have added Customer Model in the Models folder.
Next, we are going to declare that model in CustomerModel class as below.
Code Snippet of CustomerModel
using System;
using System.Collections.Generic;
using System.Linq;
using System.Threading.Tasks;
using Microsoft.AspNetCore.Mvc;
using Microsoft.AspNetCore.Mvc.RazorPages;
using RazorPagesDemo.Models;

namespace RazorPagesDemo.Pages
{
    public class CustomerModel : PageModel
    {
        public Customer Customer { get; set; }

        public void OnGet()
        {

        }
    }
}
After declaring this Customer model in CustomerModel class, now Customer Model is accessible on Razor page file (Customer.cshtml).
Now, let’s Design View.
Adding Input Controls on Customer.cshtml View
In this part, we have used New MVC tag helper to create input fields and we have added all model properties on View.
Note: If you want to learn about details of New Tag Helpers, visit this link: https://blogs.msdn.microsoft.com/cdndevs/2015/08/06/a-complete-guide-to-the-mvc-6-tag-helpers/.
@page
@using RazorPagesDemo.Models @*namespace*@
@model CustomerModel
<script src="~/lib/jquery/dist/jquery.js"></script>
<script src="~/lib/jquery-validation/dist/jquery.validate.js"></script>
<script src="~/lib/jquery-validation-unobtrusive/jquery.validate.unobtrusive.js"></script>
<div class="container">
    <h3>Add Customer</h3>
    <hr />
    <br />
    <form method="post">
        <div class="row">
            <div class="col-md-4">
                <label asp-for="Customer.Name"></label>
                <input asp-for="Customer.Name" class="form-control" />
                <span class="alert-danger" asp-validation-for="Customer.Name"></span>
            </div>
        </div>
        <div class="row">
            <div class="col-md-4">
                <label asp-for="Customer.Address"></label>
                <input asp-for="Customer.Address" class="form-control" />
                <span class="alert-danger" asp-validation-for="Customer.Address"></span>
            </div>
        </div>
        <div class="row">
            <div class="col-md-4">
                <label asp-for="Customer.Country"></label>
                <input asp-for="Customer.Country" class="form-control" />
                <span class="alert-danger" asp-validation-for="Customer.Country"></span>
            </div>
        </div>

        <div class="row">
            <div class="col-md-4">
                <label asp-for="Customer.City"></label>
                <input asp-for="Customer.City" cl class="form-control" />
                <span class="alert-danger" asp-validation-for="Customer.City"></span>
            </div>
        </div>
        <div class="row">
            <div class="col-md-4">
                <label asp-for="Customer.Phoneno"></label>
                <input asp-for="Customer.Phoneno" class="form-control" />
                <span class="alert-danger" asp-validation-for="Customer.Phoneno"></span>
            </div>
        </div>
        <br />
        <input type="submit" value="Save" class="btn btn-primary" />
        <a class="btn btn-default" href="/allcustomer">Cancel</a>
    </form>
</div>
Now save Application and run project.
And to access page, just enter Page Name “Customer”.
URL: http://localhost:######/Customer
e.g. ####### (port number)
Snapshot of Customer Page

After entering URL, the first request goes to OnGet handler.
While Debugging

Note: Handlers
There are two default handlers in Razor pages:
OnGet()OnPost()
If you want, you can create your own handlers. I will show in the upcoming example.
After completing with Designing Razor Page file (“Customer.cshtml”), now let’s add another handler to handle post request.
Adding OnPost Handler
In this part, we are going to add Post Handler to get all data which is filled by the user.

We have added OnPost handler but it is not filling data of model what we have posted.
While Debugging

For binding data, we need to add [BindProperty] attribute on the (Customer) property we declare in CustomerModel class.

If we try to Post model again, then we are going to get model populated with values. Let’s save these values in the database.
Database Part
I have created a database with the name “CustomerDB” and in that, it has “CustomerTB” table.

First thing for saving data in database, we need an ORM. We are going to use “Entity framework core”.
Installing Package for Entity Framework Core from NuGet
To install the package, just right-click on the project (RazorPagesDemo) and then select Manage NuGet package. The below dialog of NuGet Package Manager will pop up.
In the Browse tab, type “Microsoft.EntityFrameworkCore.SqlServer” in the search box and just click on Install button.
Microsoft.EntityFrameworkCore.SqlServer

Adding Connection String and Setting up DbContext
After adding a reference, now add a connection string in appsetting.json file.

Now, let’s add a class with the name DatabaseContext in Models folder.
For adding a model, just right-click on the Models folder. Then, select Add → Class. An "Add New Item" dialog will pop up with default class selected. Name the class as DatabaseContext and click on the Add button.

After adding a DatabaseContext class, next, we are going to inherit DbContext class.
After inheriting with DbContext, next we are creating a constructor which takes DbContextOptions as an input parameter and also inherits the base class constructor (: base(options)) [DbContext].
Code Snippet of DatabaseContext Class
using Microsoft.EntityFrameworkCore;
using System;
using System.Collections.Generic;
using System.Linq;
using System.Threading.Tasks;
namespace RazorPagesDemo.Models
{
    public class DatabaseContext : DbContext
    {
        public DatabaseContext(DbContextOptions<DatabaseContext> options) : base(options)
        {

        }
    }
}
Next, we are going to add a new Service in Startup.cs class for injecting dependency.
Now whenever you use DatabaseContext class, DbContext instance will be injected there.

After adding CustomerTB model, in our next step, we are going to add DbSet of all models in DatabaseContext class.
Adding DbSet for CustomerTB Model in DatabaseContext Class
Now, let's add DbSet for CustomerTB model in DatabaseContext class, as shown below:

After adding DbSet in DatabaseContext class, next we are going to add a constructor in CustomerModel class.
Setting Up Dependency Injection at CustomerModel Class
In this part, wherever we use DatabaseContext class, DbContext instance will be injected there.

Now using (“_Context”) object, we can save data in the database, let’s make a change in OnPost handler to save data in the database.
Below Snapshot, You Can See We Have Made Changes in OnPost Handler

Code Snippet of CustomerModel Class
using Microsoft.AspNetCore.Mvc;
using Microsoft.AspNetCore.Mvc.RazorPages;
using RazorPagesDemo.Models;
namespace RazorPagesDemo.Pages
{
    public class CustomerModel : PageModel
    {
        DatabaseContext _Context;
        public CustomerModel(DatabaseContext databasecontext)
        {
            _Context = databasecontext;
        }

        [BindProperty]
        public Customer Customer { get; set; }
        public void OnGet()
        {

        }
        public ActionResult OnPost()
        {
            var customer = Customer;
            if (!ModelState.IsValid)
            {
                return Page(); // return page
            }

            customer.CustomerID = 0;
            var result = _Context.Add(customer);
            _Context.SaveChanges(); // Saving Data in database
                return RedirectToPage("AllCustomer");
        }
    }
}
Now save the application and run the project.
And to access the page, just enter Page Name “Customer”.
URL: http://localhost:######/Customer E.g. ####### (port number)
Now on save button data will be saved in the database.

Database Output

Now we have completed adding part, let’s add another Razor Page to display all customers (AllCustomer).
Adding All Customer Razor Page
In this part, we are going to add another Razor page to display All Customer which are saved in the database.
Adding a new razor page in the same way as we added a customer razor page:

After adding AllCustomer.cshtml Razor page, next we are going to add Constructor and OnGet Handler.
Adding Constructor and OnGet Handler
In this part, onGet Handler, we are going to get all customer details from the database and assign those values to CustomerList and this CustomerList on Razor page, we are going to iterate and display customer details.
using Microsoft.AspNetCore.Mvc;
using Microsoft.AspNetCore.Mvc.RazorPages;
using RazorPagesDemo.Models;
using System.Collections.Generic;
using System.Linq;
namespace RazorPagesDemo.Pages
{
    public class AllCustomerModel : PageModel
    {
        DatabaseContext _Context;
        public AllCustomerModel(DatabaseContext databasecontext)
        {
            _Context = databasecontext;
        }

        public List<Customer> CustomerList { get; set; }
        public void OnGet()
        {
            var data = (from customerlist in _Context.CustomerTB
                        select customerlist).ToList();

            CustomerList = data;
        }
    }
}
Adding AllCustomer.cshtml
On AllCustomer razor page view, we are going to declare @page directive after that namespace and at last @model which is “AllCustomerModel”.

Now we are going to Iterate data (CustomerList).
Code Snippet of AllCustomerModel.cshtml
@page
@using RazorPagesDemo.Models
@model AllCustomerModel

<h2>Index</h2>

<p>
    <a asp-page="Customer">Create New Customer</a>
</p>
<table class="table">
    <thead>
        <tr>
            <th>
                @Html.DisplayName("Name")
            </th>
            <th>
                @Html.DisplayName("Address")
            </th>
            <th>
                @Html.DisplayName("Country")
            </th>
            <th>
                @Html.DisplayName("City")
            </th>
            <th>
                @Html.DisplayName("Phoneno")
            </th>
            <th>Edit | Delete</th>
        </tr>
    </thead>
    <tbody>
        @foreach (var item in Model.CustomerList)
        {
            <tr>
                <td>
                    @Html.DisplayFor(modelItem => item.Name)
                </td>
                <td>
                    @Html.DisplayFor(modelItem => item.Address)
                </td>
                <td>
                    @Html.DisplayFor(modelItem => item.Country)
                </td>
                <td>
                    @Html.DisplayFor(modelItem => item.City)
                </td>
                <td>
                    @Html.DisplayFor(modelItem => item.Phoneno)
                </td>
                <td>
                    <a asp-page="./EditCustomer" asp-route-id="@item.CustomerID">Edit</a> |
                    <a asp-page="./AllCustomer" onclick="return confirm
                    ('Are you sure you want to delete this item?');"
                    asp-page-handler="Delete" asp-route-id="@item.CustomerID">Delete</a>
                </td>
            </tr>
        }
    </tbody>
</table>
While iterating CustomerList, you might have seen a new tag helper, which we have used for Creating link for Edit and Delete button.
Edit Link
In edit link, we have just assigned EditCustomer razor page name to “asp-page” property and “asp-route-id” we have assigned CustomerID to it. EditCustomer razor page we have not added yet, we are going to add it soon.
<a asp-page="./EditCustomer" asp-route-id="@item.CustomerID">Edit</a>
Delete Link
In Delete link, we have just assigned AllCustomer razor page name to “asp-page” property and “asp-route-id” we have assigned CustomerID to it. Next, we are going to assign “asp-page-handler” property which is new one especially for razor pages. Here, we are going to add Handler name “Delete” which we are going to create in AllCustomer razor page.
<a asp-page="./AllCustomer"
onclick="return confirm('Are you sure you want to delete this item?');"
asp-page-handler="Delete" asp-route-id="@item.CustomerID">Delete</a>
Adding Delete Handler
In Razor pages, we have two default handlers, OnGet and OnPost but we can add custom handlers also to handle OnGet and OnPost request.
Below is a snapshot of it.

Code Snippet of Delete Handler
In this part, we are going add Delete handler “OnGetDelete” which take CustomerID as input. After receiving CustomerID (id) next, we are going get Customer details from the database by passing CustomerID (id) and pass it to remove method to delete it and finally, we redirect after deleting to the AllCustomer page.
public ActionResult OnGetDelete(int? id)
        {
            if (id != null)
            {
                var data = (from customer in _Context.CustomerTB
                            where customer.CustomerID == id
                            select customer).SingleOrDefault();

                _Context.Remove(data);
                _Context.SaveChanges();
            }
            return RedirectToPage("AllCustomer");
        }
Now save the application and run.
Access AllCustomer page.

Now if you see delete link, by hovering it, you can see we are passing id (CustomerId) and along with that, we are also passing handler name (“Delete”).
e.g. http://localhost:49989/AllCustomer?id=2&handler=Delete
While Debugging

Finally, we have created delete handler. The last thing that remains in CRUD operation is Edit Customer (Update), let’s start adding EditCustomer Razor page.
Adding EditCustomer Page
In this part, we are going to add another razor page to Edit Customer Details which is saved in the database.
Adding new razor page in the same way as we add customer razor page:

After adding EditCustomer.cshtml Razor page, next we are going to add Constructor and OnGet Handler.
Adding Constructor and OnGet Handler
In this part onGet Handler, we are going to get CustomerID (id) from query string. Then from that, we are going to get Customer Details from the database and assign those values to Customer Model. In this model, we are going to send to Edit Customer View.
Code Snippet of Edit Customer Model
using System;
using System.Collections.Generic;
using System.Linq;
using System.Threading.Tasks;
using Microsoft.AspNetCore.Mvc;
using Microsoft.AspNetCore.Mvc.RazorPages;
using RazorPagesDemo.Models;
namespace RazorPagesDemo.Pages
{
    public class EditCustomerModel : PageModel
    {
        DatabaseContext _Context;
        public EditCustomerModel(DatabaseContext databasecontext)
        {
            _Context = databasecontext;
        }

        [BindProperty]
        public Customer Customer { get; set; }

        public void OnGet(int? id)
        {
            if (id != null)
            {
                var data = (from customer in _Context.CustomerTB
                            where customer.CustomerID == id
                            select customer).SingleOrDefault();
                            Customer = data;
            }
        }
    }
}
Next, we are going to design Edit View for displaying records for editing.
Code Snippet of Edit Customer Page
In this page, we are creating edit page means we are going to show record and allow the user to edit details and update it.
The first thing you are going to see is @page"{id: int}" directive, which tells that page need "{id: int}"int id (CustomerID), then only it will accept requests, else it will returns an HTTP 404 (not found) error. Its id (CustomerID) we are going to send from AllCustomer View Edit link.
Note: @page"{id: int}" it is kind of routing in Razor pages.
Link example: http://localhost:49989/EditCustomer/1
@page "{id:int}"
@using RazorPagesDemo.Models
@model EditCustomerModel
<div class="container">
    <h3>Edit Customer</h3>
    <hr />
    <br />
    <form method="post">
        <input asp-for="Customer.CustomerID" type="hidden" />
        <div class="row">
            <div class="col-md-4">
                <label asp-for="Customer.Name"></label>
                <input asp-for="Customer.Name" class="form-control" />
            </div>
        </div>
        <div class="row">
            <div class="col-md-4">
                <label asp-for="Customer.Address"></label>
                <input asp-for="Customer.Address" class="form-control" />
            </div>
        </div>
        <div class="row">
            <div class="col-md-4">
                <label asp-for="Customer.Country"></label>
                <input asp-for="Customer.Country" class="form-control" />
            </div>
        </div>

        <div class="row">
            <div class="col-md-4">
                <label asp-for="Customer.City"></label>
                <input asp-for="Customer.City" cl class="form-control" />
            </div>
        </div>
        <div class="row">
            <div class="col-md-4">
                <label asp-for="Customer.Phoneno"></label>
                <input asp-for="Customer.Phoneno" class="form-control" />
            </div>
        </div>
        <br />
        <input type="submit" value="Save" class="btn btn-primary" />
        <a class="btn btn-default" href="/allcustomer">Cancel</a>
    </form>
</div>
Now save the application and run.
Access AllCustomer page:

Now hover edit link, you can see URL which is generated (http://localhost:49989/EditCustomer/1) now click on Edit link, it will display EditCustomer Page.
While Debugging


Now we have completed Edit page OnGet Handler implementation which helps to display customer data in edit mode, next we need to update data for doing that we need to Add Onpost Handler which will handle post request.
Code Snippet of OnPost Request
In this part, we are posting data which will update Customer model, which we are going to check if it is valid or not. If it is not valid, then we are going to return Page() which will show Error Message.
If it is valid, then we are going to update data in the database and redirect page to AllCustomer Page.
Code Snippet of Complete EditCustomerModel
using Microsoft.AspNetCore.Mvc;
using Microsoft.AspNetCore.Mvc.RazorPages;
using RazorPagesDemo.Models;
using System.Linq;
namespace RazorPagesDemo.Pages
{
    public class EditCustomerModel : PageModel
    {
        DatabaseContext _Context;
        public EditCustomerModel(DatabaseContext databasecontext)
        {
            _Context = databasecontext;
        }

        [BindProperty]
        public Customer Customer { get; set; }

        public void OnGet(int? id)
        {
            if (id != null)
            {
                var data = (from customer in _Context.CustomerTB
                            where customer.CustomerID == id
                            select customer).SingleOrDefault();
                            Customer = data;
            }
        }
        public ActionResult OnPost()
        {
            var customer = Customer;
            if (!ModelState.IsValid)
            {
                return Page();
            }

            _Context.Entry(customer).Property(x => x.Name).IsModified = true;
            _Context.Entry(customer).Property(x => x.Phoneno).IsModified = true;
            _Context.Entry(customer).Property(x => x.Address).IsModified = true;
            _Context.Entry(customer).Property(x => x.City).IsModified = true;
            _Context.Entry(customer).Property(x => x.Country).IsModified = true;
            _Context.SaveChanges();
            return RedirectToPage("AllCustomer");
        }
    }
}
Snapshot of Edit Customer Page

We have updated Name of Customer, now let’s view All customer view is value updated.

Wow, we have successfully Updated Customer Name in the database.
While Debugging

Validation of Form
In Razor page, validation is similar to MVC validation. There is no change in it, just adding DataAnnotations attribute on Model properties and on view, starts its validation control.


Finally, we have learned what Razor Pages are and along with that, how to do CRUD Operation with Razor Pages in a step by step manner. I hope you liked my article.
History
- 26th September, 2017: Initial version