
Customizing ASP.NET MVC Bootstrap Templates
4.61/5 (20 votes)
In this article, we will see in detail about the ways we can customize our ASP.ENT MVC Application. Here, in this article, we will see three methods to customize our ASP.NET MVC Bootstrap Templates.
Introduction
- Using ASP.NET MVC Bootstrap Bundle template
- Using the Bootstrap Bundle Template CSS in our MVC Application
- Using Bootswatch Free themes for Bootstrap ASP.NET MVC.
Using the code
Installing Bootstrap Bundle
First, we need to download and install the Bootstrap Bundle Template. For installing the Bootstrap Bundle Template Open Visual Studio 2015 >Click on Tools>Click on Extensions and Updates

From the search type “Bootstrap Bundle” and search.

Click Download from the Bootstrap Bundle.

Click on Install to install Bootstrap Bundle template.

To getting started with Bootstrap Bundle Template close the Visual Studio and reopen visual Studio 2015.
Creating Bootstrap Bundle MVC application:
Click on Bootstrap Bundle from left side Template. Select Bootstrap Bundle MVC Site, select your project path and enter your application name and click ok.

Here we can see the Bootstrap Bundle template has 2 style as “Bootstrap Example Layouts” and “Start Bootstrap Templates”.
Here first we will see how to getting started with “Bootstrap Example Layouts”
Method 1: Bootstrap Bundle Style using Bootstrap Example Layouts
Select the Bootstrap Example Layouts and click Next button.

Select your master layout style. Here we have selected “Narrow Jumbotron” layout and click Next button.

Now we need to select Theme for our Layout. Here we can see group of Theme has been listed in dropdown list.

Here we have selected “Darkly” Theme for our website.

Click Next and enter your Site Name in the text box and click Next.

Click finish, we can see our MVC application has been created, press F5 to run our application, we can see our MVC application with new bootstrap template.

Method 2: Bootstrap Bundle Style using Start Bootstrap Templates
Select the Start Bootstrap Templates Layouts and click Next button.

Next, we need to select our Theme for our MVC web application. Here we select “Modern Business” and click Next button.

Next, we can add new Custom Controllers or View by selecting from the checkbox. After selection click next button.

Here we have selected few controllers and views to be added in our MVC application, Click next after selection.

Here we have selected “Default” Theme for our website.

Click Next and enter your Site Name in the text box and click Next.

Click finish, we can see our MVC application has been created, press F5 to run our application, we can see our MVC application with new bootstrap template.

2) Using the Bootstrap Bundle Template css in our MVC Application
Method 3: Customizing ASP.NET MVC application using Bootstrap Bundle Templates
Now we create our ASP.NET MVC application and add the Bootstrap Bundle templates in our MVC application. First step is to create our ASP.NET MVC application.Open Visual Studio 2015>Click Web > Select ASP.NET Web Application(.Net Framework)

Select MVC and click Ok to create our ASP.NET MVC Application.

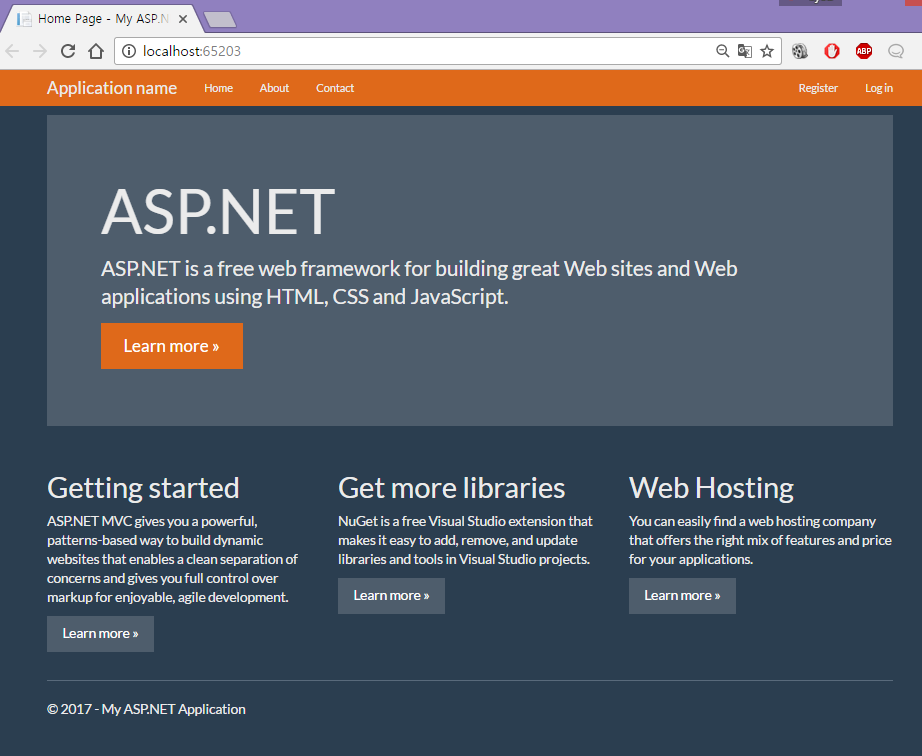
After creating of MVC application run to view the default MVC bootstrap template.

Now let’s add our Bootstrap Bundle “Modern Business” Template for our MVC application. From our Bootstrap Bundle “Modern Business” web project select the CSS folder and we need to paste the CSS folder to our new MVC web application project.

Paste the copied CSS folder to our web application

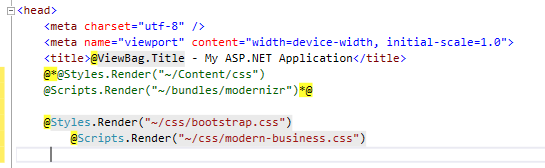
Next in our _Layout.cshtml file we need to add the Bootstrap Bundle “css” style to change our template.
Open Views Folder>Open Shared folder and open _Layout.cshtml.

Open the _Layout.cshtml file to change the default css to new Bootstrap Bundle layout css.

Open your Bootstrap Bundle “_Layout.cshtml.” file and check for css names.

Comment the existing default css and add Bootstrap Bundle template CSS.
Run the application and we can see our ASP.NET MVC application has been applied with new Bootstrap Bundle Template.

3) Using Bootswatch the Free themes for Bootstrap ASP.Net MVC.
Method 3: Customizing ASP.NET MVC application using Bootswatch Templates
Now we create our ASP.NET MVC application and add the Bootswatch Themes in our MVC application. First step is to create our ASP.NET MVC application. Open Visual Studio 2015>Click Web > Select ASP.NET Web Application (.Net Framework)
Select MVC and click Ok to create our ASP.NET MVC Application.
After creating of MVC application run to view the default MVC bootstrap template.
Bootswatch is provides Free themes for Bootstrap. Bootswatch Themes are easy to apply for our Asp.NET MVC application. Visit www.bootswatch.com to see all free Themes for MVC Applications.

Here we have selected “Superhero Theme” from the website we can see at the top menu we can see both “bootstrap.css” and “bootstrap.min.css”. This is an open source and we can copy both “bootstrap.css” and “bootstrap.min.css” style codes and replace with our default css themes.

From the “bootswatch Superhero” click on bootstrap.csss menu ,Copy the CSS style code from the
link.

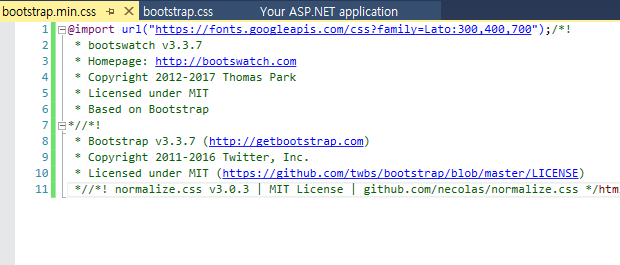
To apply the new theme with our default CSS. We open “bootstrap.css” from the content folder.

Replace the css style with our copied “bootswatch Superhero style”

Same like this for “bootstrap.min.css” From the “bootswatch Superhero” click on bootstrap.min.css
menu, Copy the CSS style code from the

To apply the new theme with our default CSS. We open “bootstrap.min.css” from the content folder.
Replace the css style with our copied “bootswatch Superhero style”
Run the application and we can see our ASP.NET MVC application has been applied with new Bootswatch Superhero Theme.
Note: If you are good at design, you can also customize ASP.NET Default theme by yourself.
History
MVCSampleTemplate.zip - 2016/02/13