
Creating a new IoT C/C++ project
This topic contains steps to create a new IoT project in the Intel® System Studio IoT Edition for the Intel® Edison board, Intel® Galileo board, or Minnowboard MAX board.
Get access to the new Intel® IoT Developer Kit, a complete hardware and software solution that allows developers to create exciting new solutions with the Intel® Galileo and Intel® Edison boards. Visit the Intel® Developer Zone for IoT.
This topic contains steps to create a new IoT project in the Intel® System Studio IoT Edition for the Intel® Edison board, Intel® Galileo board, or Minnowboard MAX board.
For steps to create a new C or C++ project that sends data from your board to the cloud, see Creating a new IoT C/C++ Cloud project.
For steps to create a project for Intel® IoT gateway devices, see Creating a new IoT Gateway C/C++ project.
For steps for the Intel® Joule™ development platform, see the Intel® Joule™ Module User Guide.
Requirements
- You have installed the Intel System Studio IoT Edition. For steps, see Installing the Intel® System Studio IoT Edition.
- You have already set up and connected your IoT board to your host system. For steps, see the following:
- For the Intel® Edison board, see the steps for 64-bit Windows, 32-bit Windows, Mac OS X, or Linux.
- For the Intel® Galileo board, see the steps for Windows, Mac OS X, or Linux.
-
For supported gateways, see Getting Started with Intel® IoT Gateways using the Intel® IoT Developer Kit 3.5.
- For steps to create and work with Java projects, see the Intel® System Studio IoT Edition User Guide for Java*.
Creating a new IoT project
This section contains steps to create a simple project using an existing code sample. By the end of this section, you should have a new project that blinks the LED on your IoT board.
- Choose Intel® IoT > Create a new Intel® project. The Create a new Project page displays.
- When prompted to select a platform type, choose the board you are using from the list. Click Next.

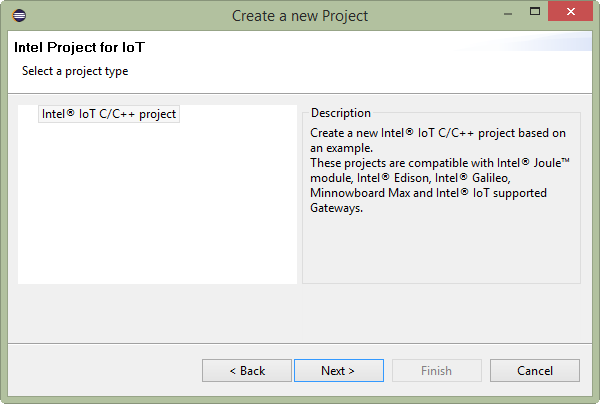
- When prompted to select a project type, select Intel® IoT C++ Project. Click Next.
- The proper target OS should be chosen by default. Click Next.

- Type a unique name in the Connection Name field.

- If you know your board's IP address, type it in the Target name or IP address field. If you don't know the IP address, you can click Search Target to search for a list of available targets on your network and select your connection from the results. Click OK or Next.
Note: The Search Target feature is not available for Intel® Joule™ development platform yet; you'll need to type the IP address manually for this type of development platform.

- Enter the name of the project in the Name field. In the Project list, select the type of project to create. A short description of the selected project type is displayed under Project Description. Click Next.

- Click Finish.
- If asked to create any new directories, click Yes to proceed. You may need to enter your login password.

- Your project is created and displayed. If asked whether you want to install platform support for the type of board you selected, click Yes to proceed. This may take several minutes.

To run a project
- From the Run drop-down list in the toolbar, select the name of your project.

- In the User ID field, type the user name to log in to your board.
- In the Password field, type the password for your board.

- If a warning message about host authenticity displays, click Yes to upload and run your project.

- Your project runs. When finished, click the Terminate icon from the Console panel to end the currently running process and clear the contents of your sketches folder.

Creating a new project from an IoT example
- Choose Intel® IoT > Import IoT Examples. The Intel System Studio IoT Edition Examples tab opens, with a list of project examples grouped by programming language.
- In the list of examples, browse for and select the example to use.
A description of the selected example is displayed on the Description tab. You can preview the code for the example by clicking the Code tab.

- Click Import. The Create a new project based on an example dialog box opens.
- Select the appropriate options for your board type and connection. Finally, type a name for the new project in the Name field, then click Finish. Your project is created and displayed in the Project Explorer panel.
