
Gesture Recognization For IoT In Intel Edison Using 3 axis Digital Accelerometer
4.82/5 (5 votes)
This is a short article on detecting UP, DOWN, RIGHT and LEFT Gesture using Intel Edison and send it over Mqtt
Introduction
An accelerometer is the device which measure proper acceleration.A proper acceleration is not the 3-coordinate axis values(rate of change of velocity) of any moving object.An accelerometer will measure an acceleration due to earth's gravity,straight towards the g=9.81m/s2.There are various application of accelerometer in science and industry. Sensitive accelerometers are used into the navigation systems for aircraft and missiles.It also measure the vibration of a rotating object.
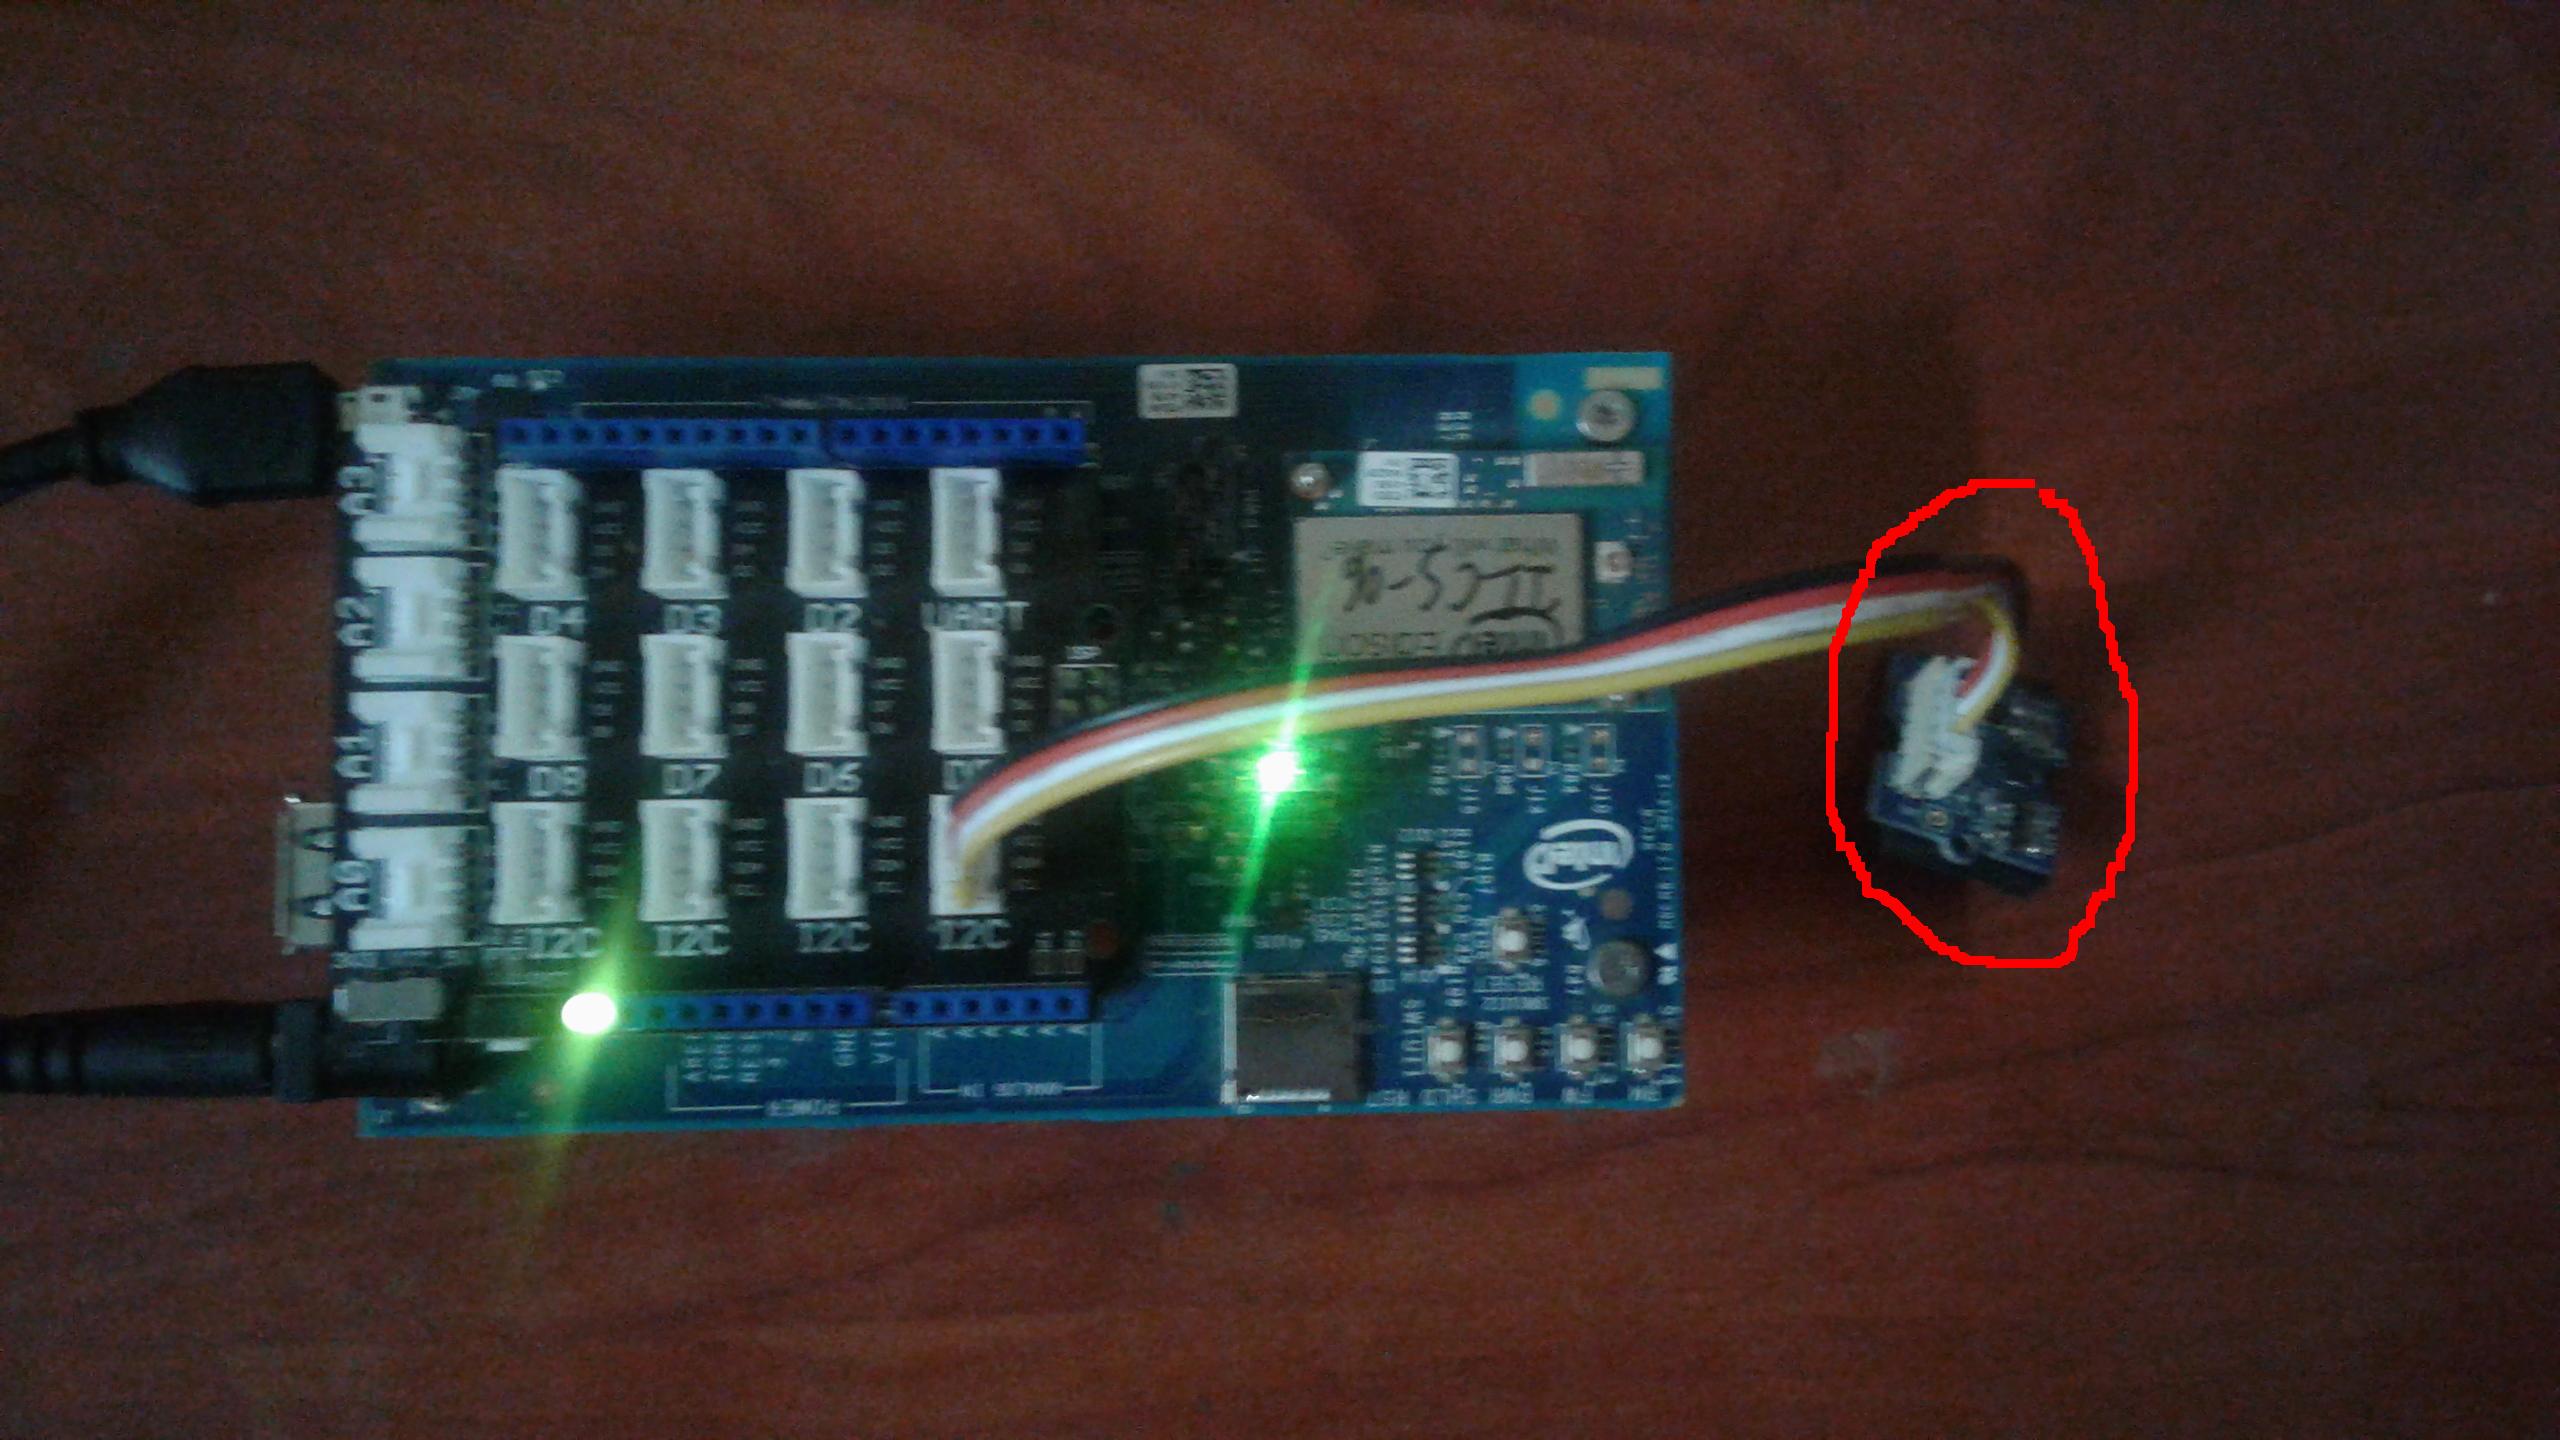
In this work I use accelerometer to find gesture up,down,left and right gesture of any moving object.To implement it with Intel Edison board I have used MMA7660 3-Axis Digital Accelerometer Grooove connector.You need to connect the device with the I2C port of the groove connector of the Intel Edison board.
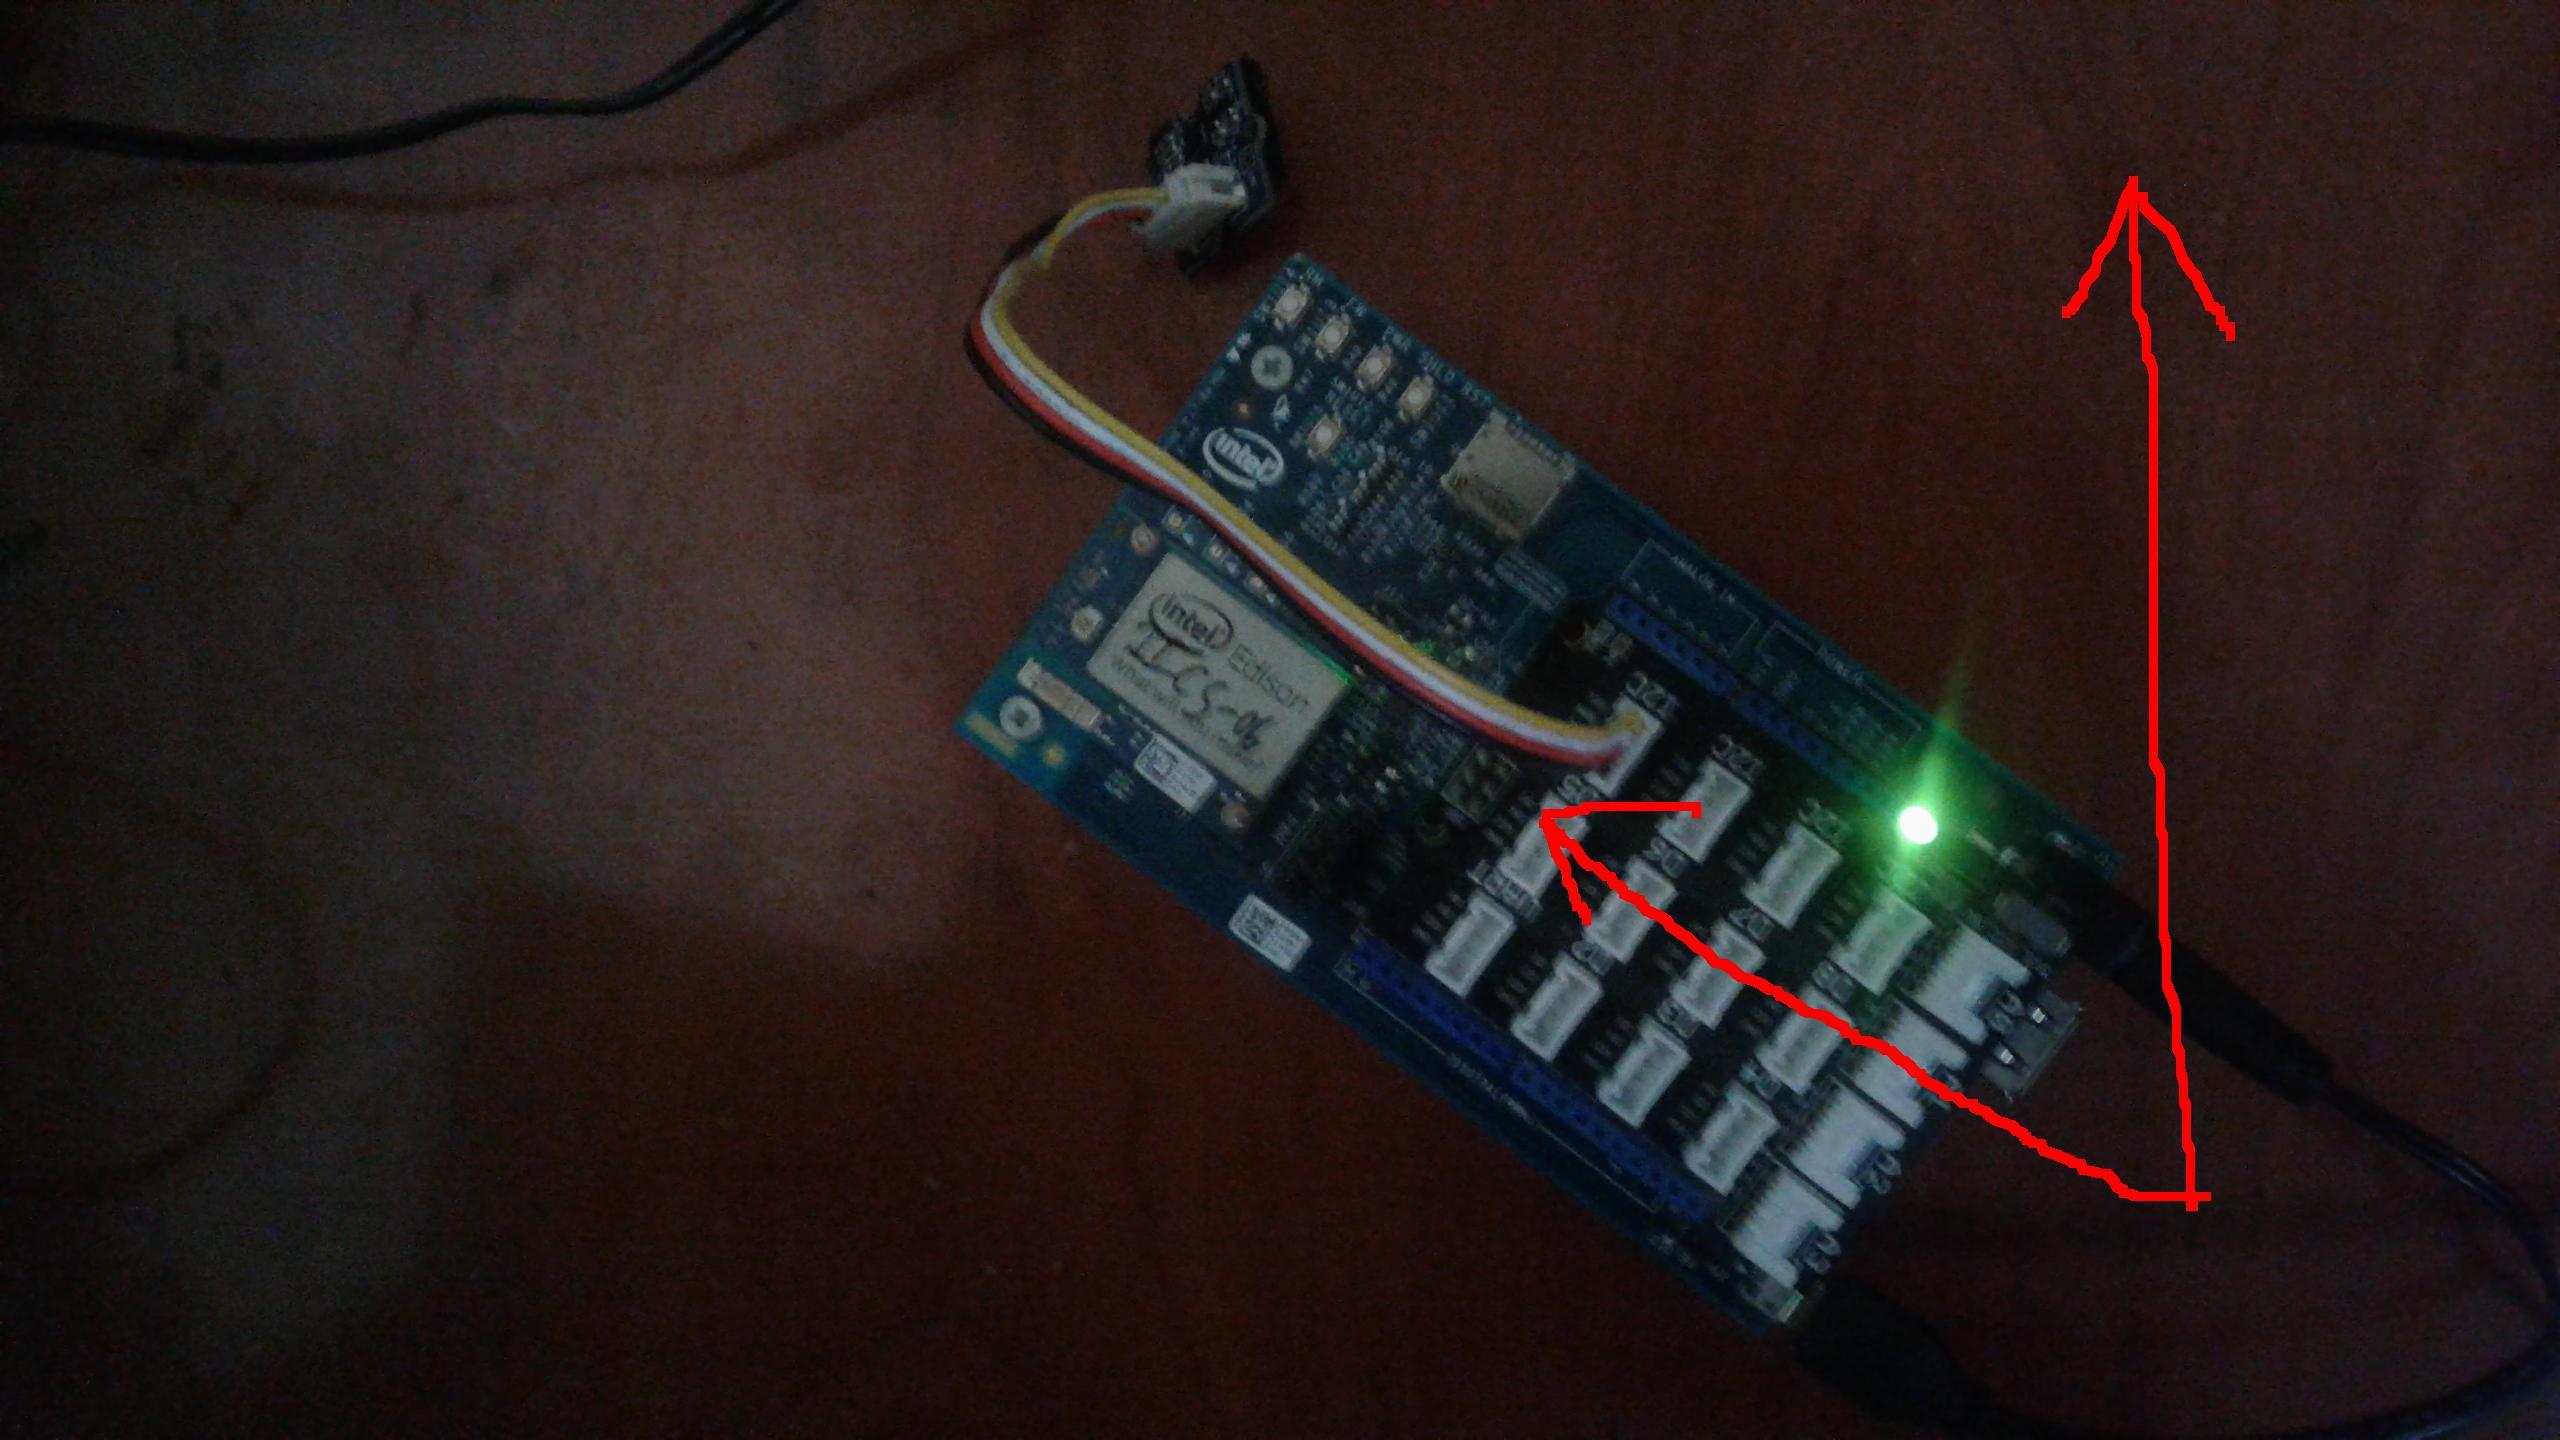
Here is the following hardware(digital Accelerometer) connection on the Intel Edison board groove connector
Using the code
It generates the different acceleration values for different gestures towards x,y and z axis.Through these values you can recognize gestures.These values are not constant but most of the time for one gesture for example left gesture it generates same values for example x=0 y=1 z=1.I have used javascript(node.js) to implement the above concept.This is the following code.
var mqtt=require('mqtt');
var client = mqtt.connect('mqtt://iot.eclipse.org');
var topic='rupam/edison/gesture';
var digitalAccelerometer = require('jsupm_mma7660');
var myDigitalAccelerometer = new digitalAccelerometer.MMA7660(
digitalAccelerometer.MMA7660_I2C_BUS,
digitalAccelerometer.MMA7660_DEFAULT_I2C_ADDR);
myDigitalAccelerometer.setModeStandby();
myDigitalAccelerometer.setSampleRate(digitalAccelerometer.MMA7660.AUTOSLEEP_64);
myDigitalAccelerometer.setModeActive();
var ax, ay, az;
ax = digitalAccelerometer.new_floatp();
ay = digitalAccelerometer.new_floatp();
az = digitalAccelerometer.new_floatp();
var outputStr;
var myInterval = setInterval(function()
{
myDigitalAccelerometer.getAcceleration(ax, ay, az);
outputStr = "Acceleration: x = "
+ roundNum(digitalAccelerometer.floatp_value(ax), 6)
+ " y = " + roundNum(digitalAccelerometer.floatp_value(ay), 6)
+ " z = " + roundNum(digitalAccelerometer.floatp_value(az), 6);
console.log(outputStr);
if(x==1 && y==0 && z==1)
{
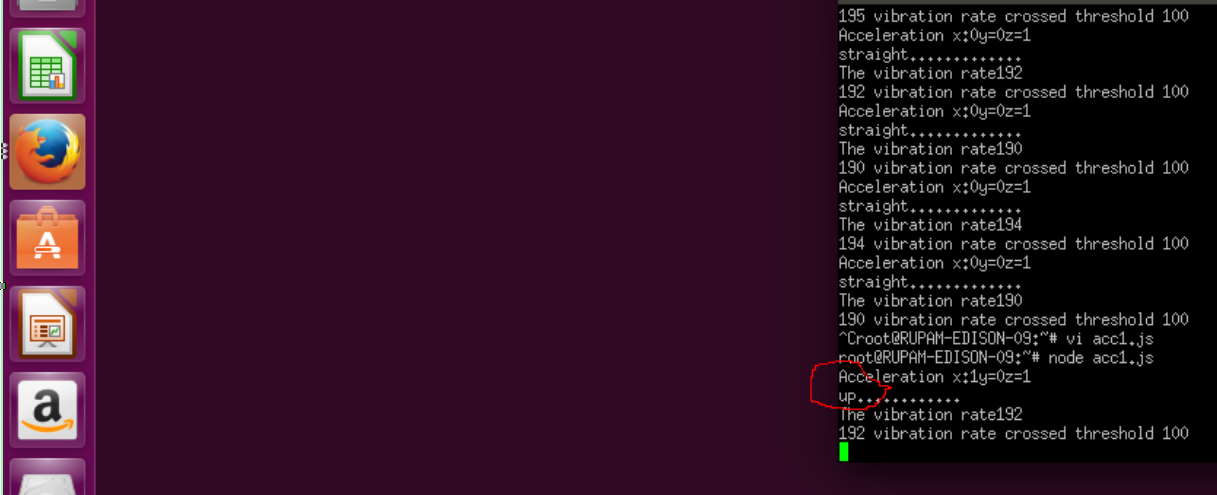
console.log(“Up…………….”);
client.publish(topic, 'UP');
}
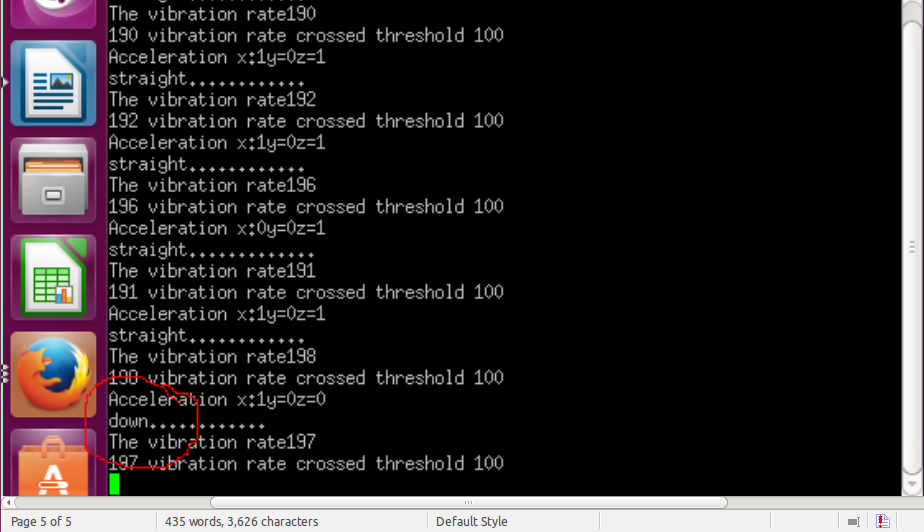
if(x==1 && y==0 && z==0)
{
console.log(“down…………...”);
client.publish(topic, 'DOWN');
}
if(x==0 && y==0 && z==1)
{
console.log(“Straight……………..”);
client.publish(topic, 'STRAIGHT');
}
if(x==0 && y==1 && z==1)
{
console.log(“left……………...”);
client.publish(topic, 'LEFT');
}
if(x==1 && y==1 && z==1)
{
console.log(“right………….”);
client.publish(topic, 'RIGHT');
}
},500);
//to display the acceleration upto a certain decimal places
function roundNum(num, decimalPlaces)
{
var extraNum = (1 / (Math.pow(10, decimalPlaces) * 1000));
return (Math.round((num + extraNum)
* (Math.pow(10, decimalPlaces))) / Math.pow(10, decimalPlaces));
}
The code is developed based on the snippet here.
In the above code UPM module for the MMA7660 I2C 3-axis digital accelerometer have been used.The module name is jsupm_mma7660 for the 3 axis digital Accelerometer.Instantiate an MMA7660 on I2C bus 0 and place the device in standby mode using setModeStandby() method so we can write registers.Enable 64 samples per second and place the device into active mode using setModeActive() method.I declare a function setInterval to get proper acceleration towards x-axis,y-axis and z-axis.These values have been used to recognize gestures.
These are the following outputs:
This is the straight position:

Figure :Straight position
The position is recognized on the terminal is as follows:

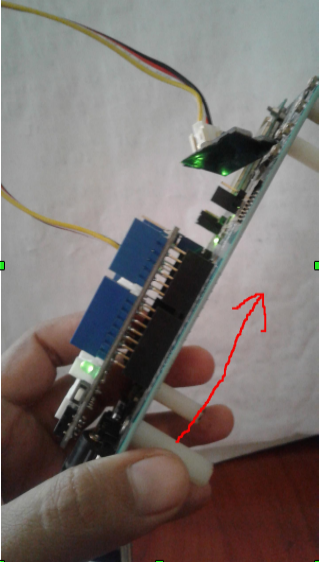
In order to recognize a up gesture the hardware position will be placed as follows:


In order to recognize the right gesture the hardware position will be placed as follows:

Figure : Right geature position
This gesture is recognizes as right on the terminal as specified on the code is as follows:

Figure : Right gesture recognization
Conclusion
Accelerometer library is available with Intel Edison. however, when we wanted to use the library for gesture recognition which we wanted to use in some of our articles, we faced a roadblock as there was no such tutorial that guided on how to recognize custom gestures. Therefore I worked with raw gesture values, studying and analyzing them to finally get a gesture recognition system going with Intel Edison and Grove accelerometer. Once the setup detects a gesture, it is published over mqtt channel. So, you can use this project as a gesture recognition tool for your gesture based IoT projects.