
2 Simple Ways to Create Custom List in SharePoint 2013
0/5 (0 vote)
Here are 2 simple ways to create Custom List in SharePoint 2013.
What is a Custom List?
A Custom List is a collection of different type of columns and information pieces which are collaborated together and is developed with some unique set of properties which provides user access to form features.
Key Features of a Custom List
- Easy to use
- You can share information and data with other users
- You can set rich standard interface
- Can easily add binary data
- Accommodates workflows
- List items can be linked/synced with Outlook to specific users and become a task
- Relative links can be linked/synced to other lists in SharePoint without need to refresh formulas
- Lists can contain links (URLs) to other SharePoint pages that contain information, documents or emails related to the project
- Everyone on the team can access, change and update this list whenever and from wherever, even from mobile also
- No compatibility issues
Approaches to Create Custom List
Custom list can be created with the following approaches:
- Using SharePoint OOTB UI feature
- Using SharePoint Designer
1. Create Custom List using SharePoint OOTB UI Feature
Follow the steps:
- Login with SharePoint site.
- Navigate to Site and Click on “Settings” option and then click on “site contents” option.

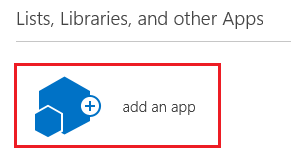
- Then click on “add an app” option.
- Select “Custom list” option from the “your app” page. It will be popup for open create custom list.

- Give the proper name as “
EmployeeList” and click on Create button.
- These steps will create custom list in SharePoint site, now you can add multiple columns with different data type in this list.

- Now, open create custom list and go through list setting and click on “Create column” option and create multiple columns with different data type as per need.

2. Create Custom List using SharePoint Designer
- Open SharePoint Designer and move to top navigate and select “SharePoint List” option and then select the Custom List.

- Moving forward, add a decent name and description for the list.

- Finally click OK once done.
Hopefully, this step by step approach will help SharePoint developer to understand in details the possible ways to create a Custom List in SharePoint 2013 using OOTB UI features and SharePoint Designer.
Other SharePoint and related Articles
- Site Vs Site Collection in SharePoint 2013
- a Must Have SharePoint Interview Questions
- ASP.NET MVC3 Vs MVC4 Vs MVC5
- A Practical guide to ASP.NET Web API
- What’s New in SharePoint 2013 for End Users | Developers | Administrators
The post 2 Simple Ways to Create Custom List in SharePoint 2013 appeared first on SharePoint For Dummies.